本文介绍生产系统监控大屏的搭建,比较实用也是实际应用比较多的方式,希望能够帮助大家对监控系统有一定的认识。
0、规划
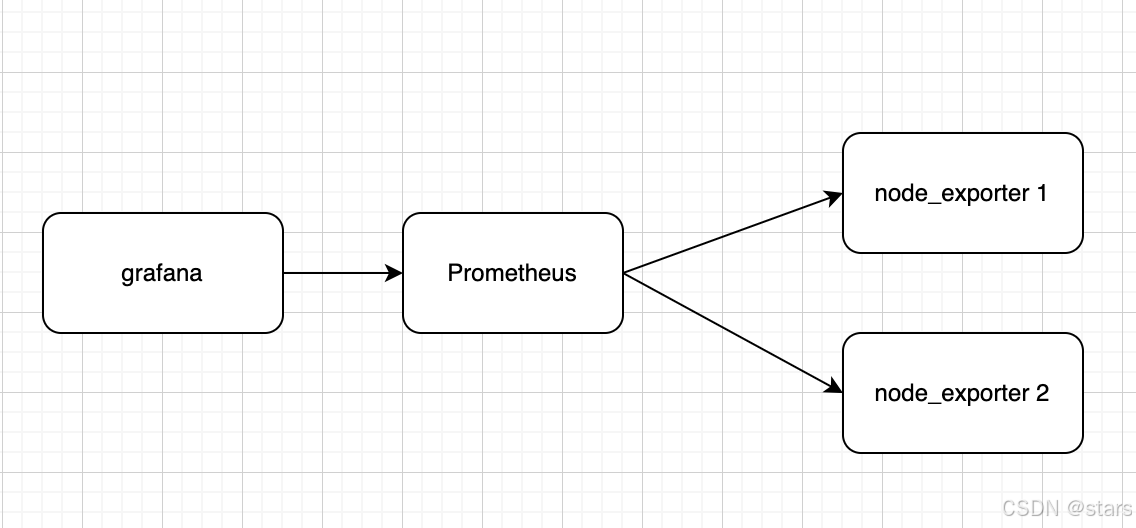
grafana主要是展示和报警,Prometheus用于保存监控数据,node_exporter用于实时采集各个应用服务器的事实状态。下图是监控系统的简易架构图。
实际应用时,node_exporter和应用系统部署在一台服务器上。咱们模拟实际生产系统,用虚机搭建,规划如下:3台服务器,两台应用,一台部署grafana和prometheus。
| 名称 | ip | port |
|---|---|---|
| grafana | 192.168.99.100 | 3000 |
| Prometheus | 192.168.99.100 | 9090 |
| node_exporter | 192.168.99.120 | 9100 |
| node_exporter | 192.168.99.130 | 9100 |
1、grafana安装
sudo docker pull grafana/grafnma
sudo docker run -d --name grafana -p 3000:3000 grafana/grafana
浏览器访问:http://192.168.99.100:3000,其中ip是虚机的ip,大家按自己的改。登录用户名密码:admin/admin。初次登录后,会要求改密码,大家改成自己容易记住的就行。
2、Prometheus安装
2.1、先准备Prometheus的配置文件
# my global config
global:
  scrape_interval: 15s # Set the scrape interval to every 15 seconds. Default is every 1 minute.
  evaluation_interval: 15s # Evaluate rules every 15 seconds. The default is every 1 minute.
  # scrape_timeout is set to the global default (10s).

# Alertmanager configuration
alerting:
  alertmanagers:
    - static_configs:
        - targets:
          # - alertmanager:9093

# Load rules once and periodically evaluate them according to the global 'evaluation_interval'.
rule_files:
  # - "first_rules.yml"
  # - "second_rules.yml"

# A scrape configuration containing exactly one endpoint to scrape:
# Here it's Prometheus itself.
scrape_configs:
  # The job name is added as a label `job=<job_name>` to any timeseries scraped from this config.
  - job_name: "prometheus"

    # metrics_path defaults to '/metrics'
    # scheme defaults to 'http'.

    static_configs:
      - targets: ["localhost:9090"]

	# 这里是我们配置的,加入node_exporter的地址就行
	# 非常重要!!!
  - job_name: “myTestJob"
    static_configs:
      - targets: ["192.168.99.120:9100"]
2.2、启动Prometheus
sudo docker run -d -p 9090:9090 -v /home/jackie/prometheus.yml:/etc/prometheus/prometheus.yml --name promethus prom/prometheus
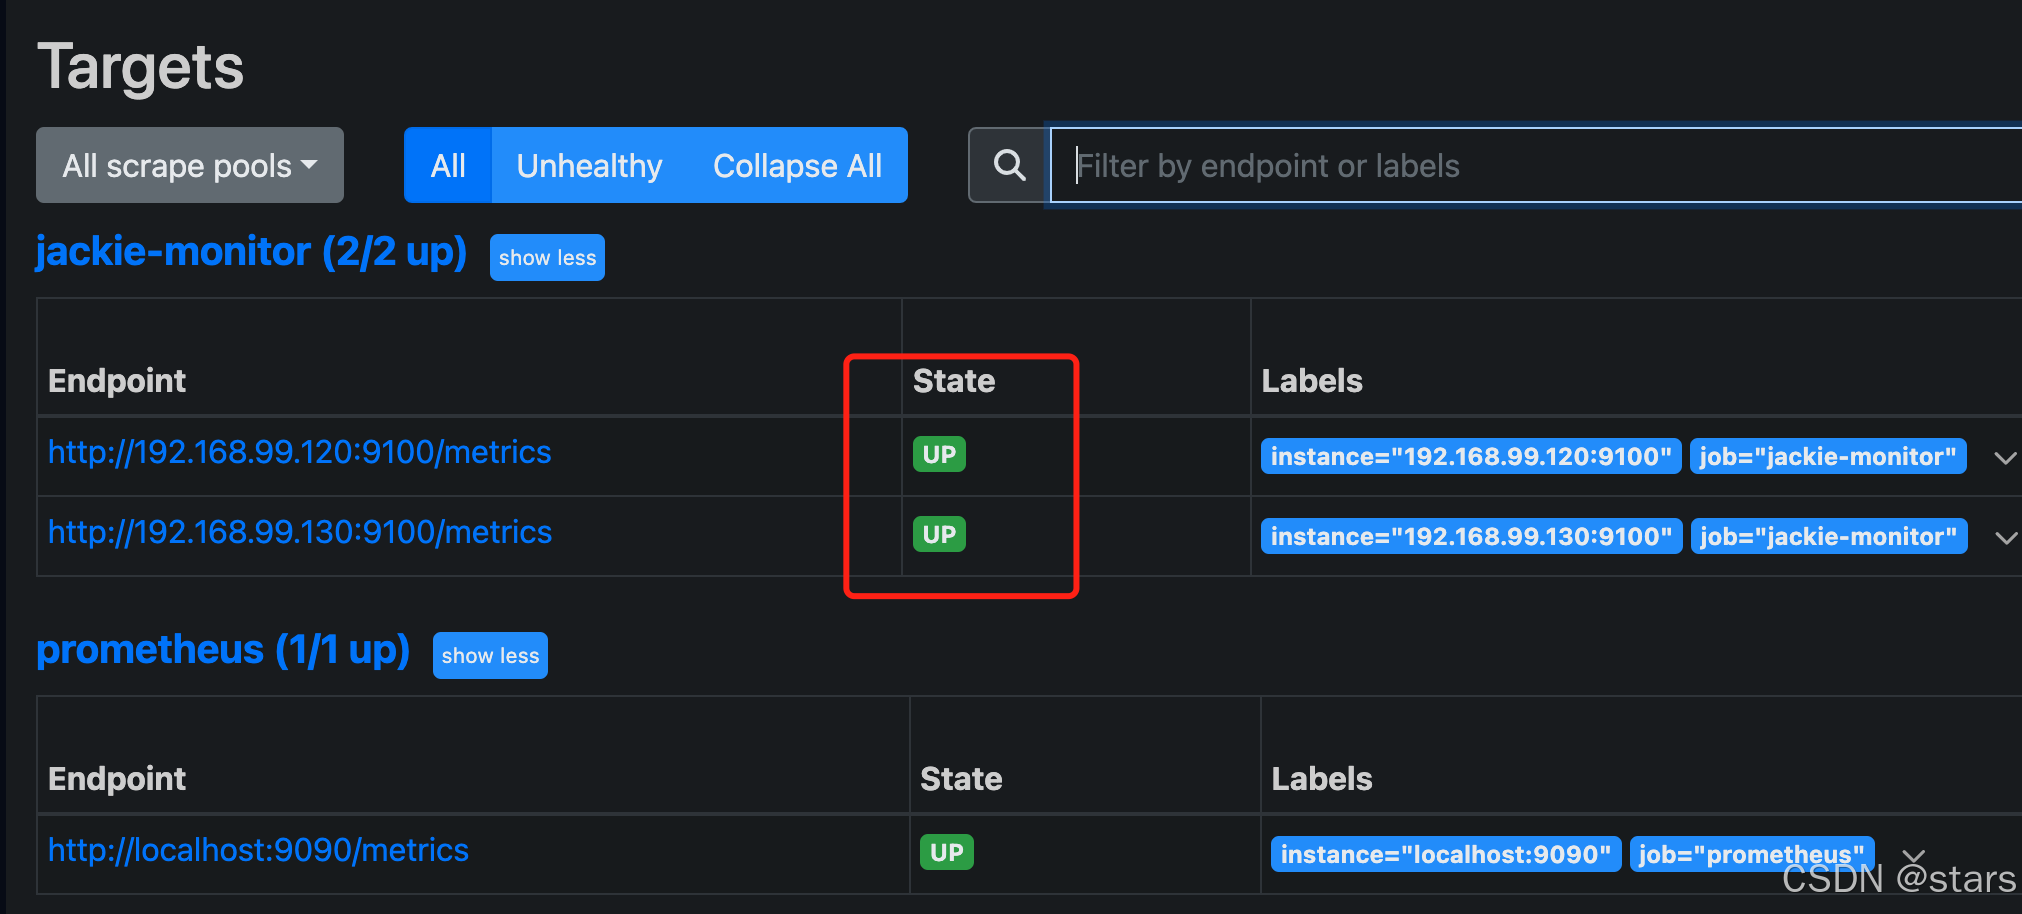
启动成功后,用浏览器访问一下:http://192.168.99.100:9090/targets,因为还没有和node_exporter关联,所以只能看到自己。不截图了,下面一会看到效果。
3、node_exporter安装
下载:https://github.com/prometheus/node_exporter/releases,按照你的操作系统选择相应的下载包。这里选的是node_exporter-1.8.2.linux-amd64.tar.gz。
tar xvfz node_exporter-1.8.2.linux-amd64.tar.gz
cd node_exporter-1.8.2.linux-amd64

# 后台运行
nohup ./node_exporter >node.log 2>&1 &
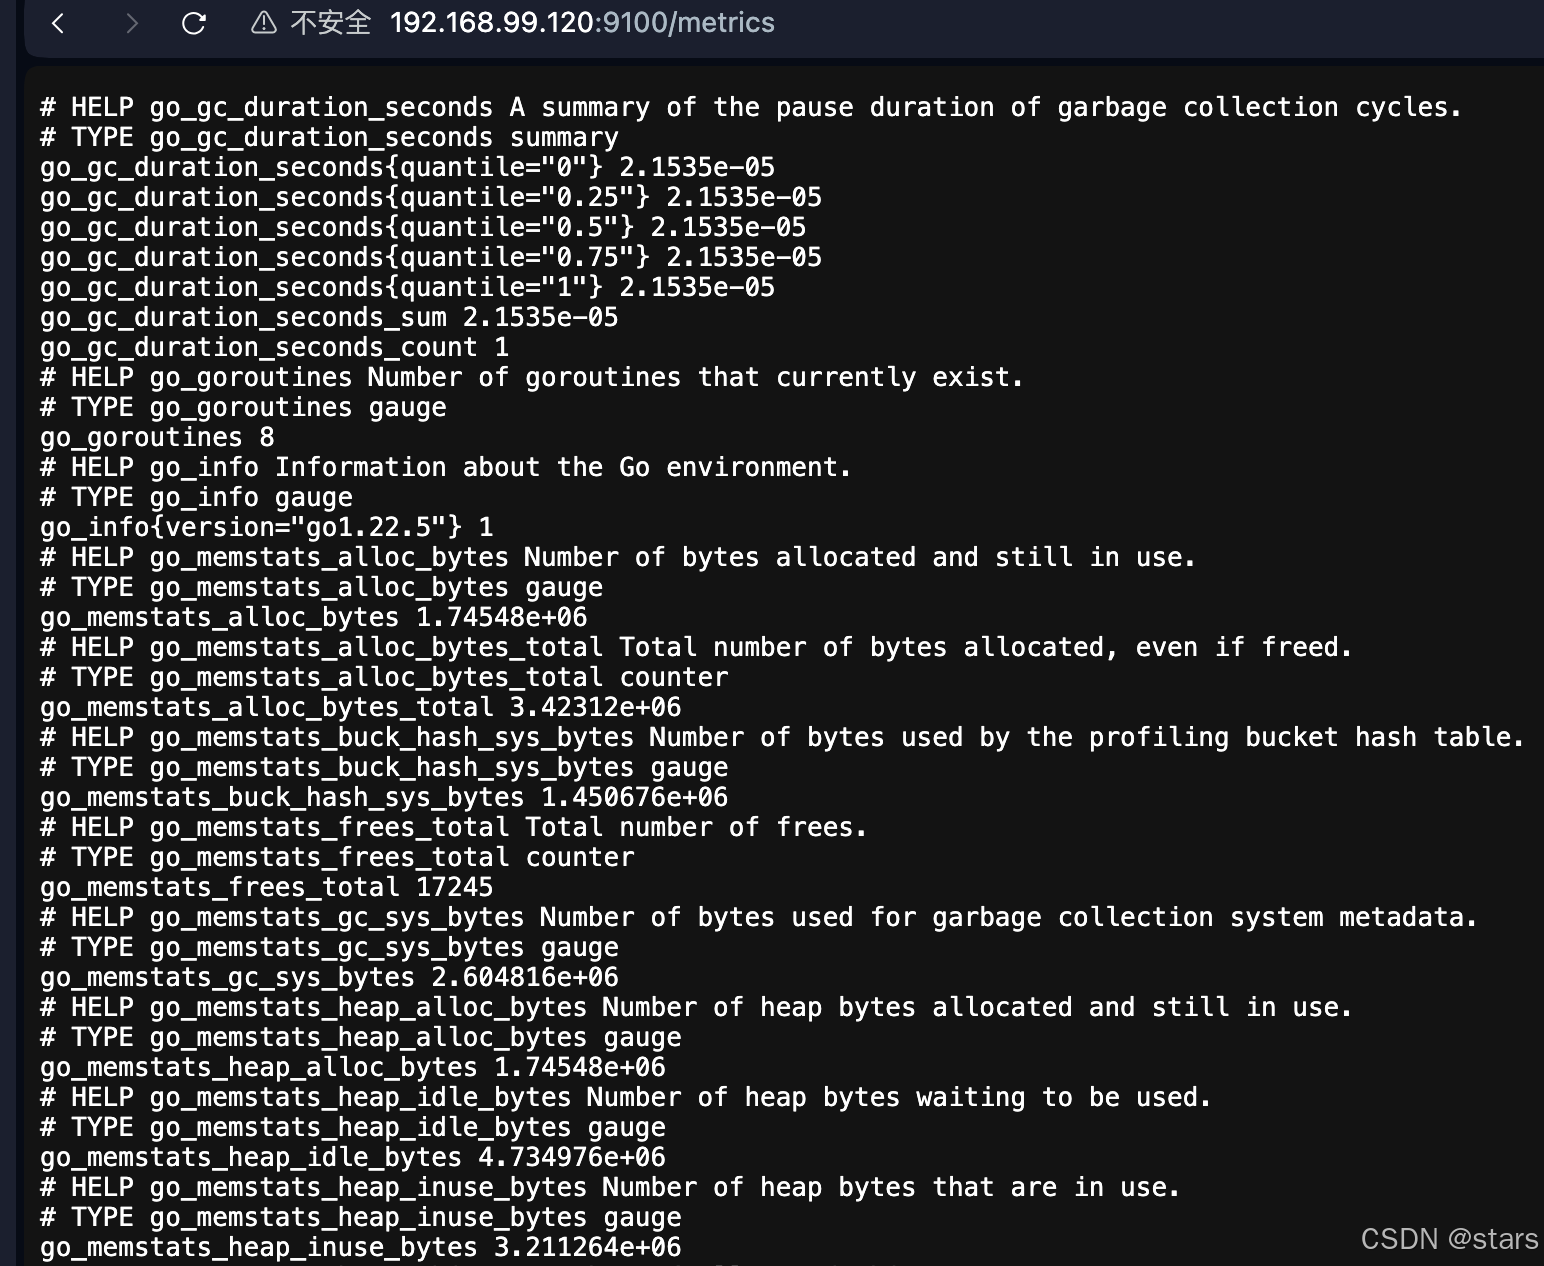
启动成功了,浏览器访问:http://192.168.99.120:9100/metrics。强调一下,这里的ip根据自己的ip写。注意:node_exporter和grafana、Prometheus不在一台虚拟机上,往上翻看看规划表。效果如下:
4、配置
4.1、配置Prometheus关联node_exporter
修改Prometheus的prometheus.yml文件,添加如下配置,如果你没有用上面的配置文件的话。
注意:==target中的ip和端口写node_exporter部署的机器的。==这里我配了两台机器,另外一个是192.169.99.130:9100。我们再次访问prometheus,看看效果。
4.2、grafana配置数据源
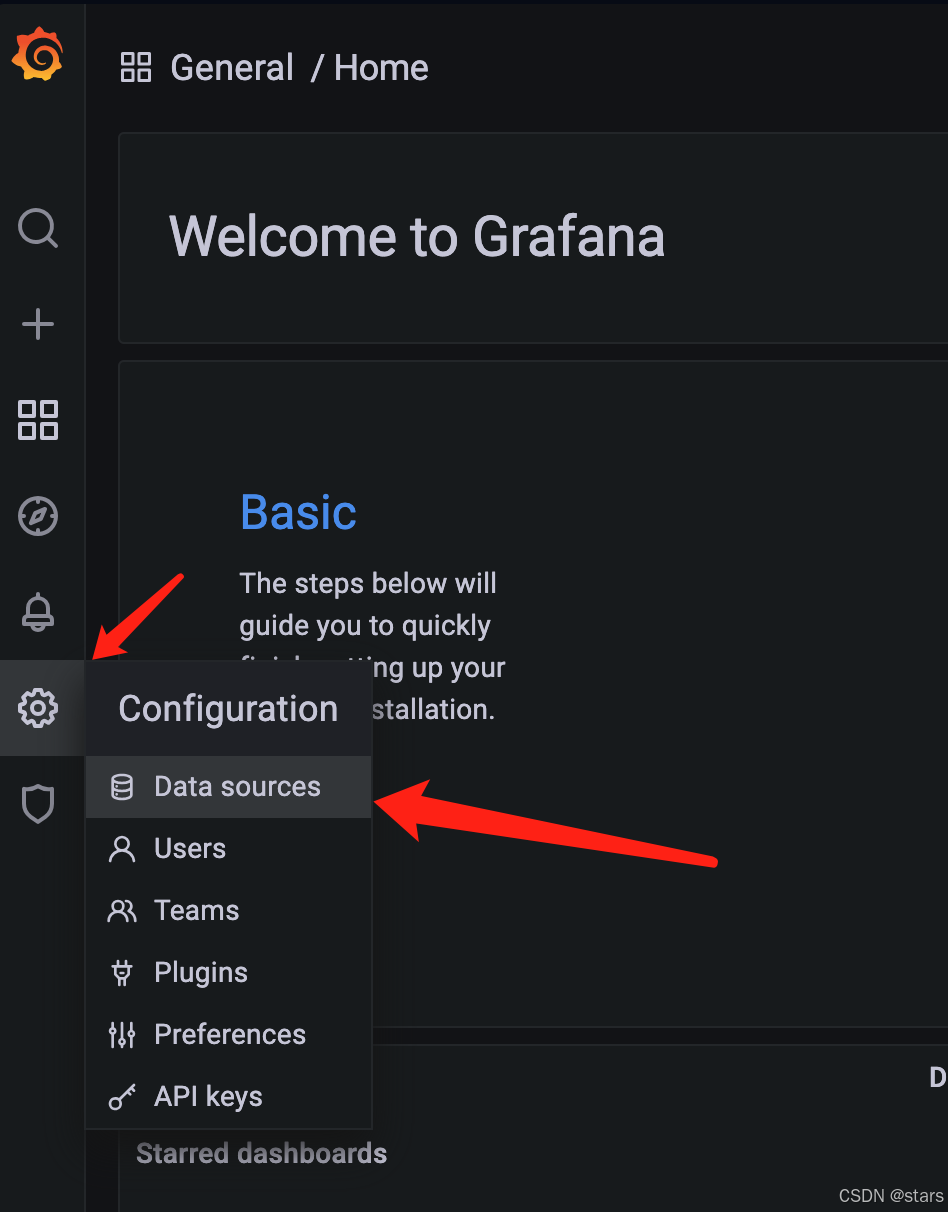
登录grafana,按下图操作:
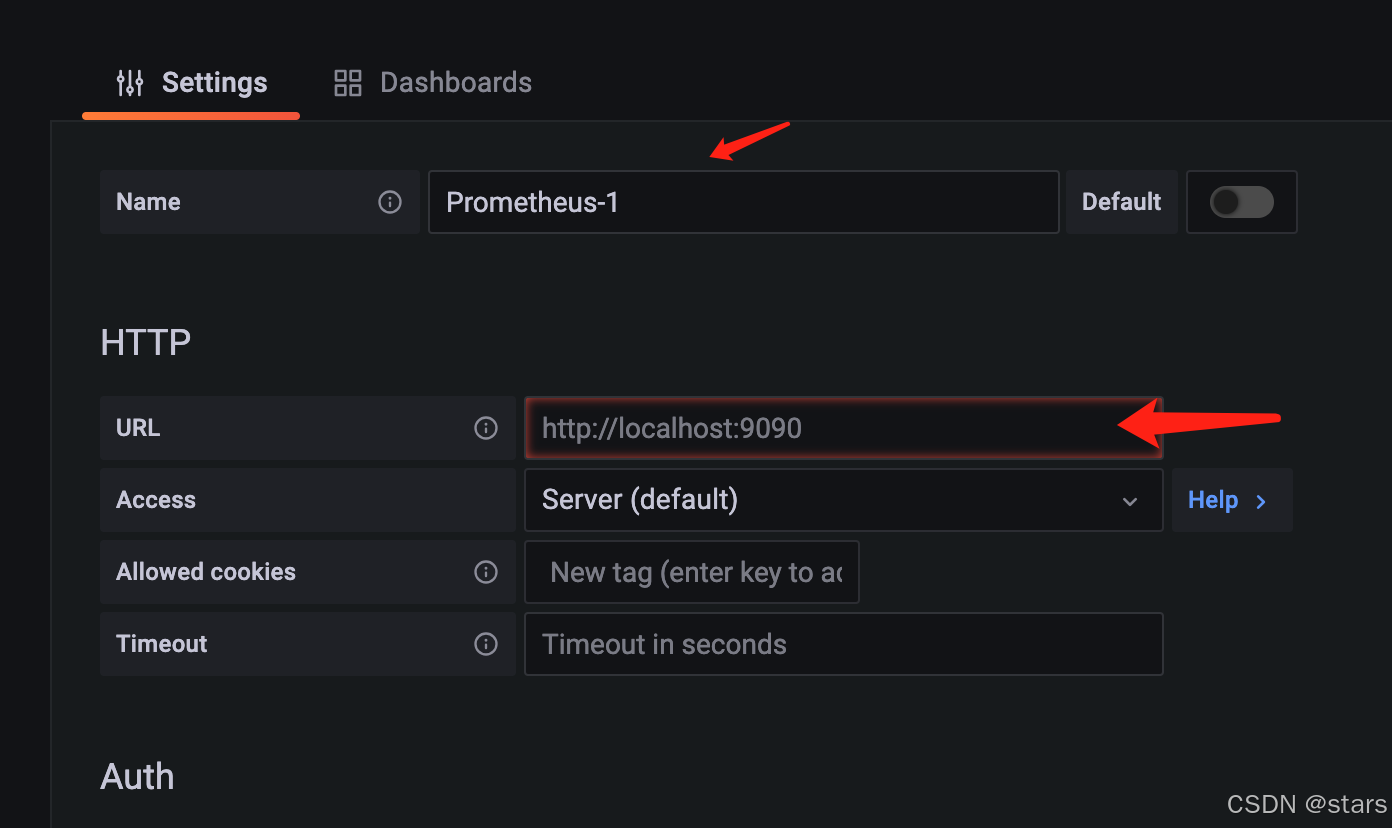
出现如下界面:
名字给一个,url写Prometheus的地址,咱们这里是http://192.168.99.100:9090/。其他保持默认,拉到最后测试并保存(save & test)。
4.3、grafana导入模版
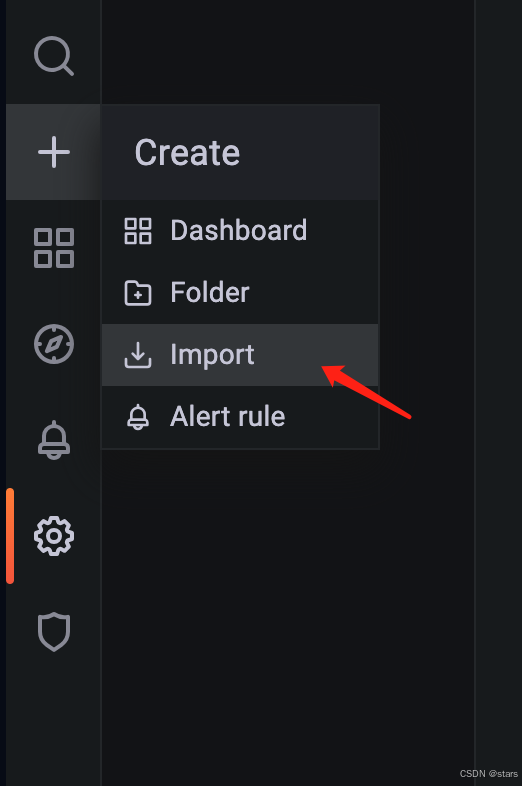
到最后一步了,模版就是咱们要是显示的页面。按下图操作:
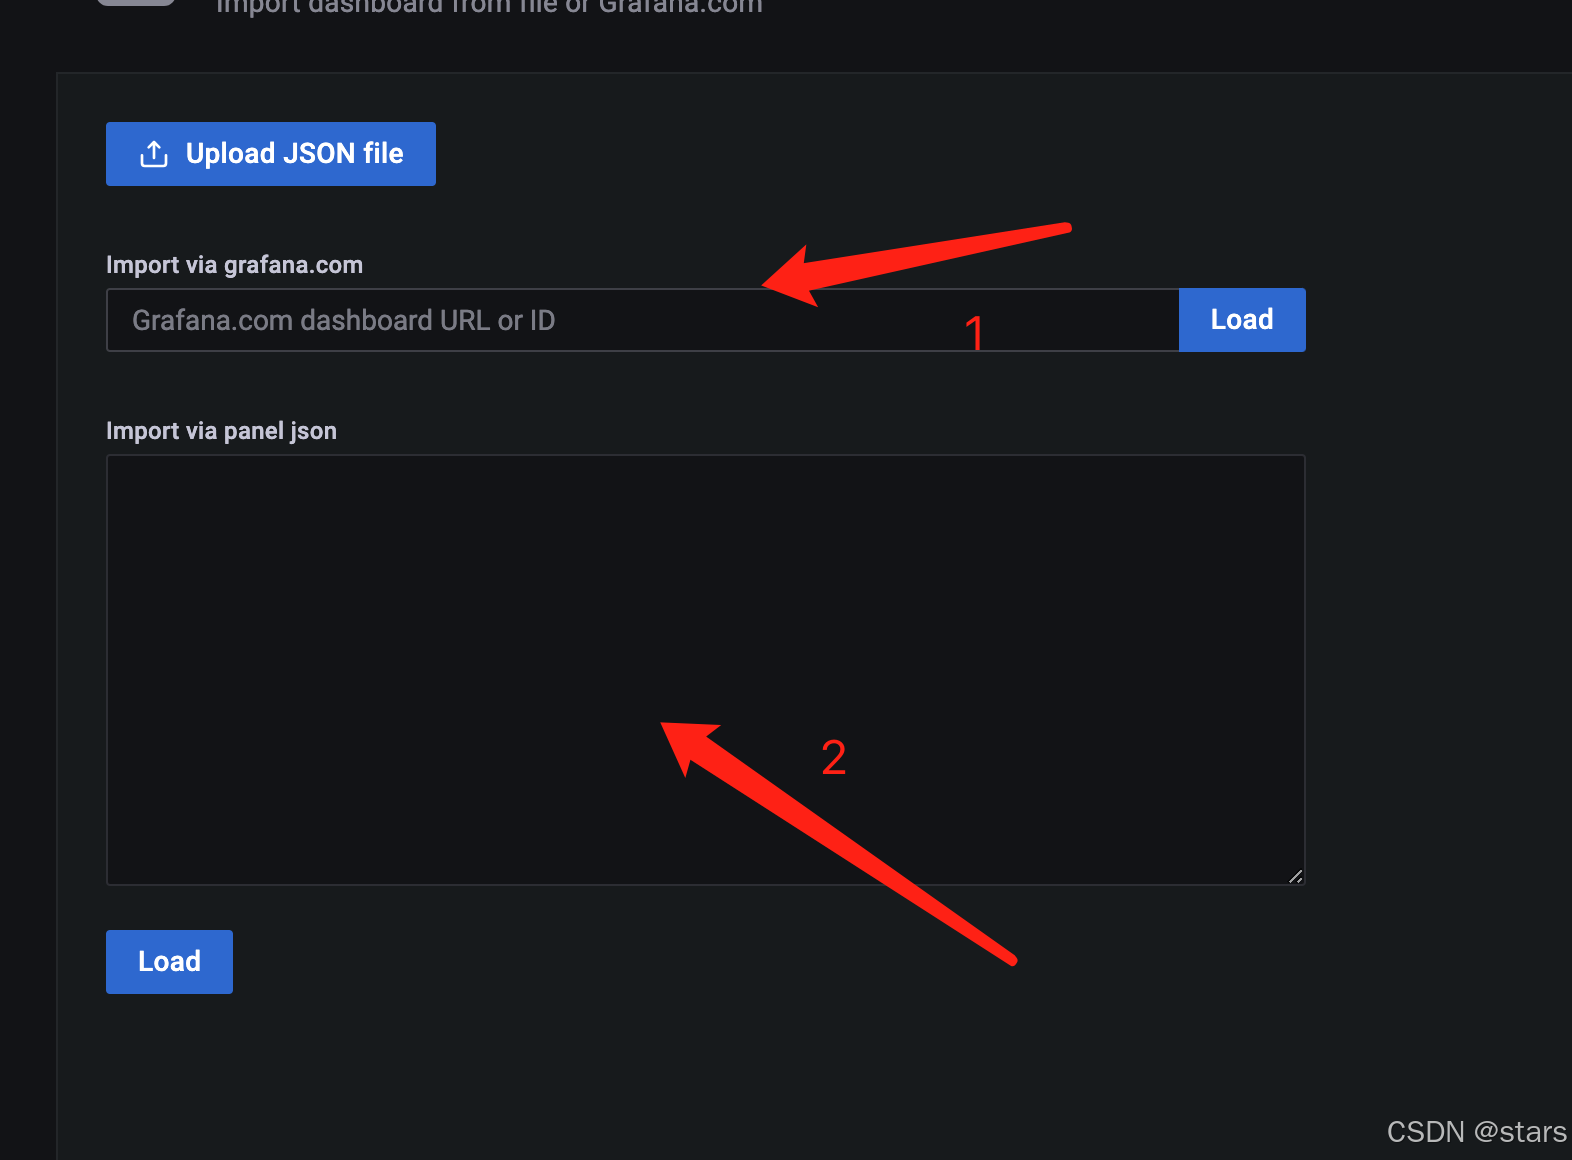
出现如下页面:
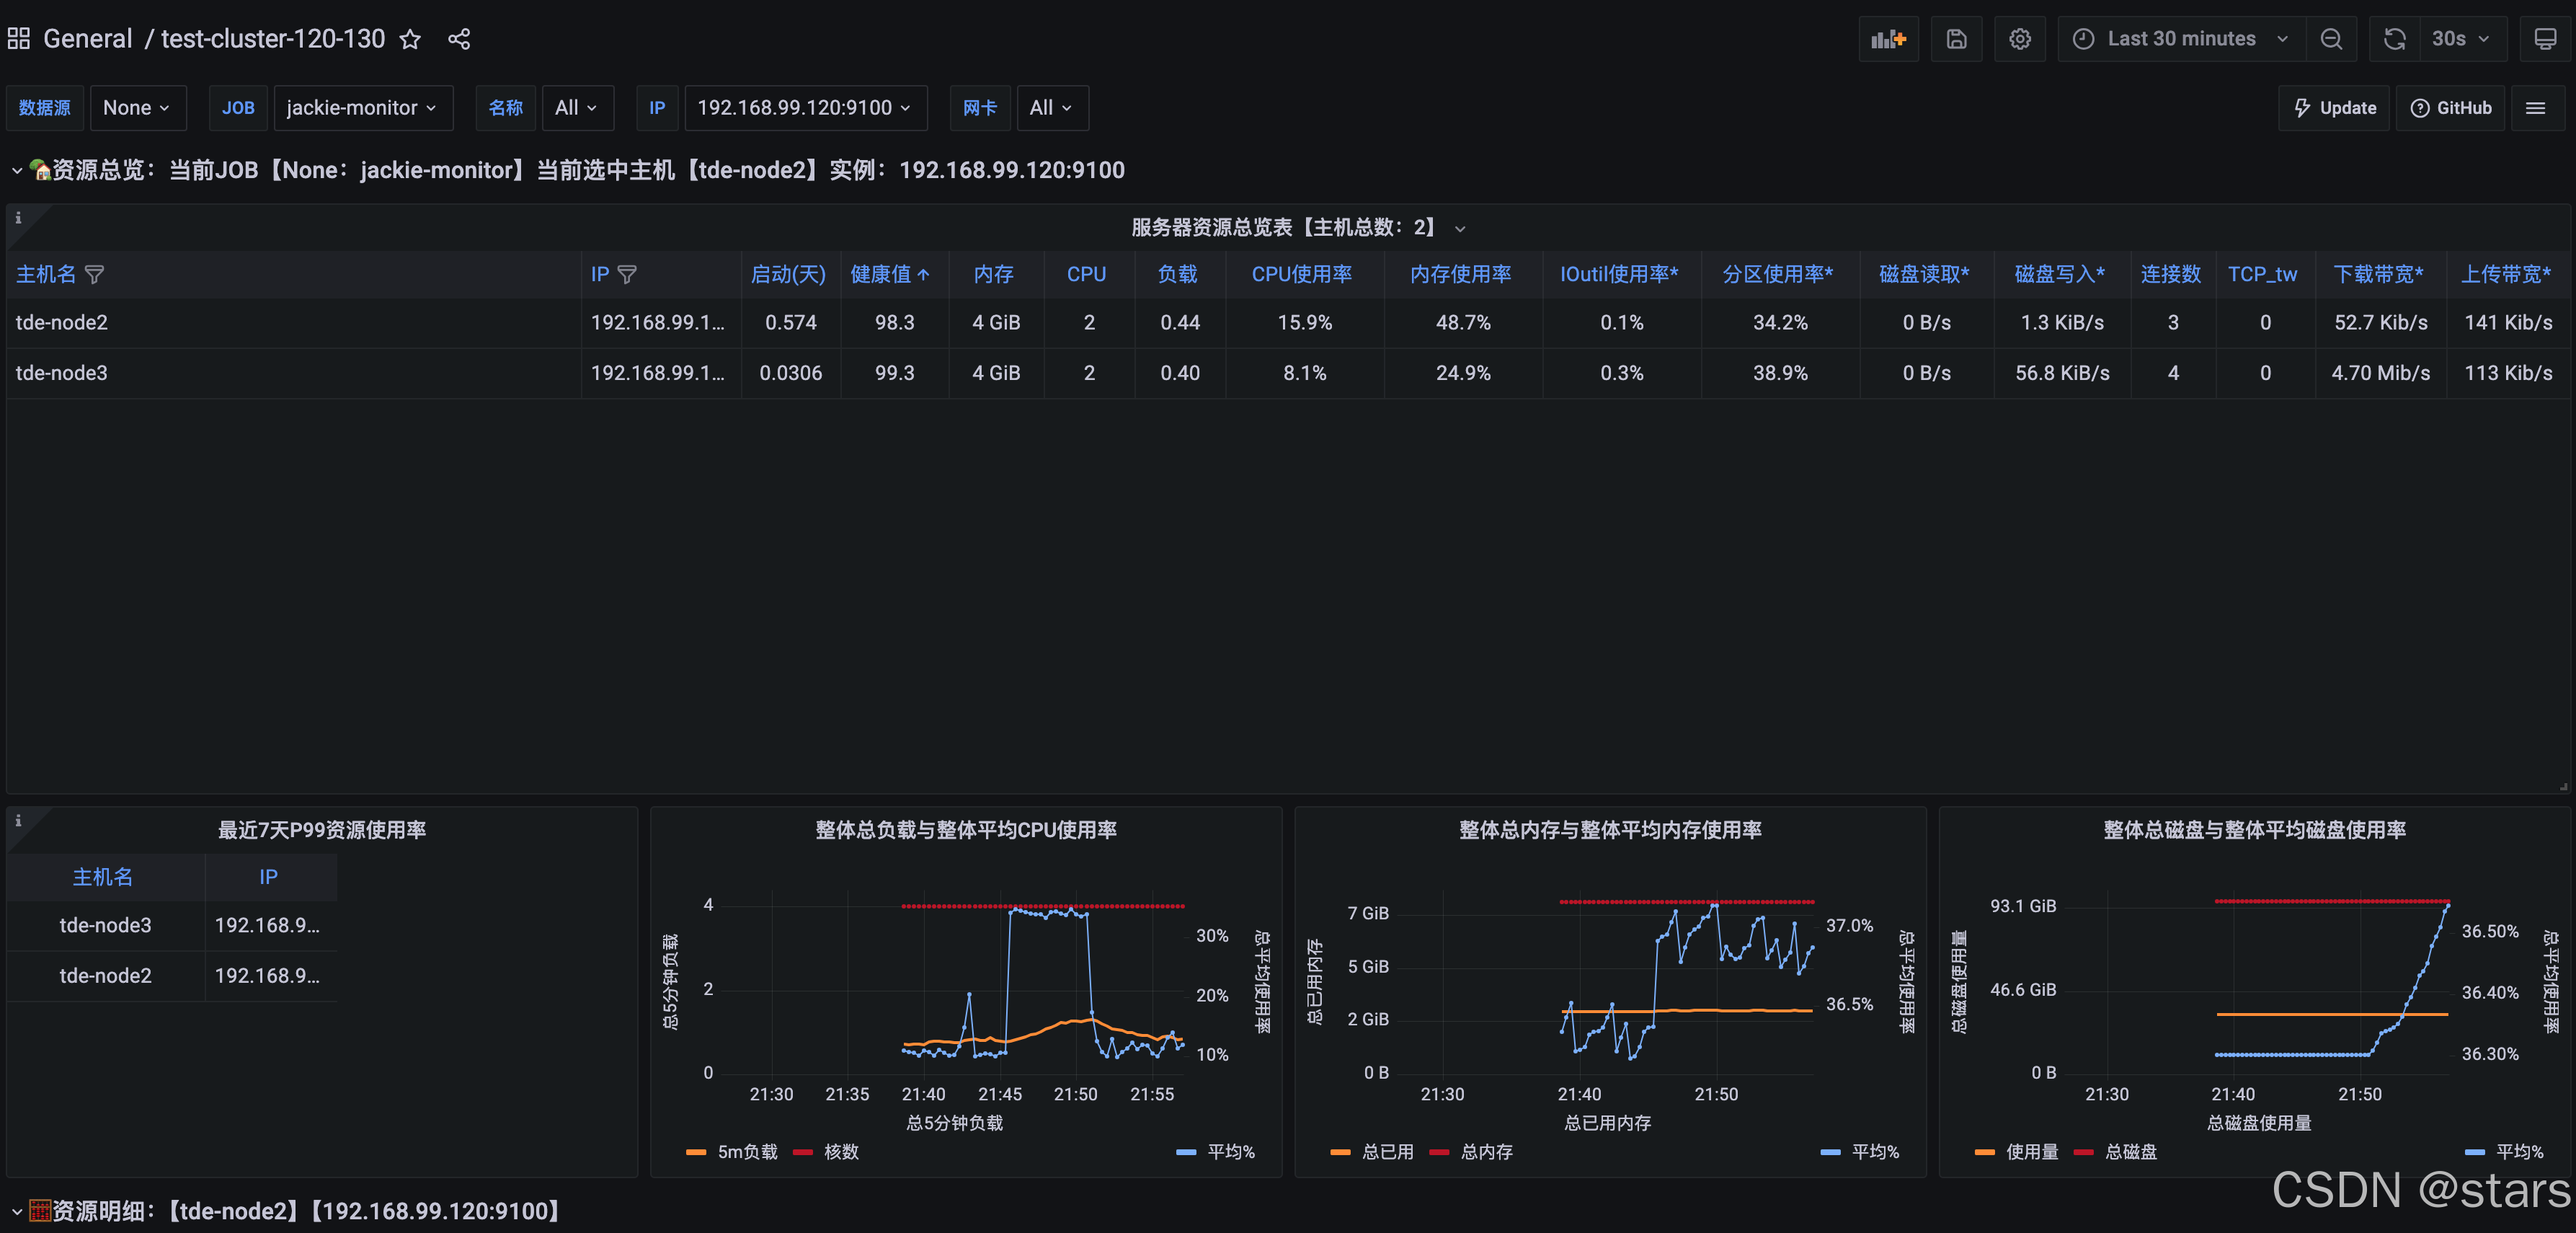
有两处需要输入的地方,咱们只需要填一个就行了。这里咱们填写id号,16098,然后点击右侧的load就行了。这个id怎么来的,在grafana市场上找的,复制就行了。稍等几秒钟,就出现下图了:
好了,监控大屏搭建完成了。
5、坑点总结
我自己在搭建时,两处比较大的坑点:
- linux防火墙,能关就关了,关不了的话就加上规则,把相应端口放行。
- 配置文件:由于编辑是用的vim,很容易出错,我就把中文的双引号写入了,导致排查时间较长。
- docker一定要跟换成国内的源。
