之前写过一篇博客是不涉及数据库的数据交互页,其实该博客的实战性不强,因为数据最终都是需要存储在数据库中的,所以这次我觉得补充一篇有关数据库的数据交互页。
首先我使用的数据库是MySQL这类关系型数据库,至于NoSQL这类,例如MongoDB这类我暂时不说着。管理数据库语言我是使用spring boot支持的spring data jpa,主要该语言完全脱离数据库语言,同时去xml化也很好,当然,没有十全十美的语言,也会有些瑕疵,后面我会补充Mybatis的使用。
一. Spring Data Jpa
提供一篇博客参考:SpringBoot学习笔记九:Spring Data Jpa的使用
首先,导入相关依赖:
<!--mysql的导入-->
<dependency>
   <groupId>mysql</groupId>
   <artifactId>mysql-connector-java</artifactId>
   <scope>runtime</scope>
</dependency>

<!--spring data jpa的导入-->
<dependency>
   <groupId>org.springframework.boot</groupId>
   <artifactId>spring-boot-starter-data-jpa</artifactId>
</dependency>

<!--jdbc的导入-->
<dependency>
    <groupId>org.springframework.boot</groupId>
    <artifactId>spring-boot-starter-jdbc</artifactId>
</dependency>
然后进行配置文件:
spring:
  datasource:
    #用户名
    username: root
    #密码
    password: 123456
    #设置url,其中//后是连接的ip地址,3306是mysql的端口号,xxxx是建的数据库名
    url: jdbc:mysql://localhost:3306/user
    driver-class-name: com.mysql.jdbc.Driver

  #进行其他设置
  jpa:
    hibernate:
      #create根据定义的类自动生成表格(每次重启便会删除前次的表)
      #除了create,常用的是update,第一次也会生成,但之后操作不会删表
      ddl-auto: update
    #在控制台看到sql语句,方便调试
    show-sql: true
注意:如果后面运行的时候有错误:
(1)ava.sql.SQLException: The server time zone value 'Öйú±ê׼ʱ¼ä' is unrecognized or represents more than one time zone. You must configure either the server or JDBC driver (via the serverTimezone configuration property) to use a more specifc time zone value if you want to utilize time zone support.
这是由于系统时间错误,这时候在配置时要修改url
url: jdbc:mysql://localhost:3306/user?serverTimezone=GMT%2B8(2)org.springframework.beans.factory.BeanCreationException: Error creating bean with name 'entityManagerFactory' defined in class path resource [org/springframework/boot/autoconfigure/orm/jpa/HibernateJpaConfiguration.class]: Invocation of init method failed; nested exception is org.hibernate.service.spi.ServiceException: Unable to create requested service [org.hibernate.engine.jdbc.env.spi.JdbcEnvironment]
这是entityManagerFactory注入bean错误,产生这个错误的原因有很多,我遇到过很多次,这时候我们要检查:
(1)依赖注入有无问题(主要是jdbc的注入)
(2)配置文件(application.properties或application.yml)中的配置有无出错,好好检查
(3)@Entity有无写(导入包应该为import javax.persistence.*;)
(4)@Service有无写,查看是否是使用xxxService而不是xxxServiceImpl
和不涉及数据库一样,涉及数据库也是有固定的流程的,首先当然是建立实体类,而jpa要求在实体类中做一些准备,也是要求注明实体类为Entiy,指定自增组件等等操作,我们看代码:
@Entity  //自动生成表
@Table(name = "user")  //生成表名,若无设置,则使用类名作为表名
public class User {

    @Id  //指定id类型
    @GeneratedValue(strategy = GenerationType.IDENTITY) //自增主键
    private Integer id;

    @NotBlank   //不能为空
    @Column(nullable = false,length = 50)  //指定不能为空,同时最大长度为50
    private String username;

    @Email  //指定为email格式,出错则报错
    @NotBlank
    @Column(nullable = false,length = 50)
    private String email;


    public User(){
    }

    public User(String username,String email){
         this.username=username;
         this.email=email;
    }

    public Integer getId() {
        return id;
    }

    public void setId(Integer id) {
        this.id = id;
    }

    public void setUsername(String username) {
        this.username = username;
    }

    public String getUsername() {
        return username;
    }

    public void setEmail(String email) {
        this.email = email;
    }

    public String getEmail() {
        return email;
    }
}
里面是包括几个标签(标签的作用我已注解,仍不是很明白的话可以上网查一下)的使用,同时含有构造函数和get和set方法。
Spring Data Jpa是要建立一个接口继承JpaRepository的,而该接口内部已经帮助我们实现了大部分数据库操作,我们仅需要调用即可。其中如果还有其他特殊操作,比如根据用户名查找用户,这时候我们仅需要根据一个固定的格式编写函数,则该接口会自动帮忙实现数据库操作语言,代码如下:
//继承该接口,其中接口括号中第一个值应该是实体类,第二个值是实体类中id的类型
//接口中不需要编写数据库相应的操作,也不需要编写函数,接口会自动生成
//特殊操作,即除去查找全体,根据id查找,添增实体,根据id修改,根据id删除外
//例如根据用户名查询用户,则需要按照固定格式,如findByXxx()编写;
public interface UserRepository extends JpaRepository<User,Integer> {
    //根据用户名查询用户
    User findByUsername(String username);
}
实现了接口其实可以直接编写controller层了,但是为了代码公式化,我们必须引入service层,在该层,除了将原本接口内的方法继承调用以外,我们还可以做事务化管理,缓存操作等等。
第一步理所当然是建立service层的接口:
/* *
* user的service层接口
* */
public interface UserService  {

    //查找全部用户
    List<User> findAll();

    //根据用户id查找用户
    User findById(Integer id);

    //保存或修改用户
    User saveOrUpdateUser(User user);

    //根据用户id删除
    void deleteById(Integer id);

    //根据用户名查找用户
    User findByUsername(String username);
}
再实现接口的方法:
//service接口的实现
@Service
public class UserServiceImpl implements UserService {
    @Autowired
    private UserRepository userRepository;

    //查找全部用户
    @Override
    @Transactional
    public List<User> findAll() {
        return userRepository.findAll();
    }

    //通过id查找用户
    @Override
    @Transactional
    public User findById(Integer id) {
        return userRepository.findOne(id);
    }

    //保存或修改用户
    //检查异常
    @Override
    @Transactional
    public User saveOrUpdateUser(User user) {
        try{
           userRepository.save(user);
        }catch (Exception e){
            throw new RuntimeException("Add User Error: "+e.getMessage());
        }
        return user;
    }

    //根据用户id删除用户
    @Override
    @Transactional
    public void deleteById(Integer id) {
         userRepository.delete(id);
    }

    //根据用户名查找用户
    @Override
    @Transactional
    public User findByUsername(String username) {
        return userRepository.findByUsername(username);
    }
}
其中@Transactional是事务管理的标签。
再接下来是controller层,其实controller层的实现和之前不涉及数据库的那篇博客有些类似,其实实现都是一样的,还有后面前端的部分实现也差不多,我就直接拷贝过来修改,将原本Put和Delete请求添加上去:
| 请求类型 | 请求路径 | 功能 |
| GET | /mysql | 获取数据库列表 |
| POST | /mysql | 创建一个对象 |
| GET | /mysql/{id} | 通过id查询一个对象 |
| PUT | /mysql/{id} | 通过id修改一个对象 |
| DELETE | /mysql/{id} | 通过id删除一个对象 |
controller层修改为:
@RestController
@RequestMapping("/users")
public class UserController {

	@Autowired
	private UserRepository userRepository;

	/**
	 * 查询所有用户
	 */
	@GetMapping
	public ModelAndView list(Model model) {
		model.addAttribute("userList", userRepository.listUsers());
		model.addAttribute("title", "用户管理");
		return new ModelAndView("users/list","userModel",model);
	}

	/**
	 * 根据 id 查询用户
	 */
	@GetMapping("{id}")
	public ModelAndView view(@PathVariable("id") Long id, Model model) {
		User user = userRepository.getUserById(id);
		model.addAttribute("user", user);
		model.addAttribute("title", "查看用户");
		return new ModelAndView("users/view","userModel",model);
	}

	/**
	 * 获取创建表单页面
	 */
	@GetMapping("/form")
	public ModelAndView createForm(Model model) {
		model.addAttribute("user", new User());
		model.addAttribute("title", "创建用户");
		return new ModelAndView("users/form","userModel",model);
	}

	/**
	 * 保存用户
	 */
	@PostMapping
	public ModelAndView saveUser(User user) {
		userRepository.saveOrUpdateUser(user);
		return new ModelAndView("redirect:/users");// 重定向到 list页面
	}

     /**
	 * 获取修改用户的界面
	 */
	@GetMapping("/modify/{id}")
	public ModelAndView modify(@PathVariable("id") Long id, Model model) {
		User user = userRepository.getUserById(id);
		model.addAttribute("user", user);
		model.addAttribute("title", "修改用户");
		return new ModelAndView("users/form","userModel",model);
	}

     /**
	 * 修改用户
	 */
	@PutMapping
	public ModelAndView UpdateUser(User user) {
		userRepository.saveOrUpdateUser(user);
		return new ModelAndView("redirect:/users");// 重定向到 list页面
	}

	/**
	 * 删除用户
	 */
	@DeleteMapping("/delete/{id}")
	public ModelAndView delete(@PathVariable("id") Long id) {
		userRepository.deleteUser(id);
		return new ModelAndView("redirect:/users"); // 重定向到 list页面
	}

}
前端thymeleaf由于对put和delete请求不支持,所以需要使用“_method”的方式实现,即:
<!--修改-->
<form  th:action="@{/user/}+${user.id}" method="post">
	<input type="hidden" name="_method" value="put">
	<!--修改按钮-->
	<a type="submit" class="btn btn-primary btn-sm">修改</button>
</form>
<!--删除-->
<form  th:action="@{/user/}+${user.id}" method="post">
	<input type="hidden" name="_method" value="delete">
	<!--删除按钮-->
	<button  type="submit" class="btn btn-danger btn-sm">删除</button>
</form>
所以我们要在原本的前端页面中进行修改,里面还是包含着一个list页面,个人信息界面和form界面:
List页面:
<body>
<h3 th:text="${userModel.title}">waylau</h3>
<div>
	<a href="/users/form.html" th:href="@{/users/form}">创建用户</a>
</div>
<table border="1">
	<thead>
	<tr>
		<td>ID</td>
		<td>Email</td>
		<td>Name</td>
	</tr>
	</thead>
	<tbody>
	<tr th:if="${userModel.userList.size()} eq 0">
		<td colspan="3">没有用户信息!</td>
	</tr>
	<tr th:each="user : ${userModel.userList}">
		<td th:text="${user.id}"></td>
		<td th:text="${user.email}"></td>
		<td ><a th:href="@{'/users/'+${user.id}}" th:text="${user.name}"></a></td>
	</tr>
	</tbody>
</table>
</body>
个人信息界面:
<body>
<h3 th:text="${userModel.title}">waylau</h3>
<div>
	<P><strong>ID:</strong><span th:text="${userModel.user.id}"></span></P>
	<P><strong>Name:</strong><span th:text="${userModel.user.name}"></span></P>
	<P><strong>Email:</strong><span th:text="${userModel.user.email}"></span></P>
</div>
<div>
   <!--删除-->
   <form  th:action="@{/user/delete}+${user.id}" method="post">
	   <input type="hidden" name="_method" value="delete">
	   <button  type="submit" class="btn btn-danger btn-sm">删除</button>
    </form>
   <!--修改-->
    <a th:href="@{'/users/modify/'+${userModel.user.id}}">修改</a>
</div>
</body>
form表单:
<body>
<h3 th:text="${userModel.title}">waylau</h3>
<form action="/users" th:action="@{/users}" method="POST" th:object="${userModel.user}">

    <!--put请求-->
    <input type="hidden" name="_method" value="put" th:if="${userModel.user!=null}">
    <input type="hidden" name="id" th:if="${userModel.user!=null}"
    th:value="${userModel.user.id}" >

	<input type="hidden" name="id" th:value="*{id}">
	名称:<br>
	<input type="text" name="name" th:value="*{name}">
	<br>
	邮箱:<br>
	<input type="text" name="email" th:value="*{email}">
	<input type="submit" value="提交">
</form>
</body>
通过前端后端结合就可以实现数据交互了
二. MyBatis
首先,仍是要导入依赖:
<!--mysql的导入-->
<dependency>
   <groupId>mysql</groupId>
   <artifactId>mysql-connector-java</artifactId>
   <scope>runtime</scope>
</dependency>

<!--jdbc的导入-->
<dependency>
    <groupId>org.springframework.boot</groupId>
    <artifactId>spring-boot-starter-jdbc</artifactId>
</dependency>

<!-- mybatis的导入 -->
<dependency>
    <groupId>org.mybatis</groupId>
    <artifactId>mybatis</artifactId>
    <version>3.4.6</version>
</dependency>
<dependency>
    <groupId>org.mybatis.spring.boot</groupId>
    <artifactId>mybatis-spring-boot-starter</artifactId>
    <version>2.0.0</version>
</dependency>
配置文件:
spring:
  datasource:
    #用户名
    username: root
    #密码
    password: 123456
    #设置url,其中//后是连接的ip地址,3306是mysql的端口号,xxxx是建的数据库名
    url: jdbc:mysql://localhost:3306/user
    driver-class-name: com.mysql.jdbc.Driver
MyBatis在Spring时代还需要配置mapping,而现在可以使用注解的方式来代替原本的配置mapping。现如今它仅需要在启动类(也就是项目构建就存在的类)中加入注解,表明mybatis的新型mapper在哪个具体的包下面即可:
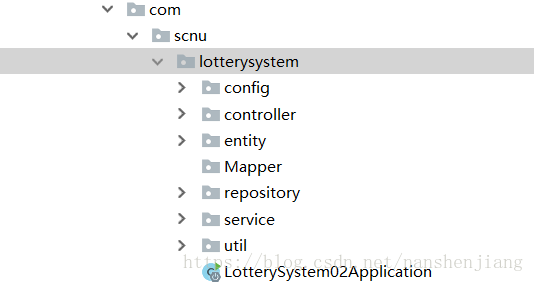
该项目路径中,包Mapper是我存放的mapper类,则我需要在LotterySystem02Applocation启动类中加入注解:
@MapperScan("com.scnu.lotterysystem.Mapper") 当然,还可以在每个mapper类上注解@Mapper,效果一样。@MapperScan只是扫描注明的包下的每个类,并将其标识为@Mapper
说完基本,当然是要先建立实体类,仍是user:
//user实体类
public class user {
    private Integer id;
    private String name;
    private String email;

    public user(){

    }
    public user(Integer id, String name, String email) {
        this.id = id;
        this.name = name;
        this.email = email;
    }

    @Override  //重构toString函数
    public String toString() {
        return "user{" +
                "id=" + id +
                ", name='" + name + '\'' +
                ", email='" + email + '\'' +
                '}';
    }

    public Integer getId() {
        return id;
    }

    public void setId(Integer id) {
        this.id = id;
    }

    public String getName() {
        return name;
    }

    public void setName(String name) {
        this.name = name;
    }

    public String getEmail() {
        return email;
    }

    public void setEmail(String email) {
        this.email = email;
    }
}
然后就是建立mapper的接口,这次建立mapper是使用注解的方法,当然仍要使用到数据库操作语言,这是mybatis的特色:
@Mapper
public interface UserMapper {

    @Select("SELECT * FROM user WHERE id = #{id}")
    public user getUserById(Integer id);

    @Update("UPDATE user SET name=#{name},email=#{email} WHERE id=#{id}")
    public void updateUser(user user);

    @Delete("DELETE FROM user WHERE id=#{id}")
    public void deleteById(Integer id);

    @Insert("INSERT INTO user(name,email) VALUES(#{name},#{email})")
    public void insertUser(user user);
}
这完成以后就类似于建立了一个JPA中的repository,我们可以建立service层来使用即可,其他步骤(建立controller,前端设计)和上面一样