背景:
我们平时会会在接口上增加 @NotNull ,@NotEmpty 等注解以实现对于接口参数的自动验证。今天有些好奇 Spring 究竟做了什么神鬼操作实现了基于注解的参数验证功能,因此有了下面的分析。
JSR303/JSR-349: JSR303是一项标准,只提供规范不提供实现,规定一些校验规范即校验注解,如@Null,@NotNull,@Pattern,位于javax.validation.constraints包下。JSR-349是其的升级版本,添加了一些新特性。
早期的 Spring Web 基于 Hibernate Validator 实现了这些校验规范。
在后期,Spring 将这部分校验独立成为了一个模块spring-validation,需要额外引入依赖实现相关注解校验。
<!-- https://mvnrepository.com/artifact/org.springframework.boot/spring-boot-starter-validation -->
<dependency>
    <groupId>org.springframework.boot</groupId>
    <artifactId>spring-boot-starter-validation</artifactId>
    <version>2.4.4</version>
</dependency>
| 注解 | 说明 |
|---|---|
@Null | 被注释的元素必须为null |
@NotNull | 被注释的元素不能为null |
@AssertTrue | 被注释的元素必须为true |
@AssertFalse | 被注释的元素必须为false |
@Min(value) | 被注释的元素必须是一个数字,其值必须大于等于指定的最小值 |
@Max(value) | 被注释的元素必须是一个数字,其值必须小于等于指定的最大值 |
@DecimalMin(value) | 被注释的元素必须是一个数字,其值必须大于等于指定的最小值 |
@DecimalMax(value) | 被注释的元素必须是一个数字,其值必须小于等于指定的最大值 |
@Size(max,min) | 被注释的元素的大小必须在指定的范围内 |
@Digits(integer,fraction) | 被注释的元素必须是一个数字,其值必须在可接受的范围内 |
@Past | 被注释的元素必须是一个过去的日期 |
@Future | 被注释的元素必须是一个将来的日期 |
@Pattern(value) | 被注释的元素必须符合指定的正则表达式 |
Spring Web 使用 @Valid(javax) 和 @Validated(spring) 标记需要对入参进行自定义验证。 @Validated 上增加了分组校验的功能,实现来不同的接口上进行不同的分组校验。
首先,我们需要构造一个测试场景。
通过 Spring Initializer 创建了一个 Spring Web 项目项目。
编写一个接口,入参为 UserDTO :
// 创建 测试 Controller
@RestController
@RquesetMapping("/user")
public class UserController{
	// 通过请求行参数进行入参,并添加 @Validated 注解用于参数验证
	@GetMapping("/add")
	public String add(@Validated User user){
		return user != null ? "success" : "fail";
	}
}
// 创建 `Java Bean` ·User·:
@Data
public class User{
	@NotNull
	private String name;
	@NotNull;
	private Integer age;
}
@RequestParam 参数
@RequestParam 中有两个属性 name 和 required 。
其中 name 属性用于标记参数的名称,用于请求行中的参数名称与请求方法中参数的映射;
而 required 属性则是用于标记当前参数是否是必须的,默认为 true。
从上面我们可以看到 @RequestParam 是用于参数绑定的,而 @Valid 注解用于标记参数需要进行验证。User 中对应属性上面的 @NotNull 注解则表示该属性需要进行非空校验。
但是 Spring 究竟是怎么实现的参数校验呢?
现在我们使用 http://localhost:8080/user/add?name=zhangsan&age=23尝试请求这个接口。
这里实际是对参数已经验证成功了,但是如果我们想要解析它的验证原理的话需要让方法报出异常,现在我们少传一个 age 参数试试: http://localhost:8080/user/add?name=zhangsan
可以清楚的看到系统异常打印的堆栈信息,现在我们只需要分析该堆栈信息即可探究其中验证原理。
我们可以看到异常是由ModelAttributeMethodProcessor抛出的,我们打开这个类的源码进行分析:
Resolve
@ModelAttributeannotated method arguments and handle return values from@ModelAttributeannotated methods.
Model attributes are obtained from the model or created with a default constructor (and then added to the model). Once created the attribute is populated via data binding to Servlet request parameters. Validation may be applied if the argument is annotated with@javax.validation.Valid. or Spring’s own@org.springframework.validation.annotation.Validated.
When this handler is created withannotationNotRequired=trueany non-simple type argument and return value is regarded as a model attribute with or without the presence of an@ModelAttribute.
ModelAttributeMethodProcessor用于处理由@ModelAttribute注解的方法参数并且处理由@ModelAttribute注解的返回值。
模型属性可以通过默认构造器创建,一旦被创建的参数通过数据绑定到Servlet请求的参数上时,如果使用@javax.validation.Valid或者 Spring 自带的注解@org.springframework.validation.annotation.Validated做了标记,则会执行校验操作。
当处理器添加了annotationNotRequired=true属性时,返回值不管有没有添加@ModelAttribute都会被认为是模型属性。
这里为什么会使用 ModelAttribute 进行校验呢?实际上是由于我没有在方法参数上添加@RequestParam 或者 @RequestBody 注解,请求参数是被认为是 ModelAttribute 进行
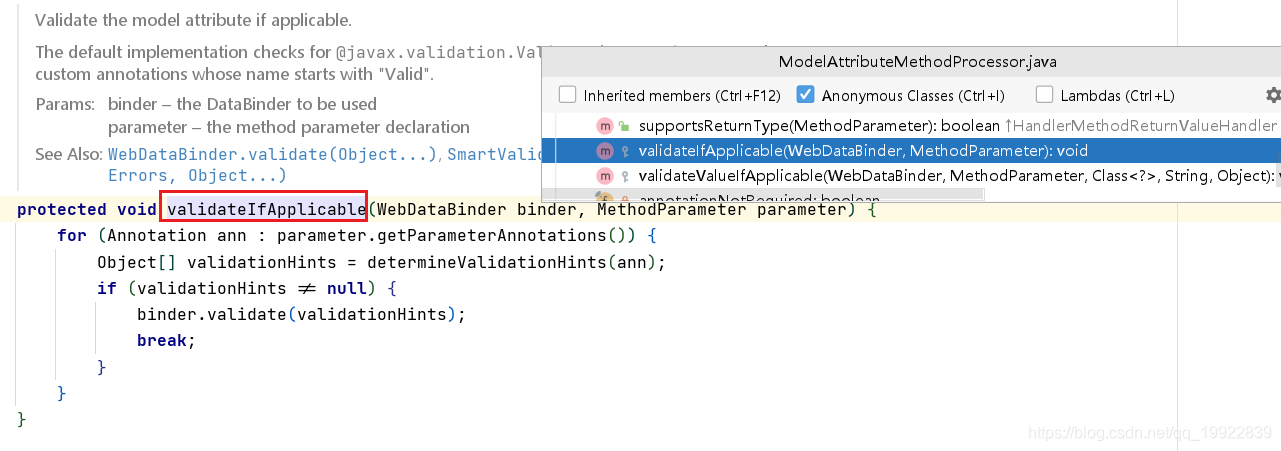
追踪 ModelAttributeMethodProcessor 最终发现校验工作是在 validateValueIfApplicable这个方法里实现的。
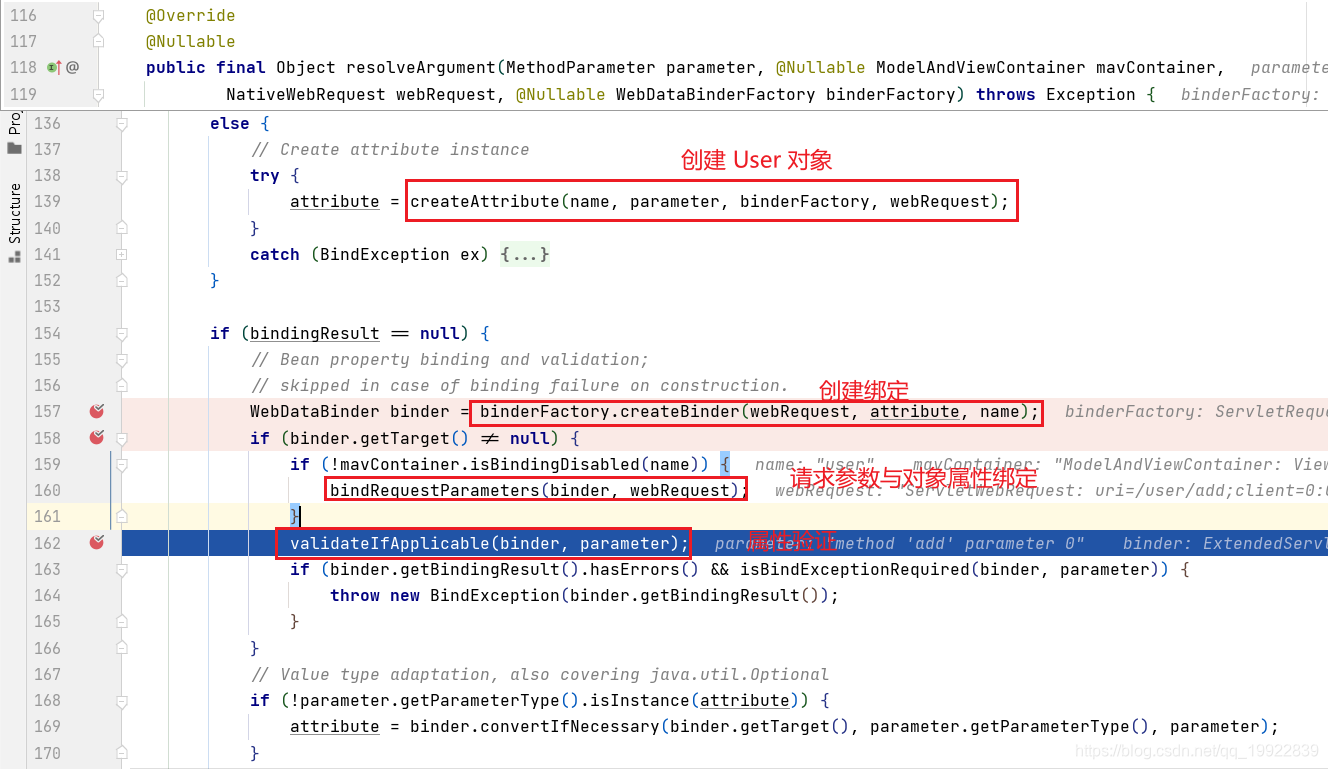
回到 resolveArgument 方法上,发现在创建了 User 对象后,通过 bindingFactory.createBinder() 方法创建了绑定对象,在接下来的操作中将请求参数与对象属性完成了映射,在映射完成后对属性进行注解校验。
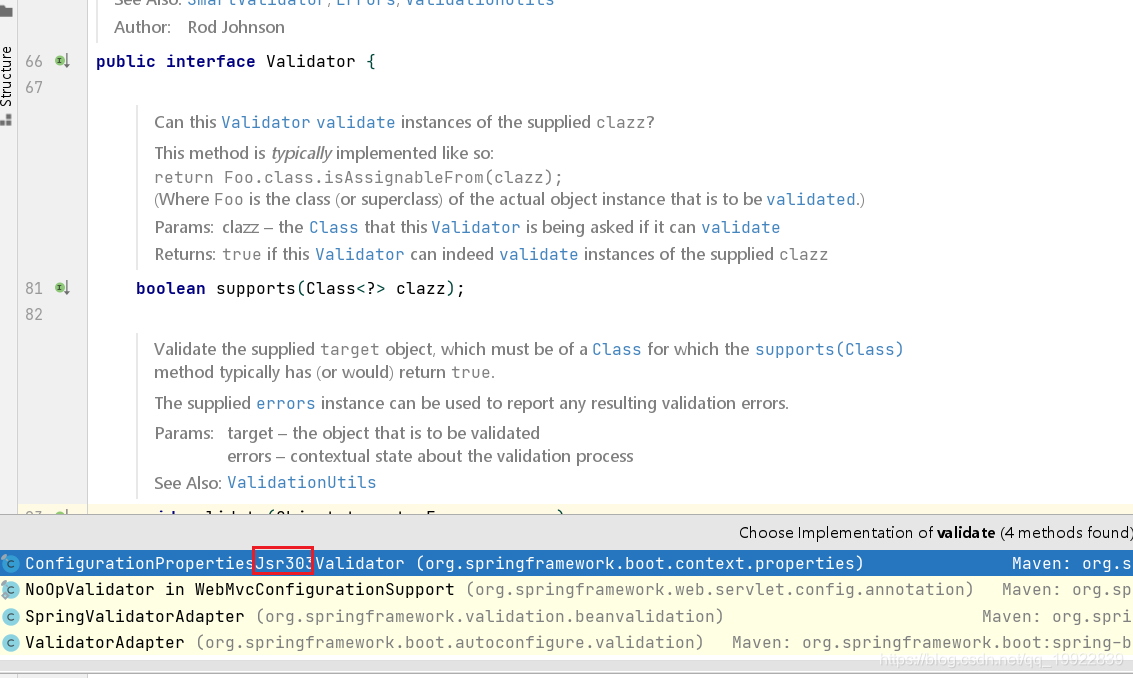
可以看到我们是在渲染完 user 对象后再进行属性的校验的。在 WebDataBinder 中保存了所有的 Validator 用于进行参数校验。我们在 validateIfApplicable中调用了 dataBinder.validate进行参数校验。
而 内部Validator是交由SpringValidatorAdapter 进行校验的,完整的校验逻辑存在于 processConstraintViolations方法中,在方法中委托给了 hibernate-validator 实现校验。
hibernate-validator 在校验结束后,会返回给 SpringValidatorAdapter 一个校验集合,由 它实现最后的消息组装。并交给消息翻译对象进行消息拼接。
参考资料
https://www.jb51.net/article/178038.htm
强悍的Spring之spring validation


