前言
Unity3d的UGUI系统与Web前端开发中常见的数据绑定和属性绑定机制有所不同。UGUI是一个相对简单和基础的UI系统,并不内置像Web前端(例如 Vue.js或React中)那样的双向数据绑定或自动更新UI的机制。UGUI是一种比较传统的 UI 系统,它更侧重于基于事件的UI更新和手动控制视图的更新。在 UGUI中,如果数据变化了,开发者需要手动更新UI元素(例如文本、按钮状态、进度条等)。这种方式虽然灵活,但需要开发者自己处理每个UI更新的时机和逻辑。
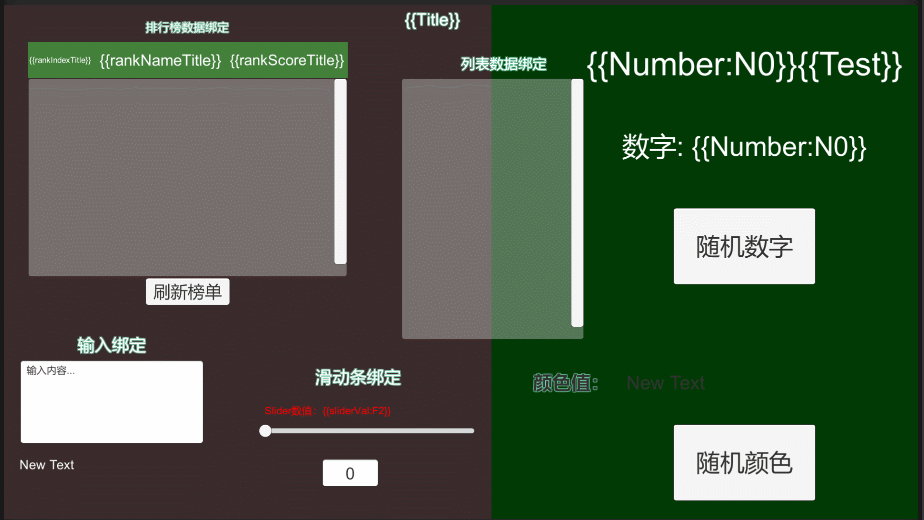
对比数据可以通过双大括号 {{}} 语法直接绑定到模板中,无需手动处理DOM元素;而Unity3d的Text修改文字内容则需要通过Text.text属性来修改,对比起来比较麻烦,特比实在数据变量频繁变更的情况下。要是在Unity的UGUI中实现了数据绑定,可以提高代码冗余、提高UI数据更新开发效率、解耦数据和UI的关联。目前实现的功能有Text内{{}}绑定数据、颜色绑定(Graphic.color)、图片绑定(Image.sprite)、列表绑定和属性绑定等功能。
尽管它有着诸多的优势,如减少了代码冗余、提高了开发效率和提高了应用的可维护性。它通过解耦视图和数据,使得开发者能够更关注业务逻辑,而不是繁琐的 UI 更新操作。这使得开发者能够更加专注于应用的核心功能,提升了代码质量和可扩展性。但是数据绑定也有一些挑战,特别是性能优化方面(尤其是在大规模数据或复杂 UI 交互时)。
关注并私信 U3D数据绑定 免费获取源码(底部公众号)。
效果
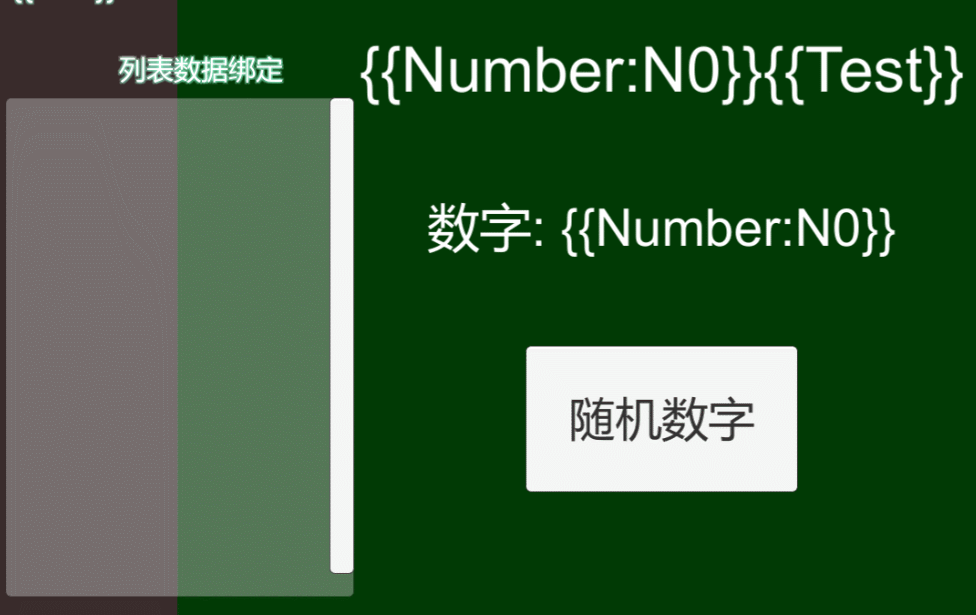
文字绑定和列表刷新:
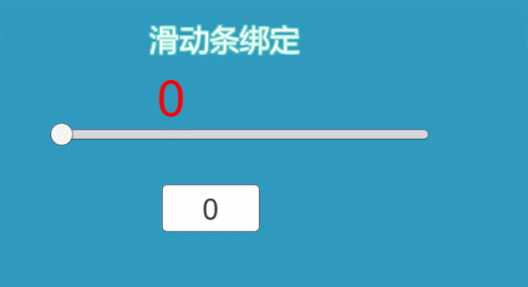
滑动条绑定:

列表绑定:
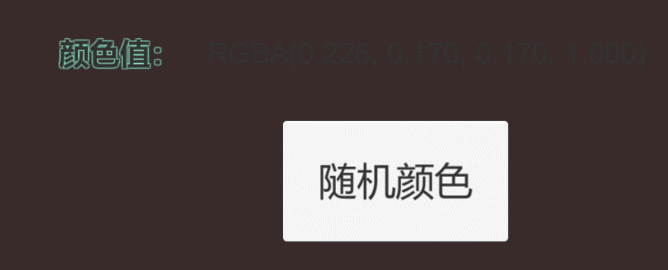
颜色绑定:
实现
大致实现思路如下:
1.先建立一个类(DataContext)作为管理键值对的容器,它允许通过键(key)来访问和修改与之相关联的值(value)。这个类还支持在值发生更改时触发一个事件(Changed),事件触发时,会传递触发变化的键。
using System;
using System.Collections.Generic;

public class DataContext
{
	public event Action<string> contextChanged = delegate { };
	private IDictionary<string, object> m_ActiveBinds = new Dictionary<string, object>();

	public bool ContainsKey(string key)
	{
		return m_ActiveBinds.ContainsKey(key);
	}
}
2.再建立一个DataBindContext类,管理和更新数据绑定的类。它通过 DataContext 来存储数据,并在数据变化时通知相关的 UI 组件更新。:当数据变化时,BindChanged 方法会被触发,自动更新所有依赖于该数据的 UI 组件。
using UnityEngine;

//数据绑定类
public class DataBindContext : MonoBehaviour
{
	private DataContext m_DataContext;
	public object this[string key]
	{
		get { return m_DataContext[key]; }
		set
		{
			if (m_DataContext == null)
			{
				m_DataContext = new DataContext();
				m_DataContext.contextChanged += BindChanged;
			}
			m_DataContext[key] = value;
		}
	}

	public void BindChanged(string key)
	{
		var children = GetComponentsInChildren<IBindable>();
		if (children == null)
			return;
		for (var i = 0; i < children.Length; i++)
			if (string.IsNullOrEmpty(children[i].key) || children[i].key == key)
				children[i].Bind(m_DataContext);
	}

}
3.再建立IBindable 接口,IBindable 提供了一个统一的接口来进行绑定键的数据更新,包括key属性(用于绑定的key值)和Bind(DataContext context)方法,Bind方法接收一个 DataContext 参数,UI 组件通过此方法将数据模型绑定到自身,监听数据变化,并在数据变化时自动更新UI。
public interface IBindable
{
	string key { get; }
	void Bind(DataContext context);
}
Text绑定
Text内采用“{{}}”绑定数据,是最最常用的数据绑定,例如{{Number:N0}}{{Test}}绑定了Number和Test的键值,当检测到数据变更会进行刷新。
显示前:
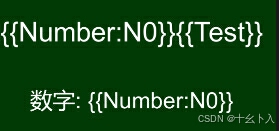
代码调用变更
DataBindContext.instance?.SetKeyValue("Number", 57729);
DataBindContext.instance?.SetKeyValue("Test", "测试绑定");
显示后:

Text的绑定实现就是通过实现IBindable接口的Bind方法,在其中将匹配的字符串进行替换变量数值,代码如下:
 m_Text.text = Regex.Replace(m_OriginalText, @"\{\{[^}]*}}", m =>
{
   var target = m.Value.Substring(2, m.Value.Length - 4).Split(':');
   var key = target[0];
   if (context.ContainsKey(key)) {
       var val = context[key];
     if (target.Length == 2 && val is IFormattable) {
            var format = target[1];
 return ((IFormattable) val).ToString(format, CultureInfo.CurrentCulture);
         }
 return val.ToString();
}
    return "";
});
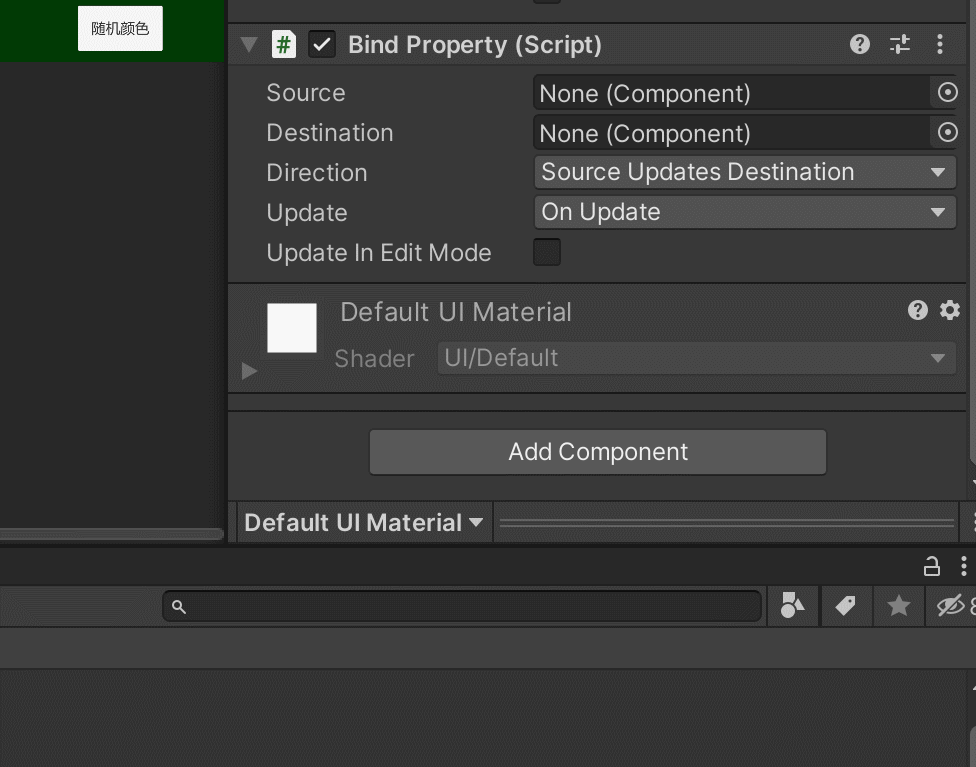
属性绑定
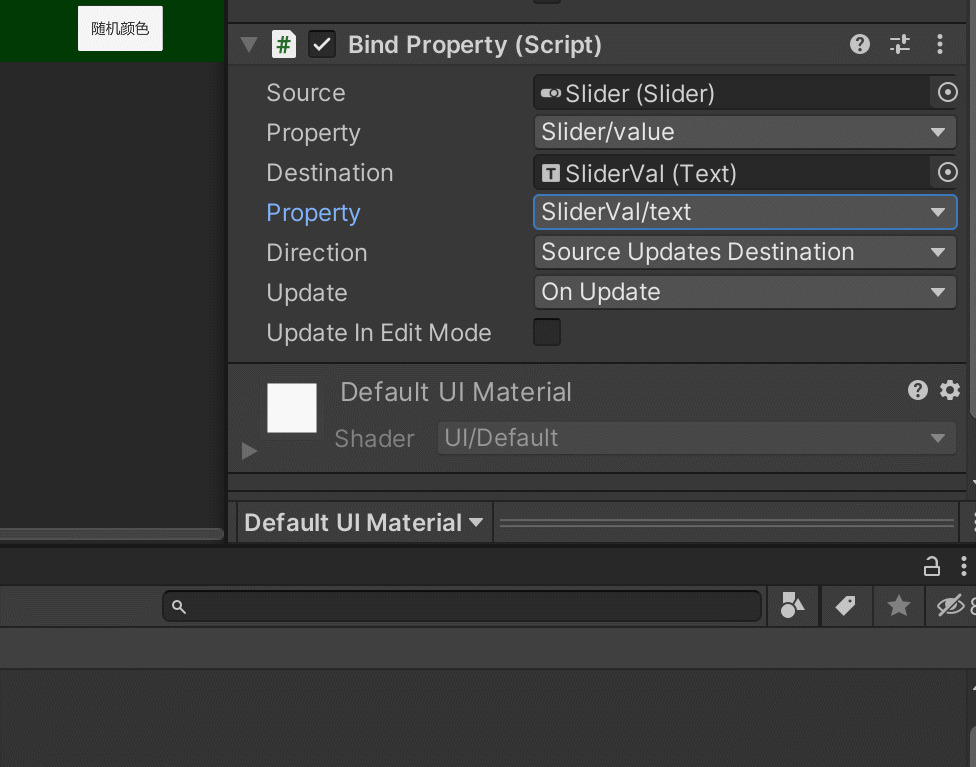
属性绑定是将两个UGUI的组件属性直接做一个关联,当然关联之前开发者也需要了解两个属性间值是否真的能关联匹配。这里以Slider的value 关联到 Text的text属性为例:
这样运行时候Slider的value属性就会同步到Text.text显示:
同时属性绑定可以选择方向和多种更新同步方式:
不同更新同步模式的代码:
private void Update()
{
	if (m_Update == UpdateMethod.OnUpdate) {
		UpdateBind();
	}
}

private void FixedUpdate()
{
	if (m_Update == UpdateMethod.OnFixedUpdate) {
		UpdateBind();
	}
}

private void LateUpdate()
{
	if (m_Update == UpdateMethod.OnLateUpdate) {
		UpdateBind();
	}
}
属性更新实现:
public void UpdateBind()
{
	if (m_SourceProperty == null || m_DestinationProperty == null)
	{
		return;
	}

	if (m_CachedSourceProperty == null || m_CachedSourceProperty.Name != m_SourceProperty
		|| m_CachedDestinationProperty == null || m_CachedDestinationProperty.Name != m_DestinationProperty)
	{
		Cache();
	}

	switch (m_Direction)
	{
		case Direction.SourceUpdatesDestination:
			if (m_CachedDestinationProperty.PropertyType == typeof(string))
			{
				m_CachedDestinationProperty.SetValue(m_Destination, m_CachedSourceProperty.GetValue(m_Source, null).ToString(),
					null);
			}
			else
			{
				m_CachedDestinationProperty.SetValue(m_Destination, m_CachedSourceProperty.GetValue(m_Source, null), null);
			}
			break;
		case Direction.DestinationUpdatesSource:
			if (m_CachedSourceProperty.PropertyType == typeof(string))
			{
				m_CachedSourceProperty.SetValue(m_Source, m_CachedDestinationProperty.GetValue(m_Destination, null).ToString(),
					null);
			}
			else
			{
				m_CachedSourceProperty.SetValue(m_Source, m_CachedDestinationProperty.GetValue(m_Destination, null), null);
			}
			break;
	}
}

public void Cache()
{
	m_CachedSourceProperty = m_Source.GetType().GetProperty(m_SourceProperty);
	m_CachedDestinationProperty = m_Destination.GetType().GetProperty(m_DestinationProperty);
}
图片绑定
[SerializeField]
[Header("绑定对象")]
private Image m_Image;
[SerializeField]
[Header("绑定键名")]
private string m_Key;

public string key
{
	get { return m_Key; }
}

public void Bind(DataContext context)
{
	if (context.ContainsKey(m_Key))
	{
		m_Image.sprite = (Sprite)context[m_Key];
	}
}
颜色绑定
[SerializeField]
[Header("绑定对象")]
private Graphic m_Graphic;
[SerializeField]
[Header("绑定键名")]
private string m_Key;

public string key
{
	get { return m_Key; }
}

public void Bind(DataContext context)
{
	if (context.ContainsKey(m_Key))
	{
		m_Graphic.color = (Color)context[m_Key];
	}
}
滑动条绑定
private Slider m_Slider;

[Header("绑定键名")]
public string m_Key;

public string key
{
    get { return m_Key; }
}
public void Bind(DataContext context)
{
    if (m_Slider == null)
        m_Slider = GetComponent<Slider>();

    if (context.ContainsKey(key))
    {
        m_Slider.value = (float)context[key];
    }
}
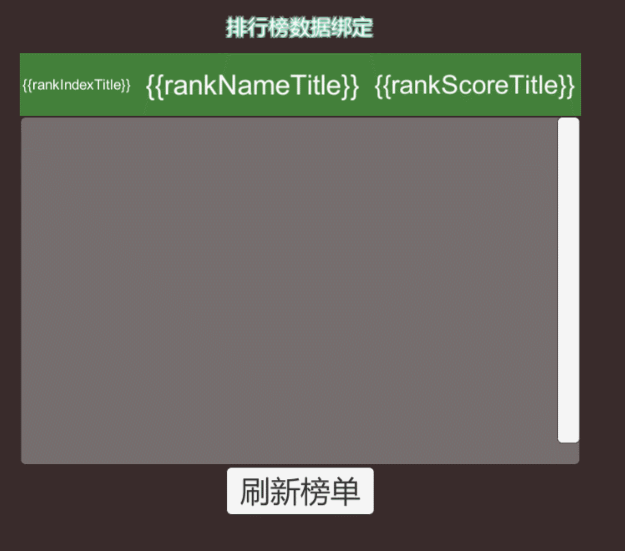
列表绑定
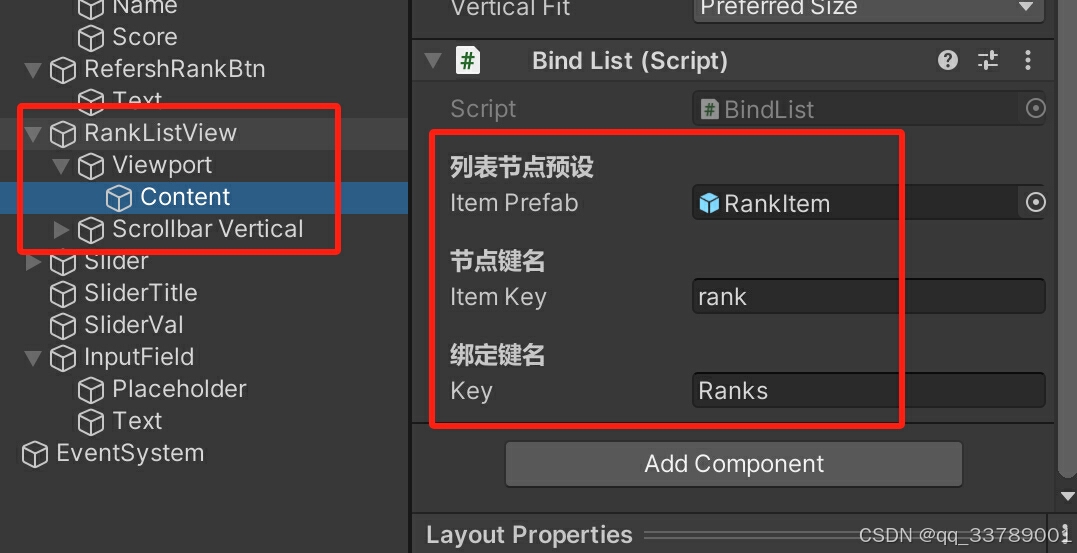
列表的绑定其实需要预设节点名称和绑定键名等设置,如下:
[SerializeField]
[Header("列表节点预设")]
private GameObject m_ItemPrefab;
[SerializeField]
[Header("节点键名")]
public string m_ItemKey;
[SerializeField]
[Header("绑定键名")]
public string m_Key;
数据绑定刷新的代码如下:
if (m_ItemPrefab == null)
{
	Debug.LogWarning("节点预设为空,无法绑定列表!");
	return;
}

m_Context = new DataContext();

if (context.ContainsKey(m_Key))
{

	var list = (ObservableList)context[m_Key];

	if (list.Count > itemObjList.Count)
	{
		for (int i = itemObjList.Count; i < list.Count; i++)
		{
			GameObject go = GameObject.Instantiate(m_ItemPrefab);
			go.transform.SetParent(transform, false);
			go.transform.localScale = Vector3.one;
			go.transform.localEulerAngles = Vector3.zero;
			go.transform.name = i.ToString("D4") + "item";

			itemObjList.Add(go);
		}
	}
	else
		for (int i = list.Count; i < itemObjList.Count; i++)
			itemObjList[i].SetActive(false);

	for (int i = 0; i < list.Count; i++)
	{
		var itemData = list[i];
		var item = itemObjList[i];

		var bindables = item.GetComponentsInChildren<IBindable>(true);
		var properties = itemData.GetType().GetProperties();

		var model = item.GetComponent<IModel>();

		if (model != null)
			model.model = itemData;

		for (var j = 0; j < properties.Length; j++)
		{
			var p = properties[j];
			m_Context[m_ItemKey + "." + p.Name] = p.GetValue(itemData, null);
		}

		for (var j = 0; j < bindables.Length; j++)
			bindables[j].Bind(m_Context);

		itemObjList[i].SetActive(true);
	}

}
其核心思路就是存在该键变更时,根据列表数据显示或者隐藏、并刷新所有子节点。通过键的值以列表的形式,节点不够时克隆节点的预设,生成节点,将单个节点的数据根据绑定配置刷新到对应的组件上,直到所有节点刷新完毕。
同时预设的节点数据需要与定义的类型结构统一,这里以排行榜为例,其数据结构如下:
class RankItem
{
	public int index { get; set; }
	public string name { get; set; }
	public float score { get; set; }
}
index、name和score分别表示排名、玩家名称和分数。
所以单个节点的预设的绑定应该如下配置:
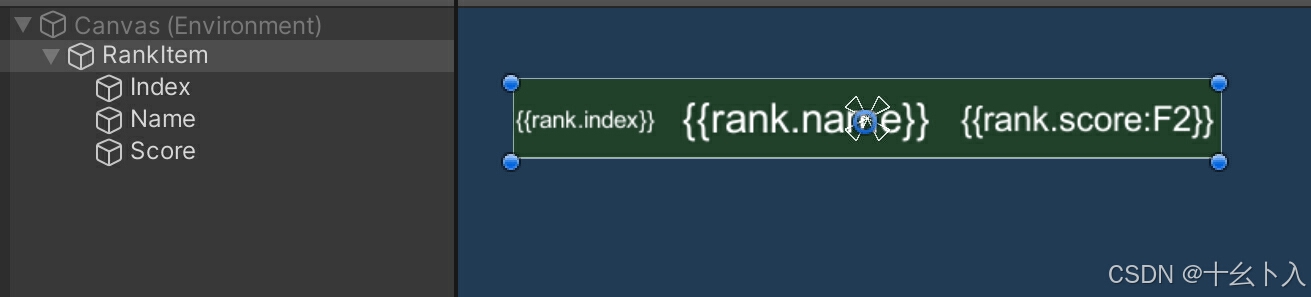
列表的键采用Ranks,同时通过如下代码生成假数据:
int count = 10;
for (int i = count; i > 0; i--)
{
	m_RankItems.Add(new RankItem
	{
		index = count - i + 1,
		score = i * 100 + Random.Range(0, 7.6f),
		name = "玩家名称" + (count - i + 1)
	});
}

DataBindContext.instance?.SetKeyValue("Ranks", m_RankItems);
绑定列表的配置最终如下图:
绑定与变更
绑定值变更数据的键值变更采用如下代码:
DataBindContext m_Context["键名"] = 值;
单例模式也可采用来修改值:
DataBindContext.instance?.SetKeyValue("键名", 值);
演示功能
这里简单搭建一个覆盖功能的UI:
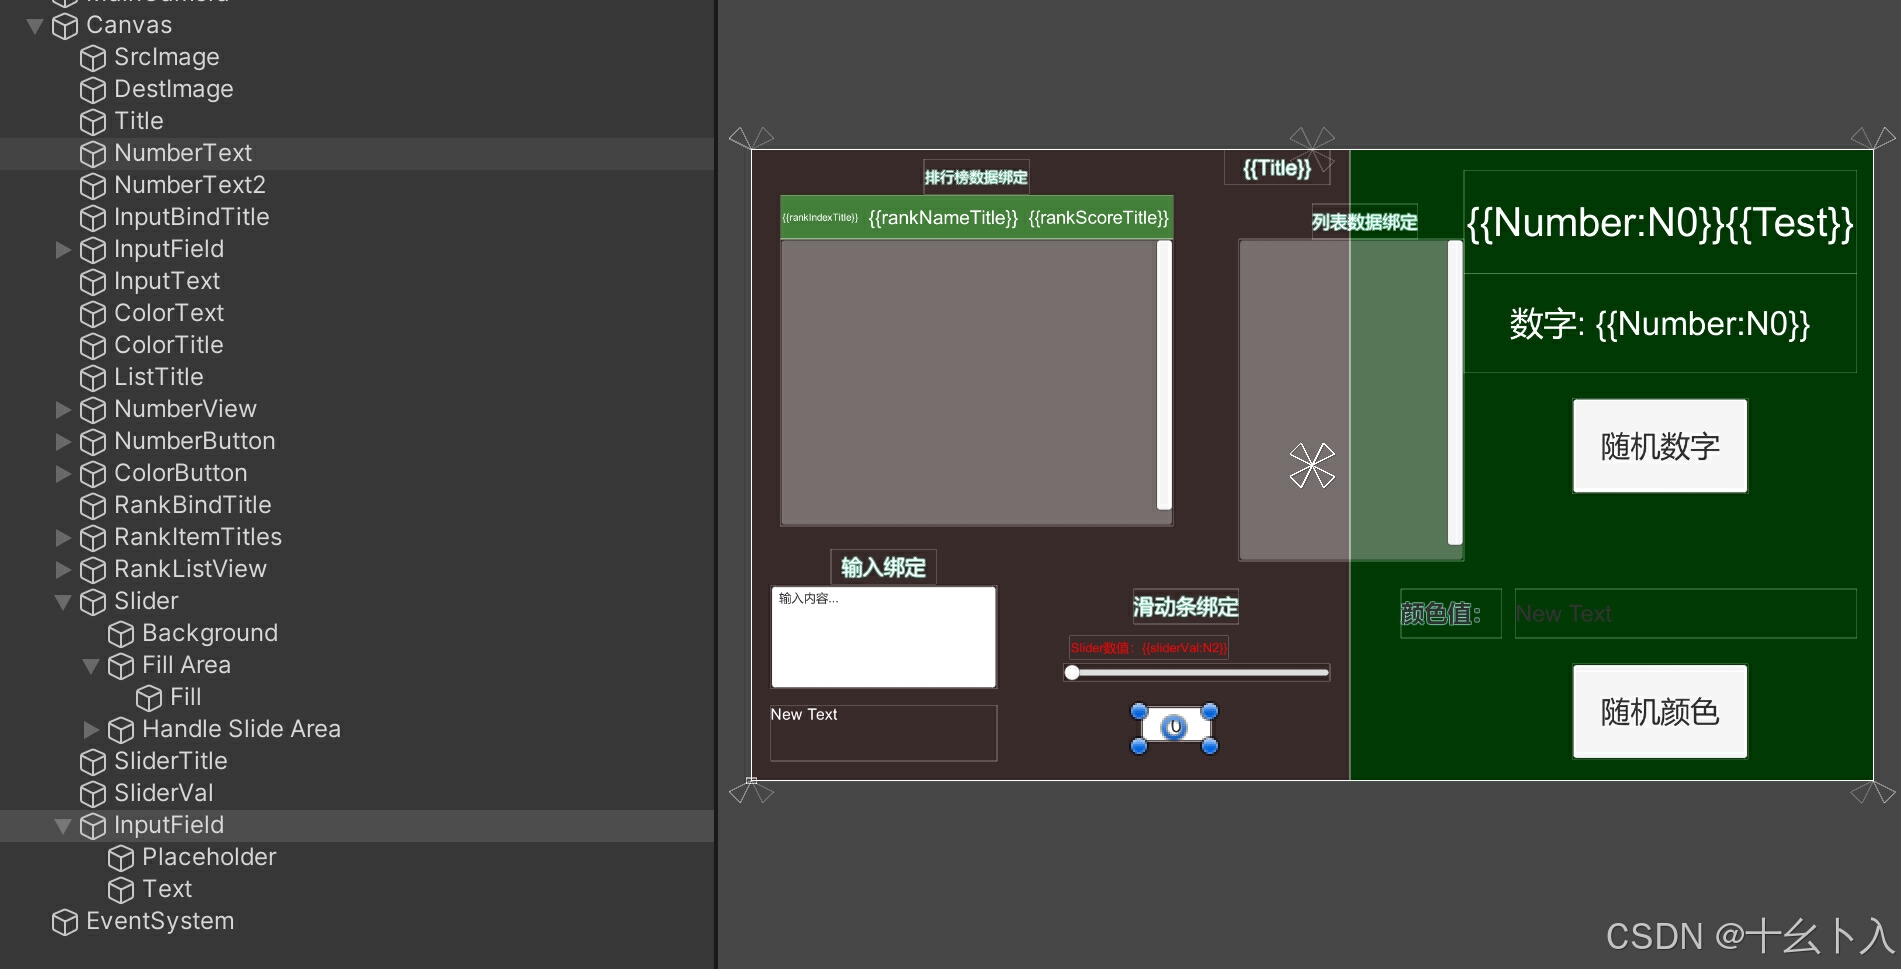
挂上对应的脚本(注意DataBindContext 需要挂在最外层)后运行效果: