🌈Don’t worry , just coding!
内耗与overthinking只会削弱你的精力,虚度你的光阴,每天迈出一小步,回头时发现已经走了很远。
📗插槽
在 Vue 3 中,插槽(Slots)是一个强大的功能,可以帮助我们在组件中定义可重用的内容。插槽分为普通插槽、具名插槽和作用域插槽。
💻代码
普通插槽
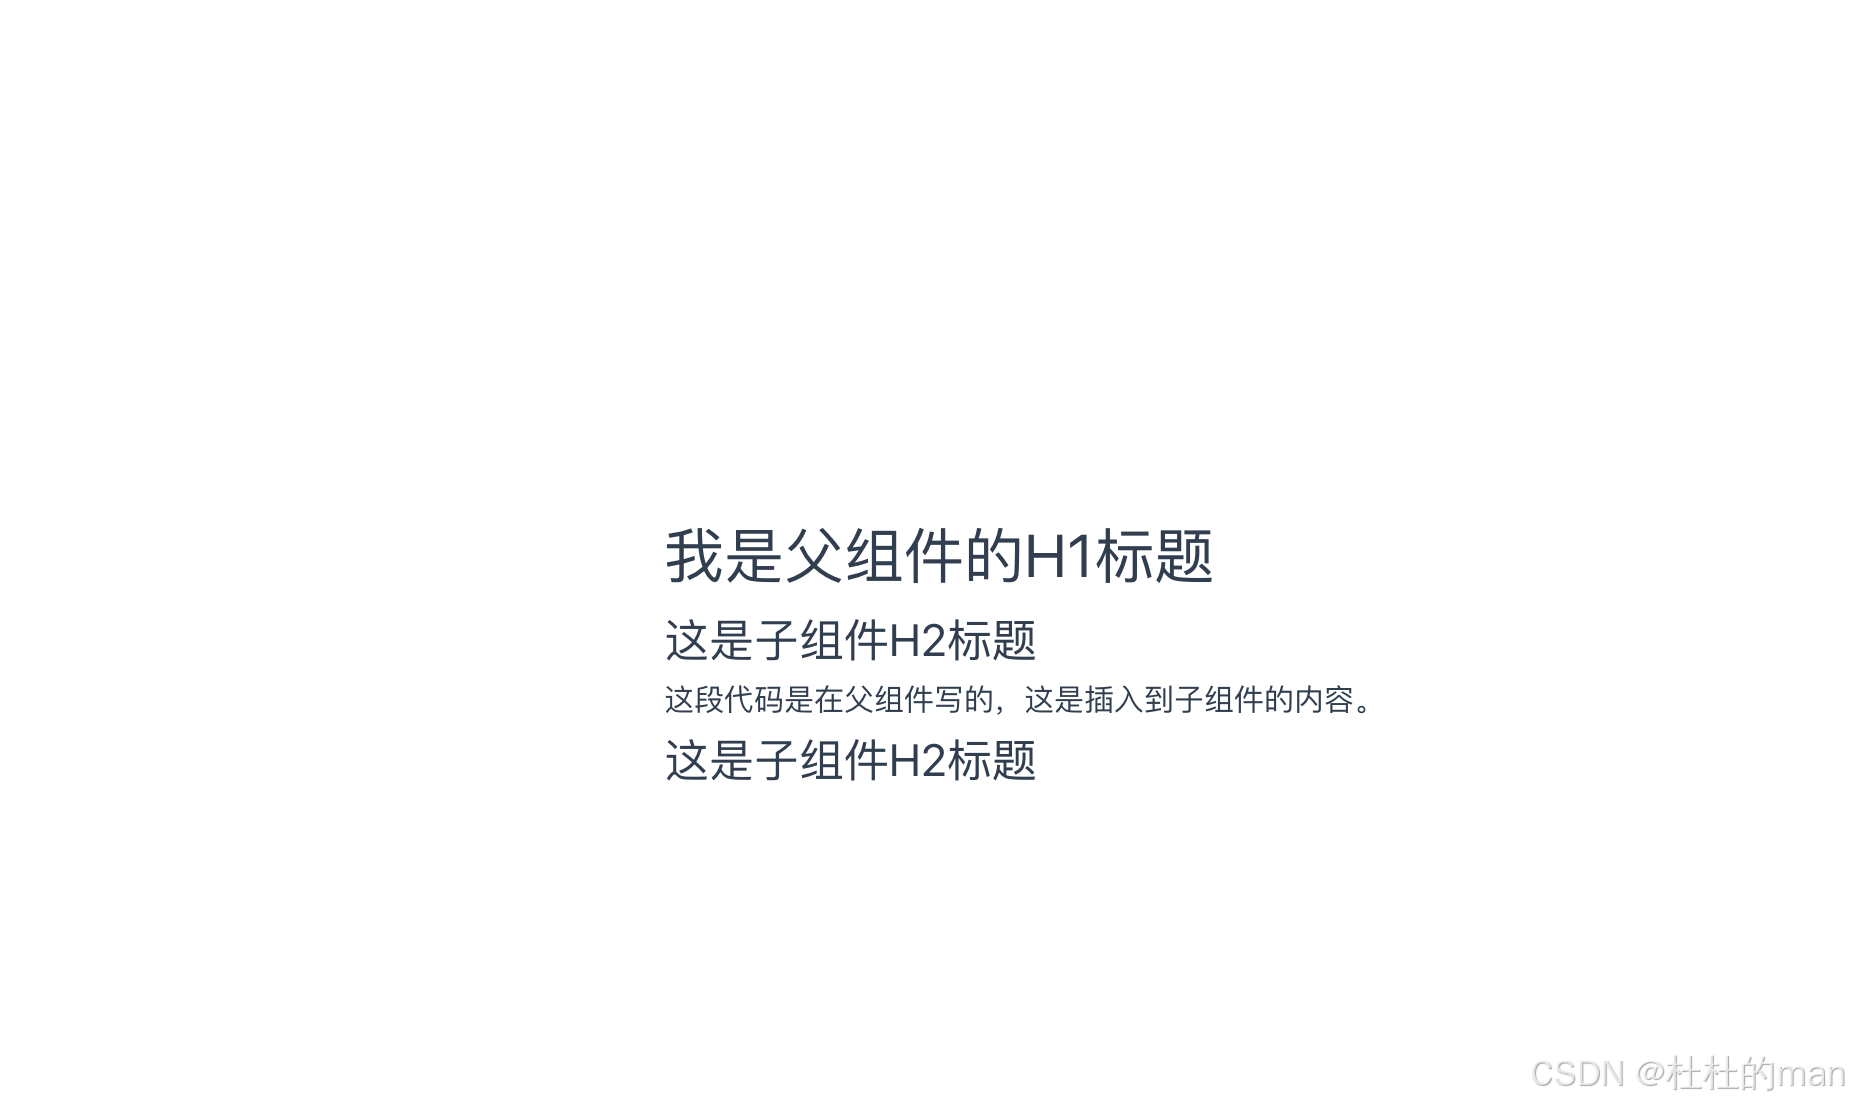
普通插槽允许你在父组件中插入内容到子组件的指定位置,是没有name属性的。
App.vue
<template>
  <div>
    <h1>我是父组件的H1标题</h1>
    <Child>
      <p>这段代码是在父组件写的,这是插入到子组件的内容。</p>
    </Child>
    <Child></Child>
  </div>
</template>

<script>
import Child from './Child.vue';

export default {
  components: { Child },
  name: 'Parent'
}
</script>
Chile.vue
<template>
    <div>
      <h2>这是子组件H2标题</h2>
      <slot></slot> <!-- 普通插槽 -->
    </div>
  </template>

  <script>
  export default {
    name: 'Child'
  }
  </script>
效果:
具名插槽
具名插槽允许你在子组件中定义多个插槽,并通过名称来区分它们。
App.vue
<template>
  <div>
    <h1>父组件</h1>
    <Child>
      <template v-slot:header>
      </template>

      <p>这是插入到子组件的主要内容,当父组件没有默认内容时才会展示子组件内容</p>

      <template v-slot:footer>
        <p>这是底部默认内容</p>
      </template>
    </Child>
  </div>
</template>

<script>
import Child from './Child.vue';

export default {
  components: { Child },
  name: 'Parent'
}
</script>
Child.vue
<template>
  <div>
    <h2>子组件</h2>
    <slot name="header">
      <ul>
        <li>header内容</li>
        <li>header内容</li>
        <li>header内容</li>
      </ul>
    </slot> <!-- 具名插槽 -->
    <slot></slot> <!-- 默认插槽 -->
    <slot name="footer">
      <ul>
        <li>footer内容</li>
        <li>footer内容</li>
        <li>footer内容</li>
      </ul>
    </slot> <!-- 具名插槽 -->
  </div>
</template>

<script>
export default {
  name: 'Child'
}
</script>
- 父组件引用子组件,父组件没有默认内容时会展示子组件显示的内容
作用域插槽
作用域插槽允许父组件访问子组件中的数据。这种插槽可以将数据传递给父组件,使父组件能够使用这些数据。
App.vue
<template>
  <div>
    <h1>父组件</h1>
    <Child>
      <template v-slot:student-slot="{ student }">
        <div class="student-info">
          <h3>学生信息:</h3>
          <p class="student-name">姓名: {{ student.name }}</p>
          <p class="student-age">年龄: {{ student.age }}</p>
          <p class="student-grade">年级: {{ student.grade }}</p>
        </div>
      </template>
    </Child>
  </div>
</template>

<script>
import Child from './Child.vue';

export default {
  components: { Child },
  name: 'Parent'
}
</script>

<style scoped>
h1 {
  color: #333; /* 主标题颜色 */
}

.student-info {
  border: 1px solid #4CAF50; /* 边框颜色 */
  padding: 10px;
  border-radius: 5px;
  background-color: #f9f9f9; /* 背景颜色 */
  margin-top: 10px;
}

.student-name {
  font-weight: bold; /* 姓名加粗 */
  color: #2196F3; /* 姓名颜色 */
}

.student-age,
.student-grade {
  color: #555; /* 年龄和年级颜色 */
}
</style>
Child.vue
<template>
  <div>
    <h2>子组件</h2>
    <slot name="student-slot" :student="student">
      <p>没有学生信息可显示。</p>
    </slot>
  </div>
</template>

<script>
import { ref } from 'vue';

export default {
  name: 'Child',
  setup() {
    // 定义一个学生对象
    const student = ref({
      name: '张三',
      age: 20,
      grade: '大二'
    });

    return {
      student
    };
  }
}
</script>
解释:
<template v-slot:student-slot="{ student }">引用插槽时,冒号后面是插槽的name
student-slot可以简写为#student-slot,在UI库中常见这样的简写,例如element-plus可以看到大量的#default。
🔍理解
该怎么理解父子组件的关系?
- 父子组件的关系就像孩子的压岁钱,孩子的压岁钱可能有很多想法,当父亲同意时孩子才能去实现。如果父亲说压岁钱只能买书,那小孩想要买玩具就不会被实现。
- 记忆:子组件中插槽的name就是小孩的名字,一个父亲可能有很多小孩,要给每个孩子指定行为用他们用name来指定;
💪无人扶我青云志,我自踏雪至山巅。


