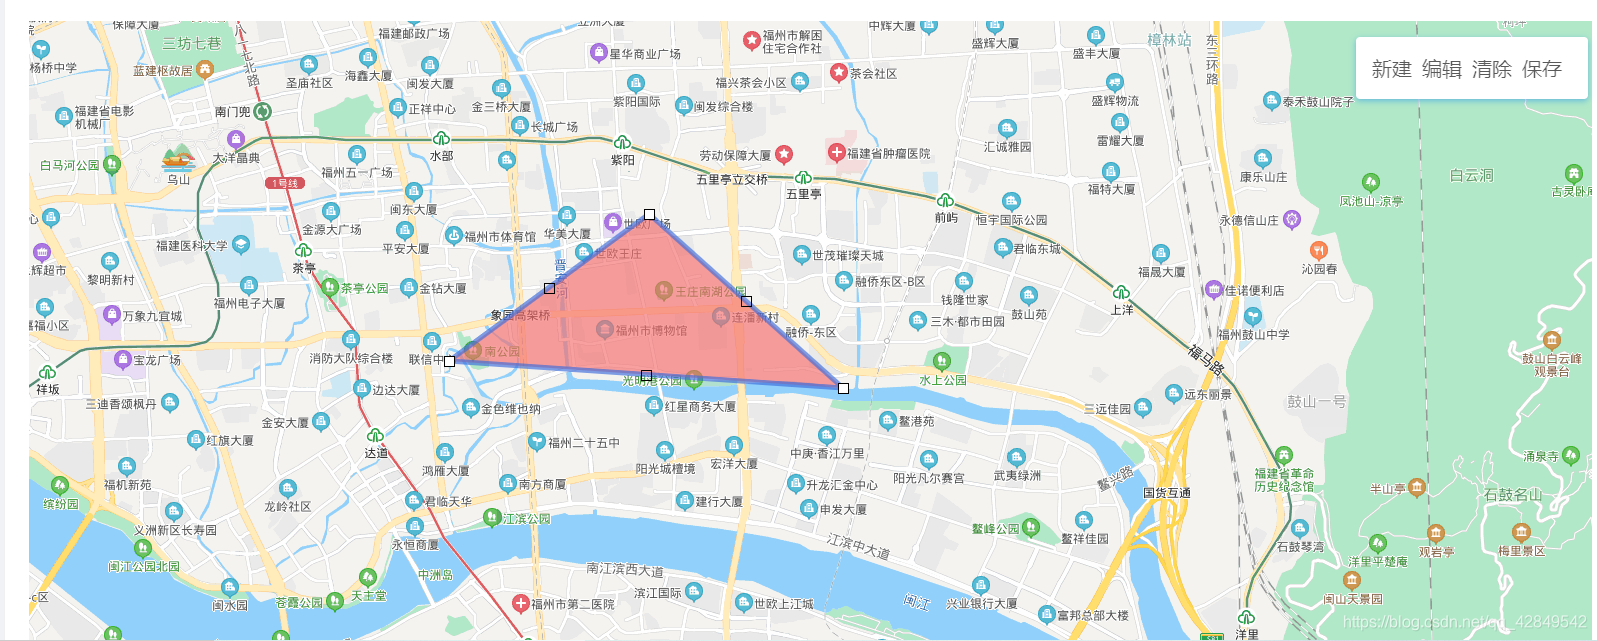
1.在vue中使用百度地图不像是在js中,在我做的过程中遇到最大的问题就是不知道如何调用map实例,不像在JS中自己new一个map实例对象,在vue中一定要去创建@ready所对应的方法,方法名随便取,然后在方法中就得到map实例,接着赋值给data中的map,就可以在其他地方调用了。要在方法中传参数{BMap, map}才能承接,但在@ready中的方法不必传参,只有有了map实例,后面的其他操作才好进行。
 handler ({BMap, map}) {

 //只有在这个方法里才能拿到map实例,后面才能执行删除操作
      console.log(BMap, map)
      let _this = this
      this.map = map
    }
我这里是全局注册将一次性引入百度地图组件库的所有组件。所以在页面上就没有引入了,如果是局部注册的话需要进行引入
import BaiduMap from 'vue-baidu-map/components/map/Map.vue'
还有我这边用的是Antd组件,如果是其他的如bootstrap等需要改一下,不然可能这些li的样式不对
<template>
    <page-layout title="基础详情页">
      <a-card>
        <baidu-map class="map" ref="map" :center="center" :zoom="15"  :scroll-wheel-zoom="true" @ready="handler" >
          <bm-polygon class="polygon" :path="polygonPath"  @lineupdate="updatePolygonPath" fillColor="#F56C6C" :editing="edit"/>
        </baidu-map>
        <ul class="drawing-panel" style="z-index: 99;">
          <li.Button class = "btn" @click="createRail" >新建</li.Button>
          <li.Button class = "btn" @click="editRail">编辑</li.Button>
          <li.Button class = "btn" @click="clearRail">清除</li.Button>
          <li.Button class = "btn" @click="saveRail">保存</li.Button>
        </ul>
        <div id="container"></div>
      </a-card>
    </page-layout>
</template>

<script>
import DetailList from '../../components/tool/DetailList'
import PageLayout from '../../layouts/PageLayout'


export default {
  name: 'BasicDetail',
  data () {
    return {
      center:{lng: 119.32, lat:26.07},
      polygonPath: [
        {lng: 119.321437,lat:26.067988},
        {lng: 119.34978048664546, lat: 26.066239294066676},
        {lng: 119.33585576560436, lat: 26.07754666038478}
      ],
      edit:false,
      map:{},
    }
  },
  methods: {
    handler ({BMap, map}) {//只有在这个方法里才能拿到map实例,后面才能执行删除操作
      console.log(BMap, map)
      let _this = this
      this.map = map
    },
    updatePolygonPath(e) {
      this.polygonPath = e.target.getPath()
    },
    createRail() {
      this.polygonPath=[
        {lng: 119.321437,lat:26.067988},
        {lng: 119.34978048664546, lat: 26.066239294066676},
        {lng: 119.33585576560436, lat: 26.07754666038478}
      ]

    },
    editRail() {
      this.edit=!this.edit
    },
    clearRail() {
    this.map.clearOverlays()
      this.polygonPath=[]
    },
    saveRail() {
      alert(JSON.stringify(this.polygonPath))
    }
  },
}
</script>

<style lang="less" scoped>
  .map  {
    width: 100%;
    height: 800px;
  }
  .polygon{
    stroke-color:"blue" ;
    stroke-opacity:0.5 ;
    stroke-weight:1 ;
    fillOpacity:0.5
  }
  .title {
    color: @title-color;
    font-size: 16px;
    font-weight: 500;
    margin-bottom: 16px;
  }
  .drawing-panel {
    z-index: 999;
    position: fixed;
    top: 18.5rem;
    right: 3.5rem;
    padding: 1rem 1rem;
    border-radius: .25rem;
    background-color: #fff;
    box-shadow: 0 2px 6px 0 rgba(27, 142, 236, 0.5);
  }
  .btn{
    margin-right: 10px;
    font-size: 20px;
    cursor: pointer;
  }
</style>
大概效果如图
