1.项目框架搭建
项目地址:Webgis: 一个关于webgis、天地图、Leaflet、Vue、数据库的学习框架。
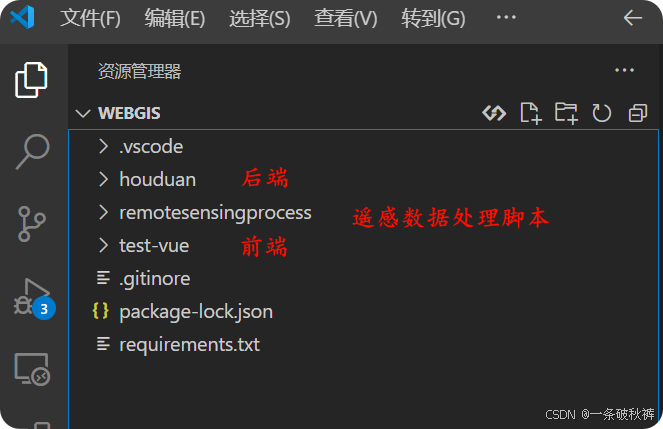
①git到本地,vscode打开。
② 配置后端
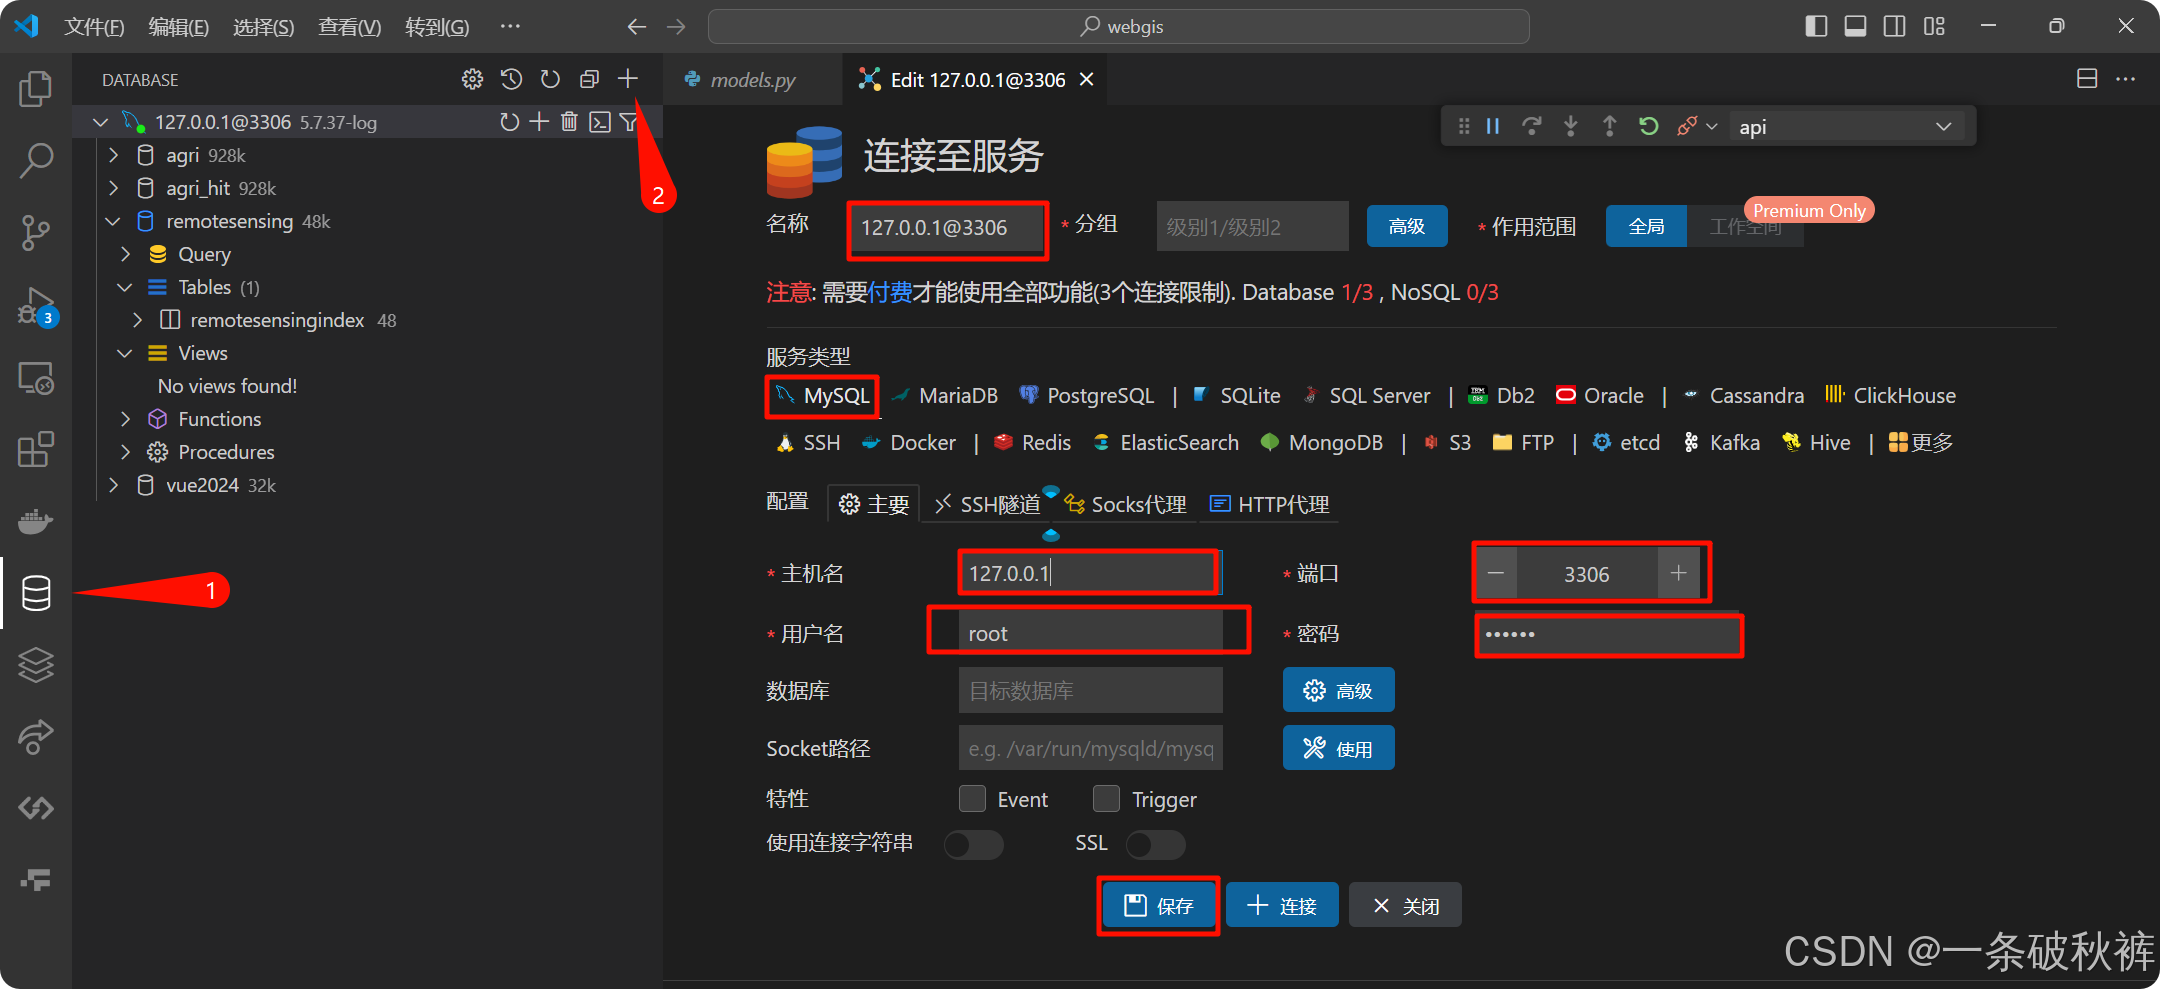
搜索下载MySQL插件(前提:电脑中装有MySQL才可应用)。
连接数据库。
配置基本信息(如:ip、port、账号、密码)。
保存,连接(如下图:连接成功)。
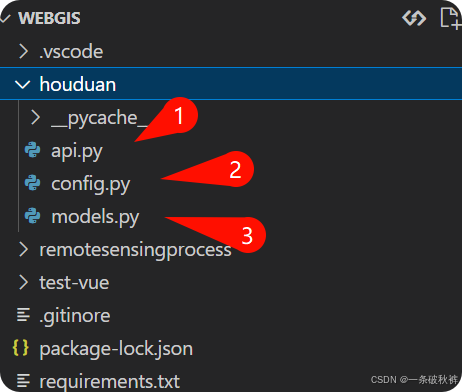
下图:
1.api:定义接口,启动数据库服务。
2.config:数据库配置文件。
3.models:数据库遥感数据表。
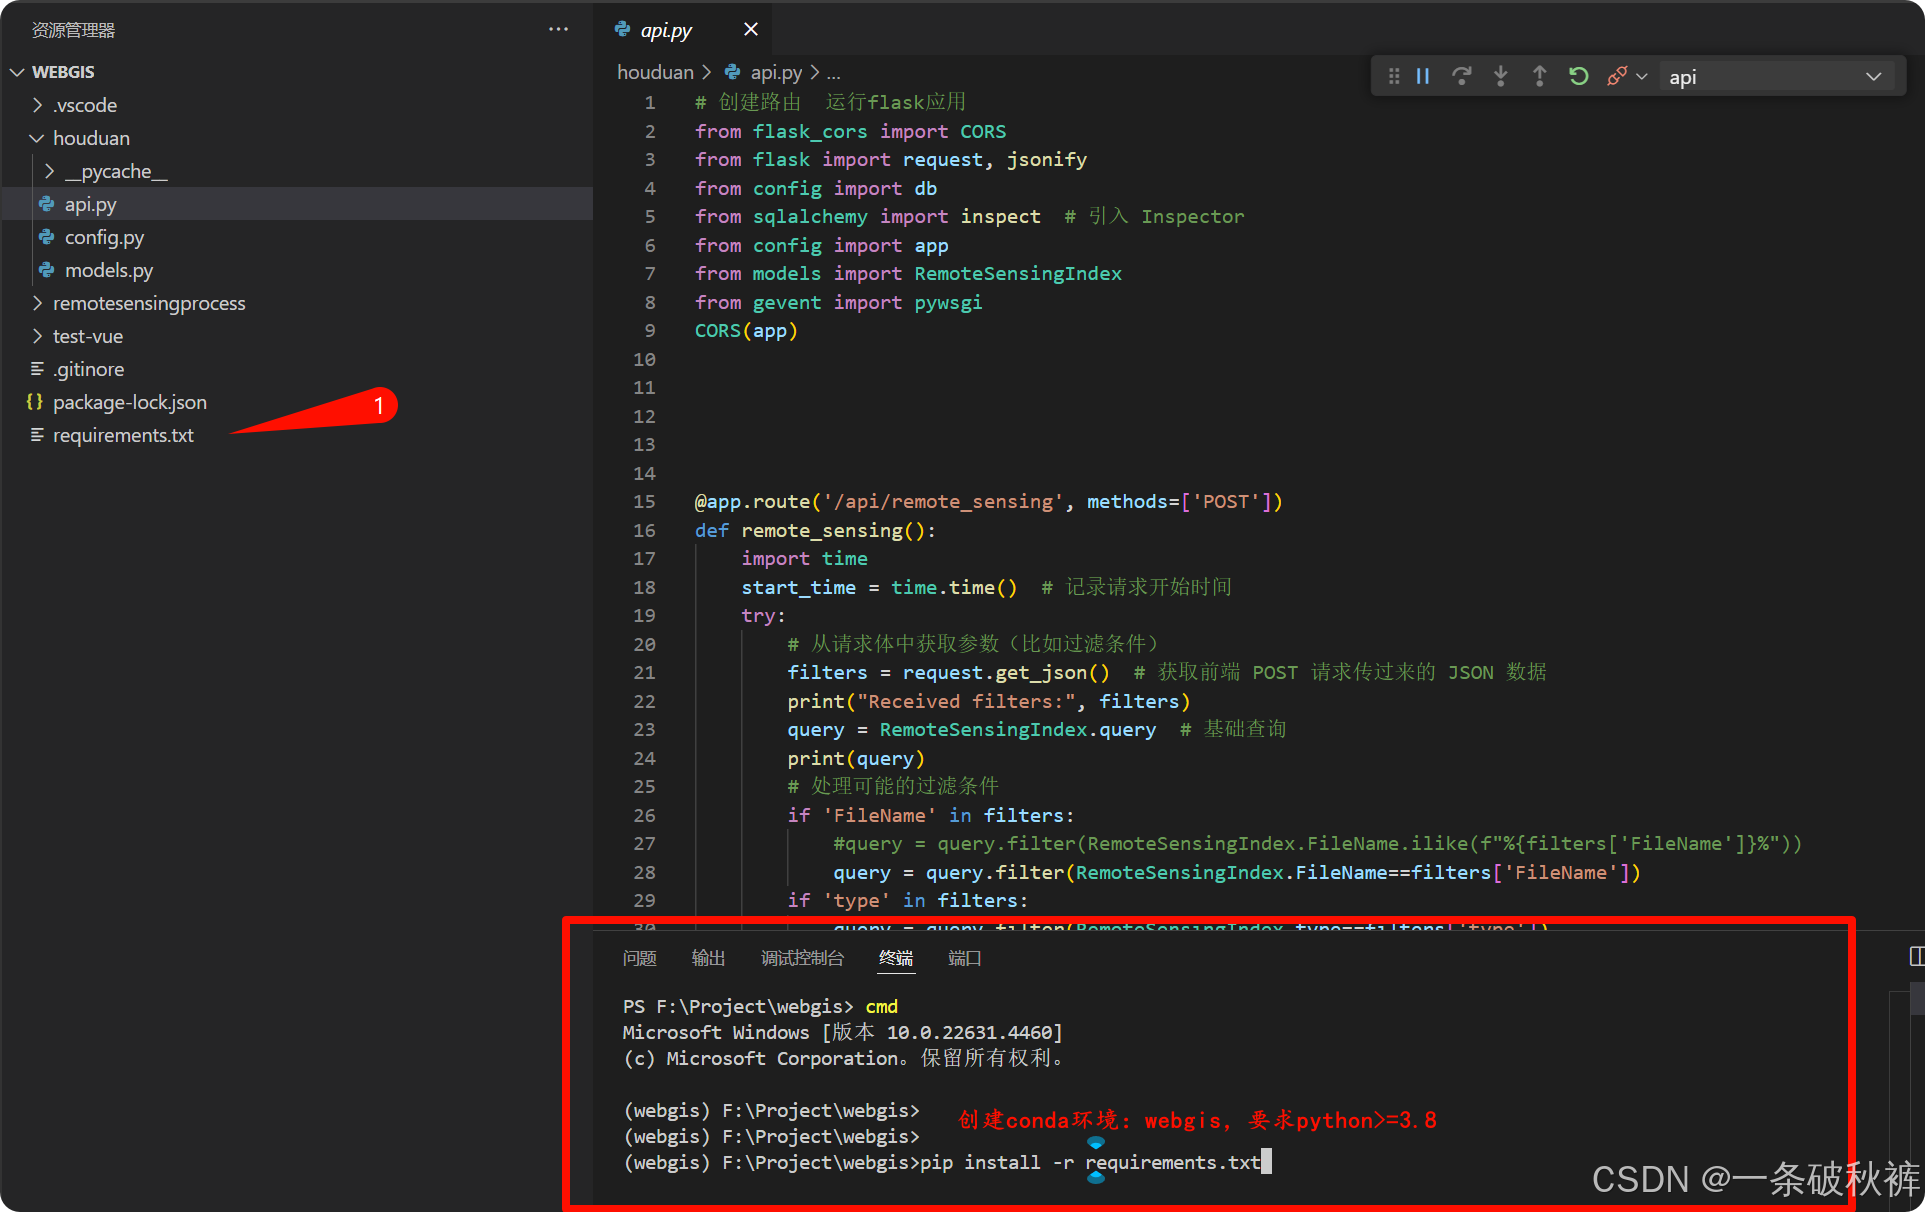
首先配置连接信息(如)。
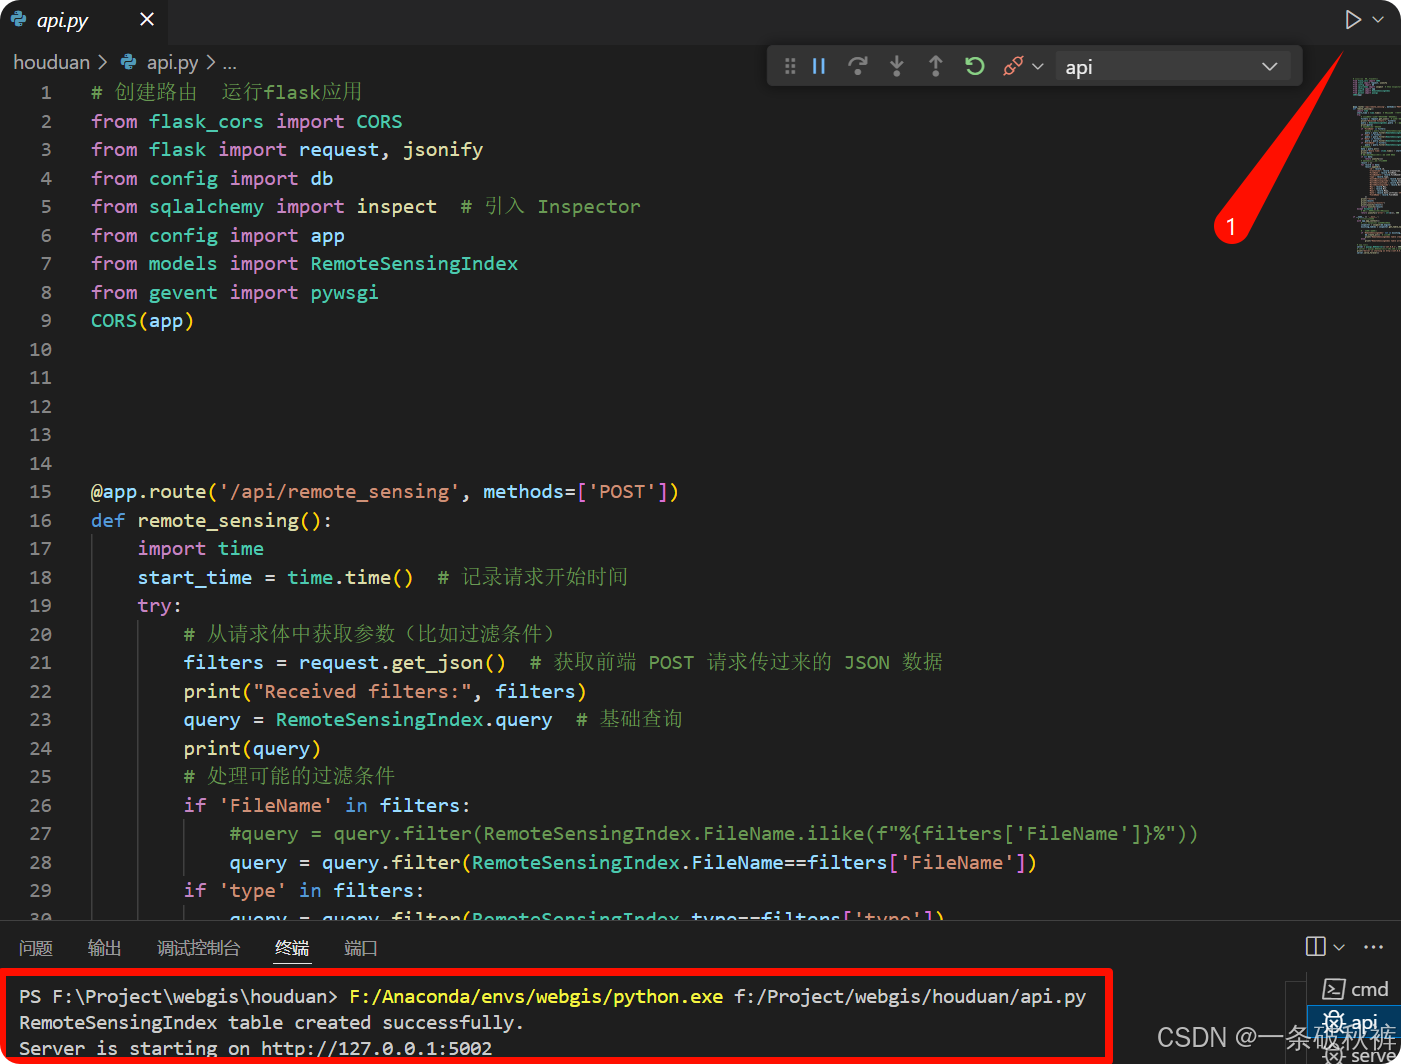
创建conda环境,再安装必要依赖。
点击运行,创建表,提示连接成功。
③配置遥感图层处理脚本
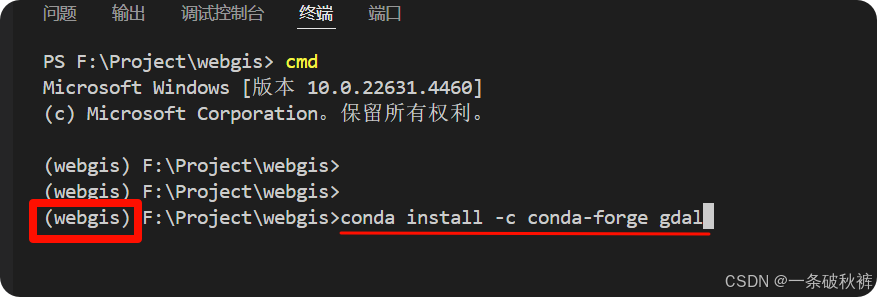
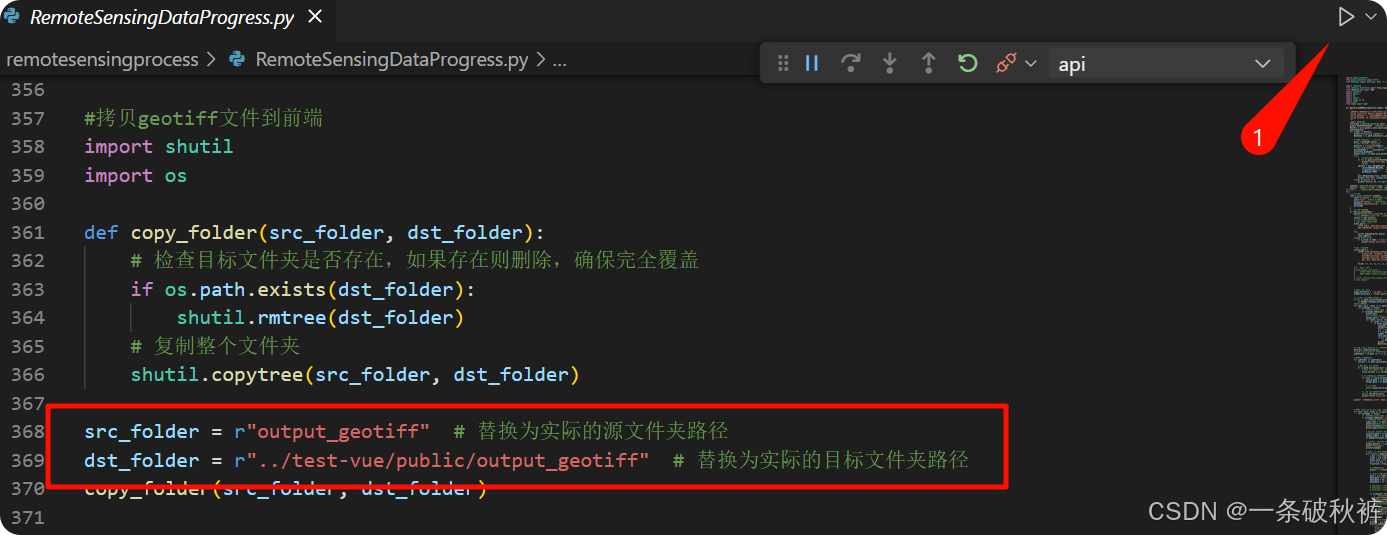
配置环境(其中 osgeo比较麻烦,单独给出),修改文件路径,运行脚本。
conda install -c conda-forge gdal参考:osgeo python安装入门实例_osgeo库安装-CSDN博客
配置读取路径(个人问题),点击运行脚本。
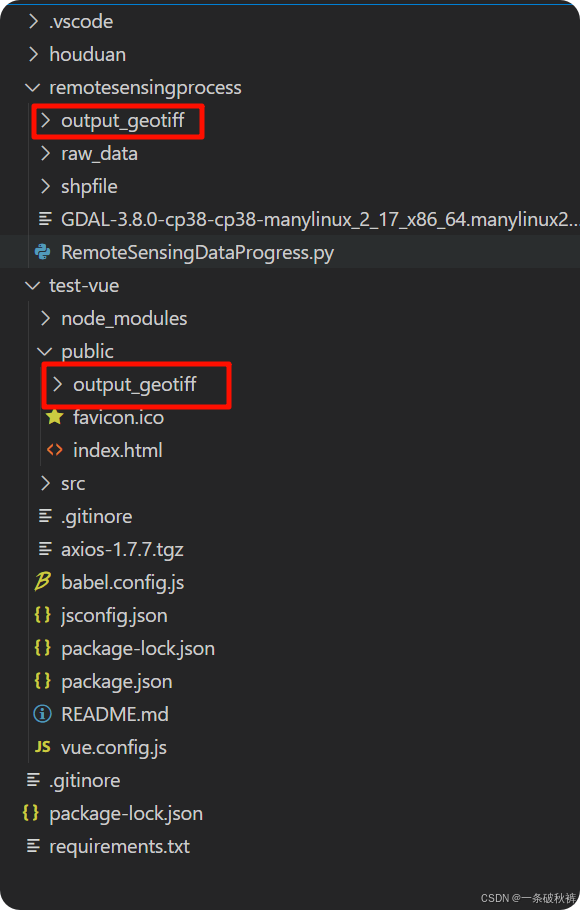
遥感处理文件夹下生成out_geotiff文件夹、前端的public下也生成out_geotiff文件夹。
脚本具体实现,看后续...
④配置前端
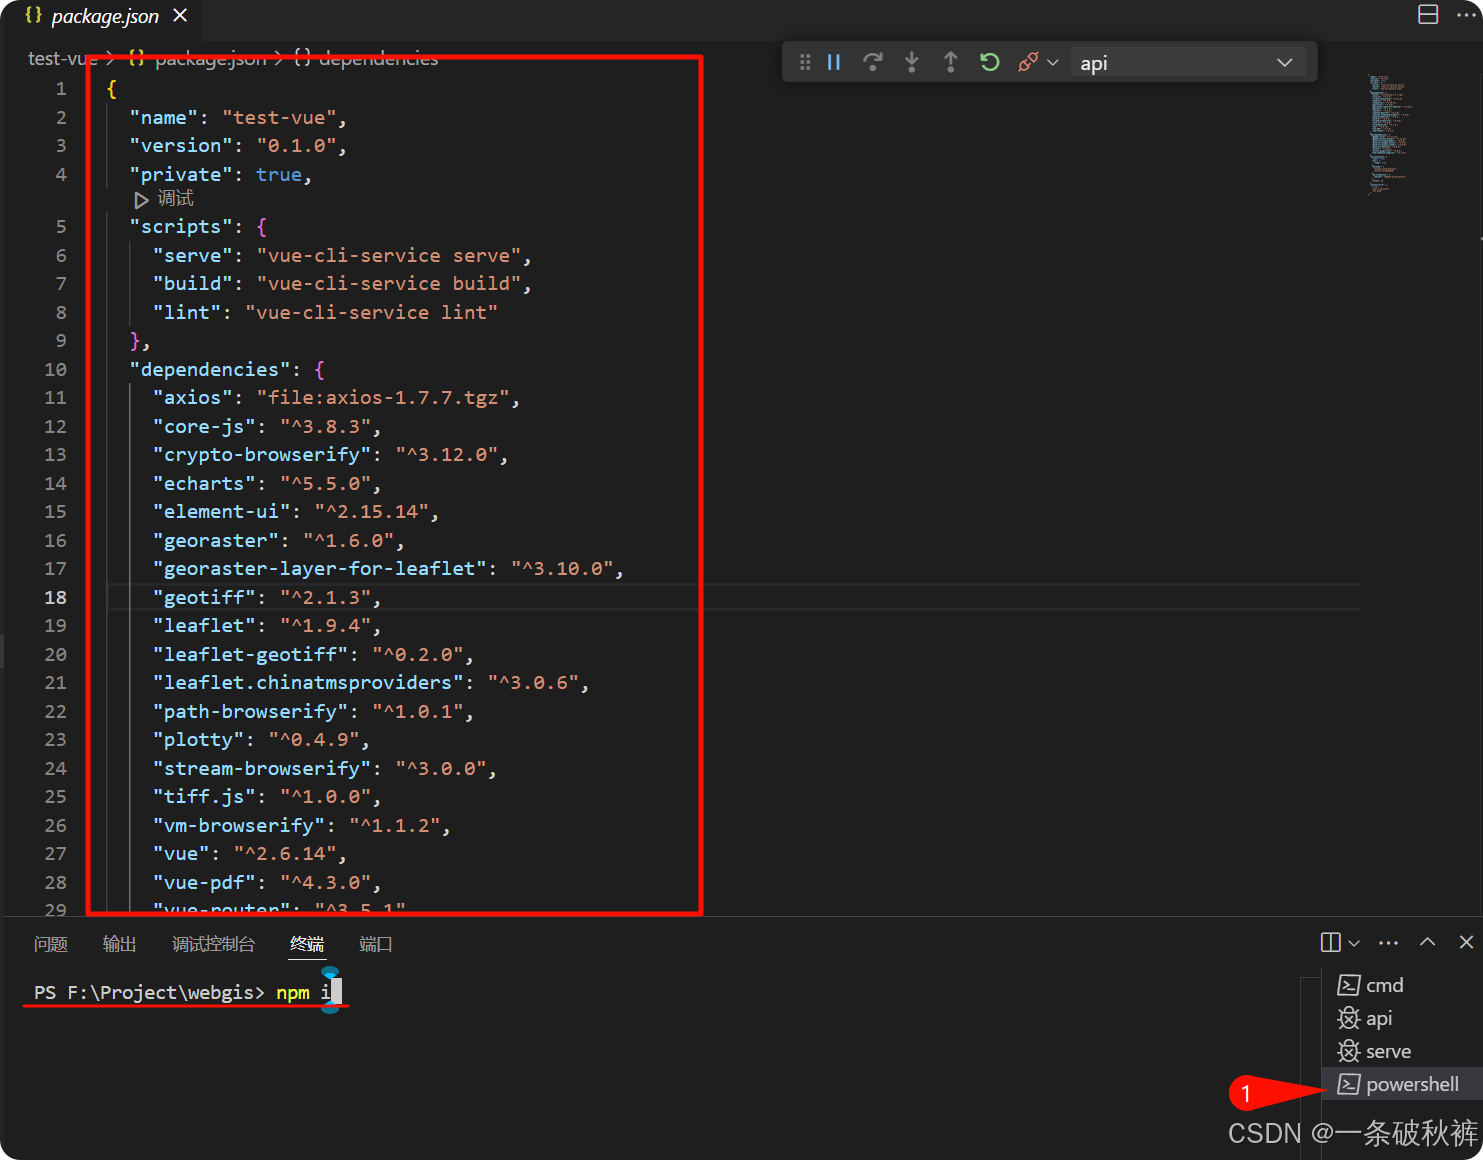
配置环境,安装必要依赖(不是conda环境)。
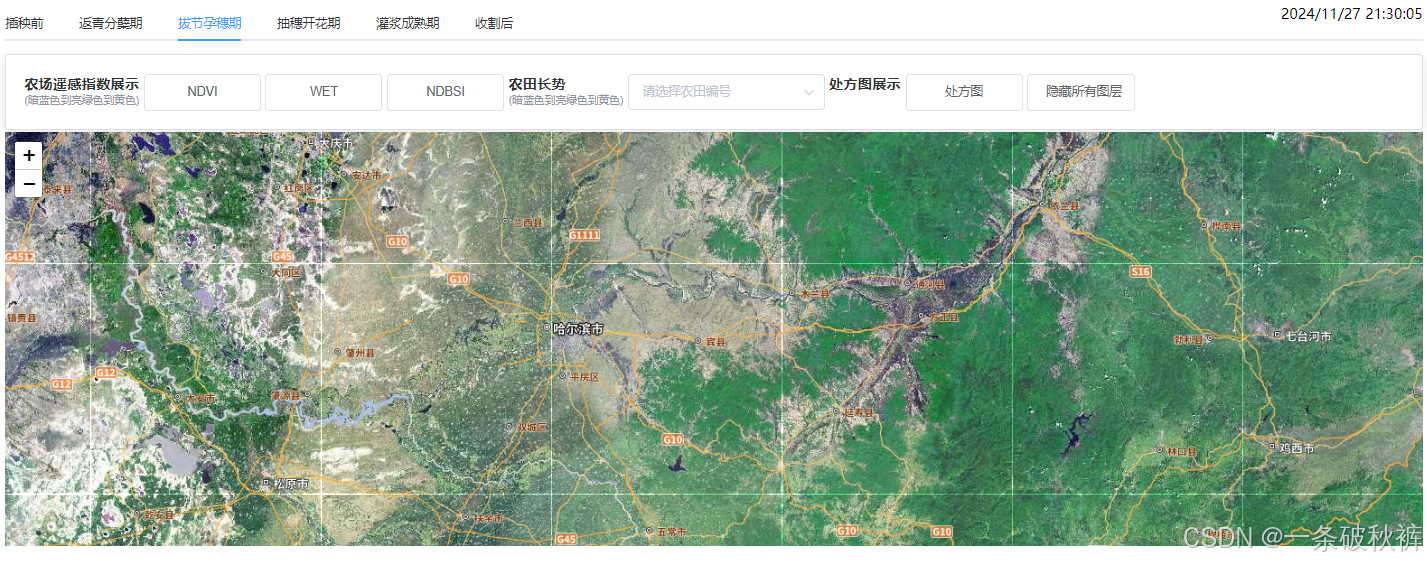
运行(npm run serve),看到前端页面。
2.项目框架代码学习
①前端
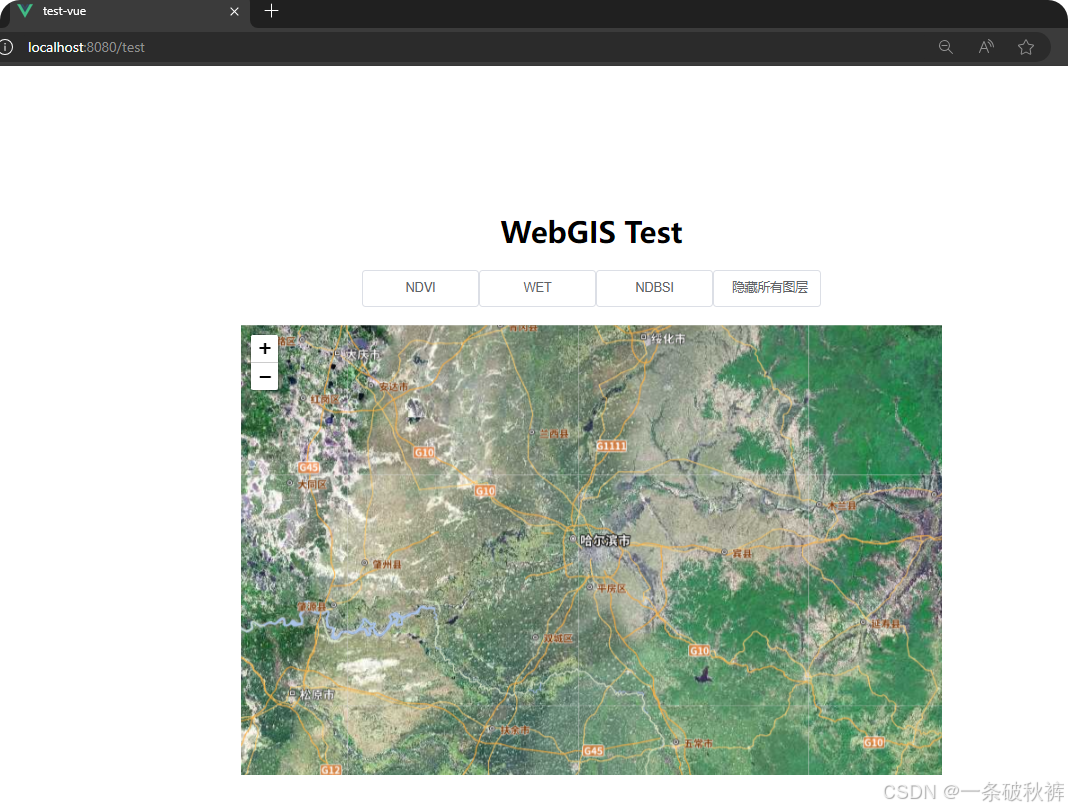
测试页面:
测试代码:
<template>
  <div class="container">
    <div>
      <h1>WebGIS Test</h1>
    </div>
    <div style="margin-bottom: 20px;">
      <!-- 农田遥感指数图层选择框 -->
      <el-col :span="3.5" v-for="type in ['NDVI', 'WET', 'NDBSI']" :key="type">
        <el-button style="width: 130px;" @click="toggleLayer(type, 'qixingnongchang')">{{ type }}</el-button>
      </el-col>
      <!-- 隐藏所有图层 -->
      <el-col :span="2.5">
        <el-button style="width: 120px;" @click="hideAllLayers">隐藏所有图层</el-button>
      </el-col>
    </div>
    <div id="baseMap" style="height: 500px; width: 50%; "></div>
  </div>
</template>

<script>
import { onMounted, ref } from "vue";
import L from 'leaflet';
import 'leaflet/dist/leaflet.css';
import 'leaflet.chinatmsproviders';
import 'leaflet-geotiff';
import '@/assets/leaflet-geotiff-plotty.js';
import axios from "axios";
export default {
  data() {
    return {
      activeName: 'third',
      currentTime: '',
      data: [],  // 用于存储从 API 获取的返回遥感数据
      activeLayers: [],

    };
  },
  methods: {
    // 根据 activeName 获取对应日期
    getDateByActiveName() {
      const dateMap = {
        first: "2024-05-03",
        second: "2024-06-04",
        third: "2024-07-14",
        fourth: "2024-08-31",
        fifth: "2024-09-24",
        sixth: "2024-10-26",
      };
      console.log("1.获取对应日期", dateMap[this.activeName]);
      return dateMap[this.activeName] || null;
    },
    //展示图层
    async toggleLayer(type, FieldName) {
      //layerKey:图层名称
      console.log("type:", type, "FieldName:", FieldName);
      const layerKey = `${this.getDateByActiveName()}_${type}_${FieldName}`; // 使用 date、type 和 FieldName 组合作为唯一标识
      console.log("2.layerKey: ", layerKey)
      // 如果图层已经显示,则隐藏,否则加载并显示
      if (this.layerVisibility[layerKey]) {
        console.log('3.隐藏图层:', layerKey);
        this.hideLayer(layerKey); // 隐藏图层
      } else {
        console.log('3.显示图层:', layerKey);
        // 将当前激活的图层标识符 layerKey 添加到 activeLayers 数组中。
        this.activeLayers.push(layerKey); // 将图层标记为活跃
        /**
         * await 是用于等待一个 Promise 对象完成的关键字。它只能在 async 函数内部使用。当执行到这一行代码时,程序会暂停执行,直到 fetchData 函数执行完成并返回结果。
         * fetchData 是一个异步函数,其主要功能是向服务器发送请求以获取遥感数据,并将这些数据加载为 GeoTIFF 图层以在地图上进行显示。
         */
        await this.fetchData(type, FieldName); // 加载并显示图层

      }

    },
    /**
     *
     * @param type 遥感指数类型
     * @param FieldName
     * 首先获取当前的日期,然后使用 Axios 库向指定的 API 发送一个 POST 请求,包含必要的过滤条件(例如日期、类型和字段名)。
     * 通过 API 返回的数据将被处理,并转换为地图可显示的图层。
     * 图层加载完成后,将图层添加到 layerGroup 中,并设置图层可见性。
     */
    async fetchData(type, FieldName) {
      const date1 = this.getDateByActiveName();
      console.log("4.对应日期为:", date1);
      const filters = { Date: date1, type: type, FieldName: FieldName, };
      try {
        // 通过向指定的 API 发送 POST 请求来获取遥感数据。
        const response = await axios.post('http://127.0.0.1:5002/api/remote_sensing', filters);
        // 将 API 返回的数据存储在 data 数组中
        this.data = response.data;
        console.log('5.Data fetched:', response.data);

        // 遍历数据并加载为 GeoTIFF 图层
        /**
         * 1遍历数据数组:this.data.forEach((layerData) => {  使用forEach方法遍历this.data数组。this.data包含从API获取的遥感数据,而layerData是当前遍历到的每一个数据项。
         *
         * 2遍历每一项数据,获取其FileNameUrl、SouthWestLatitude、SouthWestLongitude、NorthEastLatitude、NorthEastLongitude、Max、Min等属性。
         * FileNameUrl: GeoTIFF文件的URL地址,用于加载图层。
         * Max和Min: 用于显示图层数据的最小值和最大值。
         *
         * 3定义边界坐标:创建一个bounds数组来定义图层的地理范围。其中,西南角和东北角的经纬度分别被转换为浮点数(使用parseFloat),以确保它们是数值型数据。这是重要的一步,因为地图需要准确的地理坐标来渲染。
         */
        this.data.forEach((layerData) => {
          const { FileNameUrl, SouthWestLatitude, SouthWestLongitude, NorthEastLatitude, NorthEastLongitude, Max, Min } = layerData;
          const bounds = [
            [parseFloat(SouthWestLatitude), parseFloat(SouthWestLongitude)],
            [parseFloat(NorthEastLatitude), parseFloat(NorthEastLongitude)],
          ];
          /**
           * bounds 属性指定了图层的地理范围,即这个图层在地图上显示的区域。
           * renderer 属性指定了图层的渲染方式。这里使用了 plotty 渲染器,它可以将遥感数据转换为可视化的图像。
           * L.LeafletGeotiff.plotty 是一个 Leaflet 插件,用于将 GeoTIFF 数据转换为可视化的图层。
           * options 对象包含了图层的边界、渲染器和透明度。
           * opacity 属性指定了图层的透明度。
           */
          const options = {
            bounds: bounds,
            renderer: L.LeafletGeotiff.plotty({
              displayMin: parseFloat(Min),
              displayMax: parseFloat(Max),
              colorScale: "viridis",
              noDataValue: -1,
            }),
            opacity: 1,
          };
          /**
           * 1创建 GeoTIFF 图层:使用 L.leafletGeotiff 方法创建了一个 GeoTIFF 图层。FileNameUrl 是图层数据的 URL(指向一个 GeoTIFF 文件),而 options 是一个配置对象,包含了边界、渲染器和透明度等信息。
           * 2将图层添加到 layerGroup 中:使用 addLayer 方法将图层添加到 layerGroup 中。
           * 3allLayers 数组: 存储图层和类型:将图层和类型存储在 allLayers 数组中。
           * 4设置图层可见性:将图层的可见性设置为 true。
           */

          // 创建 GeoTIFF 图层
          const geoTiffLayer = L.leafletGeotiff(FileNameUrl, options);
          console.log('6.FileNameUrl:', FileNameUrl, 'bounds:', bounds, 'options:', options);
          console.log('6.geoTiffLayer:', geoTiffLayer);
          this.layerGroup.addLayer(geoTiffLayer); // 添加图层到 layerGroup
          console.log('6.layerGroup:', this.layerGroup);
          const layerKey = `${this.getDateByActiveName()}_${type}_${FieldName}`; // 使用 date0、type 和 number 组合作为唯一标识
          this.allLayers.push({ layer: geoTiffLayer, type: layerKey }); // 存储图层和类型
          console.log('6.allLayers:', this.allLayers);
          this.layerVisibility[type] = true;
          /**
           * Q:为什么FileNameUrl是 output_geotiff\20240714_RemoteSensingIndex\20240714_qixingnongchang_NDVI_geotiff.tif,但是可以访问到public文件夹?
           * A:因为FileNameUrl是API返回的路径,而public文件夹是后端服务的静态资源目录,两者是两个不同的概念。API返回的路径是相对于后端服务的,而public文件夹是相对于前端页面的。因此,当API返回的路径指向public文件夹中的文件时,前端页面可以通过该路径访问到该文件。
           * 后端返回数据:
           * result
           * [{'id': 23, 'Createtime': '2024-11-27 11:10:02',
           *'FileName': '20240714_qixingnongchang_NDVI_geotiff.tif',
           *'FileNameUrl': 'output_geotiff\\20240714_RemoteSensingIndex\\20240714_qixingnongchang_NDVI_geotiff.tif',
           *'type': 'NDVI', 'SouthWestLatitude': 47.0486, 'SouthWestLongitude': 132.631, 'NorthEastLatitude': 47.2315, 'NorthEastLongitude': 133.183, 'Max': 0.908199, 'Min': 0.000760456, 'Mean': 0.738675, 'Date': '2024-07-14', 'FieldName': 'qixingnongchang'}]
           *
           * 前端页面访问路径:http://127.0.0.1:5000/public/output_geotiff/20240714_RemoteSensingIndex/20240714_qixingnongchang_NDVI_geotiff.tif
           */


          /**
           * 设置中心点和缩放级别:使用 setView 方法设置中心点和缩放级别。这里使用了经纬度和缩放级别的平均值来设置中心点和缩放级别。
           * 这里的经纬度和缩放级别的计算方法是:
           * 1. 计算中心点的经纬度:使用 SouthWestLatitude、SouthWestLongitude、NorthEastLatitude、NorthEastLongitude 四个属性的平均值来计算中心点的经纬度。
           * 2. 计算缩放级别:根据中心点的经纬度和边界坐标的距离来计算缩放级别。如果边界坐标的距离小于 0.1 公里,则使用 11 级,否则使用 13 级。
           */
          const x = (parseFloat(SouthWestLatitude) + parseFloat(NorthEastLatitude)) / 2;
          const y = (parseFloat(SouthWestLongitude) + parseFloat(NorthEastLongitude)) / 2;
          const z = (parseFloat(NorthEastLatitude) - parseFloat(SouthWestLatitude));
          this.map.setView(L.latLng(x, y), z > 0.1 ? 11 : 13);
          console.log(`时期:${date1},显示图层: ${type},名称:${FieldName}`);
          this.layerVisibility[layerKey] = true; // 更新图层可见状态
        });

      } catch (error) {
        console.error('Error fetching data:', error);
      }
    },

    // 隐藏图层
    hideLayer(layerKey) {
      //const layerKey = `${this.getDateByActiveName()}_${type}_${FieldName}`; // 使用 date0、type 和 number 组合作为唯一标识
      // 遍历 allLayers 数组,找到匹配的图层并隐藏
      this.allLayers = this.allLayers.filter(({ layer, type: layerType }) => {
        console.log(layerKey)
        // 如果图层类型和 layerKey 匹配,则隐藏图层并返回 false,否则返回 true
        if (layerType === layerKey) {
          this.layerGroup.removeLayer(layer);
          this.layerVisibility[layerKey] = false;
          return false;
        }
        return true;
      });
    },
    // 隐藏所有图层
    hideAllLayers() {
      // 遍历 allLayers 数组,隐藏所有图层
      this.allLayers.forEach(({ layer }) => {
        // 隐藏每个图层:
        this.layerGroup.removeLayer(layer);
      });
      this.allLayers = [];
      Object.keys(this.layerVisibility).forEach((key) => {
        this.layerVisibility[key] = false;
      });
      console.log("已隐藏所有图层");
    },
  },


  setup() {
    // 地图初始化
    // const MapKey = "4be8e59596e4cee92183d2a61d77ce0c";
    const MapKey = "d70045af77b5a8c2fac6a69b80ffdd7a";
    const map = ref(null);
    const layerVisibility = ref([false, false, false]);
    const allLayers = ref([]); // 存储所有加载的遥感图层
    const layerGroup = ref(L.layerGroup()).value; // 使用 layerGroup 管理图层


    onMounted(() => {

      // 初始化地图
      map.value = L.map("baseMap", {
        center: L.latLng(45.757000, 126.642000),//哈尔滨
        // center: L.latLng(45.75075431739313, 127.5517068330741),//宾县
        //center: L.latLng(46.05075431739313,126.8517068330741),//呼兰区
        //center: L.latLng(55.23545507478532, 10.106575515900523),//田块分割
        //center: L.latLng(29.676840, -95.369222),
        zoom: 8,
        zoomControl: true,
        attributionControl: false,
      });

      // 加载天地图基础图层
      let satelliteTileLayer = L.layerGroup([
        L.tileLayer.chinaProvider('TianDiTu.Satellite.Map', { key: MapKey }),
        L.tileLayer.chinaProvider('TianDiTu.Satellite.Annotion', { key: MapKey })
      ]);

      // 加载遥感图层
      satelliteTileLayer.addTo(map.value);
      layerGroup.addTo(map.value); // 将 layerGroup 添加到地图


    });
    return {
      map,
      layerGroup,
      layerVisibility, // 添加到返回对象中
      allLayers,
    };
  }
};
</script>


<style scoped>
.container {
  display: flex;
  flex-direction: column;
  /* 垂直布局 */
  justify-content: center;
  /* 垂直居中 */
  align-items: center;
  /* 水平居中 */
  height: 100vh;
  /* 使容器占满整个视口高度 */
}
</style>
