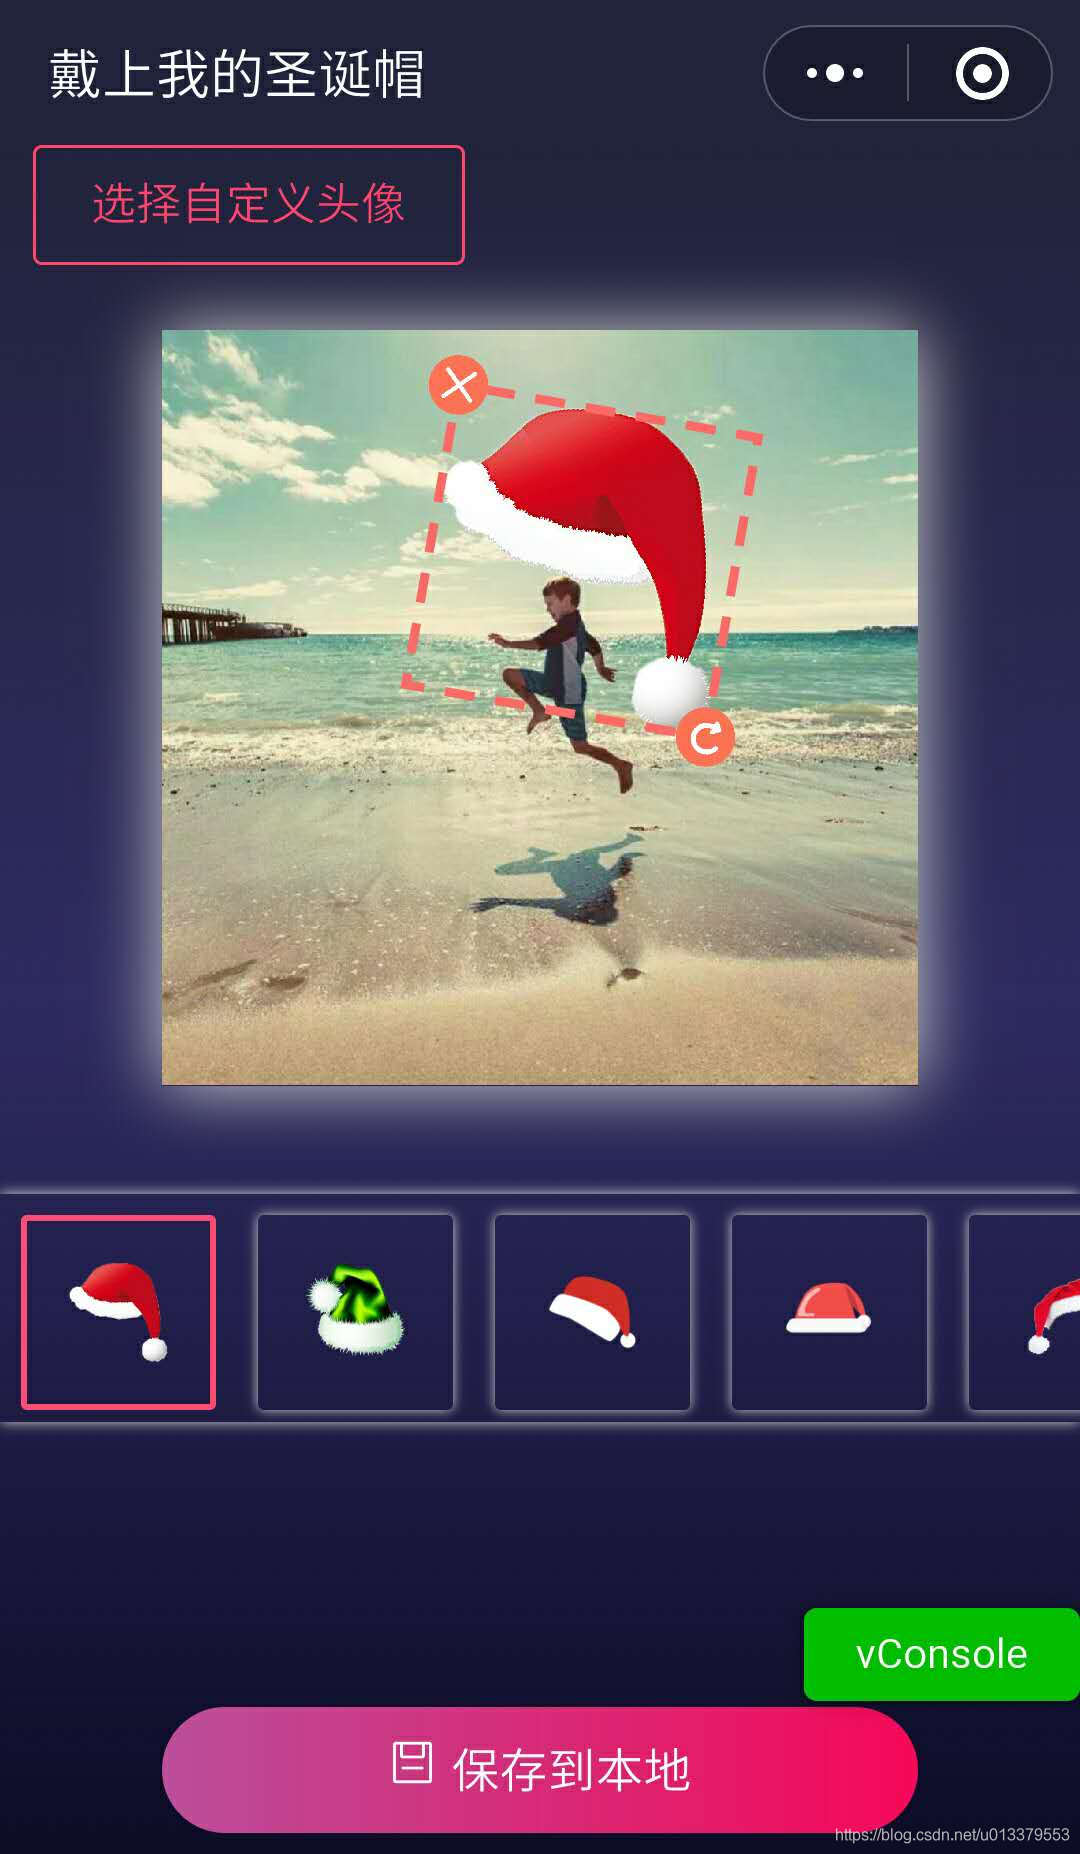
在微信小程序的画布绘制多张图片,很简单,只需要调用drawImage就可以,但是如果要做一个图片编辑的小程序,肯定要对绘制上去的图片、文字等等进行操作,比如移动一下,旋转一下或者缩放等等。但普通的画布并没有对象记忆功能,它最终输出的只是一张图片,因此我们需要自己编写代码去保存绘制的对象,今天就跟大家简单说一下具体怎么实现。大家可以先看一下最终效果,可以对每个对象进行删除及旋转缩放操作。
一、绘制对象的信息
要对多个绘制的对象进行操作,肯定要知道该对象的信息。对象的属性可以定义如下:
{type:'image' , px:0, py:0 , width: 10 ,height: 10 ,ox: 5 ,oy: 5,degree:90}
type是绘制的对象的类型,比如图片、文字。为节省篇幅,本文将以图片为例。px,py是图片左上角顶点距离画布左上角顶点分别在x轴和y轴的距离;ox,oy是旋转原点的坐标。
二、绘制对象
 for(var ti in t_icon){//遍历要绘制的对象
          var obj=t_icon[ti];
          var px = obj.px, py = obj.py, index = obj.cap_index,
            size = obj.size, degree = obj.degree;
          var wid = this.getCapWidth(size)//图片的宽高,为方便,本例中默认图片为正方形
          var tmp = this.data.iconTmp[index];
            //角度需转换为弧度制
            degree = degree * Math.PI / 180;
            var ox = px + (wid / 2), oy = py + (wid / 2)
            ctx.translate(ox,oy);
            ctx.rotate(degree );
            ctx.translate(-wid / 2, -wid / 2);
            ctx.drawImage(tmp, 0, 0, wid, wid);
            //为当前选择对象 绘制虚线框
            if (ti == this.data.current&&!save) {
              ctx.setStrokeStyle('#FF6A6A');
              ctx.setLineWidth(3)
              ctx.setLineDash([10, 7], 8);
              ctx.rect(0, 0, wid, wid)
              ctx.stroke();
              ctx.drawImage('/images/delete.png', -iconSize / 2, -iconSize/2, iconSize, iconSize);
              ctx.drawImage('/images/rotate.png', wid - iconSize/2, wid - iconSize/2, iconSize, iconSize);
            }
            ctx.rotate(-degree);
            //计算当前原点绕图片中心旋转后的坐标
            var rx0=wid/2,ry0=wid/2,
x=0,y=0,
pos=this.getRotatePosition(x,y,rx0,ry0,degree);
            var x0=pos[0],y0=pos[1];
            //将原点恢复为 0,0
            ctx.translate(-px-x0, -py-y0);
            //保存旋转原点的坐标
            obj.ox=ox;
            obj.oy=oy;
            this.data.targetIcon[ti]=obj;

        }
getRotatePosition(x,y,rx0,ry0,degree){//点x,y绕点(rx0,ry0)旋转degree后的坐标
var x0 = (x - rx0) * Math.cos(degree) - (y - ry0) * Math.sin(degree) + rx0,
y0 = (x - rx0) * Math.sin(degree) + (y - ry0) * Math.cos(degree) + ry0;
return [Number(x0),Number(y0)];
},三、画布事件监听
触摸画布时
  start: function ({ changedTouches: [touches] }) {//变量解构赋值
    var [sx, sy] = [touches.x, touches.y],//按住画布时的坐标
  t_icon=[...this.data.targetIcon];//对象数组
  this.data.current = t_icon.length - 1;
this.data.startX=sx;
this.data.startY =sy;
//防止同时作用于多个图片
if (this.data.scaleMode)return;

for(var i=t_icon.length-1;i>=0;i--){//倒序读取,因为后添加的会覆盖在之前添加的上面
  var obj=t_icon[i],wid=Number(this.getCapWidth(obj.size)),px=Number(obj.px),py=Number(obj.py),
  degree=obj.degree*Math.PI/180;
  var pos=this.getRotatePosition(0,0,(wid/2),(wid/2),degree);
  //图片左上角的坐标px,py;右下角的rx,ry
  px+=pos[0];
  py+=pos[1];
  //console.log(px+' '+py+' '+sx+' '+sy);
  pos=this.getRotatePosition(wid,wid,wid/2,wid/2,degree);
  var rx=pos[0],
  ry=pos[1];
  //删除动作
  var off=iconSize/2;//图标大小的一半
  if (sx >= px - off && sx <= px + off && sy >= py - off && sy <= py + off) {
    this.data.targetIcon.splice(i, 1);
    this.drawCap();
    return;
  }
  //旋转缩放动作
  px = Number(obj.px); py = Number(obj.py);//恢复到旋转前的坐标
  if (sx >= px+rx - off && sx <= px+rx + off && sy >= py+ry - off && sy <= py+ry + off) {
    this.data.scaleMode=1;//按住了缩放
    return;//防止同时作用于多个帽子
  }
  if(sx>=px&&sy>=py&&sx<=(px+wid)&&sy<=(py+wid)){
    //交换位置,把选中的移到最后面,这样才能让其显示在最上面
    [t_icon[i], t_icon[this.data.current]] = [t_icon[this.data.current], t_icon[i]]
    break;
  }
}
},
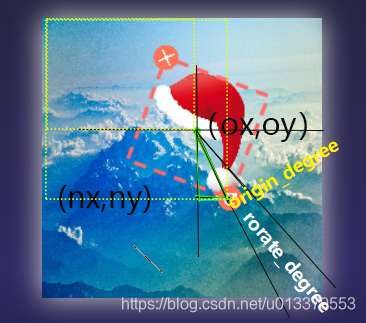
在画布上移动时,我们要保证右下角那个旋转的图标始终跟随我们的手指移动,
画张图帮助大家理解一下,画功拙劣,勿喷。。
  move: function ({ changedTouches:[touches]}) {//变量解构赋值
  var [nx ,ny]= [ touches.x ,  touches.y],//滑动时的坐标
   [ sx, sy] = [ this.data.startX, this.data.startY];
  var ti=[...this.data.targetIcon],current=this.data.current;
  if(!this.data.scaleMode){
    var obj = ti[current];
    if(!obj)return;
    var wid = Number(this.getCapWidth(obj.size)), px = Number(obj.px), py = Number(obj.py);
    //触摸到图片区域
    if (sx >= px && sy >= py && sx <= (px + wid) && sy <= (py + wid)) {
      obj.px += (nx - sx);
      obj.py += (ny - sy);
    }
    ti[current]=obj;
  }else{//缩放模式
    var obj = ti[current],wid=this.getCapWidth(obj.size),px=obj.px,py=obj.py;
    var ox=obj.ox,oy=obj.oy;//px+wid/2
    var now=Math.sqrt((nx-ox)*(nx-ox)+(ny-oy)*(ny-oy));
    //旧半径,要保持旋转中心不变
    var old_size=ti[current].size;
    ti[current].size=now*Math.SQRT2;
    ti[current].px = ox - ti[current].size/2;
    ti[current].py = oy - ti[current].size/2;
    var [y,x]=[(ny-oy),(nx-ox)],
    tan_a =  y* 1.0 / x, tan_b = 1,
//获取当前点与旋转原点的连线与y轴的夹角
    origin_degree = Math.atan(tan_a)*180/Math.PI,
//因为
    rotate_degree = origin_degree -45 ;

    //处理一些特殊情况
    if ((y >= 0 && x < 0) || (y < 0 && x < 0))rotate_degree=135+origin_degree;

   // console.log(origin_degree + ' ' + rotate_degree + ' ' + y + ' ' + x)
    ti[current].degree = rotate_degree;
  //  console.log(ox+' now:['+nx+','+ny+'] '+(ny-oy)+' '+(nx-ox)+' '+ti[current].degree)
  }
  this.data.targetIcon = ti;
  this.data.startX = nx;
  this.data.startY = ny;
  this.drawCap();
},
如果大家觉得有不足或不懂的地方,欢迎在评论区留言~~

