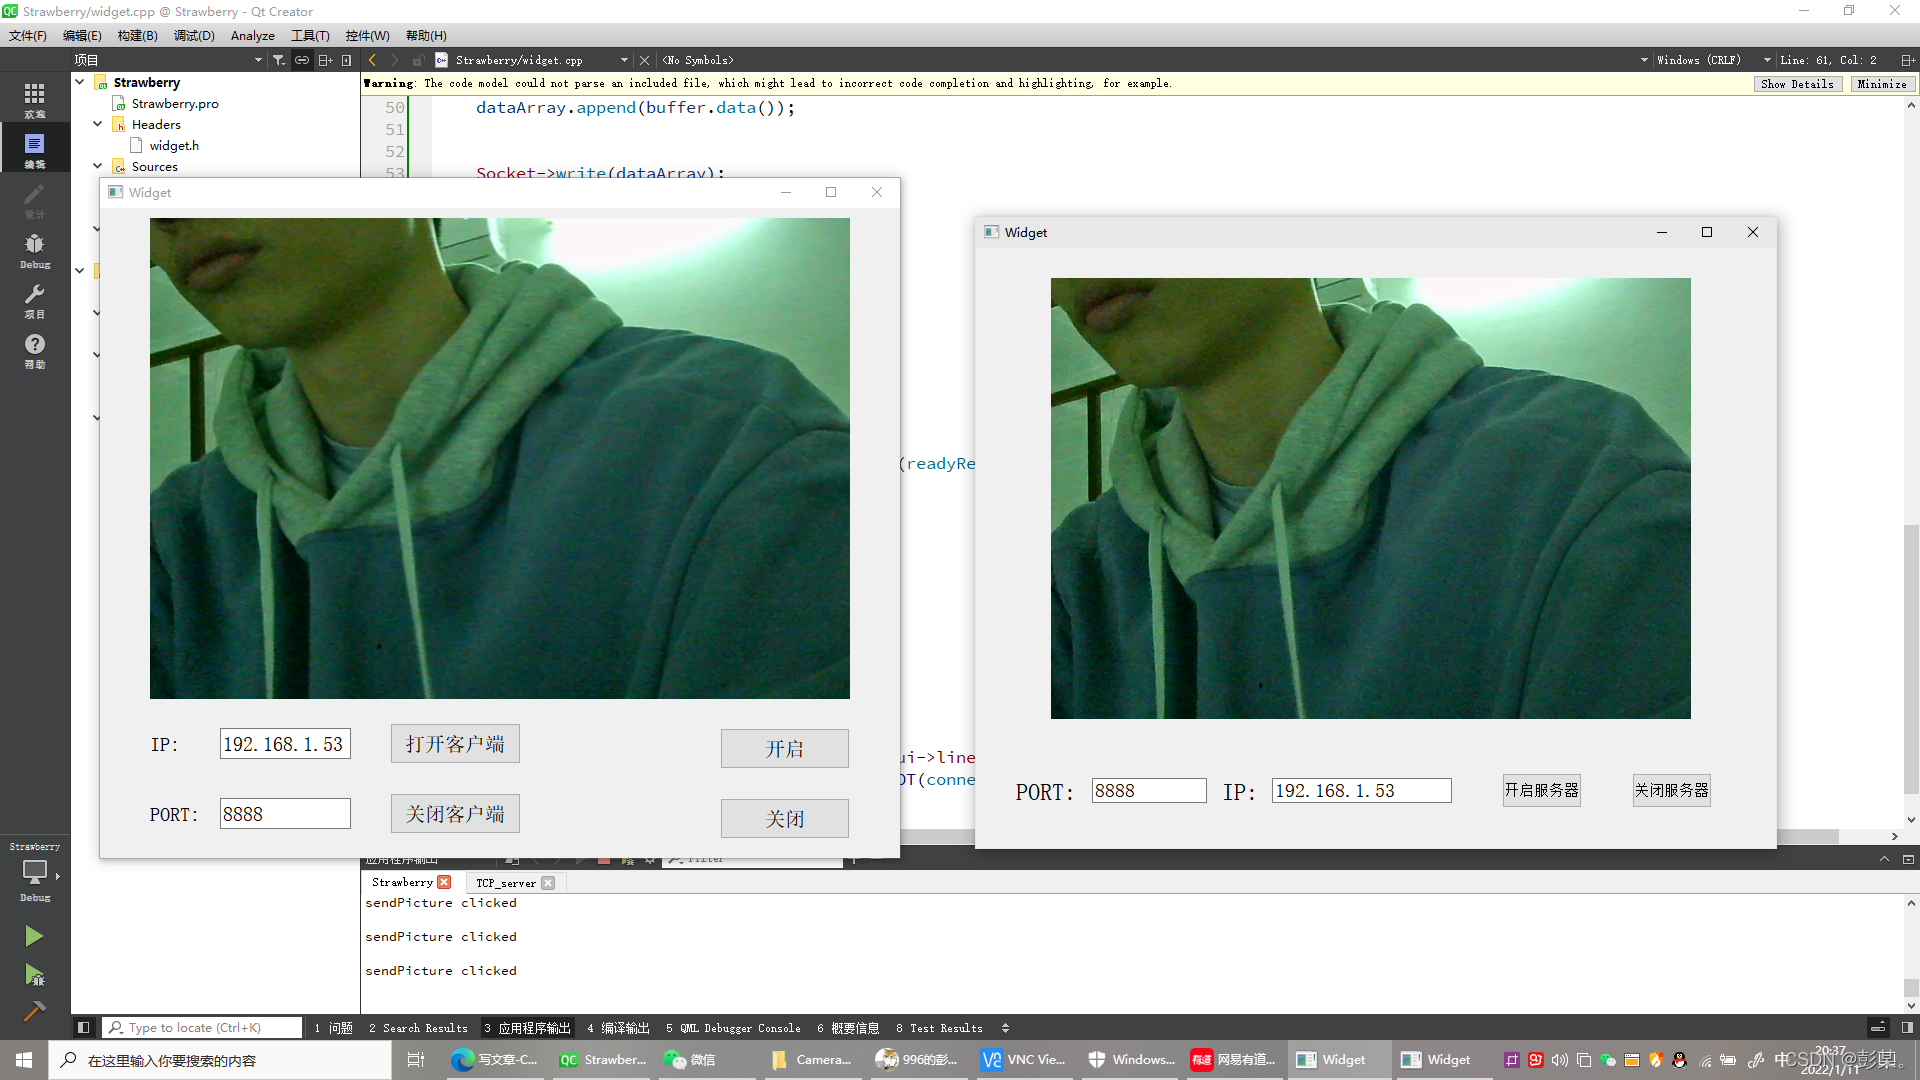
使用树莓派与window进行摄像头图传,附完整项目
前期准备
1、树莓派、摄像头
2、树莓派安装好QT并部署好opencv
方案
使用TCP协议作为传输方案,树莓派端作为客户端,windows作为服务端上位机,树莓派开启摄像头并启动定时器,每隔一段时间进行获取摄像头画面,将其转为固定格式(字节数组)后,再发送到服务器进行解析并显示到Label上
运行方式
1、先打开服务端,会自动获取服务器IP地址,设置好端口号后打开服务器
2、设置好IP和端口号后连接上服务器后打开摄像头即可
Server
#include "widget.h"
#include "ui_widget.h"
#include <QHostInfo>
#include <QString>
#include <QNetworkInterface>
#include <QBuffer>
#include <QImageReader>

int io = 1;
Widget::Widget(QWidget *parent)
    : QWidget(parent)
    , ui(new Ui::Widget)
{
    ui->setupUi(this);
    Server = new QTcpServer(this);

    Socket = new QTcpSocket(this);
    Socket->setSocketOption(QAbstractSocket::ReceiveBufferSizeSocketOption,500000);
    foreach(const QHostAddress& hostAddress,QNetworkInterface::allAddresses())
        if ( hostAddress != QHostAddress::LocalHost && hostAddress.toIPv4Address() )
            ui->IP->setText(hostAddress.toString());
    connect(Server,SIGNAL(newConnection()),this,SLOT(readsend()));
}

Widget::~Widget()
{
    delete ui;
}

void Widget::readsend()
{
    Socket = Server->nextPendingConnection();
    ui->label->setText("有客户端连接!");
    connect(Socket,SIGNAL(readyRead()),this,SLOT(Mat_show()));
}


void Widget::Mat_show()
{

    QByteArray array;
    while(Socket->waitForReadyRead(10)){
        array.append((QByteArray)Socket->readAll());
    }

    QBuffer buffer(&array);
    buffer.open(QIODevice::ReadOnly);
    QPixmap picture;//method 1
    picture.loadFromData(array, "bmp");
    if (!picture.isNull()) {
        qDebug() << "right" << endl;
        ui->label->setPixmap(picture);
    }
    else {
        qDebug() << "error" << endl;
    }
}

void Widget::on_open_clicked()
{
    Server->listen(QHostAddress::AnyIPv4,ui->lineEdit->text().toUInt());
}

void Widget::on_pushButton_2_clicked()
{
    Server->close();
}
Client
#include "widget.h"
#include "ui_widget.h"
#include <QMessageBox>
#include <QImage>
#include <QPixmap>
#include <QBuffer>

Widget::Widget(QWidget *parent)
    : QWidget(parent)
    , ui(new Ui::Widget)
{
    ui->setupUi(this);
    ui->label->setScaledContents(true);
    timer = new QTimer(this);
    timer1 = new QTimer(this);

    Socket = new QTcpSocket(this);
    connect(timer, SIGNAL(timeout()), this, SLOT(playTimer()));
}

Widget::~Widget()
{
    delete ui;
}

/*摄像头画面显示函数*/
void Widget::playTimer()
{
    int delay = 10;
    Mat flame1;
    capture >> flame1;
    int key;
    key = waitKey(delay);
    cvtColor(flame1, flame1, CV_BGR2RGB);//opencv默认BGR,转为QT为RGB
    QImage srcQImage = QImage((uchar*)(flame1.data), flame1.cols, flame1.rows, QImage::Format_RGB888);
    //改变图片的大小
    ui->label->setPixmap(QPixmap::fromImage(srcQImage).scaled(ui->label->width(), ui->label->height(), Qt::KeepAspectRatio, Qt::SmoothTransformation));
    ui->label->setAlignment(Qt::AlignCenter); //设置图片的位置为居中
    tempPixmapM = QPixmap::fromImage(srcQImage);
}
/*信息收发槽函数*/
void Widget::readyRead_Slot()
{
    qDebug() << "sendPicture clicked" << endl;

    QBuffer buffer;
    buffer.open(QIODevice::ReadWrite);
    tempPixmapM.save(&buffer, "bmp");
    QByteArray dataArray;
    dataArray.append(buffer.data());


    Socket->write(dataArray);
}

/*开启按键按下*/
void Widget::on_pushButton_clicked()
{
    timer->start(30);
    capture.open(0);
}
/*连接上服务器后连接收发信息槽函数*/
void Widget::connect_socket()
{
    timer1->start(50);
    connect(timer1,SIGNAL(timeout()),this,SLOT(readyRead_Slot()));
}
/*关闭按键按下*/
void Widget::on_pushButton_3_clicked()
{
    timer->stop();
    capture.release();     //释放摄像头资源
    ui->label->clear();
    ui->label->setText("画面显示...");
}
/*开启服务器按键按下*/
void Widget::on_open_clicked()
{
    Socket->connectToHost(ui->line_ip->text(),ui->line_port->text().toUInt());
    connect(Socket,SIGNAL(connected()),this,SLOT(connect_socket()));
}
运行图片
完整项目链接如下
https://download.csdn.net/download/weixin_44098974/75437241
