本文是鄙人早期学习的记录,存在部分不足的问题,可以私信或留言讨论,文档将一步步翻修
SpringBoot学习笔记
文章写得比较详细,所以很长(105336 字数),可以参考目录
文章目录
- SpringBoot学习笔记
-
- 一、 Spring Boot 入门
-
- 二、Spring Boot 配置
-
- 三、Spring Boot 与日志
-
- 四、SpringBoot与Web开发
-
- 1、使用SpringBoot
- 2、SpringBoot对静态页面的映射规则
-
- 访问静态资源
-
- 欢迎页配置
- 图标
- 3、模板引擎
-
- 引入thymeleaf
- Thymeleaf使用&语法
- 语法规则
-
- 1)、th:text 改变当前元素里面的内容
- 2)表达式
-
- Variable Expressions: ${...} 获取变量值,OGNL;
- Message Expressions: #{...} 获取国际化内容
- Link URL Expressions: @{...} 定义URL链接
- Fragment Expressions: ~{...} 插入文档
- Literals(字面量)
- Text operations: (文本操作)
- Arithmetic operations: (数学运算)
- Boolean operations: (布尔运算)
- Comparisons and equality:(比较运算)
- Conditional operators:(条件运算)(三元运算符也支持)
- Special tokens:(特殊)
- 4、SpringMVC自动配置
-
- 5、如何修改SpringBoot的默认配置
- 6、RestfulCRUD
-
- 7、错误处理机制
-
- 五、配置嵌入式Servlet容器
-
- 六、数据访问
-
- 七、创建SpringBootApplication
- 八、缓存
-
- 九、Spring Boot 与消息
-
- 十、SpringBoot与检索
- 十一、Spring Boot 与任务
-
- 十二、Spring Boor与安全
-
- 十三、Spring Boot与分布式
-
- 十四、Docker
-
文章目录
- SpringBoot学习笔记
- 一、 Spring Boot 入门
- 二、Spring Boot 配置
- 三、Spring Boot 与日志
- 四、SpringBoot与Web开发
-
- 1、使用SpringBoot
- 2、SpringBoot对静态页面的映射规则
-
- 访问静态资源
- 欢迎页配置
- 图标
- 3、模板引擎
-
- 引入thymeleaf
- Thymeleaf使用&语法
- 语法规则
-
- 1)、th:text 改变当前元素里面的内容
- 2)表达式
-
- Variable Expressions: ${...} 获取变量值,OGNL;
- Message Expressions: #{...} 获取国际化内容
- Link URL Expressions: @{...} 定义URL链接
- Fragment Expressions: ~{...} 插入文档
- Literals(字面量)
- Text operations: (文本操作)
- Arithmetic operations: (数学运算)
- Boolean operations: (布尔运算)
- Comparisons and equality:(比较运算)
- Conditional operators:(条件运算)(三元运算符也支持)
- Special tokens:(特殊)
- 4、SpringMVC自动配置
- 5、如何修改SpringBoot的默认配置
- 6、RestfulCRUD
- 7、错误处理机制
- 五、配置嵌入式Servlet容器
- 六、数据访问
- 七、创建SpringBootApplication
- 八、缓存
- 九、Spring Boot 与消息
- 十、SpringBoot与检索
- 十一、Spring Boot 与任务
- 十二、Spring Boor与安全
- 十三、Spring Boot与分布式
- 十四、Docker
一、 Spring Boot 入门
预:必须掌握的技术:
- Spring 框架的使用经验
- 熟练使用Maven进行项目构建和依赖管理
- 熟练使用IDEA或Eclipse
1. Spring Boot 简介
学前bb
大多数人应该知道神奇SSM(Spring+SpringMVC+MyBatis)三兄弟让JavaWeb的开发几乎是进入了新次元,按照官方的要求来编写代码,配置项目,项目就能稳定运行。
而SpringBoot更神奇了,人家就倡导两个字:自动(个人口胡
SSM配置到吐的配置文件,SpringBoot就几行字,就是舒适。
Spring Boot 来简化Spring 应用的开发,约定大于配置,去繁从简,明显提高开发效率
然后Spring Boot发展了一段时间呢,大家觉得这个啊,是真的香,拿来整微服务,岂不是美滋滋
于是你会发现大多数微服务都是Spring Boot为基础,
(甚至Eureka的服务注册中心,就是个Spring Boot项目)
2020/12/10:本篇文章呢,会提到一些自动配置的原理,各位只是看个爽,这里可以选看,如果是为了学习Spring Boot,还是建议仔细品一品的!毕竟Spring Boot就是Spring+Spring MVC的无敌全自动版本,自动配置是核心。
解决的问题
- Spring全家桶时代
- Spring Boot ——》J2EE一站式解决方案
- Spring Cloud -> 分布式整体解决方案(Spring技术栈)
优点
- 快速创建独立运行的Spring项目以及与主流框架集成
- 使用嵌入式Servlet容器,应用无需打成WAR包,直接使用Java -jar jar包名即可运行
- starters自动依赖与版本控制
- 大量的自动配置,简化开发,也可以修改默认值
- 无需配置XML,无需代码生成,开箱即用
- 准生产环境的运行时应用监控
- 与云计算的天然集成
缺点
入门快,精通很难
Spring Boot是对Spring 框架的再封装,若对Spring不了解,对SpringBoot的封装机制也不会很了解,Spring Boot中许多自动配置,需要我们了解Spring的API(只有在了解Spring的API后才能更精通Spring Boot
2.微服务
martin fowler详细介绍了微服务Martin Fowler:microservices
What are Microservices?
微服务是一种架构风格
提倡在开发应用时,一个应用应该是一组小型服务;可以通过HTTP的方式进行互通
单体应用
- All In One ,
- 是传统的架构,
- 优点:开发 、部署、运维要简单,
- 缺点:牵一发动全身,不适合大型应用
- 在多个服务器上复制这个单体进行扩展
微服务
- 一个微服务架构把每个功能元素放进一个独立的服务中
- 通过跨域服务器分发这些服务进行扩展,只在需要时进行扩展🏃
- 每一个功能元素都是一个可以替换和独立升级的软件单元
- 详细参照微服务文档
3.环境准备
- Spring Boot推荐使用jdk的版本:1.7及以上
- maven:3.3及以上版本
- intellij idea
- Spring Boot
Maven设置:
给maven的settings.xml配置文件的profiles标签添加
表明使用jdk1.8进行开发
<profile>
	<id>jdk-1.8</id>
	<activation>
	<activeByDefault>true/ activeByDefault>
	<jdk>1.8</jdk>
</activation>
	<properties>
		<maven.compiler.source>1。8</maven.compiler.source>
		<maven.compiler.target>1.8</maven.compller.target>
		<maven.compiler.compilerverslon>1.8</maven.compiler.compllerversion>
	</propert1es>
</profile>
Idea设置
进入设置页面 Ctrl+Alt+S
Build,Execution,Deployment–>Build Tools–>Maven
设置maven为本地的maven, 库也为本地maven库
4.Spring Boot HelloWorld
2020/12/20: 还是补上HelloWorld吧
首先,目前有两种流派创建Spring Boot的项目
- 使用Spring Initializer直接轻松一键搭建(懒批模式,在第6节,真看不动就跳6节吧
- 从maven项目开始一点点搭建,(相信我,都自动化了,这个了解了解就行了
4.1创建一个maven项目
<?xml version="1.0" encoding="UTF-8"?>
<project xmlns="http://maven.apache.org/POM/4.0.0" xmlns:xsi="http://www.w3.org/2001/XMLSchema-instance"
         xsi:schemaLocation="http://maven.apache.org/POM/4.0.0 https://maven.apache.org/xsd/maven-4.0.0.xsd">
    <modelVersion>4.0.0</modelVersion>
    <parent>
        <groupId>org.springframework.boot</groupId>
        <artifactId>spring-boot-starter-parent</artifactId>
        <!--版本无所谓的,想用别的也行 -->
        <version>2.2.2.RELEASE</version>
        <relativePath/> <!-- lookup parent from repository -->
    </parent>
    <!-- 这个最好跟你后面那个类的包一致 -->
    <groupId>com.jiarth</groupId>
    <artifactId>jirath_blog2</artifactId>
    <version>0.4.8-GA</version>
    <name>jirath_blog2</name>
    <description>2代个人博客系统</description>

    <properties>
        <java.version>1.8</java.version>
    </properties>

    <dependencies>
        <!--这里有了一个web程序的基础了-->
        <dependency>
            <groupId>org.springframework.boot</groupId>
            <artifactId>spring-boot-starter-web</artifactId>
        </dependency>
   	    <dependency>
            <groupId>org.springframework.boot</groupId>
            <artifactId>spring-boot-starter-test</artifactId>
            <scope>test</scope>
            <exclusions>
                <exclusion>
                    <groupId>org.junit.vintage</groupId>
                    <artifactId>junit-vintage-engine</artifactId>
                </exclusion>
            </exclusions>
        </dependency>

    </dependencies>

    <build>
        <plugins>
            <plugin>
                <groupId>org.springframework.boot</groupId>
                <artifactId>spring-boot-maven-plugin</artifactId>
            </plugin>
        </plugins>
    </build>

</project>
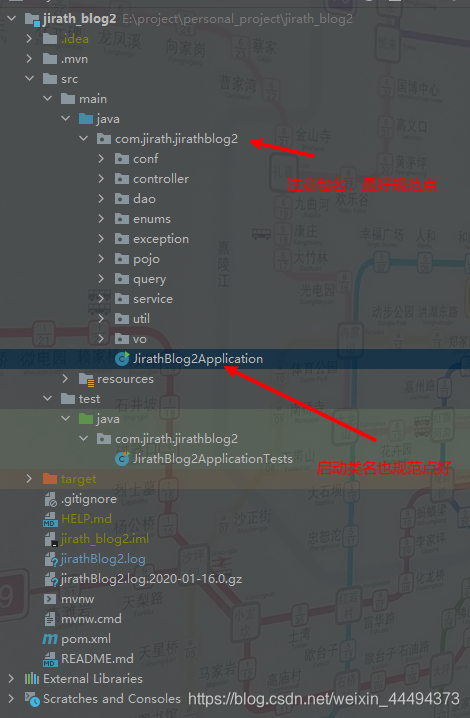
4.2 创建项目结构以及启动类
下面的包先不用管
java->你的包->xxxApplication.java(这是规范xxxxApplication) 就可以了
@SpringBootApplication
public class JirathBlog2Application {


    public static void main(String[] args) {

        SpringApplication.run(JirathBlog2Application.class, args);
    }

}
启动,看到这个Spring Boot,你就成功了
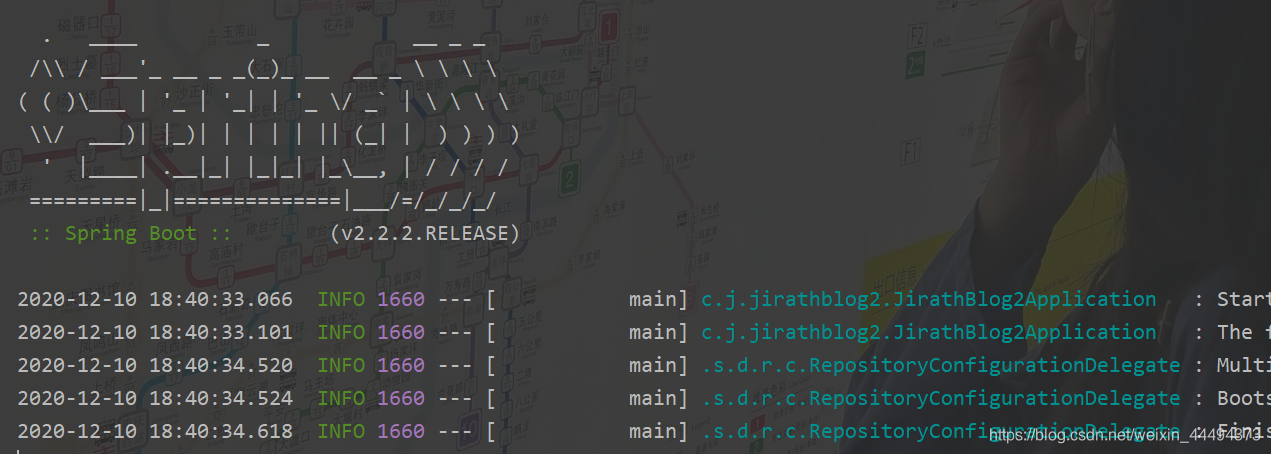
这里会有一定难度,看不懂不要慌,只不过是自动配置的原理
5.Hello World 的探究
1)pom文件
a.父项目
<parent>
        <groupId>org.springframework.boot</groupId>
        <artifactId>spring-boot-starter-parent</artifactId>
        <version>2.2.0.RELEASE</version>
        <relativePath/> <!-- lookup parent from repository -->
    </parent>
他的父项目是
<parent>
    <groupId>org.springframework.boot</groupId>
    <artifactId>spring-boot-dependencies</artifactId>
    <version>2.2.0.RELEASE</version>
    <relativePath>../../spring-boot-dependencies</relativePath>
  </parent>
其中有各种依赖的版本,Spring Boot 通过此父项目真正管理Spring Boot里面的所有依赖版本(Spring Boot的依赖仲裁中心)
以后导入依赖不需要版本,(没有depenencies中依赖管理的需要自己声明版本号)
b.导入的依赖
<dependency>
	<groupId>org.springframework.boot</groupId>
	<artifactId>spring-boot-starter-web</artifactId>
</dependency>
spring-boot-stater-web
spring-boot-stater:Spring Boot 场景启动器:帮我们导入了web模块正常运行的组件
Spring Boot将所有的功能都抽取出来,做成一个个的staters(启动器),只需要在项目中引入这些启动器,相关的依赖就能自动导入
2)主程序类,主入口类
@SpringBootApplication
public class CaitApplication {


    public static void main(String[] args) {

        SpringApplication.run(CaitApplication.class, args);
    }

}
@SpringBootApplication 核心注解,标注在某个类上说明这个类是Spring Boot的主配置类,Spring Boot 一个运行这个类的main方法来启动应用:
@Target({
   ElementType.TYPE})
@Retention(RetentionPolicy.RUNTIME)
@Documented
@Inherited
@SpringBootConfiguration
@EnableAutoConfiguration
@ComponentScan(
    excludeFilters = {
   @Filter(
    type = FilterType.CUSTOM,
    classes = {
   TypeExcludeFilter.class}
), @Filter(
    type = FilterType.CUSTOM,
    classes = {
   AutoConfigurationExcludeFilter.class}
)}
)
@ConfigurationPropertiesScan
public @interface SpringBootApplication {
-
@SpringBootConfiguration Spring Boot 的配置类;
- 标注在某个类上,表示这是一个Spring Boot 的配置类
- @Configuration 配置类上来标注这个注解;(Spring4.X)
- 配置类————配置文件;
-
@EnableAutoConfiguration 开启自动配置功能;
-
以前我们需要配置的东西,Spring Boot 帮我们自动配置;
-
@EnableAutoConfiguration告诉SpringBoot开启自动配置功能;这样自动配置才能生效
- @AutoConfigurationPackage : 自动配置包
- @**Import({AutoConfigurationImportSelector.class})**Spring的底层注解,给容器中导入一个组件;导入的组件有AutoConfigurationImportSelector.class
更多知识在 Spring注解版
-
@Target({
   ElementType.TYPE})
@Retention(RetentionPolicy.RUNTIME)
@Documented
@Inherited
@AutoConfigurationPackage
@Import({
   AutoConfigurationImportSelector.class})
public @interface EnableAutoConfiguration {
接下来从底层理解:
我们进入
@Target({
   ElementType.TYPE})
@Retention(RetentionPolicy.RUNTIME)
@Documented
@Inherited
@Import({
   Registrar.class})
public @interface AutoConfigurationPackage {

}
@Import既然是SpringBoot 的底层注解,那Import的是什么?我们查看Registar的内容,发现这个是一个静态类
static class Registrar implements ImportBeanDefinitionRegistrar, DeterminableImports {

        Registrar() {

        }

        public void registerBeanDefinitions(AnnotationMetadata metadata, BeanDefinitionRegistry registry) {

            AutoConfigurationPackages.register(registry, (new AutoConfigurationPackages.PackageImport(metadata)).getPackageName());
        }

        public Set<Object> determineImports(AnnotationMetadata metadata) {

            return Collections.singleton(new AutoConfigurationPackages.PackageImport(metadata));
        }
    }

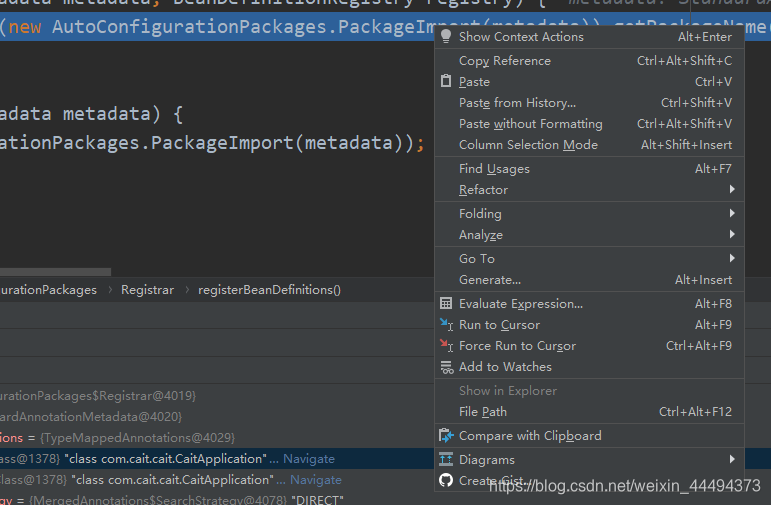
其中,这个方法registerBeanDefinitions将bean注册到容器中,我们想知道注册的到底是什么,对这行代码进行调试,

点击运行Spring Boot,
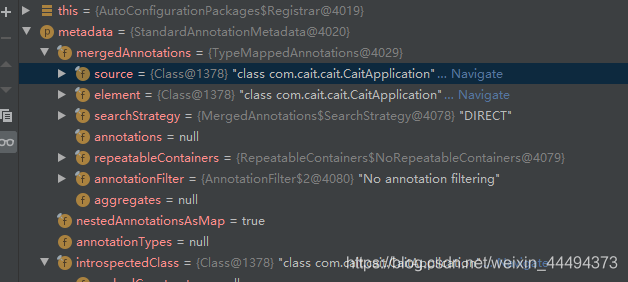
通过调试信息我们知道,这个注解源头在CaitApplication(Spring Boot 启动类)
我们选择getPackName()方法,鼠标右键选择计算表达
结果证明:导入的包为com.cait.cait,也就是启动类所在的包中所有的bean。这表明,
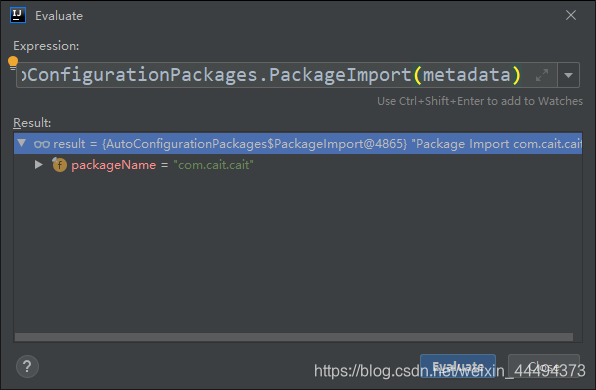
@AutoConfigurationPackage的实质是注册启动类所在包中所有标记的类为Bean
(将主配置类所在包下以及所有子包中所有的组件扫描到Spring容器)
那么问题来了EnableAutoConfiguration中也有一个Import,这个Import又是什么作用
@Import()给容器中导入括号内组件
点进AutoConfigurationImportSelector.class
由于本人使用的Spring Boot 2.X,与1略有不同,下方为1的老师讲解
EnableAutoConfigurationImportSelector:导入哪些组件的选择器🚗
选择debug模式,查看
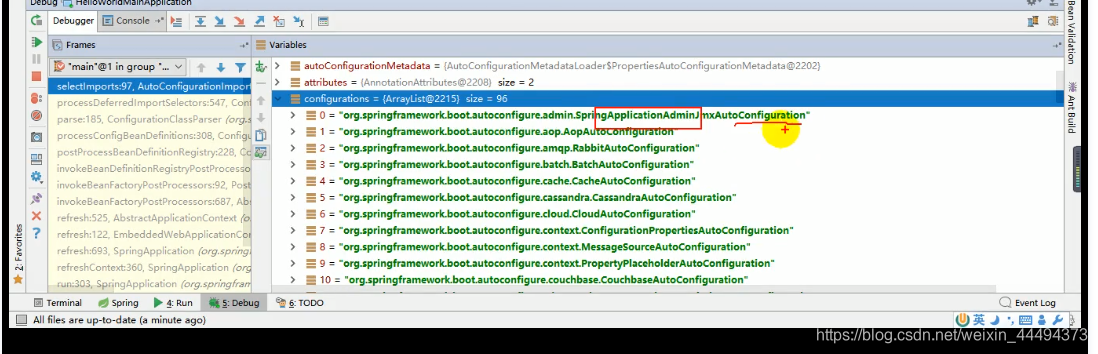
通过名字了解到是很多自动配置类(XXXAutoConfiguration):就是给容器中导入这个场景需要的所有组件并配置好组件,使用不同的功能对应不同的配置文件
通过配置类,免去了我们手动编写配置注入功能组件的工作!!!
SpringFactoriesLoader.loadFactoryNames(EnableAutoConfiguration.class,classLoader);
Spring Boot 在启动的时候从类路径下META-INF/spring.factories中获取EnableAutoConfiguration指定的值,将这些值作为自动配置类导入到容器中,自动配置类就生效,帮我们进行自动配置工作以前我们需要自己配置的配置类,自动配置类都帮我们完成。J2EE的整体解决方案和自动配置都在spring-boot-autoconfigure-XXXX.jar中
6.使用Spring Initializer快速创建Spring Boot 项目
IDE都支持Spring Boot 的快速创建项目
SpringBoot学习第一步:搭建基础
IDEA对SpringBoot的项目支持可以说是点击就能完成基础的搭建,方便的不得了,
流程如下
1.左上角File选项,New project,选择Spring Initializr
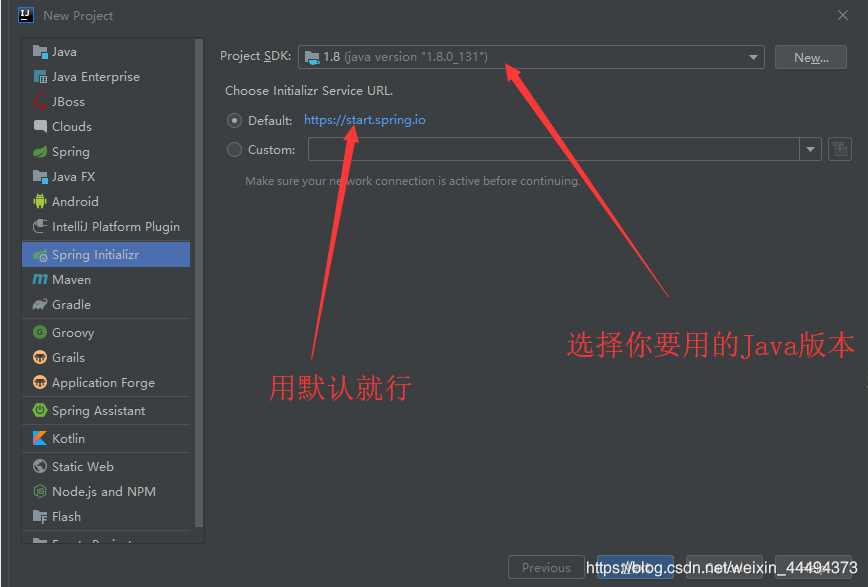
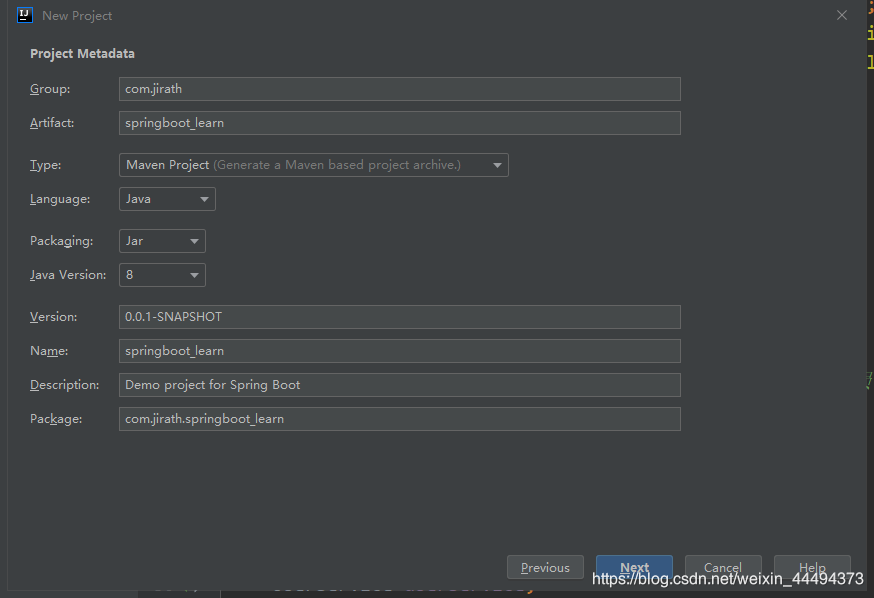
2.设置项目信息,Group 会自动创建Group文件夹,包含项目的代码;Artifact 的名字必须使用小写与下划线构成!!
3.选择web项目,右上角可以选择SpringBoot 的版本,一定要使用relese版本(正式版),不要使用SNAPSHOT版本
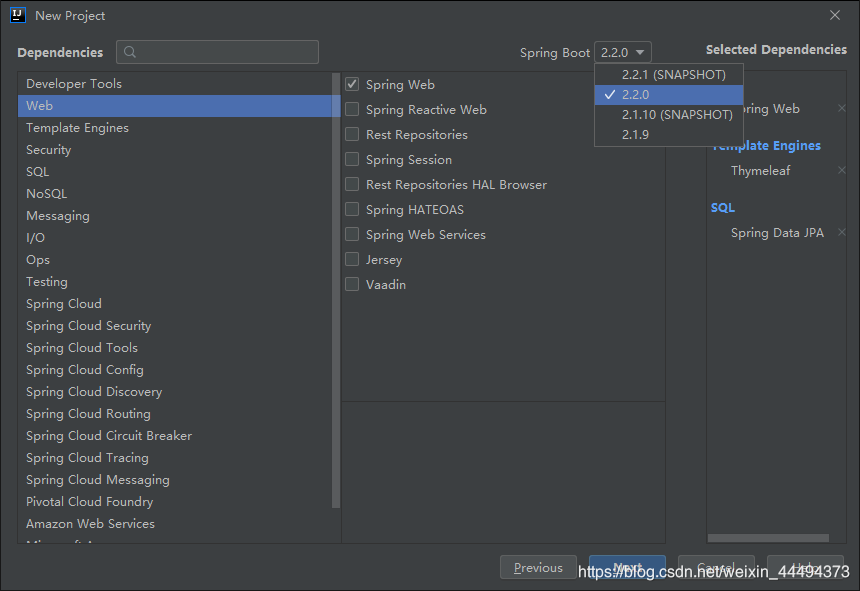
4.确定project的名字与位置,名字就是项目文件夹的名字
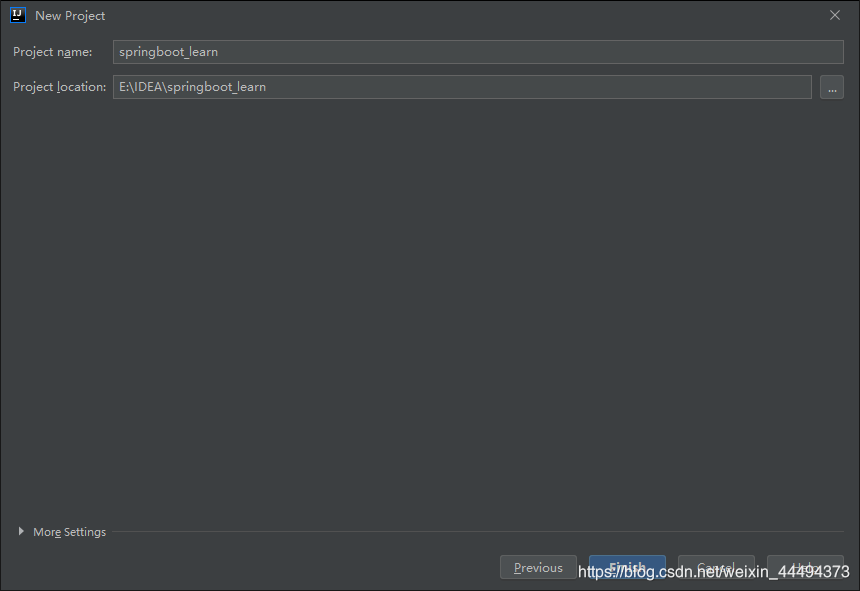
点击finish就好啦,一个SpringBoot+Maven项目就搞定了,最后创建三个基础包,上车愉快!
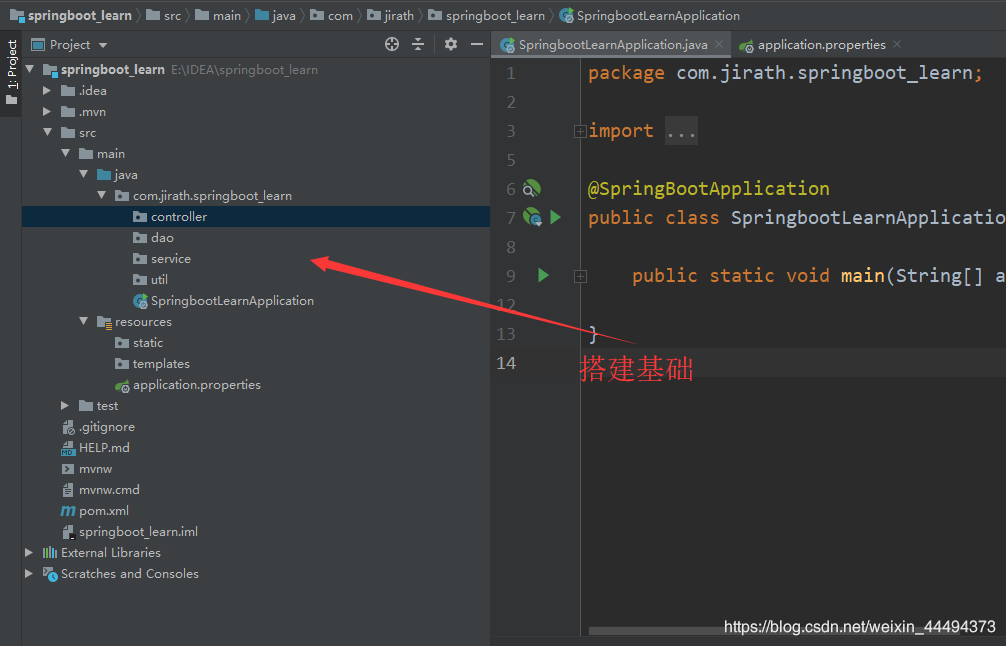
默认生成的Spring Boot 项目:
- 主程序已经生成,我们只需要我们自己的逻辑
- resouces文件夹中目录结构
- static:保存所有的静态资源:js,css,images;
- templates:保存所有的模板页面:(Spring Boot 默认jar包嵌入式的Tomcat,默认不支持Jsp页面);可以使用模板引擎(freemarker、thymeleaf);
- application.properties:Spring Boot 应用默认配置文件
- https://blog.csdn.net/weixin_44494373/article/details/102779187
二、Spring Boot 配置
1. 配置文件
Spring Boot 默认使用两种配置文件
- application.properties
- application.yml
配置文件的作用:修改Spring Boot自动配置的默认值;Spring Boot在底层自动配置好
YAML(YAML Ain’t Markup Language )语言的文本,
- YAML A Markup Language :是一个标记语言
- YAML isn’t Markup Language : 不是一个标记语言(XML类型标记文件)
标记语言:
- 以前的标记语言大多数使用的是 XXXX.xml
- YAML :以数据为中心,比json、xml等更适合做配置文件
2. YAML语法
1)基本语法
K:(空格)Value 表示一对键值对(空格必备)
以**空格**的缩进来控制层级关系;只要是左对齐的一列数据,都是同一个层级的
server:
	port: 8081
	path: /hello
属性与值也是大小写敏感的
2)值的写法
字面量:普通的值(数字,字符串,布尔)
key: value (中间有空格)字面直接来写;
- 字符串默认不用加上单引号和双引号
- “”:双引号不会转义字符串里面的特殊字符;特殊字符会作为本身想表达的意思
- example: “zhangsan \n list”:输出:zhangshan (换行) list
- ‘’:单引号 会转义特殊字符,特殊字符最终只是一个普通的字符串数据
- example: “zhangsan \n list”:输出:zhangshan \n list
- “”:双引号不会转义字符串里面的特殊字符;特殊字符会作为本身想表达的意思
对象、Map(属性和值)(键值对)
key: value
对象还是key: value的方式
example: create a object with propertities : lastName age
friends:
	lastName: zhangshan
	age: 22
行内写法:用一行表示
friends: {
   lastName: zhangshan , age: 18}
数组(List、Set):
用-值表示数组中的一个元素
pets:
	-cat
	-dog
	-pig
行内写法
pets: [cat,dog,pig]
附:Spring Boot单元测试
可以在测试期间很方便的类似编码一样进行自动注入容器的功能
package com.cait.cait;

import org.junit.jupiter.api.Test;
import org.springframework.beans.factory.annotation.Autowired;
import org.springframework.boot.test.context.SpringBootTest;

@SpringBootTest
class CaitApplicationTests {


    @Autowired
    要进行测试的类
    @Test
    void contextLoads() {

        进行操作
    }

}
3. 通过配置文件注入
1) 数据绑定到基础数据类型
@Value
String LastName;
是Spring 底层的一个注解,
对应的xml
<bean class="person">
	<property name="LastName" value="字面量/${key}/#{SpEL}"></property>
</bean>
用法很简单
在一个bean里面
@Value("${配置文件Key的全路径}"
String data;
2) 将数据绑定到类中 含配置文件与类绑定的方法
注: prefix必须全部为小写,配置的类名不能使用大写!!!!!,如 subMit是错误的!!
首先 类 与 配置文件要对应,在类前注释 @ConfigurationProperties(prefix=“pets”)
-
@ConfigurationProperties 告诉SpringBoot将本类中的所有属性和配置文件中相关属性进行绑定;
-
perfix=“pets”:配置文件中,该前缀下面的所有属性,进行一一映射
-
若报错,点击提示,官方说明应该添加依赖
-
<dependency> <groupId>org.springframework.boot</groupId> <artifactId>spring-boot-configuration-processor</artifactId> <optional>true</optional> </dependency> -
只有这个组件是容器中的组件,才能使用容器提供的@ConfigurationProperties功能
-
添加@Component注解加入容器组件
总结:导入配置文件处理器,以后进行配置文件操作就有提示,类中属性的名要对应,类名可以不同,加入注解@ConfigurationProperties(prefix = “属性的前缀”)
<dependency>
    <groupId>org.springframework.boot</groupId>
    <artifactId>spring-boot-configuration-processor</artifactId>
    <optional>true</optional>
</dependency>
配置文件少用中文!!!
若输出为乱码,原因是idea使用的是utf8
打开Setting,搜索file encoding(文件编码),选择UTF8,同时选择需要在运行时转译为ascii
- Transparent native to ascii conversion
3) @Value 获取值和 @ConfigurationProperties获取值的比较
| 类型 | @ConfigurationProperties | @Value |
|---|---|---|
| 功能 | 批量注入配置文件中的属性 | 一个个指定 |
| 松散绑定(松散语法) | supported | unsupported,要严格对应名 |
| SpEL | unsupported | supported |
| JSR303 | supported | unsupported |
| 复杂类型封装 | supported | unsupported, only simple type is permitted |
配置文件yml于properties他们都能获取到值
- 如果说,我们只是在某个业务逻辑中需要获取一下文件中的某项值,使用@Value
- 如果单独写了一个JavaBean来匹配配置文件中的值,使用@ConfigurationProperties
4) 配置文件注入值数据校验
- 导入JSR303,在配置用的Bean上添加@Validated
- Bean中属性上添加判断注解
- @Email 就是邮箱校验
- @NotNull是非空注解
- Spring boot @Validated注解以及配合@Valid的使用
- @Validated注解使用
5) @PropertySource & @ImportResource
- @PropertySource:加载指定的配置文件(非默认的application.yml)
- 参数Value指文件,encoding指编码,也很重要!!!
注:@PropertySource默认只能支持properties文件!!!!,
解决方案:SpringBoot配置文件@PropertySource 同时支持properties文件与yaml(yml)
4)Spring配置文件注入
a. @ImportResource: 导入Spring配置文件,让配置文件里面的内容生效;
想让Spring的配置文件生效,加载进来;将@ImportResouce标注在一个类上
@ImportResource(locations= {
   "classpath:bean.xml"})

导入Spring配置文件:beans.xml并使其生效
b. Spring Boot 推荐给容器添加组件的方式
-
配置类=======Spring 配置文件
-
使用@Bean添加
-
package com.jirath.springboot_learn.config;

import com.jirath.springboot_learn.service.HelloService;
import org.springframework.context.annotation.Bean;
import org.springframework.context.annotation.Configuration;

/**
 * '@Configuratoin' point out that current object is a Configuration Class,which used to replace the Spring Configuration file before.
 */
@Configuration
public class MyConfig {

    /**
     * add current function's returned value to the ContextContainer,
     * the id of the module in this ContextContainer is the name of function;
     * @return the object which used to build a Bean
     */
    @Bean
    public HelloService helloService(){

        return new HelloService();
    }
}
4.配置文件占位符
RandomValuePropertySource: 配置文件中可以使用随机数
r a n d o m . v a l u e 、 {random.value}、 random.value、{random.int}、 r a n d o m . l o n g 、 {random.long}、 random.long、{random.int(10)}、 r a n d o m . i n t [ 1024 , 65536 ] 、 {random.int[1024,65536]}、 random.int[1024,65536]、{random.uuid}
属性配置占位符
app.name=MyApp
app.description=${app.name} is a Spring Boot application
- 可以在配置文件中引用前面配置过的属性(优先级前面配置过的这里都能用)
- ${app.name:defultValue}来指定找不到属性时的默认值
- 若引用的值不存在,SpringBoot会默认将{}中间的值作为value
- 用${person.name:(defult)}可以设置默认为defult

5.Profile
在开发过程中会遇到开发和实际生产时项目的配置是不同的情况,应对这种情况,Spring设置了Profile,
Profile是Spring对不同环境提供不同配置功能的支持,可以通过激活、指定参数等方式快速切换环境
1)多Profile文件
我们在主配置文件编写的时候,文件名可以是 application-(profile).properties/yml
!!!注意,文件的profile必须在三个字符以内,否自无法作为配置文件!!
默认使用application.properties的配置:
2)yml支持多文档块方式
spring:
	profiles:
		active: dev
---
server