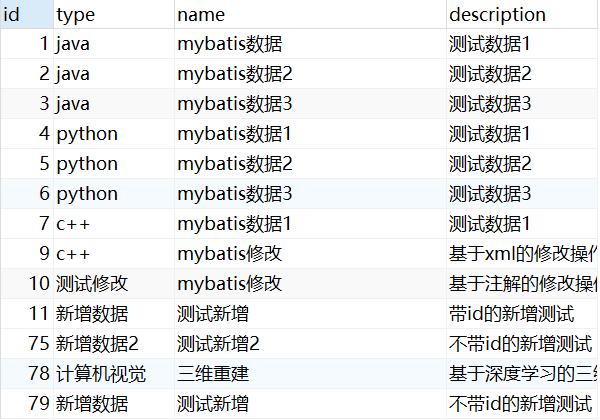
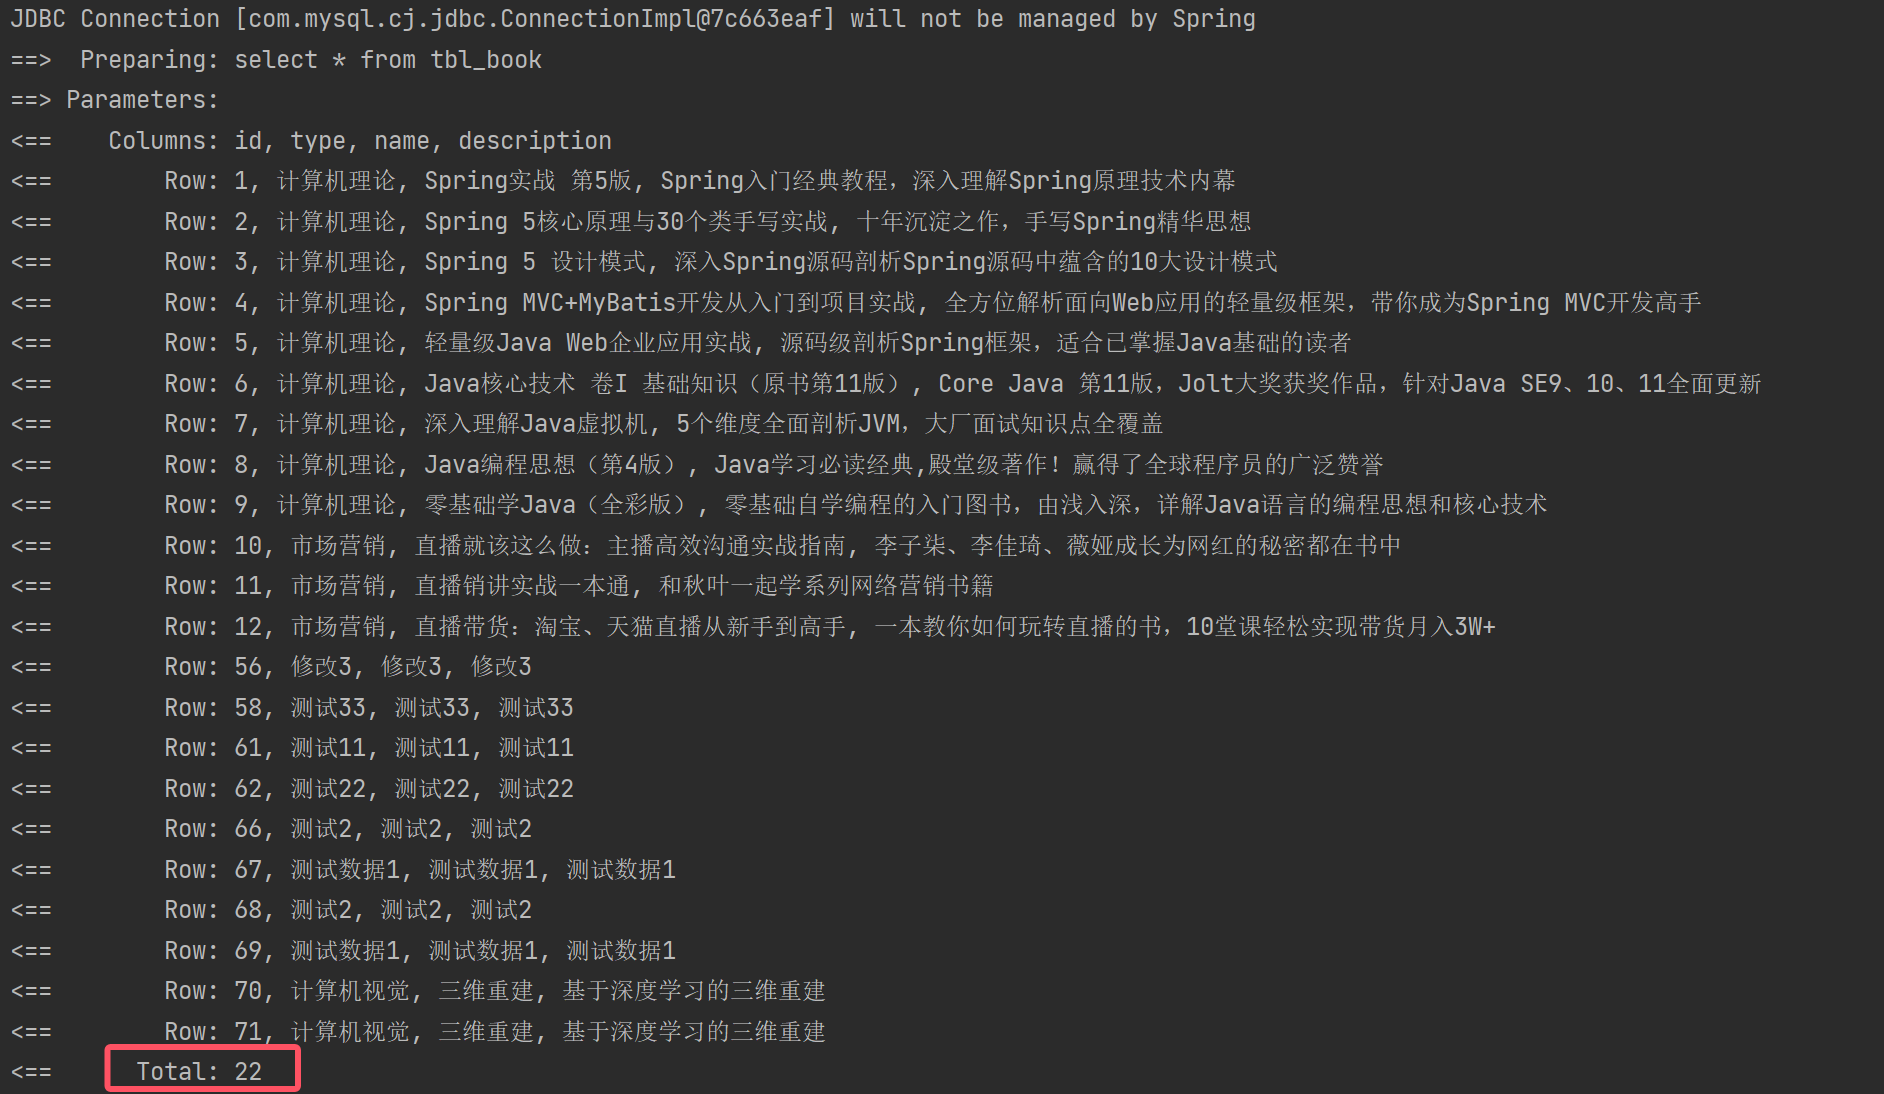
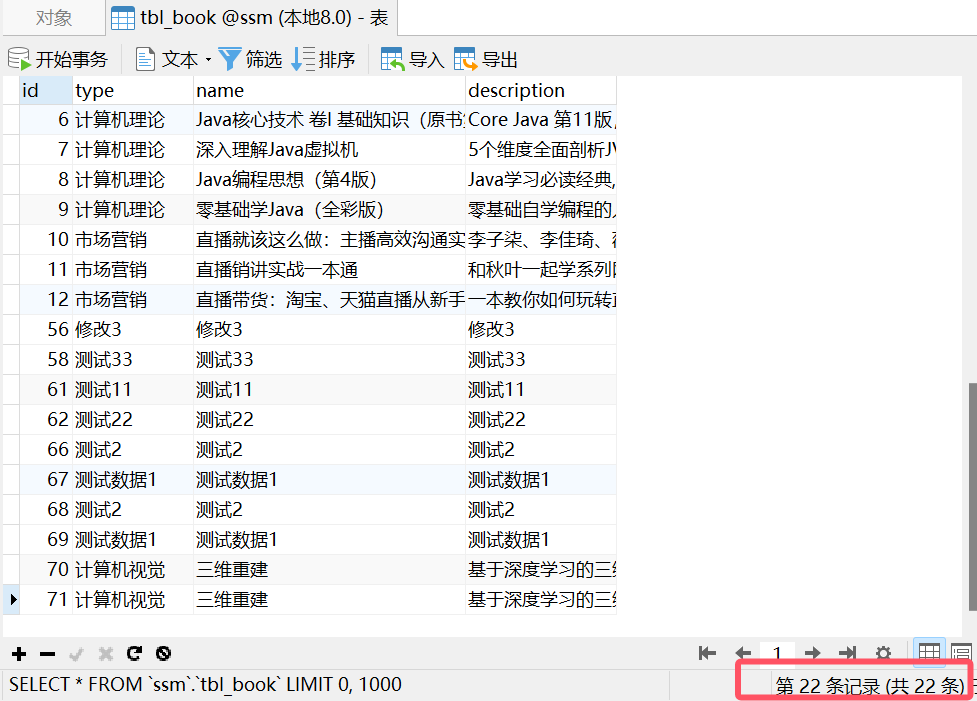
首先介绍此次使用的数据库结构,然后引出注意事项。
通过基于xml和基于注解的方式分别实现了增删改查,还有获取参数值、返回值的不同类型对比,帮助大家一次性掌握两种代码编写能力。
目录
数据库
数据库表
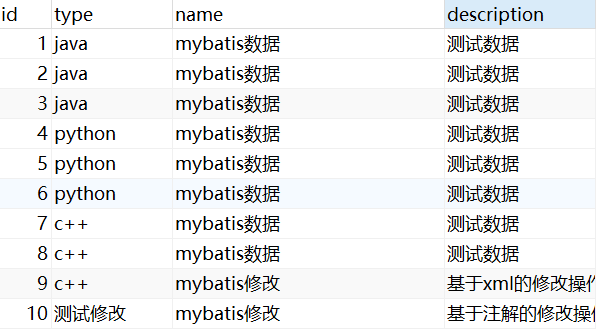
此次实验的数据库表结构如下,包含主键id和三个属性
实体类
对应的实体类如下:
import com.baomidou.mybatisplus.annotation.TableName;
import lombok.AllArgsConstructor;
import lombok.Data;
import lombok.NoArgsConstructor;

/**
 * ClassName: Book
 * Package: com.ykx.domain
 * Description: mybatis学习的数据库表tbl_book对应的实体类
 */
@Data
@AllArgsConstructor
@NoArgsConstructor
@TableName("tbl_book")
public class Book {
    private Integer id;
    private String type;
    private String name;
    private String description;
}
注意事项
1)两种占位符的说明
①#{}
传入的参数当成一个字符串,会给传入的参数加单引号
能够很大程度上防止sql注入
一般用于替换某个值
②${}
将传入的参数值直接显示生成在sql中,不会自动加引号
预编译之前就已经被变量替换,无法防止sql注入
一般用于替换表、字段名
2)增、删、改的返回值说明
返回值固定位Integer,表示受影响的行数
3)查询操作
①必须指定resultType或是resultMap
不配置别名的时候,值为类的全类名
返回值是集合的时候,只需指定集合的泛型即可,如
List<Book> getAll();

<select id="getAll" resultType="com.ykx.pojo.Book">
    select * from tbl_book
</select>
4)对应关系
①数据库名与类名不一致的情况
②字段名与属性名不一致的情况
1.获取参数值的方式
MyBatis 提供了多种传递参数的方式到 SQL 。
理解参数传递的机制有助于提高代码的可读性、灵活性。
1.1基于xml
1.1.1单个参数
①mapper
Book getById(Integer id);②xml
在单个字面量参数的情况下,{}内的名称可以任意取
如下面的代码可以把#{id} 改成 #{ID}亦或是其他
<select id="getById" resultType="com.ykx.domain.Book">
    select * from tbl_book where id = #{id}
</select>
③test
@Test
public void testSelect(){
    Book book = bookMapperXML.getById(1);
    System.out.println(book);
}
④结果
1.1.2多个参数
①mapper
Book check(String type,String name);②xml
写法一
<select id="check" resultType="com.ykx.domain.Book">
    select * from tbl_book where type = #{type} and name = #{name}
</select>
写法二
<select id="check" resultType="com.ykx.domain.Book">
    select * from tbl_book where type = #{param1} and name = #{param2}
</select>
③test
@Test
public void testCheck(){
    Book book = bookMapperXML.check("java","mybatis数据");
    System.out.println(book);
}
④结果
1.1.3map参数
①mapper
Book checkByMap(Map<String,String> map);②xml
<select id="checkByMap" resultType="com.ykx.domain.Book">
    select * from tbl_book where type = #{type} and name = #{name}
</select>
③test
@Test
public void testCheckByMap(){
    Map<String,String> map = new HashMap<>();
    map.put("type","java");
    map.put("name", "mybatis数据");
    Book book = bookMapperXML.checkByMap(map);
    System.out.println(book);
}
④结果
1.1.4实体类参数
①mapper
Integer insert(Book book);②xml
<insert id="insert">
    insert into tbl_book (type,name,description) values(#{type},#{name},#{description})
</insert>
③test
@Test
public void testInsert(){
    Book book = new Book(null,"计算机视觉","三维重建","基于深度学习的三维重建");
    Integer ans = bookMapperXML.insert(book);
    System.out.println("受影响的行数:" + ans);
}
④结果
1.1.5使用@Param标识参数
在字段名和属性名对不上或是参数名和字段名对不上的时候很有用
①mapper
写法一
Book check(@Param("type") String type, @Param("name") String name);写法二
Book check(@Param("type") String type2, @Param("name") String name2);错误写法
Book check(String type2, String name2);②xml
<select id="check" resultType="com.ykx.domain.Book">
    select * from tbl_book where type = #{type} and name = #{name}
</select>
③test
@Test
public void testCheck(){
    Book book = bookMapperXML.check("java","mybatis数据");
    System.out.println(book);
}
④结果
1.2基于注解
1.2.1单个参数
①mapper
单个参数的情况下,接口的参数名和注解里的sql语句参数可以不一致
写法一
@Select("select * from tbl_book where id = #{id}")
Book getById(Integer id);
写法二
@Select("select * from tbl_book where id = #{aa}")
Book getById(Integer id);
②test
@Test
public void testSelect(){
    Book book = bookMapper.getById(78);
    System.out.println(book);
}
③结果
1.2.2多个参数
①mapper
注:在未使用@Param的情况下,参数名不对应或是顺序不一样会导致查询失败
@Select("select * from tbl_book where type = #{type} and name = #{name}")
Book getOne(String type,String name);
②test
@Test
public void testGetOne(){
    Book book = bookMapper.getOne("计算机视觉","三维重建");
    System.out.println(book);
}
③结果
1.2.3map参数
①mapper
@Select("select * from tbl_book where type = #{type} and name = #{name}")
Book getByMap(Map<String, String> map);
②test
注:map里的key值要和#{}里的值对应,否则出现查询失败的情况
@Test
public void testByMap(){
    Map<String,String> map = new HashMap<>();
    map.put("type","java");
    map.put("name", "mybatis数据");
    Book book = bookMapper.getByMap(map);
    System.out.println(book);
}
③结果
1.2.4实体类参数
①mapper
@Insert("insert into tbl_book (id,type,name,description) " +
        "values(#{id},#{type},#{name},#{description})")
Integer insert(Book book);
②test
@Test
public void testInsert(){
    Book book = new Book(null,"新增数据","测试新增","不带id的新增测试");
    Integer ans = bookMapper.insert(book);
    System.out.println("受影响的行数:" + ans);
}
③结果
1.2.5使用@Param标识参数
只需要#{}里的值和@Param()里的值一样就行
①mapper
写法一
@Select("select * from tbl_book where type = #{type} and name = #{name}")
Book getOne(@Param("type") String type,@Param("name") String name);
写法二
@Select("select * from tbl_book where type = #{type} and name = #{name}")
Book getOne(@Param("type") String typeaa,@Param("name") String nameaa);
②test
@Test
public void testGetOne(){
    Book book = bookMapper.getOne("计算机视觉","三维重建");
    System.out.println(book);
}
③结果
2.各种操作功能
2.1基于xml
2.1.1增
①mapper
//增:实体对象新增数据
Integer insert(Book book);
②mapper.xml
<insert id="insert">
    insert into tbl_book (id,type,name,description) values(#{id},#{type},#{name},#{description})
</insert>注:这里设置了id主键自增的话,可以不设置和传入id
③test
//增:实体对象新增数据
@Test
public void testInsert(){
    Book book = new Book(71,"计算机视觉","三维重建","基于深度学习的三维重建");
    Integer ans = bookMapperXML.insert(book);
    System.out.println("受影响的行数:" + ans);
}
④结果
主键id自增并返回值
关键点:在xml里需要带上useGeneratedKeys和keyProperty
mapper
Integer autoId(Book book);mapper.xml
<insert id="autoId" useGeneratedKeys="true" keyProperty="id">
    insert into tbl_book (type,name,description) values(#{type},#{name},#{description})
</insert>
test
//增:主键自增且返回值
@Test
public void testAutoId(){
    Book book = new Book(null,"测试id自增","返回主键id","是否成功获取id的值");
    Integer ans = bookMapperXML.autoId(book);
    System.out.println("受影响的行数:" + ans);
    System.out.println("获取主键自增的id值:" + book.getId());
}
结果
2.1.2删
①mapper
//删:根据id删除数据
Integer delete(Integer id);
②mapper.xml
<delete id="delete">
    delete from tbl_book where id = #{id};
</delete>
③test
//删:根据id删除数据
@Test
public void testDelete(){
    Integer ans = bookMapperXML.delete(68);
    System.out.println("受影响的行数:" + ans);
}
④结果
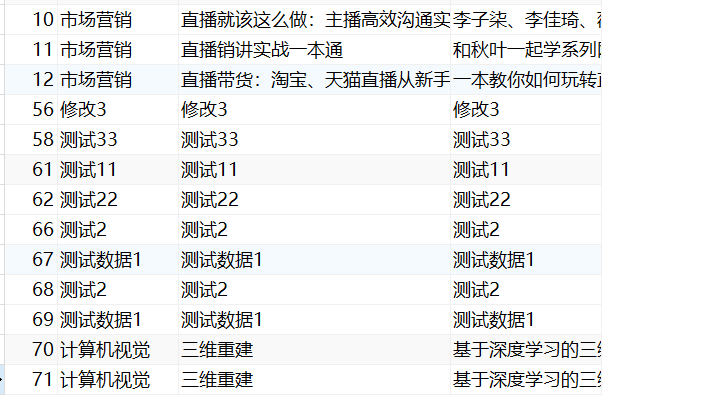
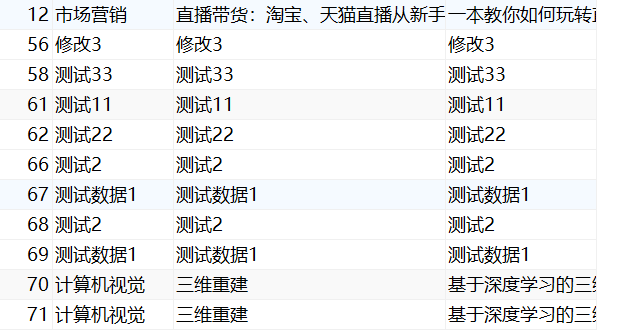
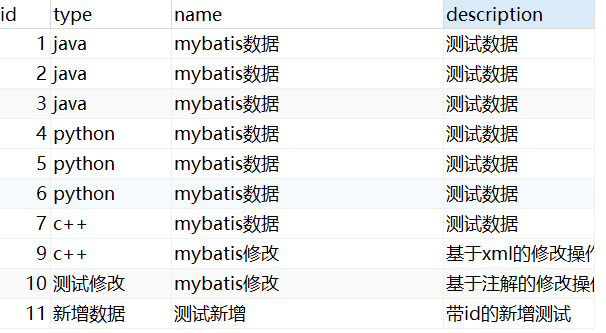
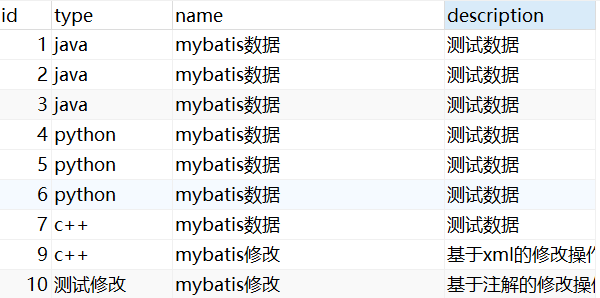
删除前
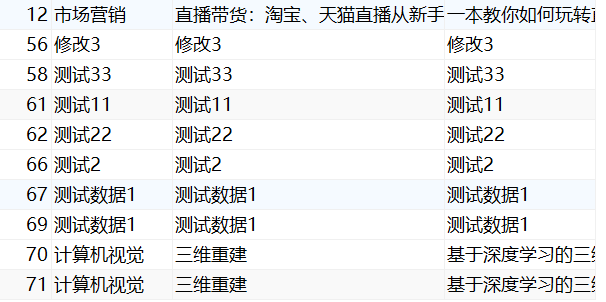
删除后
2.1.3改
①mapper
//改:根据id修改数据
Integer update(Book book);
②mapper.xml
<update id="update">
    update tbl_book set type = #{type},name = #{name},description = #{description} where id = #{id};
</update>
③test
//改:根据id修改数据
@Test
public void testUpdate(){
    Book book = new Book(58,"测试修改","mybatis修改","基于xml的修改操作");
    Integer ans = bookMapperXML.update(book);
    System.out.println("受影响的行数:" + ans);
}
④结果
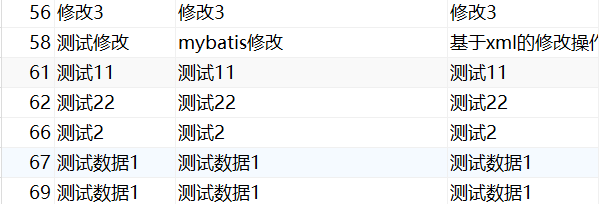
修改前
修改后
2.1.4查
①mapper
@Mapper
public interface BookMapperXML {

    //查:根据id查询数据
    Book getById(Integer id);

    //查:查询所有数据
    List<Book> getAll();

}
②mapper.xml
<?xml version="1.0" encoding="UTF-8" ?>
<!DOCTYPE mapper
        PUBLIC "-//mybatis.org//DTD Mapper 3.0//EN"
        "http://mybatis.org/dtd/mybatis-3-mapper.dtd">
<mapper namespace="com.ykx.mapper.BookMapperXML">
    <select id="getById" resultType="com.ykx.domain.Book">
        select * from tbl_book where id = #{id}
    </select>

    <select id="getAll" resultType="com.ykx.domain.Book">
        select * from tbl_book
    </select>
</mapper>
③test
@SpringBootTest
public class XMLMybatisTest {

    @Autowired
    private BookMapperXML bookMapperXML;

    //查:根据id查询数据
    @Test
    public void testSelect(){
           Book book = bookMapperXML.getById(1);
    }

    //查:查询所有数据
    @Test
    public void testGetAll(){
        List<Book> books = bookMapperXML.getAll();
        for(Book book : books){
            System.out.println(book);
        }
    }

}
④结果
2.2基于注解
2.2.1增
①mapper
@Insert("insert into tbl_book (id,type,name,description) " +
        "values(#{id},#{type},#{name},#{description})")
Integer insert(Book book);
②test
//增:实体对象新增数据
@Test
public void testInsert(){
    Book book = new Book(11,"新增数据","测试新增","带id的新增测试");
    Integer ans = bookMapper.insert(book);
    System.out.println("受影响的行数:" + ans);
}
③结果
主键id自增并返回结果
关键点:在mapper对应的方法上面加上@Options注解,并设置useGeneratedKeys和keyProperty的属性值。这个只能搭配insert语句使用!
mapper
@Options(useGeneratedKeys = true,keyProperty = "id")
@Insert("insert into tbl_book (type,name,description) " +
        "values(#{type},#{name},#{description})")
Integer autoId(Book book);
test
//增:主键自增且返回值
@Test
public void testAutoId(){
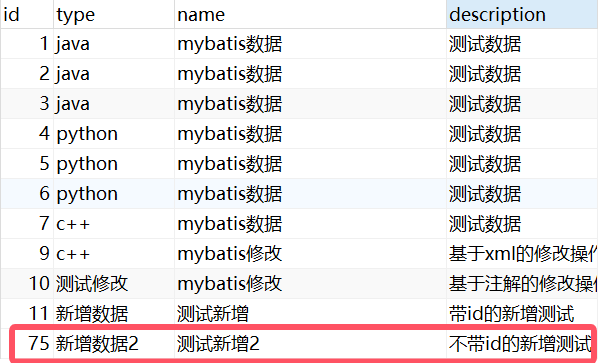
    Book book = new Book(null,"新增数据2","测试新增2","不带id的新增测试");
    Integer ans = bookMapper.autoId(book);
    System.out.println("受影响的行数:" + ans);
    System.out.println("获取主键自增的id值:" + book.getId());
}
结果
2.2.2删
①mapper
//删:根据id删除数据
@Delete("delete from tbl_book where id = #{id}")
Integer delete(Integer id);
②test
//删:根据id删除数据
@Test
public void testDelete(){
    Integer ans = bookMapper.delete(8);
    System.out.println("受影响的行数:" + ans);
}
③结果
删除前
删除后
2.2.3改
①mapper
//改:根据id修改数据
@Update("update tbl_book set type = #{type}, name = #{name}, description = #{description} where id = #{id}")
Integer update(Book book);
②test
//改:根据id修改数据
@Test
public void testUpdate(){
    Book book = new Book(62,"测试修改","mybatis修改","基于注解的修改操作");
    Integer ans = bookMapper.update(book);
    System.out.println("受影响的行数:" + ans);
}
③结果
修改前
修改后
2.2.4查
①mapper
//查:根据id查询数据
@Select("select * from tbl_book where id = #{id}")
Book getById(Integer id);

//查:查询所有数据
@Select("select * from tbl_book")
List<Book> getAll();
②test
//查:根据id查询数据
@Test
public void testSelect(){
    Book book = bookMapper.getById(71);
    System.out.println(book);
}

//查:查询所有数据
@Test
public void testGetAll(){
    List<Book> books = bookMapper.getAll();
    for(Book book : books){
        System.out.println(book);
    }
}
③结果
3.各种返回值类型
对于增、删、改操作一般返回值类型为integer,表示数据表受影响的行数。对于查询操作,一般返回值类型为实体类或是集合类型。
前面已经对增、删、改返回integer进行了测试,这里就不再赘述,下面对查询操作的返回值进行一个总结。
3.1基于xml
①查询单条数据
mapper层接口用对应的实体类接收
//查:根据id查询数据
Book getById(Integer id);
xml文件设置resultType为具体的实体类类型
<select id="getById" resultType="com.ykx.domain.Book">
    select * from tbl_book where id = #{id}
</select>
②查询多条数据
mapper层接口用List集合接收,其泛型为对应的实体类类型
//查:查询所有数据
List<Book> getAll();
xml文件设置resultType为具体的实体类类型
<select id="getAll" resultType="com.ykx.domain.Book">
    select * from tbl_book
</select>
3.2基于注解
①查询单条数据
mapper层接口的返回值类型设置为对应的实体类类型即可
//查:根据id查询数据
@Select("select * from tbl_book where id = #{id}")
Book getById(Integer id);
②查询多条数据
mapper层接口的返回值类型设置为List集合,其泛型为对应的实体类类型即可
//查:查询所有数据
@Select("select * from tbl_book")
List<Book> getAll();
原创内容 未经同意禁止转载 如有引用请标明出处
