目录
二、multipart/form-data 方式上传单个文件
三、multipart/form-data 方式上传多个文件
一、主流方法介绍
1. Base 64
优点:简单易用,可以直接嵌入到文本中。适用于小文件或需要将文件嵌入到JSON等文本格式中的场景。
缺点:编码后的数据大小会增加约33%,不适合大文件传输。需要额外的编码和解码步骤,增加了处理时间。
2. 二进制流传输
优点:传输效率高,适合大文件传输。不需要额外的编码和解码步骤。
缺点:实现相对复杂,需要处理二进制数据。不适合直接嵌入到文本协议中。
3. multipart/form-data
优点:通过HTTP POST请求中的multipart/form-data格式上传文件,易于实现。支持同时上传多个文件和文本字段。
缺点:性能略低于二进制流传输。处理大文件时可能需要更多的内存和处理时间。
4. FTP/SFTP
优点:适合需要长期稳定传输大量文件的场景。提供了丰富的文件管理功能,如目录操作、权限管理等。
缺点:需要额外的服务器配置和维护。安全性相对较低(FTP),SFTP更安全但配置复杂。
5. 云存储服务API
优点:高性能和高可用性,通常具有CDN加速功能。提供丰富的API和SDK,易于集成。安全性高,支持多种认证机制。(如阿里云OSS、AWS S3等)
缺点:需要支付云服务费用。可能存在网络延迟问题。
下面将主要对前三种方式进行演示说明,并附上前后端的示例代码。
二、multipart/form-data 方式上传单个文件

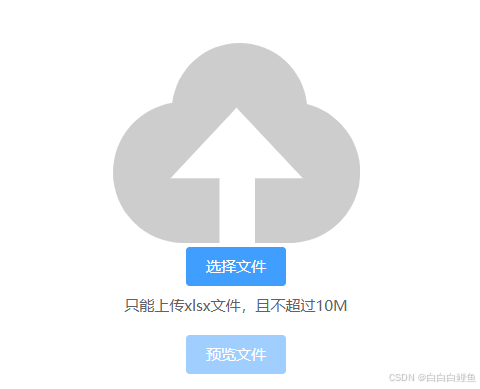
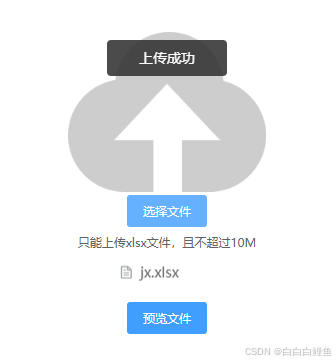
1、前端部分
<template>
  <div class="uploadFile">
    <section>
        <div class="selectFileBox">
          <el-upload
            ref="uploadExcel"
            action="/sensorjxpro/eutest/excel"
            :limit="limitNum"
            name="file"
            :auto-upload="true"
            accept=".xlsx"
            :before-upload="beforeUploadFile"
            :before-remove='removeFile'
            :on-exceed="exceedFile"
            :on-error="handleError"
            :file-list="fileList"
            :http-request="httpRequest"
          >
          <div class="img">
            <img src="@/assets/upload.png" alt="">
          </div>
            <el-button size="small" type="primary">选择文件</el-button>
            <div slot="tip" class="el-upload__tip">
              只能上传xlsx文件,且不超过10M
            </div>
          </el-upload>
          <br/>
          <el-button  size="small" type="primary" @click="goReview" :disabled="isCanClick==true ? false : true">预览文件</el-button>
        </div>
    </section>
  </div>
</template>

<script>
  import {UploadFile} from '@/api/request'
  import domMessage from '@/utils/messageOnce'
  const messageOnce = new domMessage()
export default {
    data(){
      return {
        limitNum:1,
        fileList:[],
        isCanClick:false
      }
    },
    methods:{
      goReview(){
        this.$router.push('/sensorjxpro/web/operationfile/review')
            this.$emit('setActive', 1);
    },
    removeFile(){
      this.fileList=[]
      this.isCanClick = false
    },
      // 上传文件之前的钩子, 参数为上传的文件,若返回 false 或者返回 Promise 且被 reject,则停止上传
  beforeUploadFile(file) {
    const extension = file.name.substring(file.name.lastIndexOf('.') + 1)
    const size = file.size / 1024 / 1024
    if (extension !== 'xlsx' || file.type !== 'application/vnd.openxmlformats-officedocument.spreadsheetml.sheet') {
      messageOnce.error({
                  message:'请上传后缀为.xlsx的excel文件',
                  type:'warning'
              })
              this.isCanClick = false
        }
    if (size > 10) {
      messageOnce.error({
                  message:'文件大小不得超过10M',
                  type:'warning'
              })
              this.isCanClick = false
         }
    },
  // 文件超出个数限制时的钩子
  exceedFile(files, fileList) {
    messageOnce.error({
      type:'warning',
      message: `只能选择 ${
        this.limitNum
      } 个文件,当前共选择了 ${files.length + fileList.length} 个`
    })
    this.isCanClick = false
  },
  // 文件上传失败时的钩子
  handleError(err) {
     this.$message.error(err.msg)
     this.isCanClick = false
  },
  httpRequest(item){
    console.log('item',item);
    this.fileList = item.file
    this.importData()
  },
  importData(){
    let formData = new FormData() //创建一个 FormData 对象
      formData.append('file', this.fileList) // 将文件添加到 FormData 对象中
      UploadFile(formData).then((res)=>{ // 调用 UploadFile API 上传文件,并处理响应。
        const resData = JSON.parse(res.data)
        if(resData.result == 1){
          this.$toast('上传成功')
          // 将表头和表格数据存起来
          sessionStorage.setItem('SET_EXCELHEADER',JSON.stringify(resData.data.excelHeaders))
          sessionStorage.setItem('SET_EXCELDATA',JSON.stringify(resData.data.inJxContents))
          // this.$store.commit('SET_EXCELHEADER',resData.data.excelHeaders)
          // this.$store.commit('SET_EXCELDATA',resData.data.inJxContents)
          this.isCanClick = true // 启用预览按钮
        }
        console.log('上传文件res',res);
      })
  }}

}
</script>

<style lang="scss" scoped>
    @import '@/style/uploadFile/uploadFile.scss'
</style>
对于上传的组件,使用的是element ui 组件 | Element
          <el-upload
            ref="uploadExcel"
            action="/sensorjxpro/eutest/excel"
            :limit="limitNum"
            name="file"
            :auto-upload="true"
            accept=".xlsx"
            :before-upload="beforeUploadFile"
            :before-remove='removeFile'
            :on-exceed="exceedFile"
            :on-error="handleError"
            :file-list="fileList"
            :http-request="httpRequest"
          >
****************************************************************
el-upload 是 Element UI 提供的文件上传组件。
ref="uploadExcel":给组件设置一个引用名称,方便在 JavaScript 中操作。
action="/sensorjxpro/eutest/excel":文件上传的 URL。
:limit="limitNum":限制上传文件的数量,limitNum 是一个绑定的数据属性。
name="file":上传文件的表单字段名。
:auto-upload="true":是否自动上传文件。
accept=".xlsx":只允许上传 .xlsx 文件。
:before-upload="beforeUploadFile":文件上传前的钩子函数。
:before-remove="removeFile":文件移除前的钩子函数。
:on-exceed="exceedFile":超过文件数量限制时的钩子函数。
:on-error="handleError":文件上传失败时的钩子函数。
:file-list="fileList":已上传文件列表,fileList 是一个绑定的数据属性。
:http-request="httpRequest":自定义上传请求的函数。
2、后端部分
使用 MultipartFile 对象进行接收,以及后续的逻辑操作
    @PostMapping("/upload")
    public RespondDto uploadFile(@RequestParam("file") MultipartFile multipartFile) {
        ExcelOperatVo excelOperatVo = excelOperatService.uploadExcel(multipartFile);
        return new RespondDto(excelOperatVo);
    }
public ExcelOperatVo uploadExcel(MultipartFile multipartFile) {
// 保存文件到本地
File dir = new File("uploadFile/excel");
if (!dir.exists()) {
dir.mkdirs();
}
LocalDateTime current = LocalDateTime.now();
DateTimeFormatter formatter = DateTimeFormatter.ofPattern("yyyy-MM-dd");
String formatted = current.format(formatter);
//加上三位随机数
Random random = new Random();
int end3 = random.nextInt(999);
File file = new File(dir.getAbsolutePath() + File.separator + formatted + "-" + end3 + "-" + multipartFile.getOriginalFilename());
try {
multipartFile.transferTo(file);
} catch (IOException e) {
e.printStackTrace();
}
log.info("【上传文件》文件已保存到本地:{}】",file.getAbsolutePath());
// 获取excel文件内容
ArrayList<InJxContent> inJxContents = readExcel(file.getAbsolutePath());
// 读取excel表头 新建动态数组,返回两个数组
SSExcel07Sheet sheet = new SSExcel07Workbook().open(file.getAbsolutePath()).getSheet(0);
ArrayList<ExcelHeaderTvo> excelHeaderTvos = new ArrayList<>();
for (int i = 0; i < 7; i++) {
String cellValue = sheet.getCell(0, i).getCellValue().toString();
ExcelHeaderTvo excelHeaderTvo = new ExcelHeaderTvo(cellValue, cellValue, cellValue, "center", "13%", true);
if(i <= 1){
excelHeaderTvo.setEdit(false);
}
switch (i) {
case 0:
excelHeaderTvo.setField("tel");
break;
case 1:
excelHeaderTvo.setField("name");
break;
case 2:
excelHeaderTvo.setField("degree");
break;
case 3:
excelHeaderTvo.setField("attitude");
break;
case 4:
excelHeaderTvo.setField("duty");
break;
case 5:
excelHeaderTvo.setField("pMPoints");
break;
case 6:
excelHeaderTvo.setField("jxPoints");
break;
case 7:
excelHeaderTvo.setField("coefficient");
break;
}
excelHeaderTvos.add(excelHeaderTvo);
}
ExcelOperatVo excelOperatVo = new ExcelOperatVo(excelHeaderTvos, inJxContents);
return excelOperatVo;
} private ArrayList<InJxContent> readExcel(String filePath) {
SSExcel07Sheet sheet = (new SSExcel07Workbook()).open(filePath).getSheet(0);
ArrayList<InJxContent> inJxContents = new ArrayList<>();
log.info("【readExcel方法开始:】");
//外层控制行,每行为一个jxContent对象
for (int i = sheet.getFirstRowNum() + 1; i <= sheet.getLastRowNum(); i++) {
InJxContent injxContent = new InJxContent();
//内层各项为各列属性值
for (int j = 0; j <= 7; j++) {
if (sheet.getCell(i, j).getCellValue() != null || j == 2) {
switch (j) {
case 0:
injxContent.setTel(BigInteger.valueOf(Long.valueOf((String) sheet.getCell(i, j).getCellValue())));
break;
case 1:
injxContent.setName((String) sheet.getCell(i, j).getCellValue());
break;
case 2:
Double d1 = sheet.getCell(i, j).getXSSFCell().getNumericCellValue() * 100;
injxContent.setDegree(new DecimalFormat("#").format(d1) + "%");
break;
case 3:
injxContent.setAttitude(Integer.valueOf((String) sheet.getCell(i, j).getCellValue()));
break;
case 4:
injxContent.setDuty(Integer.valueOf((String) sheet.getCell(i, j).getCellValue()));
break;
case 5:
injxContent.setPmPoints((String) sheet.getCell(i, j).getCellValue());
break;
case 6:
Float v = Float.parseFloat((String) sheet.getCell(i, j).getCellValue());
String format = new DecimalFormat("#.#").format(v);
injxContent.setJxPoints(Float.parseFloat(format));
break;
case 7:
injxContent.setCoefficient(Float.parseFloat((String) sheet.getCell(i, j).getCellValue()));
break;
default:
log.info("执行了default");
break;
}
}
}
injxContent.setRowkey(i);
inJxContents.add(injxContent);
}
log.info("【上传文件:】excel:内容:{}",inJxContents);
return inJxContents;
}三、multipart/form-data 方式上传多个文件
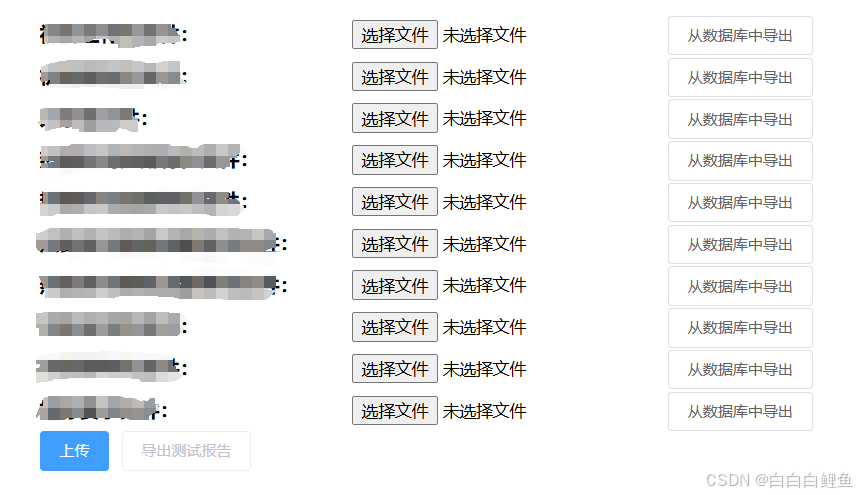
单文件和多文件上传没用太大的区别,但是还是分开介绍一下,此处支持选择一个或多个文件文件后,点击上传一次性全部上传完
这段代码跟单个文件上传相比,主要是加入了循环遍历的逻辑:
      // 获取文件输入框的引用
      const fileInputs = this.$refs.uploadForm.querySelectorAll('input[type="file"]');
      let hasFileSelected = false;
      fileInputs.forEach((fileInput) => {
        const fileList = fileInput.files;
        for (let i = 0; i < fileList.length; i++) {
          formData.append('multipartFiles', fileList[i]);
          formData.append('types', fileInput.id);
          hasFileSelected = true;}
      });
1、前端部分
<template>
  <div>
    <h1>文件上传和导出</h1>
    <form ref="uploadForm" @submit="uploadFormSubmit"  enctype="multipart/form-data">
      <div>
        <label for="初测主特性">初测主特性文件:</label>
        <input type="file" id="初测主特性" name="files[]" accept=".xlsx">
        <el-button class="export-file" >从数据库中导出</el-button>
      </div>
            。。。
      <div>
        <label for="指标要求">指标要求文件:</label>
        <input type="file" id="指标要求" name="files[]" accept=".xlsx">
        <el-button class="export-file" >从数据库中导出</el-button>
      </div>
      <el-button type="primary" @click="uploadFormSubmit">上传</el-button>
      <el-button :disabled="!fileUrls" @click="exportButtonClick">导出测试报告</el-button>
    </form>
  </div>
</template>
<script>
export default {
  data() {
    return {
      fileUrls: null,
    };
  },
  methods: {
    uploadFormSubmit(e) {
      e.preventDefault();
      const formData = new FormData();
      // 获取文件输入框的引用
      const fileInputs = this.$refs.uploadForm.querySelectorAll('input[type="file"]');
      let hasFileSelected = false;
      fileInputs.forEach((fileInput) => {
        const fileList = fileInput.files;
        for (let i = 0; i < fileList.length; i++) {
          formData.append('multipartFiles', fileList[i]);
          formData.append('types', fileInput.id);
          hasFileSelected = true;}
      });
      if (!hasFileSelected) {
        alert('请至少选择一个文件!');
        return;
      }
      this.showLoadingMessage('文件上传中...');
      this.$request.post('/manage/server/uploadExcels', formData)
          .then((response) => {
            // console.log(response.data);
            const data = response.data;
            if (data.result === 1 && data.data.length > 0) {
              this.fileUrls = data.data;
              this.showMessage('文件上传完成!', 'success');
            }
          })
          .catch((error) => {
            console.error('上传失败:', error);
            this.showMessage('文件上传失败,请重试!', 'error');
          });
    },
    exportButtonClick() {
      const fileUrls = this.fileUrls;
      console.log(fileUrls);
      if (!fileUrls) {
        alert('请先上传文件!');
        return;
      }
      this.showLoadingMessage('文件导出中...');
      this.$request.get('/manage/server/writeExcel', {
        params: {
          // fileUrls: fileUrls,
          // 通过将参数值转换为逗号分隔的字符串,可以避免方括号被自动编码,从而解决这个异常问题。记得在后端接收参数时进行相应的处理,将逗号分隔的字符串转换为数组再进行后续操作。
          fileUrls: fileUrls.join(',')
        },
        responseType: 'blob'
      })
          .then((response) => {
            const blob = new Blob([response.data]);
            const url = window.URL.createObjectURL(blob);
            const a = document.createElement('a');
            a.href = url;
            a.download = '测试报告.xlsx';
            a.click();
            this.showMessage('文件导出完成!', 'success');
            setTimeout(() => {
              const fileInputs = this.$refs.uploadForm.querySelectorAll('input[type="file"]');
              fileInputs.forEach((fileInput) => {
                fileInput.value = '';
              });
              this.fileUrls = null;
              const messageElements = document.querySelectorAll('.loading, .success, .error');
              messageElements.forEach((messageElement) => {
                messageElement.remove();
              });
            }, 5000)
          })
          .catch((error) => {
            console.error('导出失败:', error);
            this.showMessage('文件导出失败,请重试!', 'error');
          });
    },
    showLoadingMessage(message) {
      const loadingElement = document.createElement('div');
      loadingElement.classList.add('loading');
      loadingElement.innerText = message;
      this.$refs.uploadForm.appendChild(loadingElement);
    },
    showMessage(message, type) {
      const messageElement = document.createElement('div');
      messageElement.classList.add(type);
      messageElement.innerText = message;
      this.$refs.uploadForm.appendChild(messageElement);
    }
  }
}
</script>
2、后端部分
后端接收参数则从 MultipartFile 变成了 MultipartFile[]
    /**
     * 1、接受前端传入的文件数组和文件类型对应的数组【文件和类型数组要一一对应】,下载到本地,并将下载到本地的文件路径返回给前端
     * 2、url: http://localhost:xxxxx/manage/server/uploadExcels
     * @param multipartFiles
     * @param types
     */

    @PostMapping(value = "/uploadEndTestExcels")
    public RespondDto upLoadFiles(@NonNull @RequestParam("multipartFiles") MultipartFile[] multipartFiles,
                                  @NonNull @RequestParam("types") String[] types) throws IOException {
        return fileService.upLoadFiles(multipartFiles,types);
    }

    /**
     * 1、接受前端传入的文件路径参数,对文件进行解析,最终生成/导出一个最终的Excel文件
     * 2、url: http://localhost:xxxx/manage/server/writeExcel
     * @param fileUrls
     * @throws IOException
     * @throws URISyntaxException
     */

    @GetMapping(value = "/writeEndTestExcel")
    public void writeExcel(HttpServletResponse response ,
                           @RequestParam("fileUrls") String[] fileUrls) throws IOException, URISyntaxException {
        fileService.writeExcel(response,fileUrls);
    }
    /**
     * 实现多文件一次性上传功能【上传多个Excel文件,并获取每个上传文件的类型】
     *
     * 0、实现上传的文件保存到本地
     * 1、将每个文件的名字以文件类型的名字进行重命名,并且保存到指定文件路径下,并且将文件文件路径以数组的形式返回给前端
     */
    public RespondDto upLoadFiles(MultipartFile[] files, String[] types) throws IOException {
        String formattedDate = LocalDateTime.now().format(DateTimeFormatter.ofPattern("yyyy-MM-dd"));
        //加上三位随机数
        int randomNum = new Random().nextInt(999);
        //将每次上传的Excel文件放到指定的文件夹下
        File dir = new File(absolutePath + File.separator + "uploadFile" + File.separator + formattedDate + randomNum);
        if (!dir.exists()) {
            dir.mkdirs();}
        // 将重命名文件名变量fileRename移至循环外部,初始化为null
        String fileRename = null;
        // 将fileToSave移至循环外部,初始化为null
        File fileToSave;
        List<String> fileUrls = new ArrayList<String>();
        // 存储已上传的type类型
        Set<String> uploadedTypes = new HashSet<String>();
        for (int i = 0; i < files.length; i++) {
            MultipartFile file = files[i];
            String type = types[i];
            // 判断文件或类型不能为空,不能上传空文件
            if (file.isEmpty() || StringUtils.isEmpty(type)) {
                return new RespondDto<>("文件或类型不能为空,请重新上传!");}
            String originalFileName = file.getOriginalFilename();
            // 判断文件后缀名是否符合要求
            if (!originalFileName.endsWith("xlsx")) {
                log.error(originalFileName + "不是.xlsx后缀的Excel文件!");
                throw new RuntimeException("仅支持.xlsx后缀的Excel文件!");}
            uploadedTypes.add(type);
            String fileExt = originalFileName.substring(originalFileName.lastIndexOf("."));
            Workbook workbook = new XSSFWorkbook(file.getInputStream());
            Sheet sheet = workbook.getSheet("XXXX表");
            if (Objects.isNull(sheet)) {
                Sheet sheet2 = workbook.getSheet("增益压缩");
                Row row = sheet2.getRow(0);
                Cell cell = row.getCell(0);
                if (cell != null && Objects.equals(cell.getCellTypeEnum(), CellType.STRING)) {
                    String value = cell.getStringCellValue();
                    if (value.equals("测试项目")) {
                        fileRename = type + "指标";}}
            } else {
                Row row = sheet.getRow(0);
                Cell cell = row.getCell(7);
                if (cell != null && Objects.equals(cell.getCellTypeEnum(), CellType.STRING)) {
                    String value = cell.getStringCellValue();
                    fileRename = type + "XX性" + value.substring(value.length() - 3);
                }}
            // 在循环内部为fileToSave赋值
            fileToSave = new File(dir.getAbsolutePath() + File.separator + fileRename + fileExt);
            if (fileToSave.exists()) {
                fileToSave.delete();}
            FileOutputStream os = null;
            try {
                os = new FileOutputStream(fileToSave);
                IOUtils.copy(file.getInputStream(), os);
                String fileUrl = fileToSave.getAbsolutePath();
                fileUrls.add(fileUrl);
            } catch (Exception e) {
                e.printStackTrace();
                return new RespondDto<>("文件上传失败!");
            } finally {
                if (os != null) {
                    IOUtils.closeQuietly(os);}}
            log.info("【源文件】" + originalFileName + "已保存到本地,【文件名】是 " + fileRename + " 【存放路径是】 " + fileToSave.getAbsolutePath());
        }
        return new RespondDto<>(fileUrls);
    }
/**
* 实现多文件解析并导出生成测试报告功能
*
* 0、将源文件路径遍历出来,每次都放到输入流中,同时去遍历配置文件,将类型名称与文件名称符合的配置文件读取出来
* 1、进行copy操作,最后将源文件路径遍历完后将目标Excel进行保存
*/
@Override
public RespondDto writeExcel(HttpServletResponse response, String[] fileUrls) throws IOException, URISyntaxException {
String excelFilePath = absolutePath + File.separator + "template.xlsx";
FileInputStream destinationFileInputStream = new FileInputStream(excelFilePath);
Workbook destinationWorkbook = new XSSFWorkbook(destinationFileInputStream);
List<String> errorMessages = new ArrayList<>();
Integer currentRow = 0;
for (String url : fileUrls) {
// 追踪当前需要写入的行数
processFile(url, destinationWorkbook, configCheck.getConfig(), errorMessages , currentRow);
if(url != null && url.contains("符合性")){
currentRow++;
}
}
destinationWorkbook.setForceFormulaRecalculation(true);
destinationWorkbook.write(response.getOutputStream());
destinationFileInputStream.close();
destinationWorkbook.close();
if (errorMessages.isEmpty()) {
return new RespondDto<>("Excel导出成功!");
} else {
String errorInfo = String.join("\n", errorMessages);
return new RespondDto<>("Excel导出过程中发生错误:\n" + errorInfo);
}
}四、Base 64 方式上传单个或多个文件
1、Base64 和 二进制流 是两种不同的概念:
二进制流:
直接传输文件的原始字节数据。适用于大文件传输,效率高。不需要额外的编码和解码步骤。
Base64:
将二进制数据转换为文本形式,以便在文本协议(如HTTP)中传输。编码后的数据大小会增加约33%。需要在发送前进行编码,在接收后进行解码。
2、前端部分
        <el-col :span="24">
          <el-form-item label="上传文件:">
            <el-button type="primary" @click="handleFileSelect">拍照/视频</el-button>
            <input id="fileInput" type="file" ref="fileInput" multiple accept="image/*,video/*"
                   @change="handleFileChange" style="display: none;">
            <div v-for="(file, index) in form.fileList" :key="index">
              <el-image :src="file.content" v-if="file.type === 'image'"                style="max-width: 100px; max-height: 100px;"></el-image>
              <video v-else-if="file.type === 'video'" :src="file.content" controls                style="max-width: 100px; max-height: 100px;"></video>
              <i class="el-icon-delete" @click="deleteFile(index)"></i>
            </div>
            <div style="display: block; font-size: 12px; color: #888;">
              支持一次上传一个/多个文件,但不是必选项,若无法描述清楚,或需操作多步骤时应拍照/视频
            </div>
          </el-form-item>
        </el-col>
handleFileSelect() {
console.log('文件选择操作触发');
this.$refs.fileInput.click();
},
handleFileChange(event) {
console.log('文件改变事件触发');
let files = event.target.files;
for (let i = 0; i < files.length; i++) {
const file = files[i];
// 检查文件类型是否符合要求
if (!this.checkFileType(file)) {
alert('文件格式不符合要求,图片只能识别png、jpg、jpeg,视频只能识别mp4、avi、mov !');
continue;
}
const reader = new FileReader();
reader.onload = e => {
let fileType = file.type.includes('video') ? 'video' : 'image';
this.form.fileList.push({ content: e.target.result, type: fileType, file: file });
};
reader.readAsDataURL(file);
}
},
checkFileType(file) {
const imageTypes = ['image/png', 'image/jpeg', 'image/jpg'];
const videoTypes = ['video/mp4', 'video/avi', 'video/quicktime'];
if (file.type.includes('image')) {
return imageTypes.includes(file.type);
} else if (file.type.includes('video')) {
return videoTypes.includes(file.type);
}
return false;
},
toBase64(file, callback) {
console.log('开始转换文件为Base64编码');
const reader = new FileReader();
reader.readAsDataURL(file);
reader.onload = () => {
const base64 = reader.result.split(',')[1];
callback(base64);
};
reader.onerror = error => {
console.error('Error converting file to base64:', error);
};
},
saveDataToBackend() {
console.log('开始保存数据到后端');
if (!this.form.operation) {
alert('请完成备注后再保存!');
return;
}
this.loading = true; // 开始保存时显示loading图标
const reqData = {
productId: this.form.productId,
currentLocation: this.form.currentLocation,
operation: this.form.operation, // 添加操作种类
fileList: this.form.fileList.length === 0 ? null : [], // 根据文件列表是否为空初始化 fileList
userIndex: this.getPersonIndex(),
questReason: this.form.questReason, // 问题描述
isUsed: sessionStorage.getItem(key_DingResponseUsed) || cachedResponseUsed ,
isStored: sessionStorage.getItem(key_DingResponseStored) || cachedResponseStored,
belongContent:this.form.belongContent //归属项目
};
// 如果 fileList 不为空,进行 Base64 转换
if (this.form.fileList.length > 0) {
const promises = this.form.fileList.map(file => {
return new Promise((resolve) => {
this.toBase64(file.file, base64 => {
reqData.fileList.push({
content: base64,
type: file.type,
});
resolve();
});
});
});
// 等待所有文件转换完成后再发送请求
Promise.all(promises)
.then(() => {
// 发送请求到后端
return SensorBorderRequest.SaveAllCardRecords(reqData);
})
.then(response => {
console.log('保存成功:', response);
this.$message.success('保存成功!');
setTimeout(() => {
this.resetTestingFields(); // 重置表单字段
this.$router.push("/ddinguia/web/history");
}, 500); // 0.5 秒后跳转
})
.catch(error => {
console.error('保存失败:', error);
this.$message.error('保存失败!');
})
.finally(() => {
this.loading = false; // 保存完成后取消loading状态
});
} else {
// 如果 fileList 为空,直接发送请求
SensorBorderRequest.SaveAllCardRecords(reqData)
.then(response => {
console.log('保存成功:', response);
this.$message.success('保存成功!');
setTimeout(() => {
this.resetTestingFields(); // 重置表单字段
this.$router.push("/ddinguia/web/history");
}, 500); // 0.5 秒后跳转
})
.catch(error => {
console.error('保存失败:', error);
this.$message.error('保存失败!');
})
.finally(() => {
this.loading = false; // 保存完成后取消loading状态
});
}
},
3、后端部分
对于后端部分,接收到的文件就是以base64编码的字符串,按照对象格式进行接收转化,再解码就可以保存到服务器上了
    public class ContentFile {

        private String name;//文件名
        private String content;// base64
        private String type; // 图片或者视频
    }


    private List<String> saveFilesByType(List<ContentFile> files) {
        if (files == null || files.isEmpty()) {
            return new ArrayList<>();
        }
        List<String> urlList = new ArrayList<>();
        for (ContentFile file : files) {
            if (file == null || file.getContent() == null || file.getContent().isEmpty()) {
                continue;
            }
            String fileType = file.getType();
            String extension = getFileExtensionByType(fileType);
            if (extension.isEmpty()) {
                // 不支持的文件类型,进行相应的处理
                continue;
            }
            String fileName;
            if (file.getName() != null && !file.getName().isEmpty()) {
                // 获取UUID,并截取前三位
//                String shortUUID = UUID.randomUUID().toString().substring(0, 3);
                //fileName = file.getName() + shortUUID + extension;
                fileName = file.getName() +  extension;
            } else {
//                System.out.println("44444444444");
                // 获取当前时间
                Date currentDate = new Date();
                // 格式化日期时间
                SimpleDateFormat dateFormat = new SimpleDateFormat("yyyyMMdd_HHmmss");
                String formattedDate = dateFormat.format(currentDate);
                // 获取UUID,并截取前三位
                String shortUUID = UUID.randomUUID().toString().substring(0, 3);
                // 构造新的文件名
                fileName = fileType + "_" + formattedDate + "_" + shortUUID + extension;
            }
            File directory = new File(fileProperties.getSavePath() + File.separator + fileType + "s");
            System.out.println("fileProperties.getSavePath()对应的路径是:" + directory);
            if (!directory.exists()) {
                directory.mkdirs();
            }
            String fileSavePath = fileProperties.getSavePath() + fileType + "s" + File.separator + fileName;
            System.out.println("fileSavePath文件保存的路径是:" + fileSavePath);
            try (FileOutputStream fos = new FileOutputStream(fileSavePath)) {
                byte[] decodedBytes = Base64.getDecoder().decode(file.getContent());
                fos.write(decodedBytes);
                urlList.add("static/ddinguia" + File.separator + "server" + File.separator + "files" + File.separator + fileType + "s" + File.separator + fileName);
                System.out.println(urlList);
            } catch (IOException e) {
                throw new RuntimeException(e);
            }
        }
        return urlList;
    }
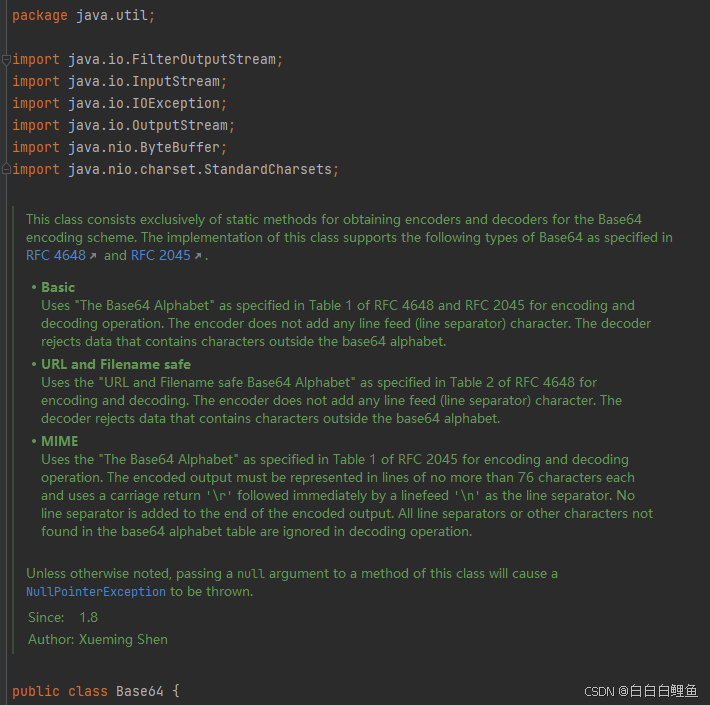
关于base 64的工具类 可以自己写,也可以使用 java.util 自带的
五、二进制流传输文件
1、前端部分
使用FormData对象可以方便地处理文件上传,但这里为了演示二进制流传输,直接将文件读取为二进制数据
<template>
  <div>
    <input type="file" @change="handleFileChange" />
    <button @click="uploadFile">上传</button>
  </div>
</template>

<script>
import axios from 'axios';

export default {
  data() {
    return {
      file: null,
    };
  },
  methods: {
    handleFileChange(event) {
      this.file = event.target.files[0];
    },
    async uploadFile() {
      if (!this.file) {
        alert('请选择一个文件');
        return;
      }

      const formData = new FormData();
      formData.append('file', this.file);

      try {
        const response = await axios.post('http://localhost:8080/upload', formData, {
          headers: {
            'Content-Type': 'application/octet-stream',
          },
        });
        console.log('文件上传成功', response.data);
      } catch (error) {
        console.error('文件上传失败', error);
      }
    },
  },
};
</script>
2、后端部分
Spring Boot 使用@RequestBody注解接收二进制数据,并将其保存到指定路径。
import org.springframework.web.bind.annotation.*;
import org.springframework.web.multipart.MultipartFile;

import java.io.IOException;
import java.nio.file.Files;
import java.nio.file.Path;
import java.nio.file.StandardOpenOption;

@RestController
public class FileUploadController {

    @PostMapping("/upload")
    public String uploadFile(@RequestBody byte[] fileData) {
        try {
            // 保存文件到指定路径
            Path path = Path.of("path/to/save/file");
            Files.write(path, fileData, StandardOpenOption.CREATE, StandardOpenOption.TRUNCATE_EXISTING);
            return "文件上传成功";
        } catch (IOException e) {
            e.printStackTrace();
            return "文件上传失败";
        }
    }
}


