目录
@ConfigurationProperties + @Component
@ConfigurationProperties + @EnableConfigurationProperties
springboot原理
设计思想
自动配置原理
@SpringBootApplication
包含了:
@Target({ElementType.TYPE})
@Retention(RetentionPolicy.RUNTIME)
@Documented
@Inherited
@SpringBootConfiguration@Configuration
@Component
@EnableAutoConfiguration@AutoConfigurationPackage
@Import({Registrar.class})Registrar类中:
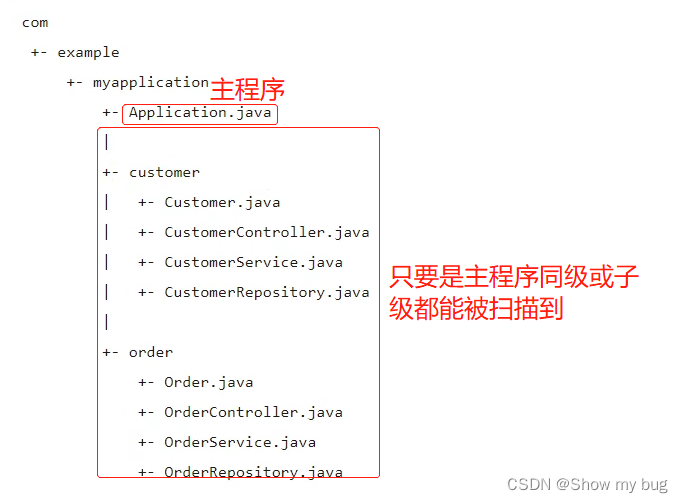
将(默认主程序所在的)包下的所有组件导入进来
@Import({AutoConfigurationImportSelector.class})
AutoConfigurationImportSelector 类中:
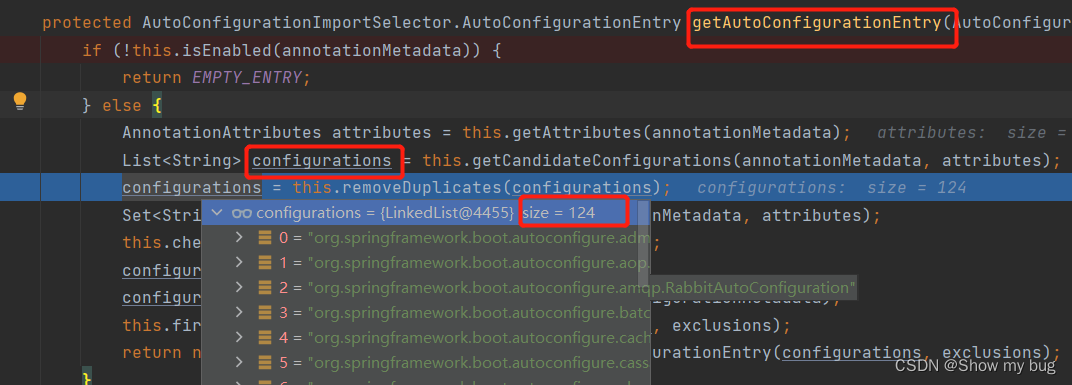
debug进入 getAutoConfigurationEntry 这个方法:
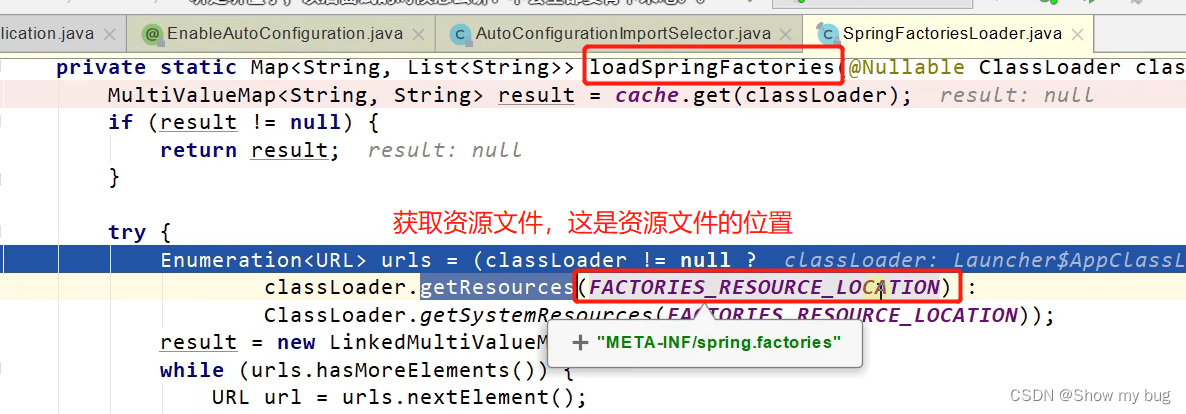
最终利用:private static Map<String, List<String>> loadSpringFactories(@Nullable ClassLoader classLoader) {} 这个方法得到所有组件
怎么得到:从META-INF/spring.factories位置来加载一个文件
默认扫描我们当前系统里面所有META-INF/spring.factories位置的文件
有的包有这个文件,有的没有
最核心的包,他的spring.factiries里面写死了所有自动配置类, springboot一启动就会去加载
但是按照条件装配规则 @Configuration( ),最终会按需加载
不满足条件的不加载:
只要生效的配置类就会给容器中装配很多组件,相当于拥有了这些功能
最后:@AutoConfigurationPackage 是导入主程序所在的包下所有的组件
@Import({AutoConfigurationImportSelector.class}) 导入的是所有需要依赖的包(maven中声明,spring底层逻辑需要)
总结:
@ComponentScan(excludeFilters = {
@Filter(type = FilterType.CUSTOM, classes = {TypeExcludeFilter.class} ),
@Filter( type = FilterType.CUSTOM, classes = {AutoConfigurationExcludeFilter.class} )}
)
springboot 启动原理
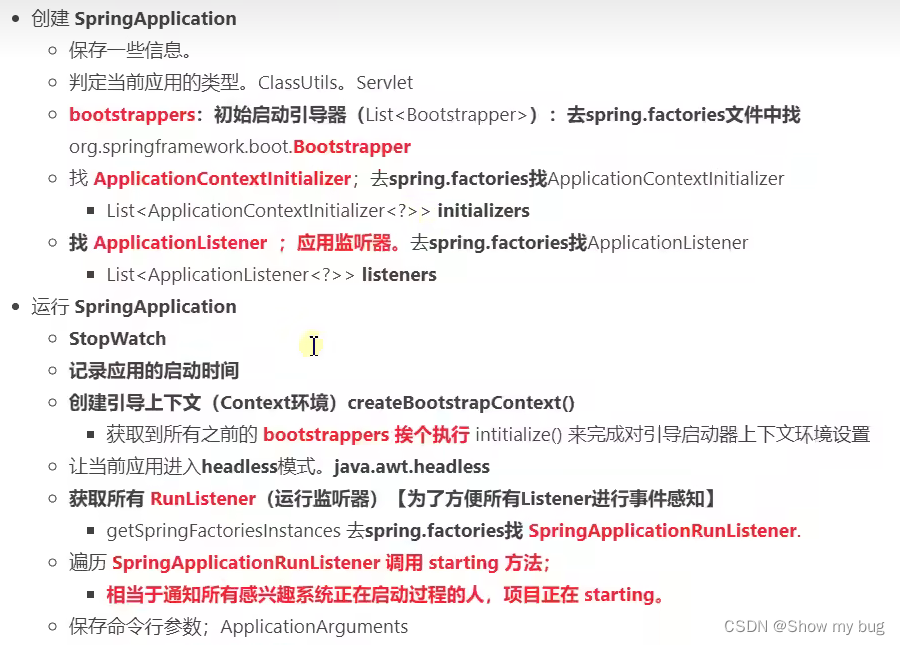
1.创建 SpringbootApplication
保存一些信息:
- 主类的名称
- 判断当前应用的类型:WebApplicationType.deduceFromClasspath(); 工具类 ClassUtils
- 找初始化器 ApplicationContextInitializer,去 spring.factories 找
- 找应用监听器 ApplicationListener,去 spring.factories 找
    public SpringApplication(ResourceLoader resourceLoader, Class<?>... primarySources) {
        this.sources = new LinkedHashSet();
        this.bannerMode = Mode.CONSOLE;
        this.logStartupInfo = true;
        this.addCommandLineProperties = true;
        this.addConversionService = true;
        this.headless = true;
        this.registerShutdownHook = true;
        this.additionalProfiles = new HashSet();
        this.isCustomEnvironment = false;
        this.lazyInitialization = false;
        this.resourceLoader = resourceLoader;
        Assert.notNull(primarySources, "PrimarySources must not be null");
        this.primarySources = new LinkedHashSet(Arrays.asList(primarySources));
        this.webApplicationType = WebApplicationType.deduceFromClasspath();
        this.setInitializers(this.getSpringFactoriesInstances(ApplicationContextInitializer.class));
        this.setListeners(this.getSpringFactoriesInstances(ApplicationListener.class));
        this.mainApplicationClass = this.deduceMainApplicationClass();
    }
2.启动 SpringbootApplication
核心方法
    public ConfigurableApplicationContext run(String... args) {//args是如果用命令行启动传入的参数
        StopWatch stopWatch = new StopWatch();
        //记录应用的启动时间
        stopWatch.start();
        //创建引导上下文(context环境)
        ConfigurableApplicationContext context = null;
        Collection<SpringBootExceptionReporter> exceptionReporters = new ArrayList();
        //让当前应用进入headless模式,java.awt.headless(自力更生模式...)
        this.configureHeadlessProperty();
        //获取所有的 Runlistenner (运行监听器),方便所有的 Listener 进行事件感知
        SpringApplicationRunListeners listeners = this.getRunListeners(args);
         //所有监听器调用它的 starting(),
        listeners.starting();

        Collection exceptionReporters;
        try {
            //保存命令行参数
            ApplicationArguments applicationArguments = new DefaultApplicationArguments(args);
            //准备环境(获取)
            ConfigurableEnvironment environment = this.prepareEnvironment(listeners, applicationArguments);
            //配置环境
            this.configureIgnoreBeanInfo(environment);
            Banner printedBanner = this.printBanner(environment);
            //根据 webApplicationType 创建IOC容器 ApplicationContext (重要)
            context = this.createApplicationContext();
            exceptionReporters = this.getSpringFactoriesInstances(SpringBootExceptionReporter.class, new Class[]{ConfigurableApplicationContext.class}, context);
            //准备 IOC容器(ApplicationContext)的基本信息
            this.prepareContext(context, environment, listeners, applicationArguments, printedBanner);
            //刷新 IOC容器(核心部分),创建容器中的所有组件
            this.refreshContext(context);
            //容器刷新后的工作
            this.afterRefresh(context, applicationArguments);
            //容器启动花费时间
            stopWatch.stop();
            if (this.logStartupInfo) {
                (new StartupInfoLogger(this.mainApplicationClass)).logStarted(this.getApplicationLog(), stopWatch);
            }
            //所有监听器调用它的 started(),通知所有监听器已经 started()
            listeners.started(context);
            //获取容器中的 ApplicationRunner,CommandLineRunner并合并排序,遍历调用他们的 run()
            this.callRunners(context, applicationArguments);
        } catch (Throwable var10) {
            this.handleRunFailure(context, var10, exceptionReporters, listeners);
            throw new IllegalStateException(var10);
        }

        try {
            listeners.running(context);
            return context;
        } catch (Throwable var9) {
            this.handleRunFailure(context, var9, exceptionReporters, (SpringApplicationRunListeners)null);
            throw new IllegalStateException(var9);
        }
    }
具体细节
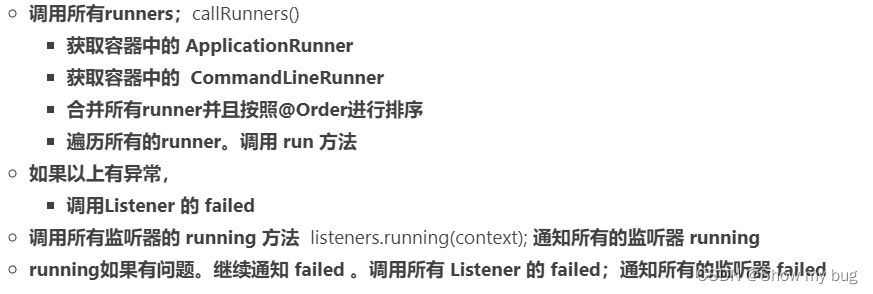 自定义事件监听组件
依赖管理
- 父项目做依赖管理
    <!-- pom.xml  -->
<parent>
        <groupId>org.springframework.boot</groupId>
        <artifactId>spring-boot-starter-parent</artifactId>
        <version>2.2.1.RELEASE</version>
        <relativePath/> <!-- lookup parent from repository -->
</parent>

<!-- 点击 spring-boot-starter-parent 进入里面 -->

<!-- parent里面还有父项目 -->
  <parent>
    <groupId>org.springframework.boot</groupId>
    <artifactId>spring-boot-dependencies</artifactId>
    <version>2.2.1.RELEASE</version>
    <relativePath>../../spring-boot-dependencies</relativePath>
  </parent>

点 <artifactId> 标签内容进去,里面 几乎声明了所有开发中常用的依赖的版本号
2.如果需要修改版本号,在pom.xml里:
3.开发导入starter场景启动器
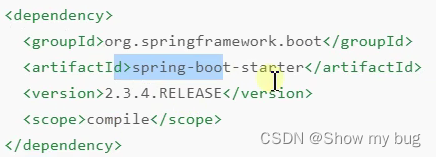
1.<artifactId>spring-boot-starter-web</artifactId>,只要引入starter,这个场景所有常规需要的依赖都会自动引入2.*-spring-boot-starter:第三方为我们提供的简化开发的场景启动器
3.所有启动器最底层的依赖:
4.无需关注版本号,自动版本仲裁
1.引入默认依赖可以不写版本号
2.不在父项目的依赖要写
自动配置功能
自动配好Tomcat
引入 tomcat
        spring-boot-starter-web 引入了 spring-boot-starter-tomcat
配置 tomcat
自动配好springMVC
引入SpringMVC全套组件
自动配置SpringMVC常用功能
自动配好Web常见功能,
如: 字符编码问题
默认的包结构
默认的包扫描规则:在主程序所在的包
自定义扫描路径:
或者:@ComponentScan() 指定扫描路径
或者注释掉:@SpringBootApplication 写另外三个并自定义路径(因为SpringBootApplication 包含的就是这三个)
各种配置拥有默认值
按需加载所有自动配置项
非常多的starter
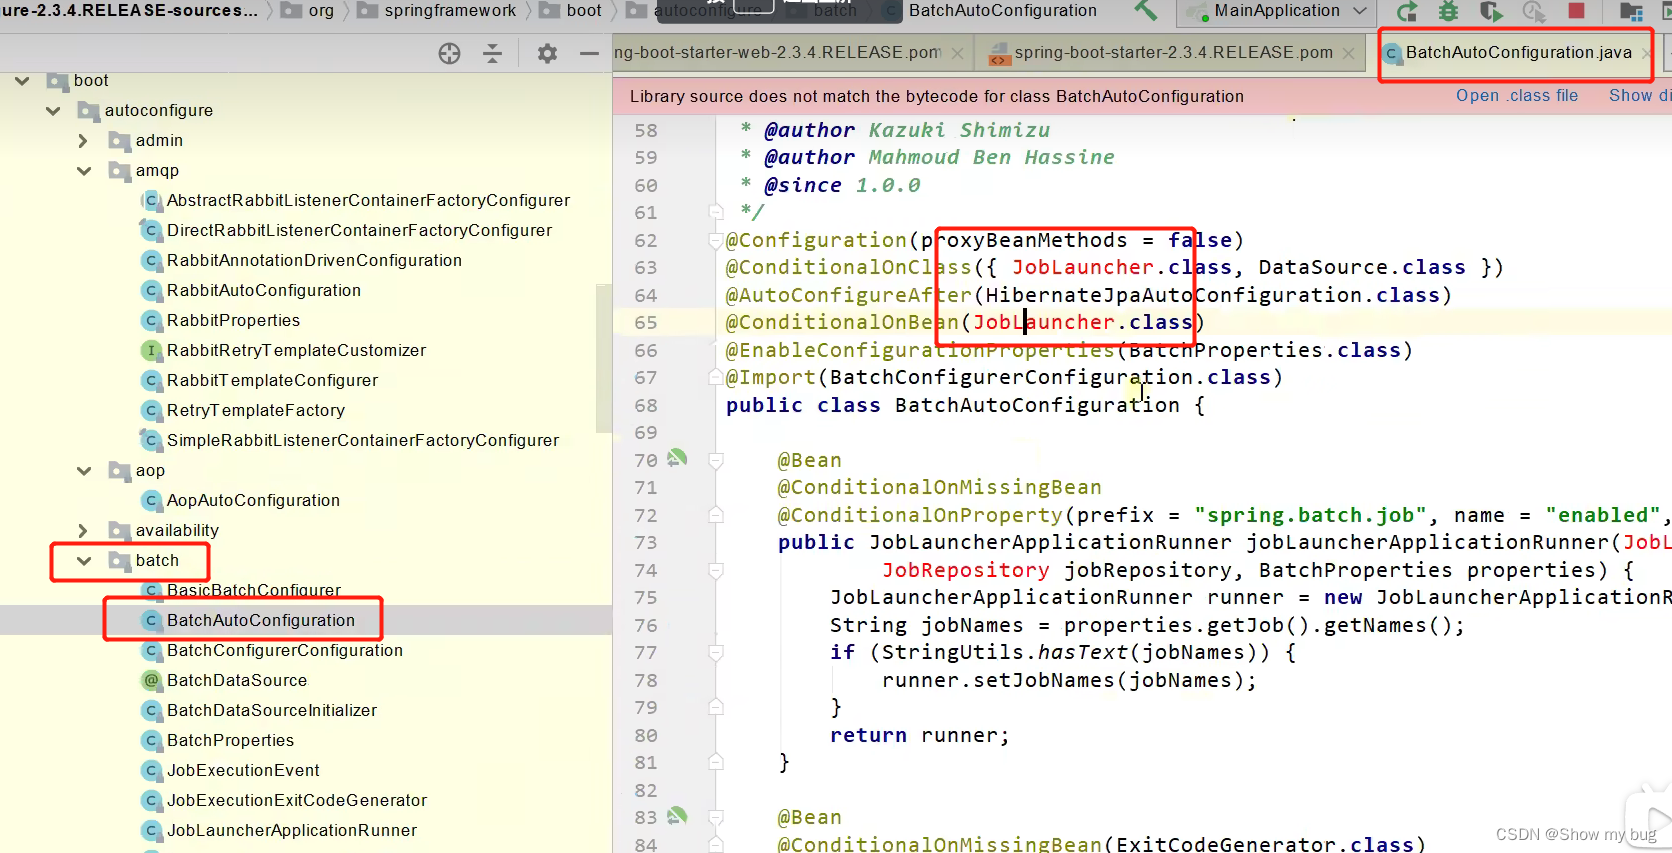
引入了哪些场景这个场景的自动配置才会开启
举例:
1.batch 依赖未被引入maven,所以现在右边是有爆红的(表示未生效)
2.当加了依赖过后:spring-boot-starter-batch
3.再刷新 springboot就会去下载所需要的包,就不会爆红了
Springboot的所有自动配置功能都在:spring-boot-autoconfigure 包里面
容器功能
组件添加
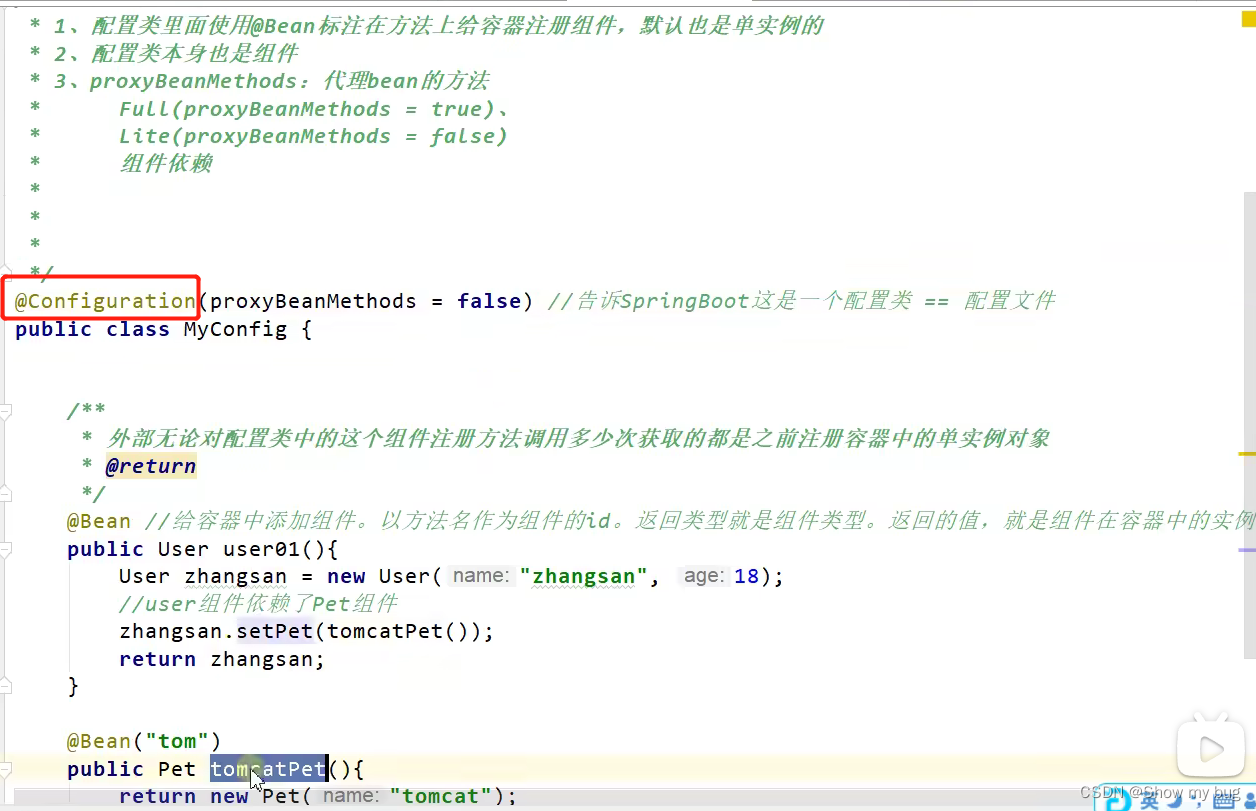
@Configuration
@Import
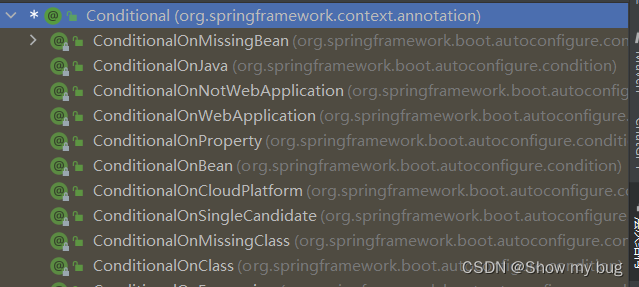
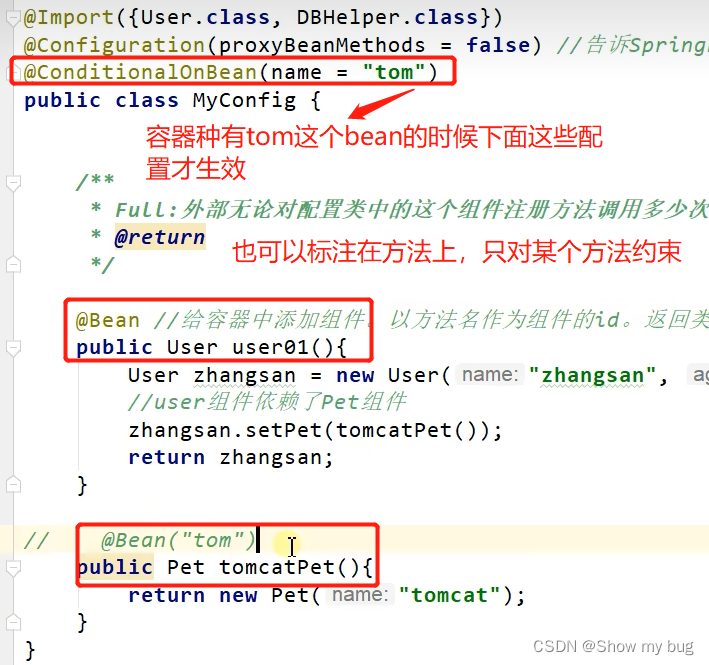
@Conditional
条件装配:满足 Conditional 指定的条件则进入组件注入
用法:
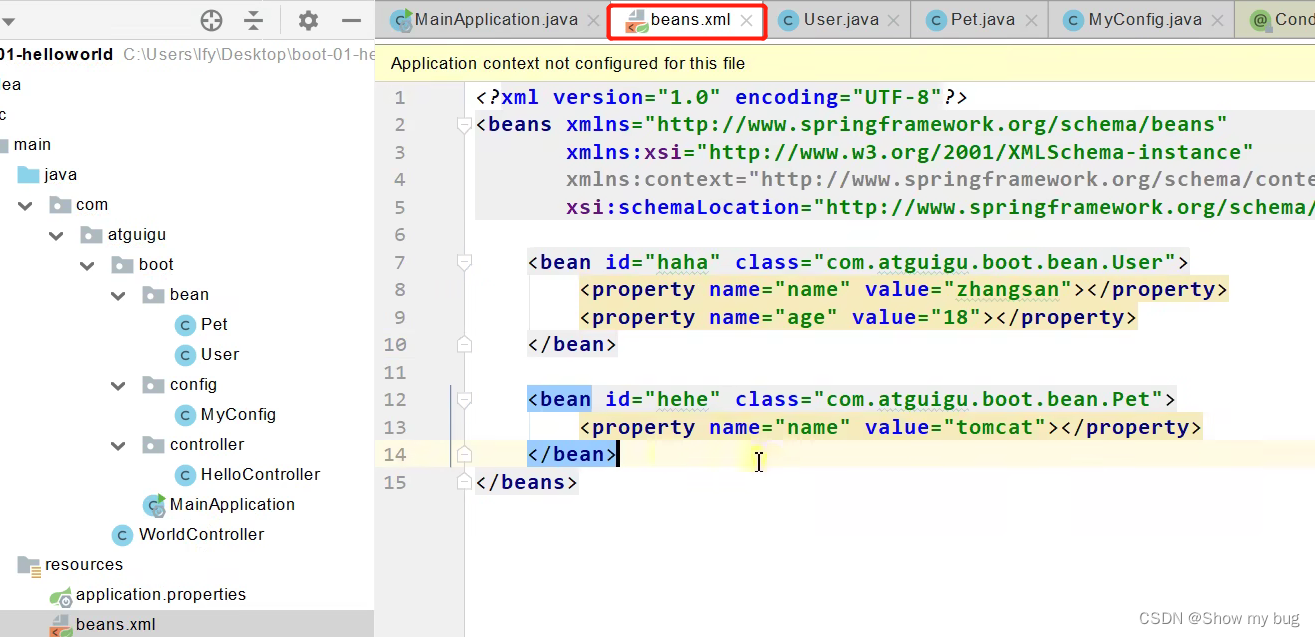
@ImportResource
配置绑定
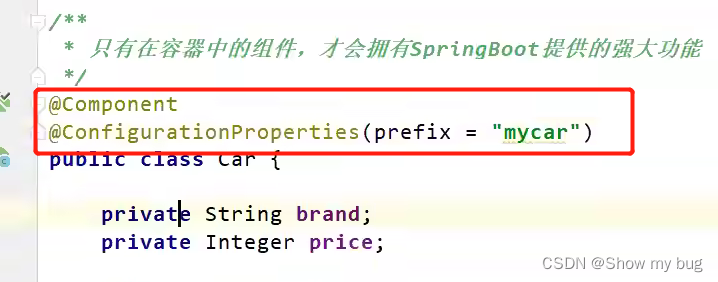
@ConfigurationProperties + @Component
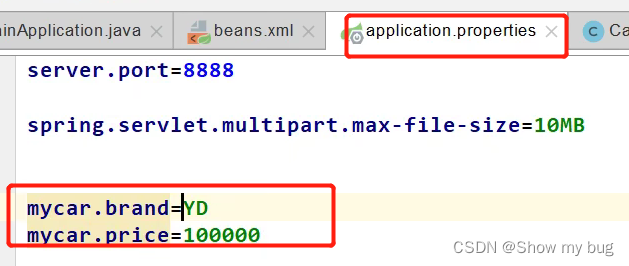
配置文件的绑定到bean
配置文件
@ConfigurationProperties + @EnableConfigurationProperties
原理同上
@ConfigurationProperties 不变
@EnableConfigurationProperties 加在配置类上,并且说明需要注入哪个类


