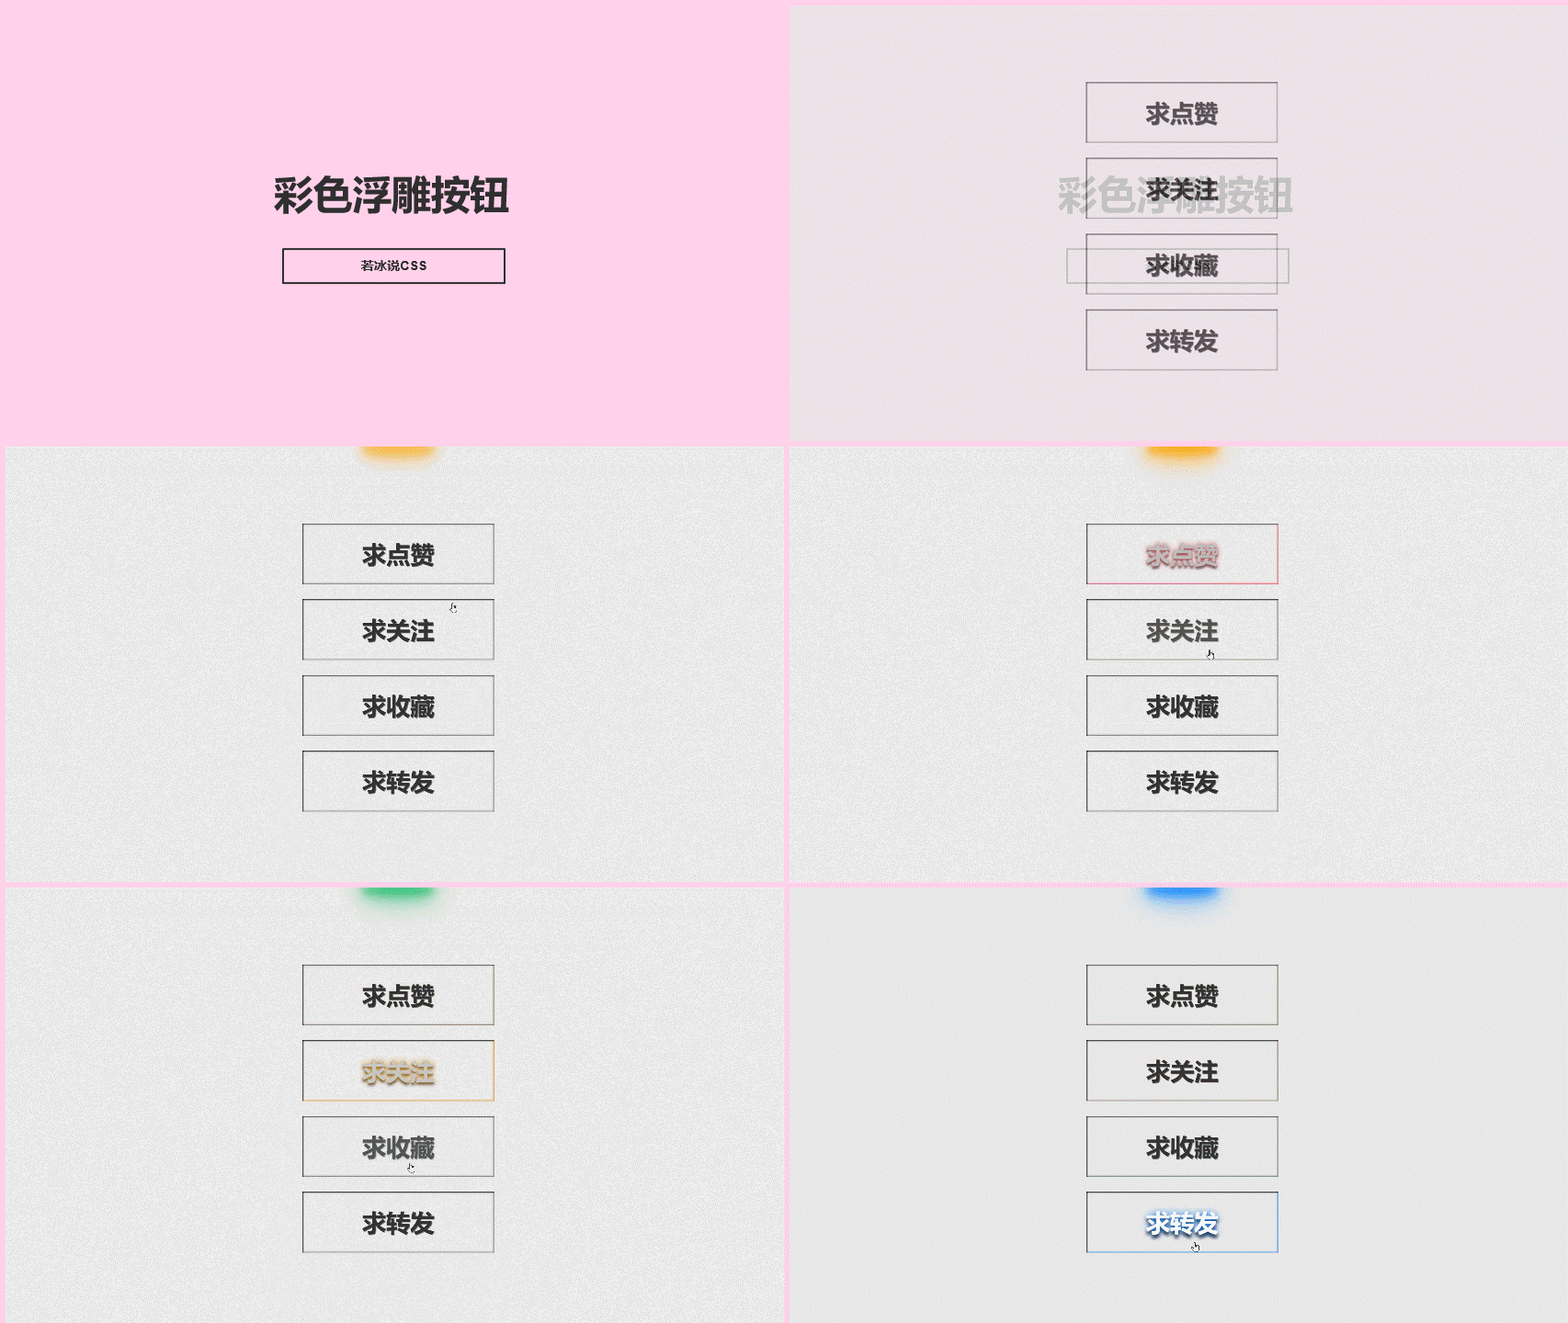
效果演示
实现了一个彩色按钮特效,包括一个按钮(button)和一个前景色(::before)。按钮具有四种不同的颜色,当鼠标悬停在按钮上时,前景色会出现渐变效果,并且按钮的颜色、文本阴影和边框阴影会发生变化。整个按钮具有立体感,使其看起来更加美观。
Code
HTML
<!DOCTYPE html>
<html lang="en">

<head>
    <meta charset="UTF-8">
    <meta name="viewport" content="width=device-width, initial-scale=1.0">
    <title>彩色浮雕按钮</title>
    <link rel="stylesheet" href="./25-彩色浮雕按钮.css">
</head>

<body>
    <button>求点赞</button>
    <button>求关注</button>
    <button>求收藏</button>
    <button>求转发</button>
</body>

</html>
CSS
* {
    margin: 0;
    padding: 0;
}

body {
    height: 100vh;
    display: flex;
    justify-content: center;
    align-items: center;
    flex-direction: column;
    background-color: #e8e8e8;
}

button {
    margin: 10px;
    width: 280px;
    height: 90px;
    font-size: 35px;
    font-weight: bold;
    background: transparent;
    border: 1px solid transparent;
    cursor: pointer;
    position: relative;
    box-shadow: inset 1px 1px 2px #000,
        inset -1px -1px 2px #808080;
    color: #333;
    text-shadow: 1px 1px 0 #808080;
    overflow: hidden;
    transition: 0.3s linear 0.15s;
}

button:nth-child(1) {
    --c: #ff4757;
}

button:nth-child(2) {
    --c: #ffa502;
}

button:nth-child(3) {
    --c: #2ed573;
}

button:nth-child(4) {
    --c: #1e90ff;
}

button::before {
    content: "";
    position: absolute;
    width: 100px;
    height: 8px;
    top: 0;
    left: 50%;
    transform: translateX(-50%);
    border-radius: 0 0 50% 50%;
    filter: blur(5px);
    transition: 0.3s;
}

button:hover::before {
    background: var(--c);
    box-shadow: 0 0 10px var(--c),
        0 0 20px var(--c),
        0 0 30px var(--c),
        0 0 40px var(--c),
        0 0 50px var(--c);
}

button:hover {
    color: #fff;
    text-shadow: 0 0 10px var(--c),
        0 5px 5px #000;
    box-shadow: inset 1px 1px 2px #000,
        inset -1px -1px 2px var(--c);
}
实现思路拆分
好的,下面是每行代码的详细讲解及注释:
* {
    margin: 0;
    padding: 0;
}
这段代码是设置所有元素的外边距和内边距为0。
body {
    height: 100vh;
    display: flex;
    justify-content: center;
    align-items: center;
    flex-direction: column;
    background-color: #333;
}
这段代码是设置body元素的高度为100vh,使用flex布局,使其水平和垂直居中。同时设置flex-direction为column,使其内部元素垂直排列。并且设置背景颜色为#333。
button {
    margin: 10px;
    width: 280px;
    height: 90px;
    font-size: 35px;
    font-weight: bold;
    background: transparent;
    border: 1px solid transparent;
    position: relative;
    box-shadow: inset 1px 1px 2px #000,
    inset -1px -1px 2px #808080;
    color: #333;
    text-shadow: 1px 1px 0 #808080;
    overflow: hidden;
    transition: 0.3s linear 0.15s;
}
这段代码是设置按钮的样式。包括外边距、宽度、高度、字体大小、字体粗细、背景、边框、相对定位、内部阴影效果、字体颜色和文本阴影效果。并且设置过渡效果。
button:nth-child(1) {
    --c: #ff4757;
}

button:nth-child(2) {
    --c: #ffa502;
}

button:nth-child(3) {
    --c: #2ed573;
}

button:nth-child(4) {
    --c: #1e90ff;
}
这段代码是为每个按钮设置不同的颜色。使用CSS变量(–c)来存储颜色值。
button::before {
    content: "";
    position: absolute;
    width: 100px;
    height: 8px;
    top: 0;
    left: 50%;
    transform: translateX(-50%);
    border-radius: 0 0 50% 50%;
    filter: blur(5px);
    transition: 0.3s;
}
这段代码是设置前景色的样式。使用伪元素::before,设置宽度、高度、相对定位、顶部和左侧偏移、圆角和模糊效果。并且设置过渡效果。
button:hover::before {
    background: var(--c);
    box-shadow: 0 0 10px var(--c),
    0 0 20px var(--c),
    0 0 30px var(--c),
    0 0 40px var(--c),
    0 0 50px var(--c);
}
这段代码是设置当鼠标悬停在按钮上时,前景色的渐变效果。使用:hover伪类,设置背景颜色和阴影效果。
button:hover {
    color: #fff;
    text-shadow: 0 0 10px var(--c),
    0 5px 5px #000;
    box-shadow: inset 1px 1px 2px #000,
    inset -1px -1px 2px var(--c);
}
这段代码是设置当鼠标悬停在按钮上时,按钮的颜色、文本阴影和边框阴影的变化。使用:hover伪类,设置字体颜色、文本阴影效果和内部阴影效果。
