1.加载测试专用属性
主要为@SpringBootTest中properties属性和args属性
package com.example;

import org.junit.jupiter.api.Test;
import org.springframework.beans.factory.annotation.Value;
import org.springframework.boot.test.context.SpringBootTest;
import org.springframework.validation.annotation.Validated;

//添加临时属性,优先级大于application.yml中的属性
//properties为当前测试类添加临时属性
//@SpringBootTest(properties = {"test.prop=testValue1"})
//args属性可以为当前测试用例添加临时的命令行参数
//@SpringBootTest(args = {"--test.prop=testValue2"})
//args的优先级最高
@SpringBootTest(properties = {"test.prop=testValue1"},args = {"--test.prop=testValue2"})
class Springboot02TestApplicationTests {
    @Value("${test.prop}")
    private String msg;

    @Test
    void testProperties(){
        System.out.println(msg);
    }
}
2.加载测试专用配置
用例
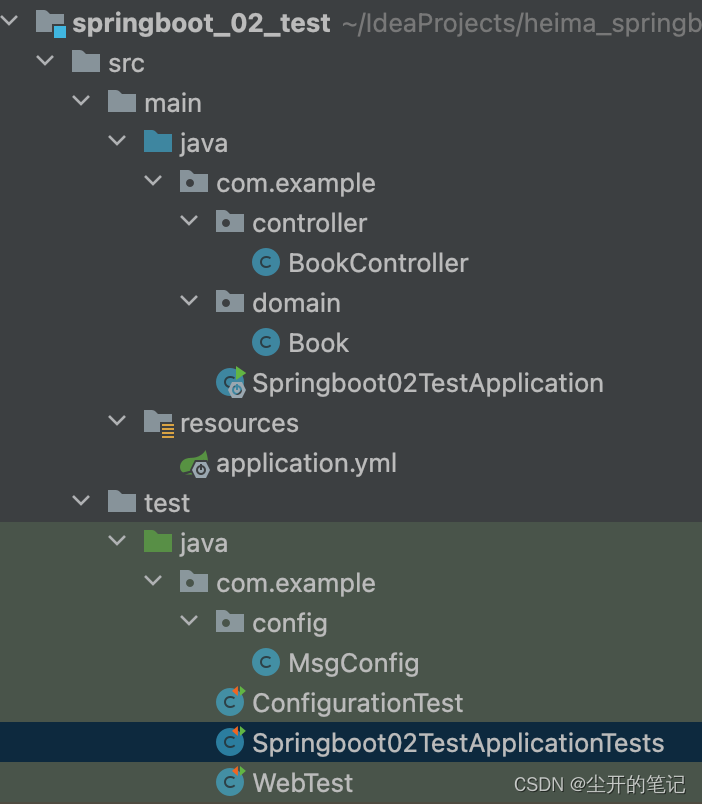
项目结构
MsgConfig.class
package com.example.config;

import org.springframework.context.annotation.Bean;
import org.springframework.context.annotation.Configuration;

@Configuration
public class MsgConfig {

    @Bean
    public String message(){
        return "message";
    }
}
ConfigurationTest.class
package com.example;

import com.example.config.MsgConfig;
import org.junit.jupiter.api.Test;
import org.springframework.beans.factory.annotation.Autowired;
import org.springframework.boot.test.context.SpringBootTest;
import org.springframework.context.annotation.Import;

@SpringBootTest
@Import(MsgConfig.class)
public class ConfigurationTest {
    @Autowired
    private String msg;

    @Test
    void testConfiguration(){
        System.out.println(msg);
    }
}
3.表现层测试
使用webEnvironment属性开启tomcat,具体代码如下:
项目结构
BookController.class
package com.example.controller;

import com.example.domain.Book;
import org.springframework.stereotype.Controller;
import org.springframework.web.bind.annotation.GetMapping;
import org.springframework.web.bind.annotation.RequestMapping;
import org.springframework.web.bind.annotation.RestController;

import javax.xml.ws.RequestWrapper;

@RestController
@RequestMapping("/book")
public class BookController {
    /*@GetMapping
    public String getById(){
        System.out.println("getById is running.....");
        return "Springboot";
    }*/

    @GetMapping
    public Book getById(){
        Book book=new Book();
        book.setId(1);
        book.setName("流浪地球");
        book.setType("科幻");
        return book;
    }
}
Book.class
package com.example.domain;

import lombok.Data;

@Data
public class Book {
    private int id;
    private String name;
    private String type;
}
WebTest.class
package com.example;

import org.junit.jupiter.api.Test;
import org.springframework.beans.factory.annotation.Autowired;
import org.springframework.boot.test.autoconfigure.web.servlet.AutoConfigureMockMvc;
import org.springframework.boot.test.context.SpringBootTest;
import org.springframework.mock.web.MockHttpServletRequest;
import org.springframework.test.web.servlet.MockMvc;
import org.springframework.test.web.servlet.ResultActions;
import org.springframework.test.web.servlet.ResultMatcher;
import org.springframework.test.web.servlet.request.MockHttpServletRequestBuilder;
import org.springframework.test.web.servlet.request.MockMvcRequestBuilders;
import org.springframework.test.web.servlet.result.ContentResultMatchers;
import org.springframework.test.web.servlet.result.HeaderResultMatchers;
import org.springframework.test.web.servlet.result.MockMvcResultMatchers;
import org.springframework.test.web.servlet.result.StatusResultMatchers;

@SpringBootTest(webEnvironment = SpringBootTest.WebEnvironment.RANDOM_PORT)

//开启虚拟调用
@AutoConfigureMockMvc
public class WebTest {
    @Autowired
    private MockMvc mvc;

    @Test
    void testWeb() throws Exception {
        //创建一个虚拟的请求
        MockHttpServletRequestBuilder build= MockMvcRequestBuilders.get("/book");
        mvc.perform(build);
    }


    //状态匹配
    @Test
    void testStatus() throws Exception {
        //创建一个虚拟的请求
        MockHttpServletRequestBuilder build= MockMvcRequestBuilders.get("/book");
        ResultActions action = mvc.perform(build);

        //设定预期值,与真实值进行比较,成功测试通过
        //定义本次调用的预期值
        StatusResultMatchers status = MockMvcResultMatchers.status();
        //预期本次调用成功
        ResultMatcher ok = status.isOk();
        //添加预期值到本次调用过程中进行匹配
        action.andExpect(ok);
    }

    //字符串匹配

    @Test
    void testBody() throws Exception {
        //创建一个虚拟的请求
        MockHttpServletRequestBuilder build= MockMvcRequestBuilders.get("/book");
        ResultActions action = mvc.perform(build);

        //设定预期值,与真实值进行比较,成功测试通过
        //定义本次调用的预期值
        ContentResultMatchers content = MockMvcResultMatchers.content();
        //预期本次调用成功
        ResultMatcher result = content.string("springboot");
        //添加预期值到本次调用过程中进行匹配
        action.andExpect(result);
    }


    //json匹配

    @Test
    void testJson() throws Exception {
        //创建一个虚拟的请求
        MockHttpServletRequestBuilder build= MockMvcRequestBuilders.get("/book");
        ResultActions action = mvc.perform(build);

        //设定预期值,与真实值进行比较,成功测试通过
        //定义本次调用的预期值
        ContentResultMatchers content = MockMvcResultMatchers.content();
        //预期本次调用成功
        ResultMatcher result = content.json("{\"id\":1,\"name\":\"流浪地球\",\"type\":\"科幻\"}");
        //添加预期值到本次调用过程中进行匹配
        action.andExpect(result);
    }

    //ContentType匹配

    @Test
    void testContentType() throws Exception {
        //创建一个虚拟的请求
        MockHttpServletRequestBuilder build= MockMvcRequestBuilders.get("/book");
        ResultActions action = mvc.perform(build);

        //设定预期值,与真实值进行比较,成功测试通过
        //定义本次调用的预期值
        HeaderResultMatchers header = MockMvcResultMatchers.header();
        //预期本次调用成功
        ResultMatcher contentType = header.string("Content-Type", "application/json");
        //添加预期值到本次调用过程中进行匹配
        action.andExpect(contentType);
    }

    @Test
    void testGetById() throws Exception {
        //创建一个虚拟的请求
        MockHttpServletRequestBuilder build= MockMvcRequestBuilders.get("/book");
        ResultActions action = mvc.perform(build);


        //设定预期值,与真实值进行比较,成功测试通过
        //定义本次调用的预期值
        StatusResultMatchers status = MockMvcResultMatchers.status();
        //预期本次调用成功
        ResultMatcher ok = status.isOk();
        //添加预期值到本次调用过程中进行匹配
        action.andExpect(ok);


        //设定预期值,与真实值进行比较,成功测试通过
        //定义本次调用的预期值
        ContentResultMatchers content = MockMvcResultMatchers.content();
        //预期本次调用成功
        ResultMatcher result = content.json("{\"id\":1,\"name\":\"流浪地球\",\"type\":\"科幻\"}");
        //添加预期值到本次调用过程中进行匹配
        action.andExpect(result);

        //设定预期值,与真实值进行比较,成功测试通过
        //定义本次调用的预期值
        HeaderResultMatchers header = MockMvcResultMatchers.header();
        //预期本次调用成功
        ResultMatcher contentType = header.string("Content-Type", "application/json");
        //添加预期值到本次调用过程中进行匹配
        action.andExpect(contentType);
    }
}
4.业务层测试回滚
想在Springboot中做业务层相关的测试,但是又不想留下数据在数据库中,则只需在测试类上添加@Transactional注解即可。
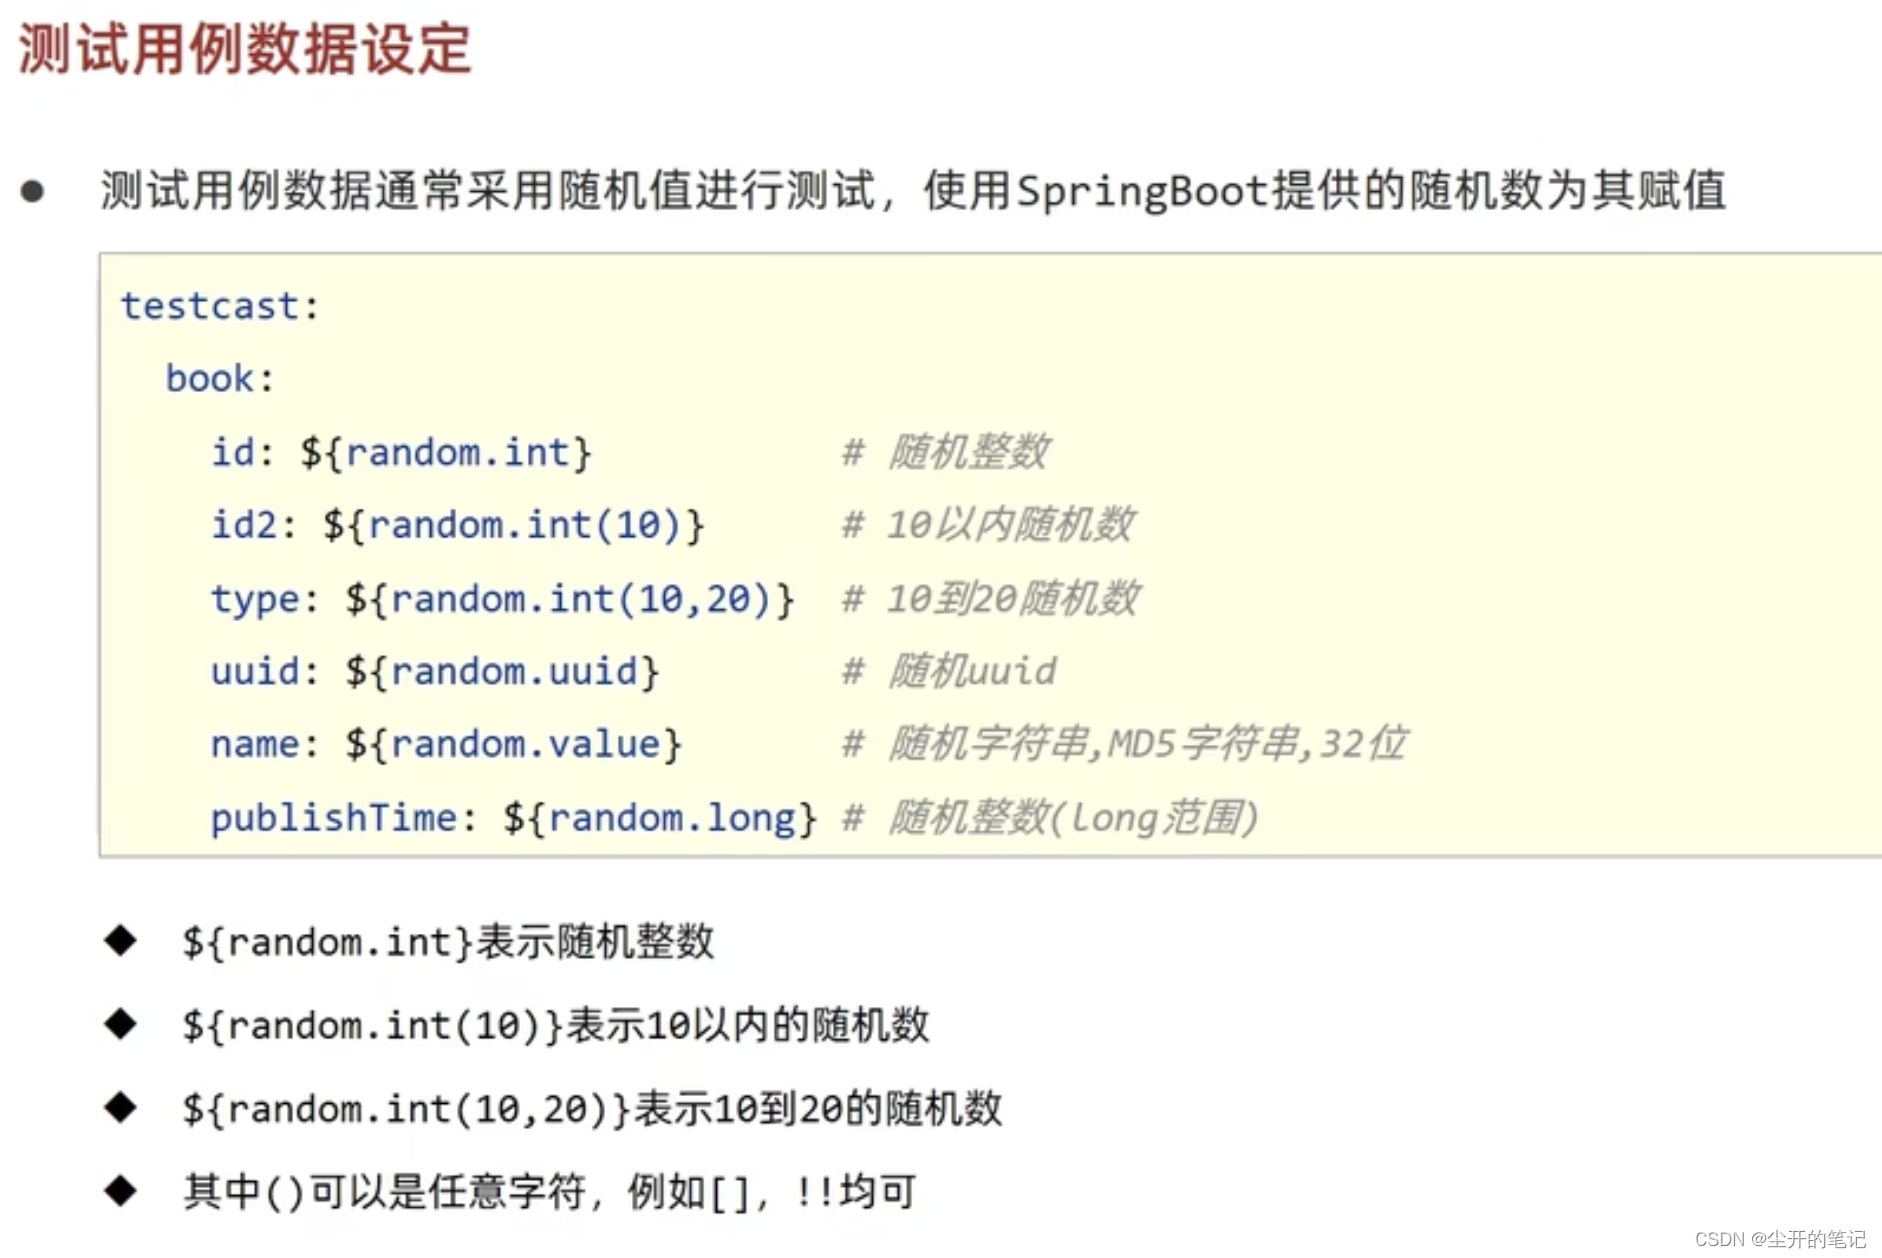
5.测试用例使用随机值
总结
这部分内容作为了解使用。


