c++List详细使用
write in front
作者:@ 不进大厂不改名
专栏:@ c++
作者简介:大一学生 希望能向其他大佬和同学学习!
本篇博客简介:本文主要讲述了一种新容器list的使用方法,相信你在学了后,能够加深对STL的理解。
本章目标
1.List的介绍
2.迭代器的使用
3.list的元素获取
4.list容量相关
5.list的操作函数
6.总结
1.List的介绍
List介绍
1.list是可以在是可以在常数范围内在任意位置插入和删除的序列式容器,并且该容器可以前后双向迭代。
这时候同学们可能会有疑惑,这看上去和我们以前学的双向链表十分相似是吧。
2.list的底层式双向链表结构,双向链表中每个元素储存在互不相关的独立节点中,在节点中通过指针指向前一个元素和后一个元素。
3.list和forward_list非常相似:最主要的不同在于forward_list是单链表,只能超前迭代,让其更简单高效。
4.与其他的序列式的容器相比(arry,vector,deque),list通常在任意位置进行插入、移除元素的执行效率更好。
这个也就是双链表的优点了。
5.与其他序列式容器相比,list和forward_list最大的缺陷就是不支持任意位置的随机访问,比如要访问list的第6个元素,必须从已知的位置(一般式头部或者尾部)迭代到该位置,在这段位置上迭代需要线性的时间开销;list还需要一些额外的空间,以保存每个节点的相关联信息(对于储存类型较小元素的大list来说可能是一个重要的因素)
这也就是双链表的缺点
List的使用方式
List的定义方式
方式一:构造一个某类型的空容器
list<int> a1;//构造int类型的空容器
方式二:构造一个由n个val的值
list<int> a2(10,2);
方式三:拷贝构造其他容器的复制品
list<int> a3(a2);
方式四:使用迭代器拷贝某一段内容
string s1="hello world";
list<char> a4(s1.begin(),s1.end())
方式五:构造数组某段区间的复制品
int arr[5]={1,2,3,4,5};
list<int> a5(arr,arr+5);
省流:上面四种方式和vector的构造一模一样,只是list里面多了一点,list可以用数组初始化。
List的插入和删除
头插和头删
push_front和 pop_front
void test1()
{
	list<int> a1;
	a1.push_front(1);
	a1.push_front(2);
	a1.push_front(3);
	a1.push_front(4);
	a1.push_front(5);
	a1.push_front(6);
	for (auto x : a1)
	{
		cout << x << " ";
	}
	a1.pop_front();
	a1.pop_front();
	a1.pop_front();
	a1.pop_front();
	cout << endl;
	for (auto x: a1)
	{
		cout << x << " ";
	}
}
尾插和尾删
void test2()
{
	list<int> a1;
	a1.push_back(1);
	a1.push_back(2);
	a1.push_back(3);
	a1.push_back(4);
	a1.push_back(5);
	a1.push_back(6);
	for (auto x : a1)
	{
		cout << x << " ";
	}
	cout << endl;
	a1.pop_back();
	a1.pop_back();
	a1.pop_back();
	for (auto x : a1)
	{
		cout << x << " ";
	}
}
insert
有三种插入方式
方式一:在指定位置插入一个值
void test7()
{
	list<int> a;
	a.push_back(1);
	a.push_back(2);
	a.push_back(3);
	a.push_back(4);
	a.push_back(5);
	a.insert(a.end(),50);
	for (auto x : a)
	{
		cout << x << " ";
	}
}
方式二:在指定迭代器位置插入n个val
void test7()
{
	list<int> a;
	a.push_back(1);
	a.push_back(2);
	a.push_back(3);
	a.push_back(4);
	a.push_back(5);
	a.insert(a.end(),5,10);
	for (auto x : a)
	{
		cout << x << " ";
	}
}
方式三:在指定迭代器位置插入一段代码(左闭右开)
void test7()
{
	list<int> a;
	a.push_back(1);
	a.push_back(2);
	a.push_back(3);
	a.push_back(4);
	a.push_back(5);
	a.insert(a.end(),a.begin(),a.end());
	for (auto x : a)
	{
		cout << x << " ";
	}
}
erase支持两种删除方式
方式一:删除指定迭代器的位置
void test7()
{
	list<int> a;
	a.push_back(1);
	a.push_back(2);
	a.push_back(3);
	a.push_back(4);
	a.push_back(5);
	a.erase(a.begin());
	for (auto x : a)
	{
		cout << x << " ";
	}
}
方式二:删除某个迭代器区间
void test7()
{
	list<int> a;
	a.push_back(1);
	a.push_back(2);
	a.push_back(3);
	a.push_back(4);
	a.push_back(5);
	a.erase(a.begin(),a.end());
	for (auto x : a)
	{
		cout << x << " ";
	}
}
2.迭代器的使用
begin和end
void test3()
{
	list<int> a1;
	a1.push_back(1);
	a1.push_back(2);
	a1.push_back(3);
	a1.push_back(4);
	a1.push_back(5);
	a1.push_back(6);
	list<int>::iterator it = a1.begin();
	while (it != a1.end())
	{
		cout << *it << " ";
		it++;
	}
}
rbegin和rend
void test4()
{
	list<int> a1;
	a1.push_back(1);
	a1.push_back(2);
	a1.push_back(3);
	a1.push_back(4);
	a1.push_back(5);
	a1.push_back(6);
	list<int>::reverse_iterator it = a1.rbegin();
	while (it != a1.rend())
	{
		cout << *it << " ";
		it++;
	}
}
3.list的元素获取
front和back
front函数用于获取list容器当中的第一个元素,back函数用于获取list容器中的最后一个元素。
void test5()
{
	list<int> a;
	a.push_back(1);
	a.push_back(2);
	a.push_back(3);
	a.push_back(4);
	a.push_back(5);
	a.push_back(6);
	cout << a.front() << " " << a.back() << endl;
}
4.list容量相关
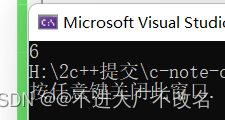
size可以直接获取容量的大小
void test5()
{
	list<int> a;
	a.push_back(1);
	a.push_back(2);
	a.push_back(3);
	a.push_back(4);
	a.push_back(5);
	a.push_back(6);
	cout << a.size();
}
resize
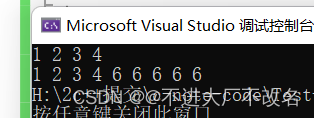
resize两个参数,一个是你要重新赋值的大小,一个是你要重新赋值的默认值
使用规则:
1.如果被重新赋值的值小于本来的大小,那么size就缩小到此值
2.如果重新赋值的值大于本来的大小那么就将szie扩大到该值并且把我们默认值赋予它。
void test6()
{
	list<int> a;
	a.push_back(1);
	a.push_back(2);
	a.push_back(3);
	a.push_back(4);
	a.push_back(5);
	a.push_back(6);
	a.resize(4, 6);
	for (auto x : a)
	{
		cout << x << " ";
	}
	cout << endl;
	a.resize(9, 6);

	for (auto x : a)
	{
		cout << x << " ";
	}
}
empyt和clear
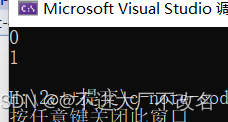
1.clear清空list
1.empty判断是否为空
void test6()
{
	list<int> a;
	a.push_back(1);
	a.push_back(2);
	a.push_back(3);
	a.push_back(4);
	a.push_back(5);
	a.push_back(6);
	a.resize(4, 6);
	cout << a.empty()<<endl;
	a.clear();
	cout << a.empty()<<endl;
}
5.list的操作函数
sort
顾名思义就是排序
void test6()
{
	list<int> a;
	a.push_back(5);
	a.push_back(6);
	a.push_back(3);
	a.push_back(8);
	a.push_back(2);
	a.push_back(4);
	for (auto x : a)
	{
		cout << x << " ";
	}
	a.sort();
	cout << endl;
	for (auto x : a)
	{
		cout << x << " ";
	}

}
splice
splice的使用发法有三种
方式一:将一个list拼接到另一个指定迭代器位置。
void test6()
{
	list<int> a;
	list<int> a1(5,6);
	a.push_back(5);
	a.push_back(6);
	a.push_back(3);
	a.push_back(8);
	a.push_back(2);
	a.push_back(4);
	a.splice(a.begin(), a1);
	for (auto x : a)
	{
		cout << x << " ";
	}

}
方式二:将容器当中的某一个数据拼接到另一个容器的指定迭代器的位置。
void test6()
{
	list<int> a;
	list<int> a1(5,6);
	a.push_back(5);
	a.push_back(6);
	a.push_back(3);
	a.push_back(8);
	a.push_back(2);
	a.push_back(4);
	a.splice(a.begin(), a1,a1.begin());
	for (auto x : a)
	{
		cout << x << " ";
	}

}
方式三:将容器指定指定迭代器区间的数据拼接到另一个容器的指定迭代器位置。
void test6()
{
	list<int> a;
	list<int> a1(5,6);
	a.push_back(5);
	a.push_back(6);
	a.push_back(3);
	a.push_back(8);
	a.push_back(2);
	a.push_back(4);
	a.splice(a.begin(), a1,a1.begin(),a1.end());
	for (auto x : a)
	{
		cout << x << " ";
	}

}
remove
参数只有一个,给定一个值删除list中所有这个值
void test6()
{
	list<int> a;
	list<int> a1(5,6);
	a.push_back(5);
	a.push_back(6);
	a.push_back(3);
	a.push_back(8);
	a.push_back(2);
	a.push_back(4);
	a.splice(a.begin(), a1,a1.begin(),a1.end());
	a.remove(6);
	for (auto x : a)
	{
		cout << x << " ";
	}
}
remove_if
给定一个条件如果符合条件就删除
void test6()
{
	list<int> a;
	list<int> a1(5,6);
	a.push_back(5);
	a.push_back(6);
	a.push_back(3);
	a.push_back(8);
	a.push_back(2);
	a.push_back(4);
	a.splice(a.begin(),a1,a1.begin(),a1.end());
	for (auto x : a)
	{
		cout << x << " ";
	}
	cout << endl;
	a.remove_if(single_digit);
	for (auto x : a)
	{
		cout << x << " ";
	}

}
unique
去除连续的重复值
void test6()
{
	list<int> a;
	list<int> a1(5,6);
	a.push_back(5);
	a.push_back(6);
	a.push_back(3);
	a.push_back(8);
	a.push_back(2);
	a.push_back(4);
	a.splice(a.begin(),a1,a1.begin(),a1.end());
	for (auto x : a)
	{
		cout << x << " ";
	}
	cout << endl;
	a.unique();
	for (auto x : a)
	{
		cout << x << " ";
	}

}
注意了我们并不是去重,而是删除连续重复的值
如果我们想要去重应该怎么办呢?
就是先排序再去除连续的重复值
void test6()
{
	list<int> a;
	list<int> a1(5,6);
	a.push_back(5);
	a.push_back(6);
	a.push_back(3);
	a.push_back(8);
	a.push_back(2);
	a.push_back(4);
	a.push_back(4);
	a.push_back(4);
	a.splice(a.begin(),a1,a1.begin(),a1.end());
	for (auto x : a)
	{
		cout << x << " ";
	}
	cout << endl;
	a.sort();
	a.unique();
	for (auto x : a)
	{
		cout << x << " ";
	}
}
merge
归并并进行排序
使得两个list合并到一个当中并且使他们有序
注意!!!!
一定要提前对两个list进行排序
不然会报错!!!!
void test6()
{
	list<int> a;
	list<int> a1(3,6);
	a.push_back(5);
	a.push_back(6);
	a.push_back(3);
	a.push_back(8);
	a.push_back(2);
	a.push_back(4);
	a.push_back(4);
	a.push_back(4);
	a1.push_back(56);
	a1.push_back(34);
	a1.push_back(34);
	a1.push_back(28);
	a.sort();
	a1.sort();
	a.merge(a1);
	for (auto x : a)
	{
		cout << x << " ";
	}
}
reverse
这个很简单,就是字面意思(逆序)
void test6()
{
	list<int> a;
	list<int> a1(3,6);
	a.push_back(5);
	a.push_back(6);
	a.push_back(3);
	a.push_back(8);
	a.push_back(2);
	a.push_back(4);
	a.push_back(4);
	a.push_back(4);
	a1.push_back(56);
	a1.push_back(34);
	a1.push_back(34);
	a1.push_back(28);
	a.sort();
	a1.sort();
	a.merge(a1);
	a.reverse();
	for (auto x : a)
	{
		cout << x << " ";
	}
}
assign
这个函数有两个用法
方式一:重新赋予n个val值
void test7()
{
	list<char> a(4, 'a');
	a.assign(3, 'b');
	for (auto x : a)
	{
		cout << x << " ";
	}
}
方式二:使用迭代器赋值
void test7()
{
	list<char> a(4, 'a');
	string s("hello");
	a.assign(s.begin(), s.end());
	for (auto x : a)
	{
		cout << x << " ";
	}
}
swap
交换两个容器的内容
void test7()
{
	list<char> a(20, 'a');
	list<char> b(10, 'b');
	a.swap(b);
	for (auto x : a)
	{
		cout << x << " ";
	}
}
6.总结
本文主要讲了list的一些函数的使用,大家是不是发现和前面两个的容器差不多,但是相对于它们多出一些函数,我们主要记住这些多出的函数就行,本张就到此结束,希望观众老爷们留下你的三连加关注,谢谢!


