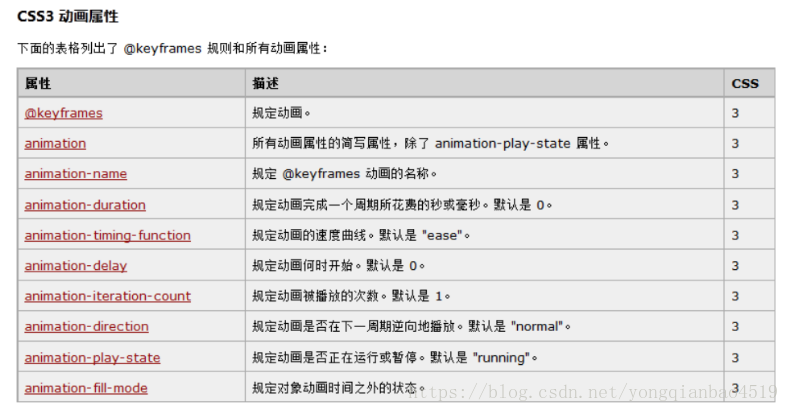
一、动画【 animation 】
动画是CSS3中具有颠覆性的特征之一,可通过设置多个节点来精确控制一个或一组动画,常用来实现复杂的动画效果。
语法格式:
| animation:动画名称 花费时间 运动曲线 何时开始 播放次数 是否反方向; |
以上的几项,除了 名字,动画时间,延时 有严格顺序要求之外,其他顺序随意。
直接用案例理解吧。
案例一(基本理解)
        .animationtest {
            width: 300px;
            height: 300px;
            background-color: pink;
            float: left;
            /*animation:动画名称 花费时间 运动曲线  何时开始  播放次数  是否反方向;*/
            /*动画名称:要和keyframe的动画名称相同,才可以对应上*/
            /*播放次数:可以任意写数字次数,如果想要无限次播放则使用infinite*/
            /*是否反方向:不回放可以不填也可以填normal,如果想要回放则可以用alternate*/
            animation: move 4s ease 0s infinite normal;
        }
        .animationtest2 {
            width: 200px;
            height: 200px;
            float: left;
            background-color: skyblue;
            animation: move2 4s infinite alternate;
        }
        /*keyframes有两种设置方式,一种是简单分为两步,也就是  form>to 两步,也可以利用 0%>100% 为区间进行详细的动画区分*/
        @keyframes move {
            from {
                width: 500px;
                height: 300px;
            }
            to {
                width: 700px;
                height: 500px;
                background-color: blue;
            }

        }
        @keyframes move2 {
            20% {
                width: 250px;
                height: 200px;
                background-color: red;
            }
            50% {
                width: 300px;
                height: 300px;
                background-color: greenyellow;
            }
            70% {
                width: 500px;
                height: 500px;
                background-color: pink;

            }
            100% {
                width: 100px;
                height: 100px;
                background-color: deeppink;

            }
        }
<div class="animationtest">
</div>
<div class="animationtest2">
</div>以上能够理解animation的主要作用,接下来做两个案例。
案例二(心脏跳动案例)
效果:
图片:
代码:
        div {
            width: 400px;
            margin: 100px auto;
        }
        img {
            width: 400px;
            height: 100%;
            /*animation:动画名称 花费时间 运动曲线  何时开始  播放次数  是否反方向;*/
            animation: heartbeat 1s ease-out infinite;
        }
        @keyframes heartbeat {
            30% {
                transform: scale(1);
            }
            60% {
                transform: scale(1.1);
            }
            100% {
                transform: scale(1);
            }
        }
<div>
<img src="images/heart.jpg" alt="">
</div>案例三(大海波涛)
效果:
图片:
代码:
        * {
            margin: 0;
            padding: 0;
        }
        body {
            width: 100%;
            height: 100%;
            background-color: lightseagreen;
            /*删除掉多余部分,使得左下两条滚动条不显示*/
            overflow: hidden;
        }
        .sun {
            width: 80px;
            height: 80px;
            margin: 60px 60px;
            position: relative;
        }
        .sun::before, .sun::after  {
            content: '';
            width: 40px;
            height: 40px;
            background-color: #ffffff;
            position: absolute;
            top: 50%;
            left: 50%;
            border-radius: 50%;
            animation: sun 2s linear infinite;
        }
        .sun::after {
            width: 80px;
            height: 80px;
            background: rgba(255, 255, 255, .7);
            border-radius: 50%;
            animation: sun 2s linear 0.5s infinite;
        }
        img {
            width: 100%;
            height: auto;
            position: absolute;
            bottom: 0;
            left: 0;
        }
        .img1 {
            animation: move linear 2s infinite alternate;
        }
        .img2 {
            animation: move linear 2s infinite 1s alternate;
        }
        @keyframes move {
            0% {
                bottom: 0;
            }

            50% {
                bottom: -50px;
            }

            100% {
                bottom: 0;
            }
        }
        @keyframes sun {
            0% {
                transform: translate(-50%, -50%) scale(1);
                box-shadow: 0 0 16px rgba(255,255,255,0.7);
            }

            50% {
                transform: translate(-50%, -50%) scale(1.1);
                box-shadow: 0 0 30px rgba(255,255,255,0.7);
            }

            100% {
                transform: translate(-50%, -50%) scale(1);
                box-shadow: 0 0 16px rgba(255,255,255,0.7);
            }
        }
<div class="sun"></div>
<img src="images/wave1.png" class="img2" alt="">
<img src="images/wave2.png" class="img1" alt="">二、CSS3伸缩布局
CSS3在布局方面做了非常大的改进,使得我们对块级元素的布局排列变得十分灵活,适应性非常强,其强大的伸缩性,在响应式开中可以发挥极大的作用。
1.基本使用方式
在原先的CSS中,如果我们要将一个盒子均分成三等份,那么我们会这么分:
section {
         /*注意,伸缩布局父盒子也要用百分比来设定宽度*/
         width: 80%;
        height: 200px;
        margin: 100px auto;
}
div {
     /*如果是CSS3要将三个盒子分成三等份,一般是用以下方式:*/
     width: 33.33%;
     height: 100%;
     float: left;
}
<section>
<div>1</div>
<div>2</div>
<div>3</div>
</section>这样虽然可以均分三个盒子,但是三个盒子的伸缩性非常差,如果页面产生变化,比如缩小或者扩大,盒子是无法跟随页面的大小进行伸缩的,此时我们就可以用伸缩布局了。
section {
/*注意,伸缩布局父盒子也要用百分比来设定宽度*/
width: 80%;
height: 200px;
margin: 100px auto;
/*在CSS3中,我们引入一个新的伸缩布局*/
display: flex;
/*伸缩布局的宽是不定的,我们伸缩页面,其宽度也会伸缩,但是会一直保持在三等份*/
}
div {
height: 100%;
/*flex指的是每一个div各占一份,也就是三个DIV均分为三等份*/
flex: 1;
}
div:first-child {
background-color: pink;
}
div:nth-child(2) {
background-color: red;
}
div:nth-child(3) {
background-color: blue;
}<section>
<div>1</div>
<div>2</div>
<div>3</div>
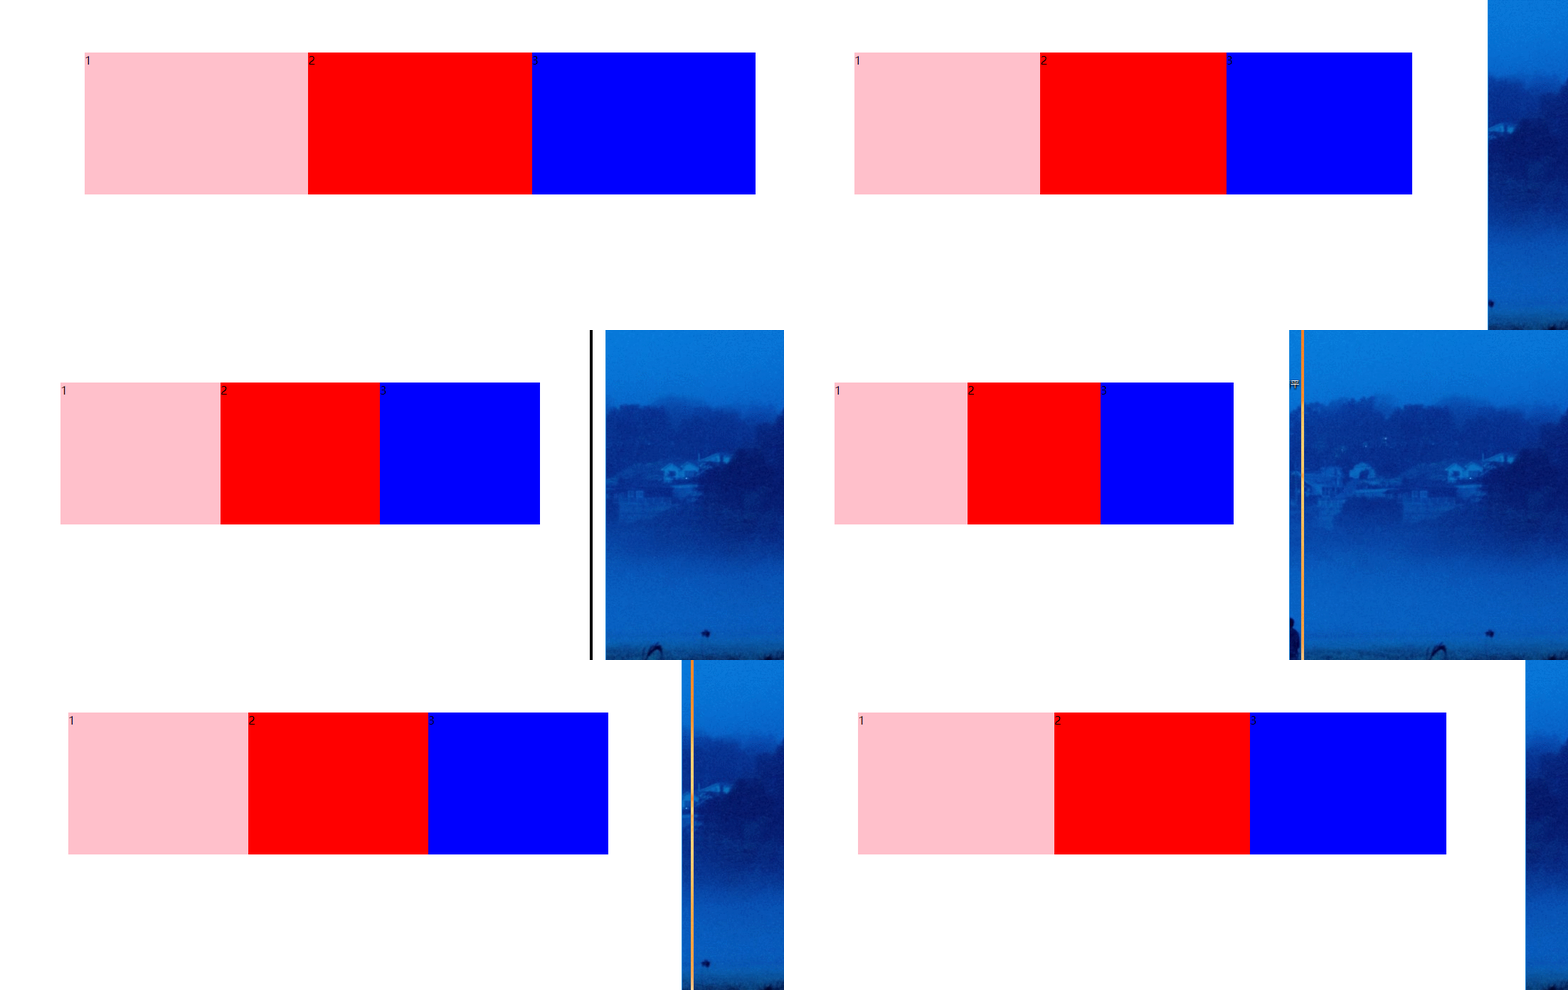
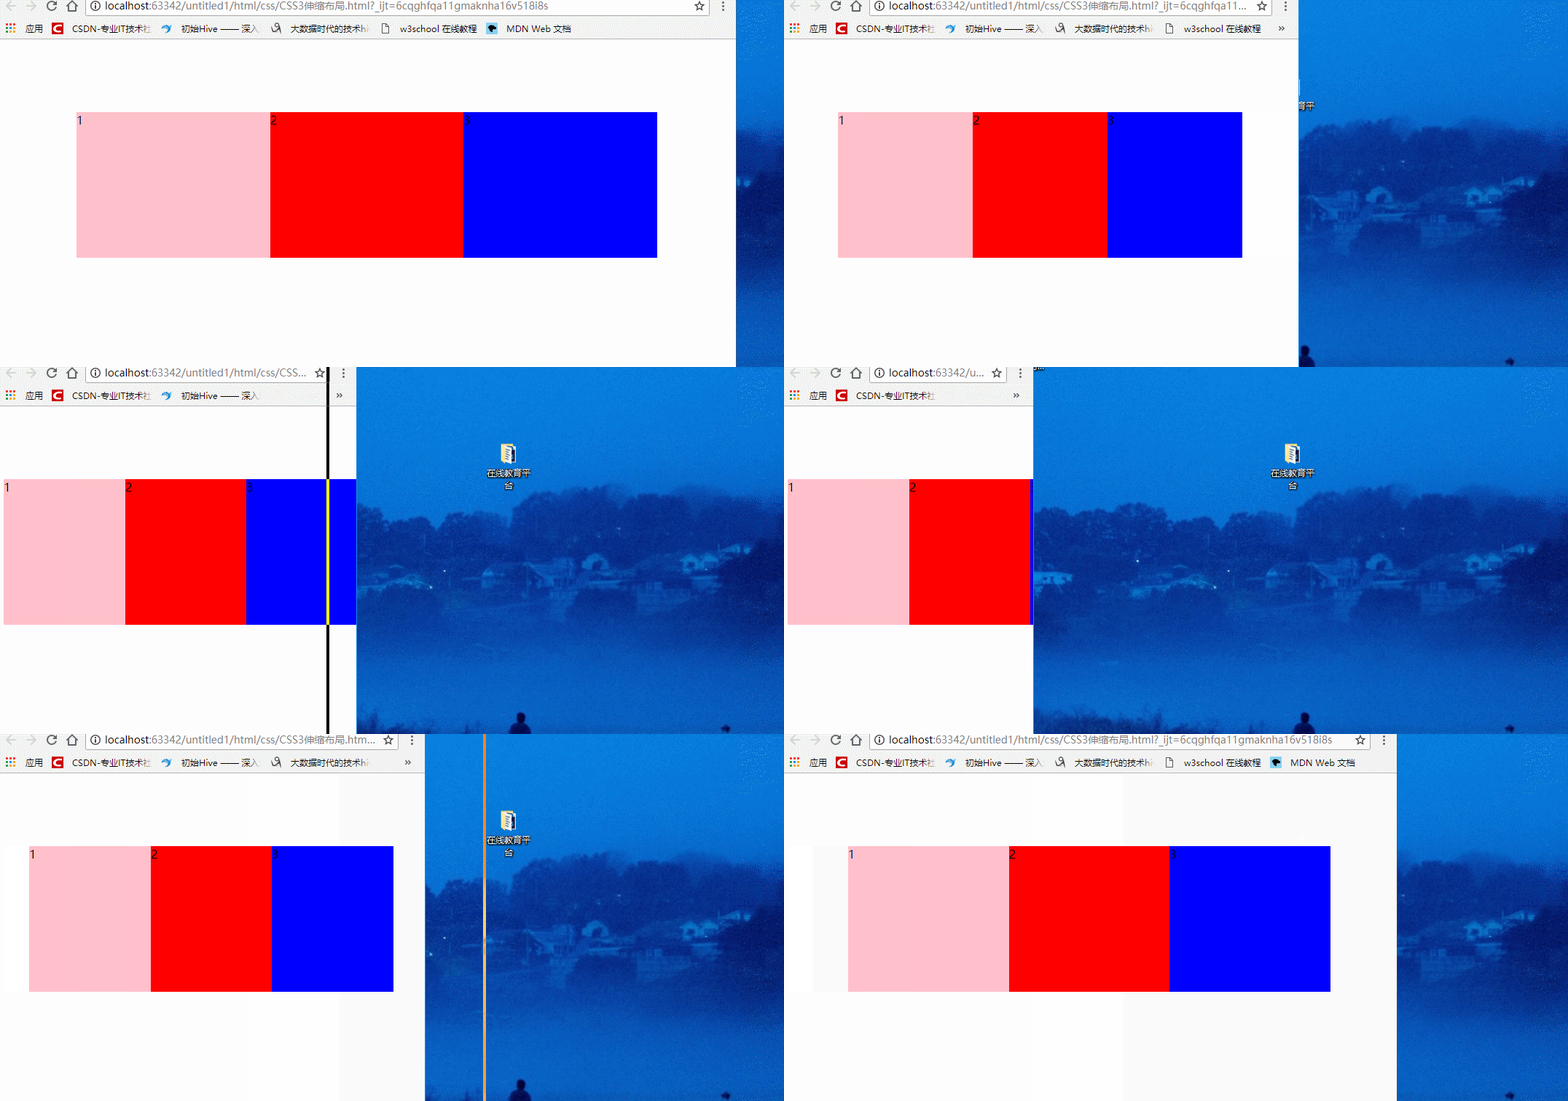
</section>效果:

我们也可以各自给盒子添加份数,如:
section {
/*注意,伸缩布局父盒子也要用百分比来设定宽度*/
width: 80%;
height: 200px;
margin: 100px auto;
/*在CSS3中,我们引入一个新的伸缩布局*/
display: flex;
/*伸缩布局的宽是不定的,我们伸缩页面,其宽度也会伸缩,但是会一直保持在三等份*/
}
div {
height: 100%;
/*flex指的是每一个div各占一份,也就是三个DIV均分为三等份*/
flex: 1;
}
div:first-child {
background-color: pink;
/*第一个div占两份,第二个div占一份,第三个div占两份,那么盒子就会变成5份*/
flex: 2;
}
div:nth-child(2) {
background-color: red;
}
div:nth-child(3) {
background-color: blue;
flex: 2;
}
<section>
    <div>1</div>
    <div>2</div>
    <div>3</div>
</section>效果:
2.其他属性
(1)伸缩方向(flex-direction)
伸缩方向用来控制伸缩布局的方向,行伸缩或者列伸缩。
属性有:
flex-direction: row 行伸缩,默认属性。
flex-direction: column 列伸缩。
flex-direction: row-reverse 掉转盒子顺序,原先为1 2 3 ,掉转后顺序为3 2 1。
flex-direction: column-reverse 同上。
我们可以为小盒子添加宽度使其固定宽度不再伸缩。
但是在添加固定宽度时,注意自己不能有份数,其他盒子则必须要有份数。
section {
/*注意,伸缩布局父盒子也要用百分比来设定宽度*/
width: 80%;
height: 200px;
margin: 100px auto;
/*在CSS3中,我们引入一个新的伸缩布局*/
display: flex;
/*伸缩布局的宽是不定的,我们伸缩页面,其宽度也会伸缩,但是会一直保持在三等份*/
/*如果我们想要其垂直伸缩分等份,那么我们可以用*/
flex-direction: column;
/*相对应的水平等份是row,不过默认就是row,所以不需要再设置*/
/*还有另外两个属性 row-reverse 和 column-reverse ,它会将我们的子盒子的顺序调转过来,也就是说如果你使用了row-reverse,那么1 2 3排列的三个盒子就会变成3 2 1 排列。*/
}
div {
height: 100%;
/*flex指的是每一个div各占一份,也就是三个DIV均分为三等份*/
flex: 1;
}
div:first-child {
background-color: pink;
}
div:nth-child(2) {
background-color: red;
}
div:nth-child(3) {
background-color: blue;
}
<section>
    <div>1</div>
    <div>2</div>
    <div>3</div>
</section>
效果:
(2)伸缩极限宽度(max-width/min-width)
控制外盒子的最大/最小伸缩宽度。
section {
            /*注意,伸缩布局父盒子也要用百分比来设定宽度*/
            width: 80%;
            height: 200px;
            margin: 100px auto;

            /*在CSS3中,我们引入一个新的伸缩布局*/
            display: flex;
            /*伸缩布局的宽是不定的,我们伸缩页面,其宽度也会伸缩,但是会一直保持在三等份*/

            /*我们还可以为父盒子设置最大宽度和最小宽度*/
            /*max-width*/
            min-width: 500px;
            /*这样父盒子缩小到500px就会固定下来,不再缩小*/
}
div {
    height: 100%;
    /*flex指的是每一个div各占一份,也就是三个DIV均分为三等份*/
    flex: 1;
}
div:first-child {
    background-color: pink;
}
div:nth-child(2) {
    background-color: red;
}
div:nth-child(3) {
    background-color: blue;
}
<section>
<div>1</div>
<div>2</div>
<div>3</div>
</section>效果:
可以看到盒子缩小到一定大小就固定住,不再缩小了。
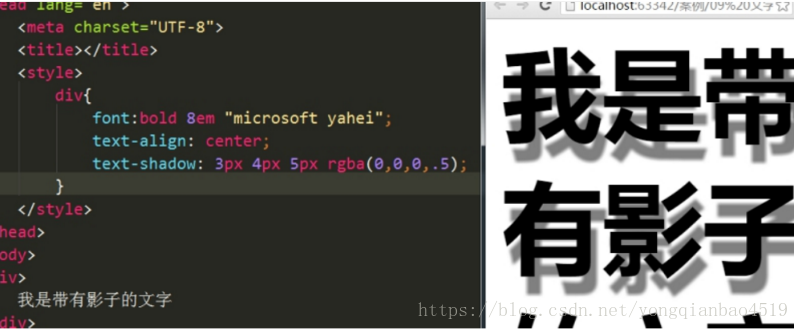
三、CSS3文字阴影
格式:
| text-shadow:水平位置 垂直位置 模糊距离 阴影颜色; |
前两项必写,后两项可以选写。
四、CSS3背景运用
1.背景渐变(了解即可)
就是颜色渐变,但是兼容性非常差,很不常用。
格式:
| background:-webkit-linear-gradient(渐变的起始位置, 起始颜色, 结束颜色); |
| background:-webkit-linear-gradient(渐变的起始位置, 颜色 位置, 颜色位置....); |
2.CSS3背景缩放
通过background-size来设置背景图片的尺寸,就像设置img的尺寸一样,在移动Web开发中做屏幕适配非常广泛。
因为移动web开发一半都要适用不同系统,比如最主流的IOS和Android,并且屏幕的像素也是需要考虑的因素,所以一般移动Web开发中所用的精灵图会比较大,分辨率比较高,所以就需要用到背景缩放,具体应用可看下方携程网案例。
格式:
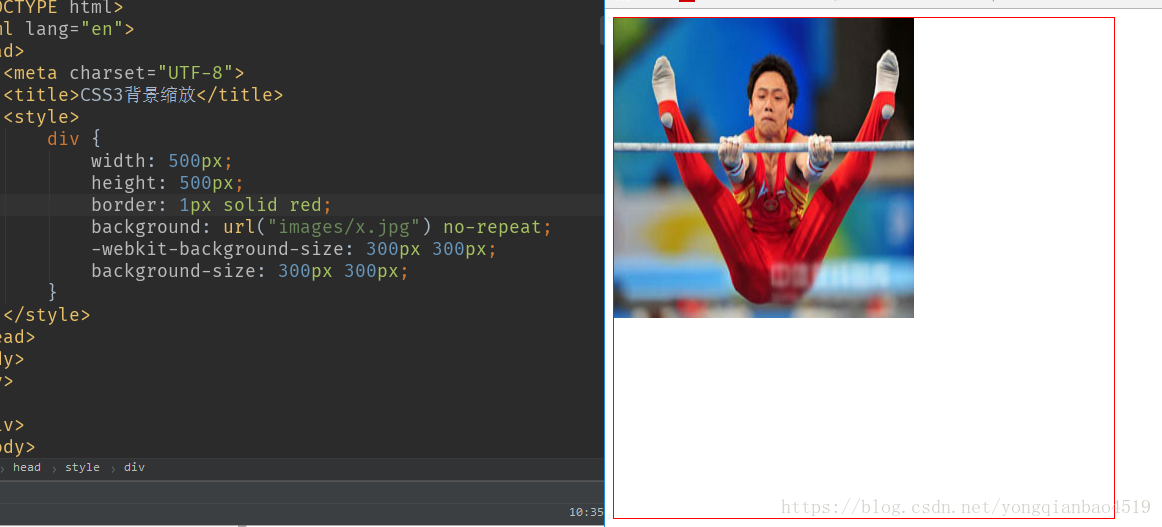
(1)可以设置长度单位(px)或百分比(设百分比时以盒子的宽高为参照)。
效果:
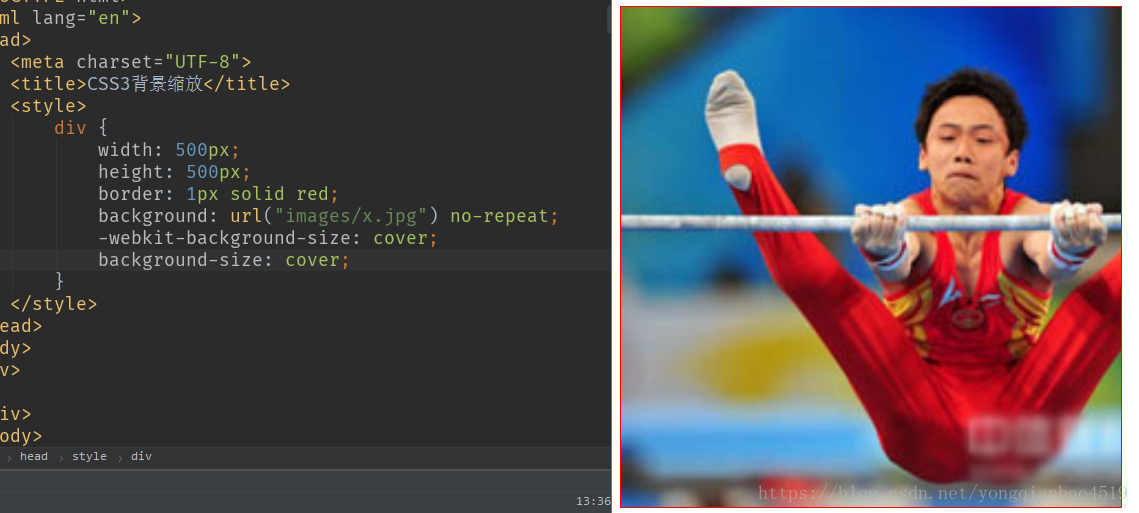
(2)可以设置为cover。
设置为cover时,会自动调整缩放比例,保证背景填满一整个盒子,如有溢出部分则会被隐藏,也就是高跨到极致。cover是最常用的。
效果:
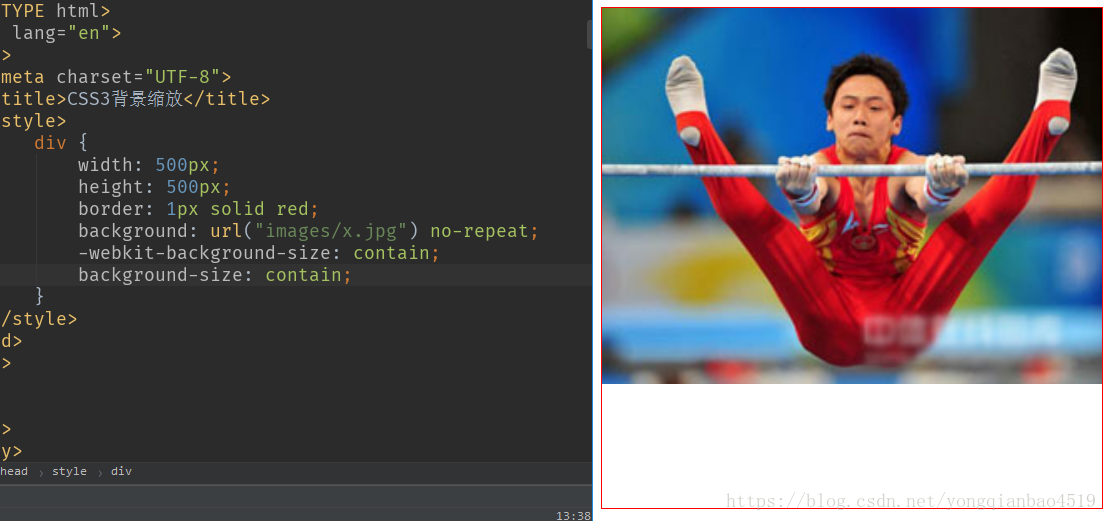
(3)可以设置为contain。
设置为contain时,会自动调整缩放比例,保证图片始终完整显示在背景区域,也就是宽跨到极致。
效果:
3.多背景
以逗号隔开可以设置多背景。
- 一个元素可以设置多重背景图像。
- 每组属性使用逗号分隔。
- 如果设置多重背景图之间存在交集(即重叠关系),则前面的背景图会覆盖在后面的背景图上。
格式:
| background: url(test1.jpg) no-repeat scroll 10px 20px/70px 90px , url(test1.jpg) no-repeat scroll 10px 20px/110px 130px c #aaa; |
案例(泡泡浮动效果):
效果:
图片:
代码:
div {
            width: 300px;
            height: 80px;
            -webkit-border-radius: 20px;
            -moz-border-radius: 20px;
            border-radius: 20px;

            background: url("images/paopao.png") no-repeat top left,url("images/paopao.png") no-repeat right bottom;
            /*多背景颜色写在后面,以防被叠加*/
            background-color: skyblue;
            -webkit-transition: all 3s;
            -moz-transition: all 3s;
            -ms-transition: all 3s;
            -o-transition: all 3s;
            transition: all 3s;
        }
        div:hover {
            background-position: right bottom, top left;
}<div></div>五、综合案例(携程网)
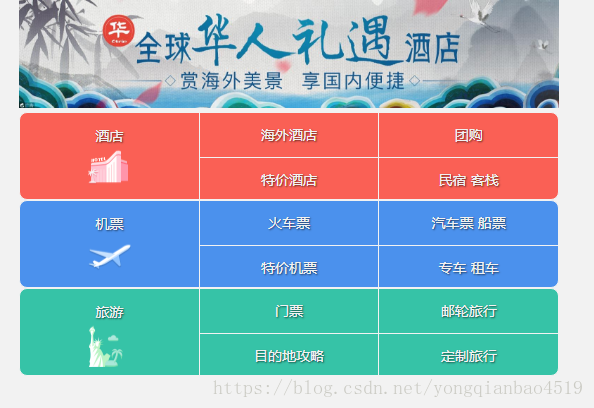
效果:
图片:
代码:
        * {
            margin: 0;
            padding: 0;
            box-sizing: border-box;
        }
        html, body {
            max-width: 540px;
            min-width: 320px;
            margin: 0 auto;
            font: normal 14px/1.5 Tahoma,"Lucida Grande",Verdana,"Microsoft Yahei",STXihei,hei;
            background-color: #F2F2F2;
        }
        header {
            height: 108px;
        }
        header img {
            height: 100%;
            width: auto;
        }
        nav {
            width: 100%;
            margin-top: 4px;
        }
        nav a {
            text-decoration: none;
            color: #F2F2F2;
            text-shadow: 1px 1px 1.5px rgba(0, 0, 0, .6);
            /*text-shadow:水平位置 垂直位置 模糊距离 阴影颜色;*/
        }
        .row {
            height: 88px;
            display: flex;
            background-color: #FA6055;
            border: 1px solid #F2F2F2;
            border-radius: 8px;
            overflow: hidden;
        }
        .flight {
            background-color: #4B91ED;
        }
        .travel {
            background-color: #36C3A7;
        }
        .row div {
            height: 100%;
            border-right: 1px solid #F2F2F2;
            flex: 1;
        }
        .row div:nth-child(3) {
            border: 0;
        }
        .row div a {
            width: 100%;
            height: 100%;
            display: block;
        }
        .row div em {
            text-align: center;
            line-height: 45px;
            font-style: normal;
            display: block;
            height: 45px;
        }
        .row div i {
            display: block;
            margin: -10px auto;
            width: 43px;
            height: 43px;
            background: url("images/ctrip.png") no-repeat 0 -127px;
            -webkit-background-size: 104px;
            background-size: 104px;
        }
        .row div .flight-icon {
            background-position: 0 -288px;
        }
        .row div .travel-icon {
            background-position: 0 -178px;
        }
        .row-d{
            display: flex;
            flex-direction: column;
        }
        .row-d a {
            text-align: center;
            line-height: 44px;
            flex: 1;
        }
        .row-d a:first-child {
            border-bottom: 1px solid #F2F2F2;
        }
    <header>
        <img src="images/banner.jpg" alt="">
    </header>
    <nav>
        <div class="row">
            <div>
                <a href="#">
                    <em>酒店</em>
                    <i></i>
                </a>
            </div>
            <div class="row-d">
                <a href="#">海外酒店</a>
                <a href="#">特价酒店</a>
            </div>
            <div class="row-d">
                <a href="#">团购</a>
                <a href="#">民宿 客栈</a>
            </div>
        </div>
        <div class="row flight">
            <div>
                <a href="#">
                    <em>机票</em>
                    <i class="flight-icon"></i>
                </a>
            </div>
            <div class="row-d">
                <a href="#">火车票</a>
                <a href="#">特价机票</a>
            </div>
            <div class="row-d">
                <a href="#">汽车票 船票</a>
                <a href="#">专车 租车</a>
            </div>
        </div>
        <div class="row travel">
            <div>
                <a href="#">
                    <em>旅游</em>
                    <i class="travel-icon"></i>
                </a>
            </div>
            <div class="row-d">
                <a href="#">门票</a>
                <a href="#">目的地攻略</a>
            </div>
            <div class="row-d">
                <a href="#">邮轮旅行</a>
                <a href="#">定制旅行</a>
            </div>
        </div>
    </nav>
