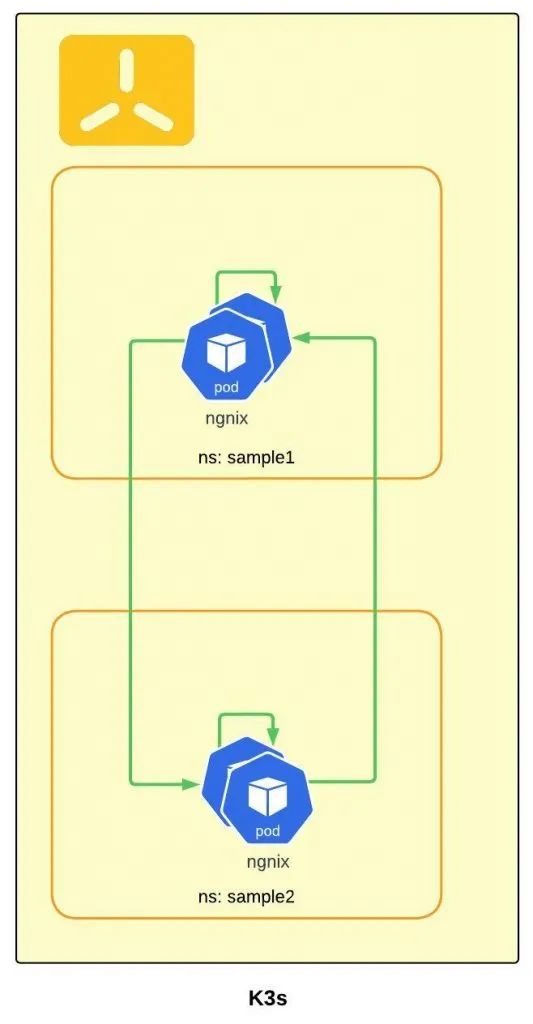
本文将介绍如何在示例项目中使用网络策略,并解释它在 K3s 中的工作原理,从而帮助用户提高部署的安全性。
关于 K3s 对网络策略的支持存在一个普遍的误解,因为 K3s 默认使用 Flannel CNI,而 Flannel CNI 不支持网络策略。其实,K3s 使用 Kube-router 网络策略控制器为网络策略提供支持,所以网络策略也可以在 K3s 中使用,就像在其他 Kubernetes 发行版中一样。
正常的 Pod 相互通信
默认情况下,在 K3s 中,一个特定命名空间中的所有 services/Pod 都可以被任何其他命名空间中的所有其他 Pod 访问。
为了举例说明 Pod 如何相互通信,让我们在两个不同的命名空间(sample1 和 sample2)中使用简单的 nginx deployment 和 service 来测试,如下所示:
nginx.yaml
apiVersion: apps/v1
kind: Deployment
metadata:
  name: nginx
  labels:
    app: nginx
spec:
  replicas: 1
  selector:
    matchLabels:
      app: nginx
  template:
    metadata:
      labels:
        app: nginx
    spec:
      containers:
      - name: nginx
        image: nginx
        ports:
        - containerPort: 80
---
apiVersion: v1
kind: Service
metadata:
  name: ngnix-service
spec:
  selector:
    app: nginx
  type: ClusterIP
  ports:
  - protocol: TCP
    port: 80
    targetPort: 80
创建测试命名空间并将 nginx 部署到对应命名空间中:
# 在 sample1 中创建第一个示例应用
kubectl create ns sample1
kubectl apply -f nginx.yaml -n sample1

# 在 sample2 中创建第二个示例应用
kubectl create ns sample2
kubectl apply -f nginx.yaml -n sample2
接下来可以尝试在 Pod 中使用 curl 来检查 Pod 间的通信。
sample1 中的 pod -> sample2 命名空间中的 service:
# 从 sample1 访问 sample2
kubectl exec -n sample1 $(kubectl get po -n sample1 -l app=nginx -o name) -- curl --max-time 2 http://ngnix-service.sample2.svc.cluster.local

# 从 sample1 访问 sample1
kubectl exec -n sample1 $(kubectl get po -n sample1 -l app=nginx -o name) -- curl --max-time 2 http://ngnix-service.sample1.svc.cluster.local:80
sample2 中的 pod -> sample1 命名空间中的 service:
# 从 sample2 访问 sample1
kubectl exec -n sample2 $(kubectl get po -n sample2 -l app=nginx -o name) -- curl --max-time 2 http://ngnix-service.sample1.svc.cluster.local:80

# 从 sample2 访问 sample2
kubectl exec -n sample2 $(kubectl get po -n sample2 -l app=nginx -o name) -- curl --max-time 2 http://ngnix-service.sample2.svc.cluster.local:80
可以看到,以上命令均可以访问到对应目的地址,也就代表相互都可以通信。
使用 NetworkPolicy 限制 Pod 相互通信
NetworkPolicy Editor(https://editor.cilium.io/)是一个很好的 UI 工具,可以用于生成 Networkploicy,下面是一个示例。
apiVersion: networking.k8s.io/v1
kind: NetworkPolicy
metadata:
  name: test-network