原理
用阈值来分离图片中的对象是一种最简单的分离方法。根据我们想要分离的图片中的对象,设置特定的阈值,然后通过将图片的每个像素值与该阈值进行对比,从而确定我们想要的图像中的区域。
二值化类型
OpenCV中的threshold函数共有5种类型的阈值操作方法可选。
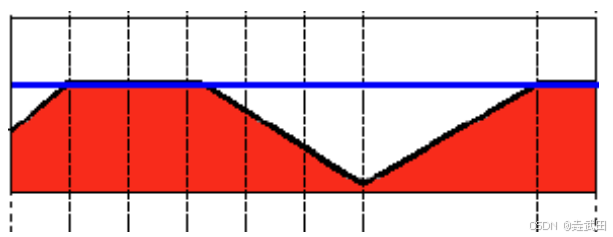
首先我们有一张原图,图中像素点的值用
s
r
c
(
x
,
y
)
src(x,y)
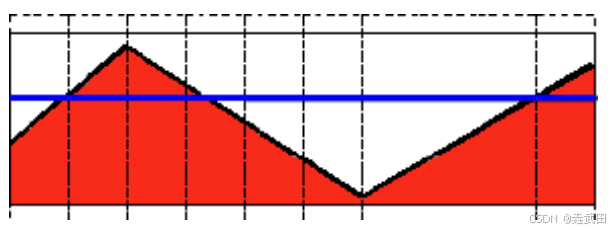
src(x,y)表示,该图片中的颜色分布图如下(纵轴为颜色值,横轴为不同像素点,蓝线为固定阈值):
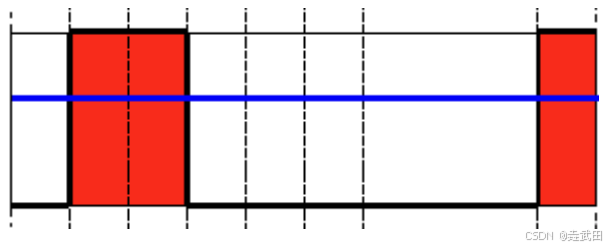
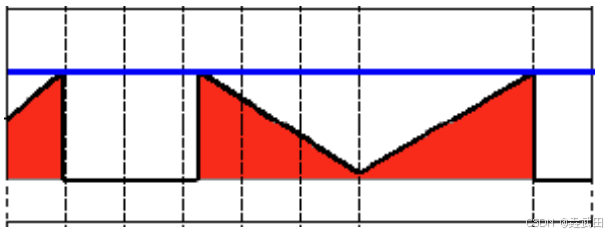
二值化(Threshold Binary)
二值化操作的具体方法用公式表示为:
d
s
t
(
x
,
y
)
=
{
m
a
x
V
a
l
u
e
if
s
r
c
(
x
,
y
)
>
t
h
r
e
s
h
o
l
d
0
otherwise
dst(x,y)= \begin{cases} maxValue & \text{if} \quad src(x,y) > threshold \\ 0 & \text{otherwise} \end{cases}
dst(x,y)={maxValue0ifsrc(x,y)>thresholdotherwise
- d s t ( x , y ) 为像素点阈值操作后的结果,下同 dst(x,y)为像素点阈值操作后的结果,下同 dst(x,y)为像素点阈值操作后的结果,下同
即,如果像素点的颜色值
s
r
c
(
x
,
y
)
src(x,y)
src(x,y)高于阈值
t
h
r
e
s
h
o
l
d
threshold
threshold,该像素点就会被赋予用户定义的
m
a
x
V
a
l
u
e
maxValue
maxValue;否则的话,像素点就会被赋予0值。
其效果用颜色值分布图表示,如下:
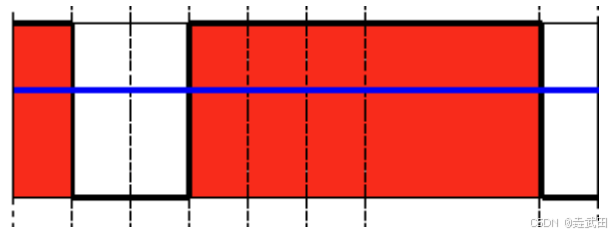
反二值化(Threshold Binary, Inverted)
反二值化与二值化正好相反,用公式表达为:
d
s
t
(
x
,
y
)
=
{
0
if
s
r
c
(
x
,
y
)
>
t
h
r
e
s
h
o
l
d
m
a
x
V
a
l
u
e
otherwise
dst(x,y)= \begin{cases} 0 & \text{if} \quad src(x,y)>threshold \\ maxValue & \text{otherwise} \end{cases}
dst(x,y)={0maxValueifsrc(x,y)>thresholdotherwise
即,超过阈值的像素点都被赋予0值,而没有超过的都被赋予
m
a
x
V
a
l
u
e
maxValue
maxValue。
用颜色值分布图表示如下:
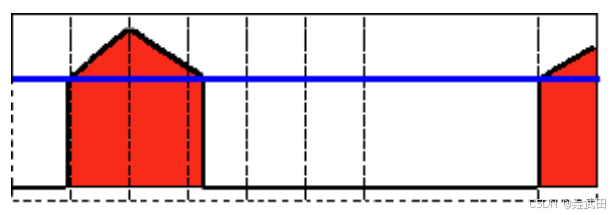
截断(Truncate)
截断的具体方法用公式表示如下:
d
s
t
(
x
,
y
)
=
{
t
h
r
e
s
h
o
l
d
if
s
r
c
(
x
,
y
)
>
t
h
r
e
s
h
o
l
d
s
r
c
(
x
,
y
)
otherwise
dst(x,y)= \begin{cases} threshold & \text{if} \quad src(x,y)>threshold \\ src(x,y) & \text{otherwise} \end{cases}
dst(x,y)={thresholdsrc(x,y)ifsrc(x,y)>thresholdotherwise
即,超过阈值的像素点被赋予阈值的值,而没有超过的则保留原值。
用颜色分布图表示如下:
零值化
零值化操作用公式表达如下:
d
s
t
(
x
,
y
)
=
{
s
r
c
(
x
,
y
)
if
s
r
c
(
x
,
y
)
>
t
h
r
e
s
h
o
l
d
0
otherwise
dst(x,y)= \begin{cases} src(x,y) & \text{if} \quad src(x,y)>threshold \\ 0 & \text{otherwise} \end{cases}
dst(x,y)={src(x,y)0ifsrc(x,y)>thresholdotherwise
即,如果超过阈值就保留原值,没有超过阈值就赋予0值。
用颜色值分布图表示如下:
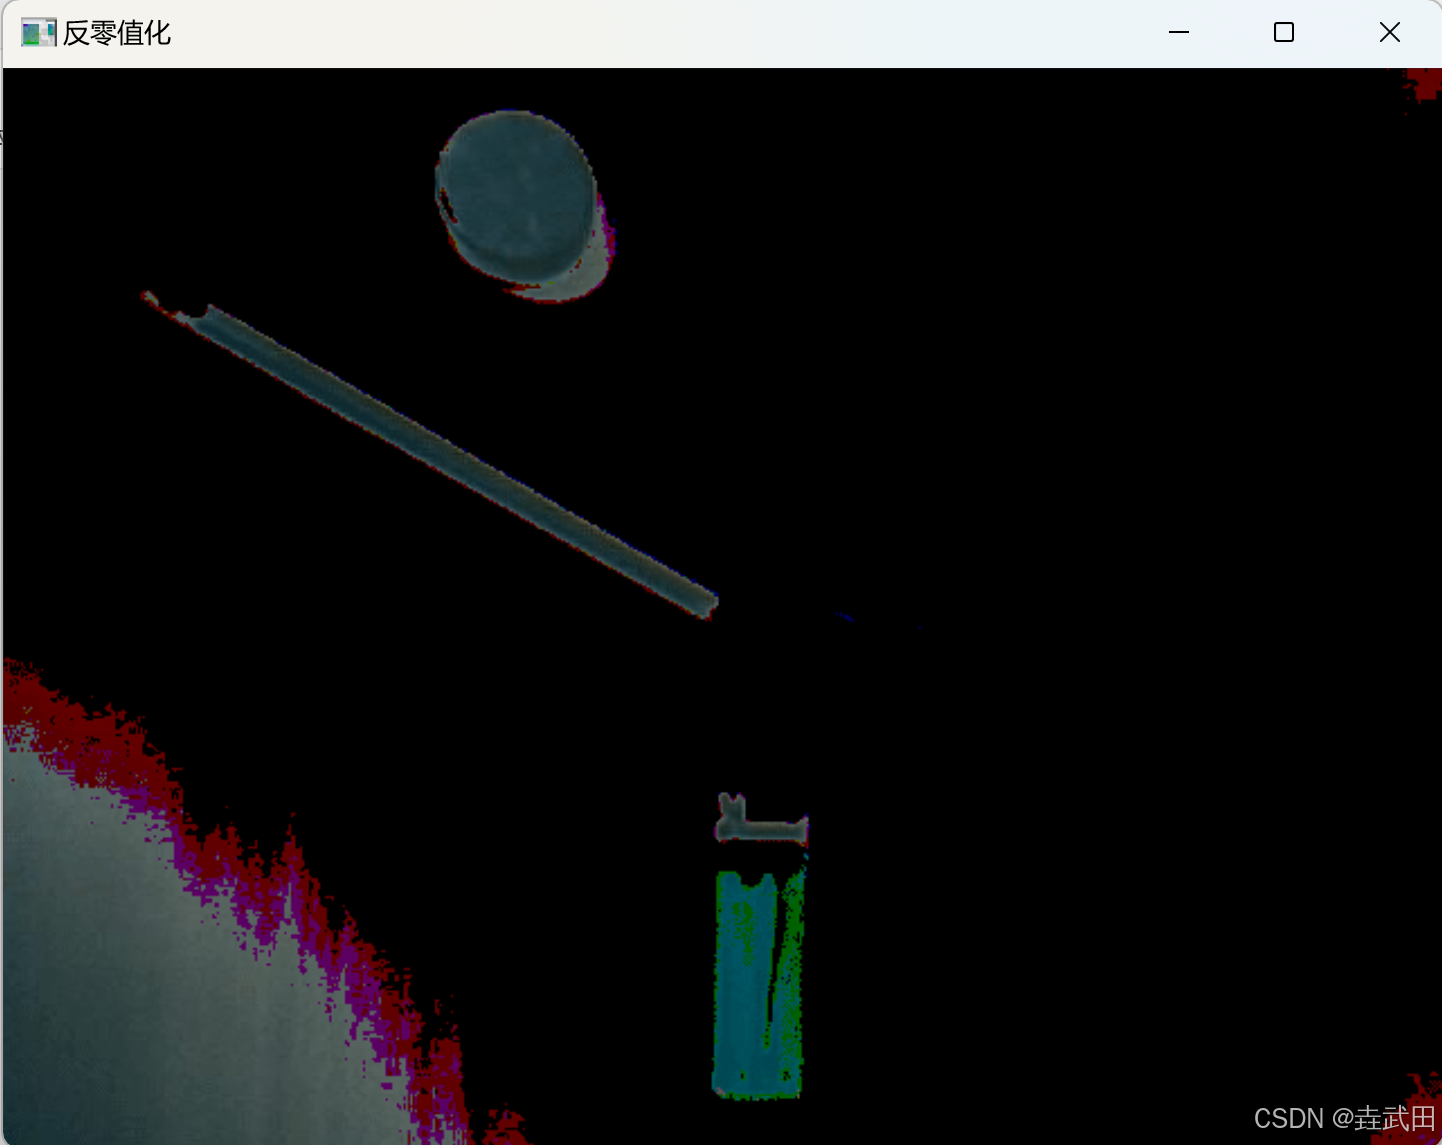
反零值化
顾名思义这个方法是零值化方法的反面,用公式表示如下:
d
s
t
(
x
,
y
)
=
{
0
if
s
r
c
(
x
,
y
)
>
t
h
r
e
s
h
o
l
d
s
r
c
(
x
,
y
)
otherwise
dst(x,y)= \begin{cases} 0 & \text{if} \quad src(x,y)>threshold \\ src(x,y) & \text{otherwise} \end{cases}
dst(x,y)={0src(x,y)ifsrc(x,y)>thresholdotherwise
即,超过阈值的像素点赋予0值,没有超过阈值的保留原值。
用颜色分布图表示其结果如下:
代码实现
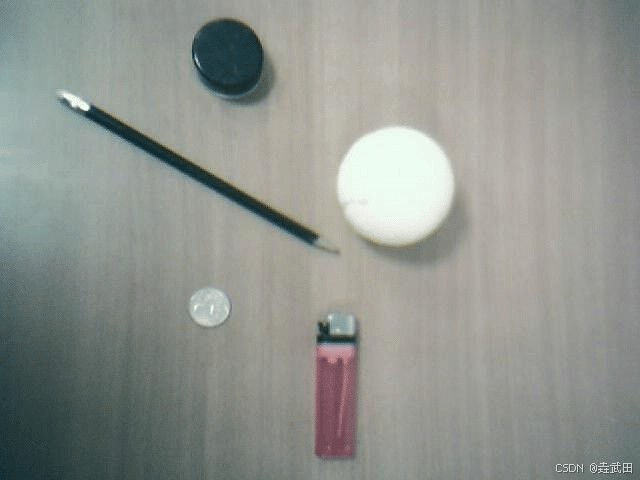
本示例使用的图片可以在下载OpenCV文件夹中找到:"...\opencv\sources\samples\data\stuff.jpg"。原图如下:
5种类型的阈值操作都是用cv:threshold函数实现的,该函数原型如下:
double cv::threshold(InputArray	src,
					OutputArray	dst,
					double		threshold,
					double		maxValue,
					int			type)
src:原图dst:输出图threshold:阈值maxValue:二值化和反二值化中的maxvalue,但是其他方法中也需要指定,不过用不到type:阈值操作类型
*THRESH_BINARY:二值化,0
*THRESH_BINARY_INV:反二值化,1
*THRESH_TRUNC:截断,2
*THRESH_TOZERO:零值化,3
*THRESH_TOZERO_INV:反零值化,4- 目前用不到返回值,先不用管
这里将所有的阈值threshold都设置为100;
将二值化和反二值化中的maxValue都设置为255;
//二值化
Mat binary_dst;
threshold(src,
	binary_dst,
	100,
	255,
	0);

//反二值化
Mat inv_binary_dst;
threshold(src,
	inv_binary_dst,
	100,
	255,
	1);

//截断
Mat trunc_dst;
threshold(src,
	trunc_dst,
	100,
	255,
	2);

Mat trunc_dst1;
threshold(src,
	trunc_dst1,
	100,
	150,
	2);

//零值化
Mat zero_dst;
threshold(src,
	zero_dst,
	100,
	255,
	3);

//反零值化
Mat inv_zero_dst;
threshold(src,
	inv_zero_dst,
	100,
	255,
	4);
效果如下:
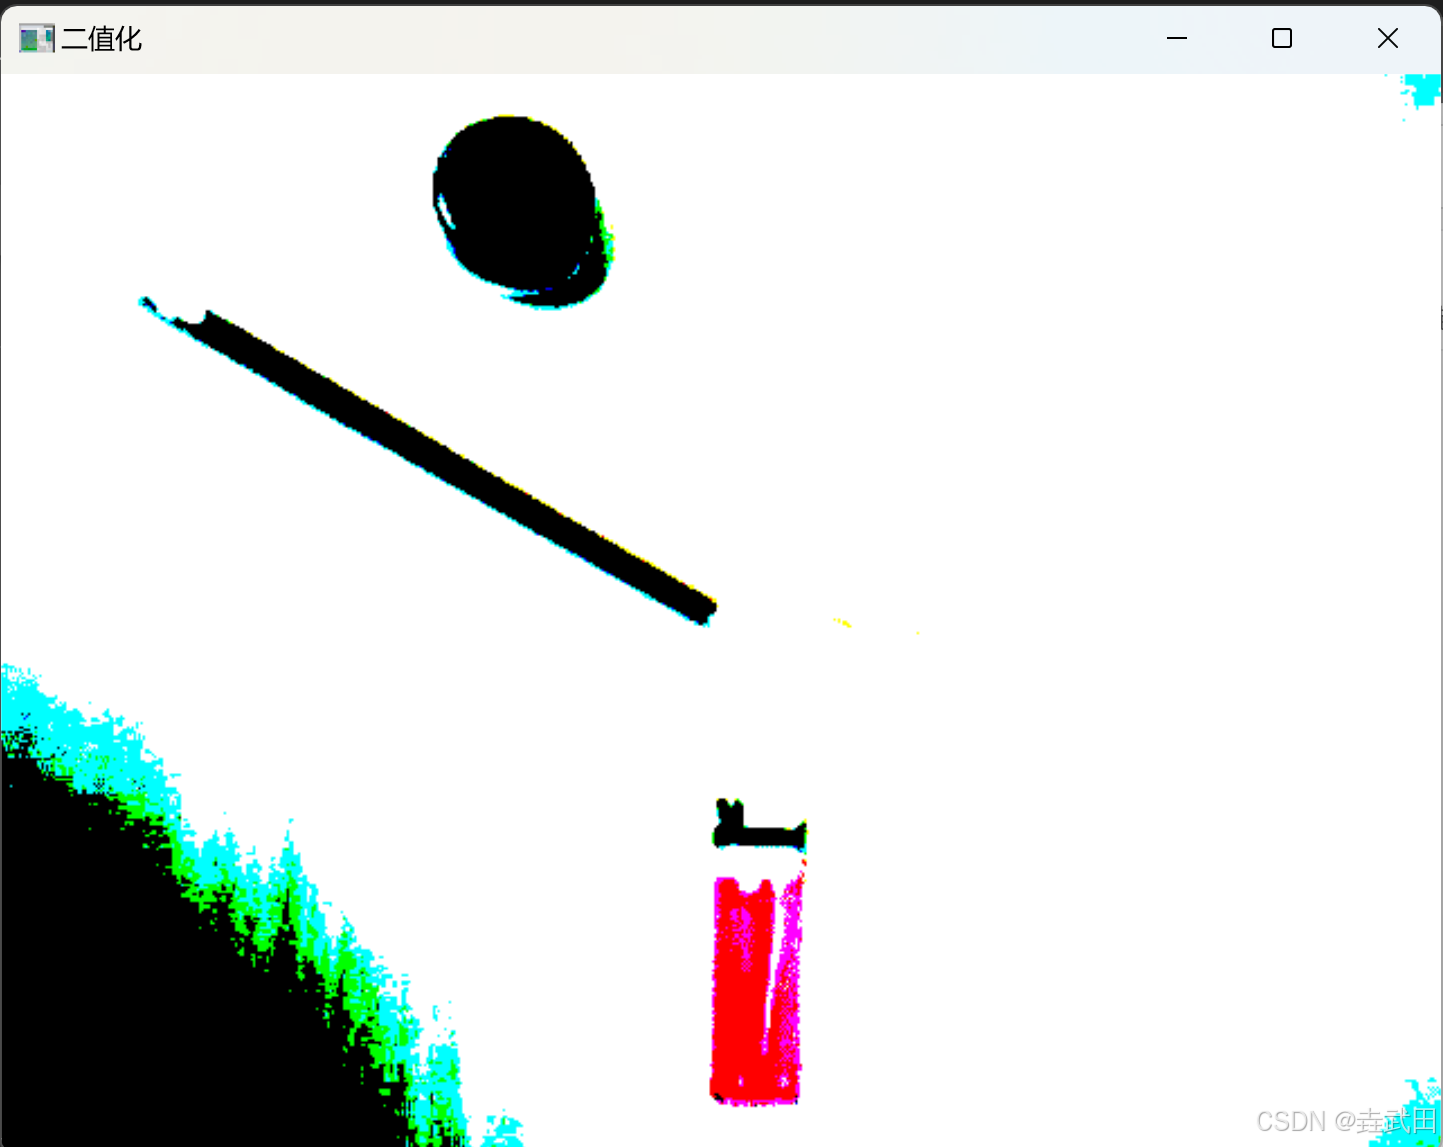
- 二值化
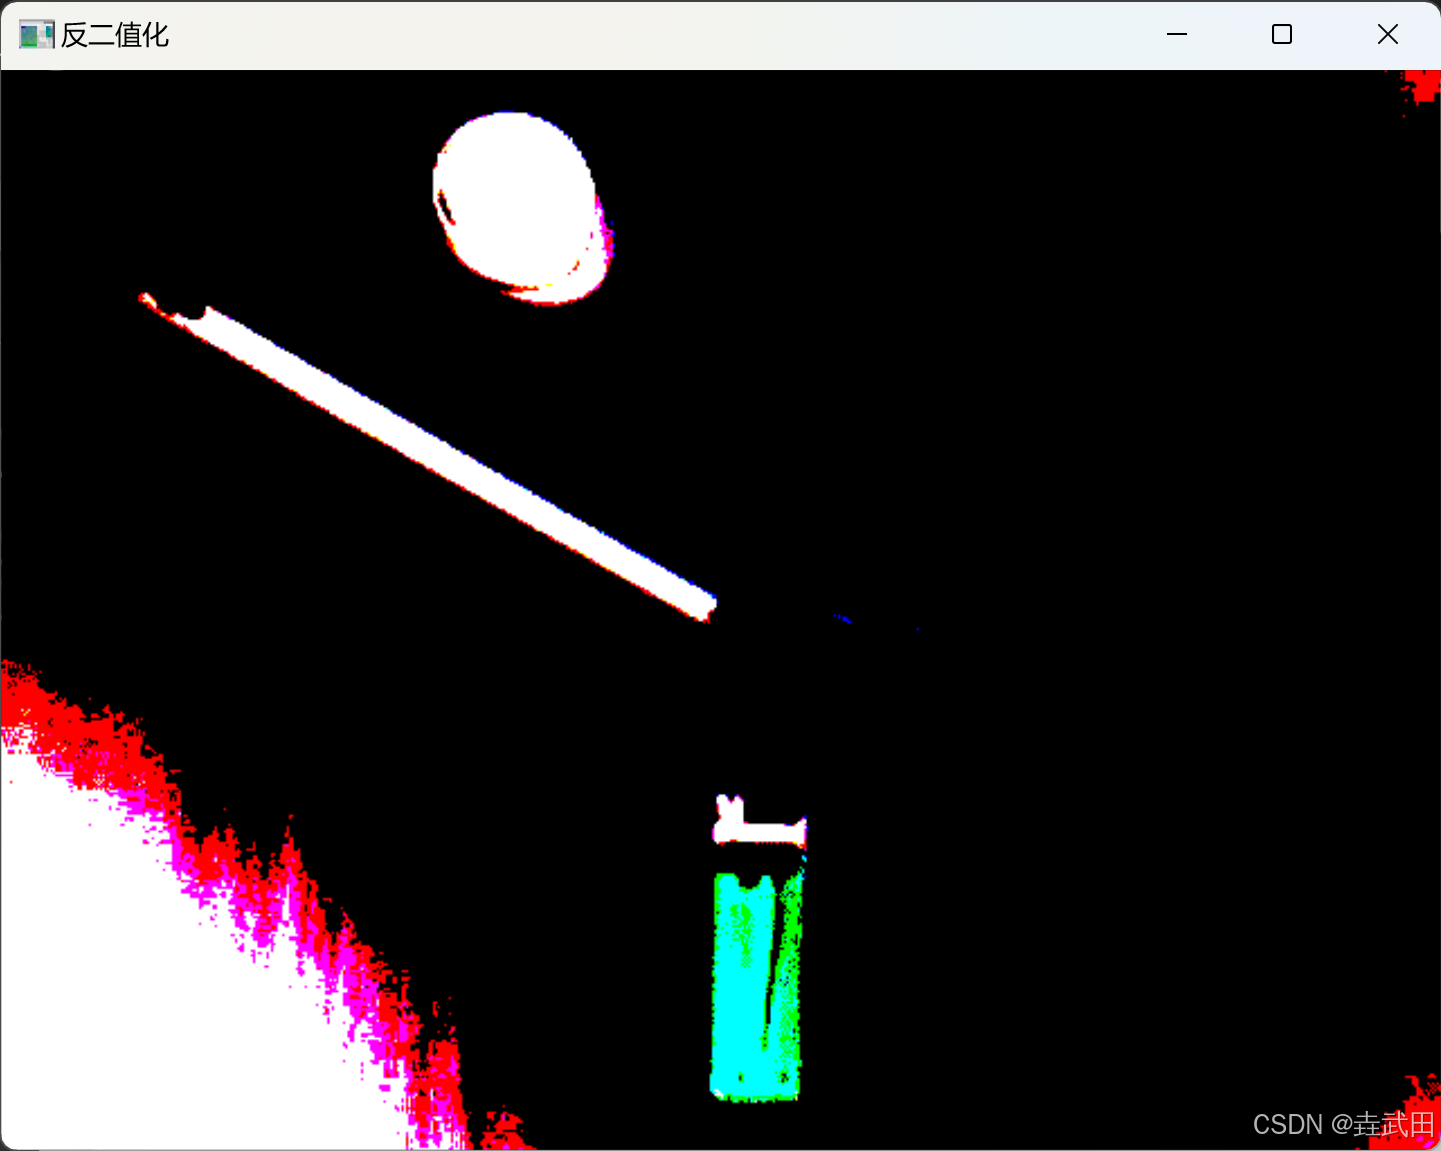
- 反二值化
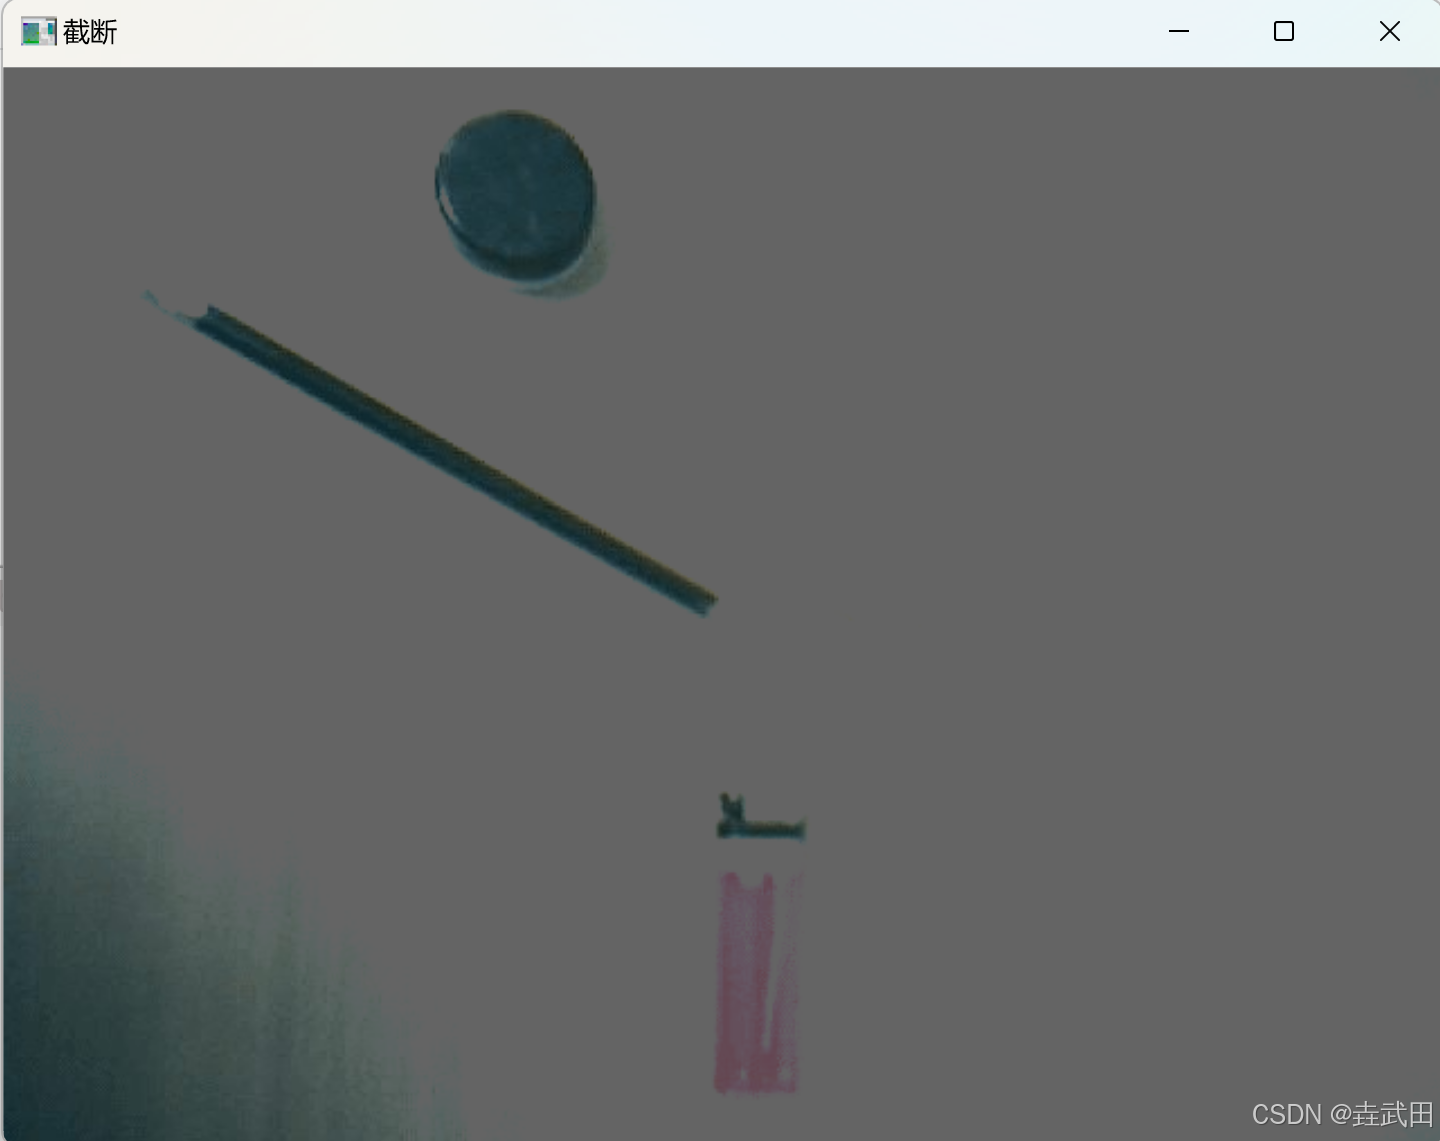
- 截断
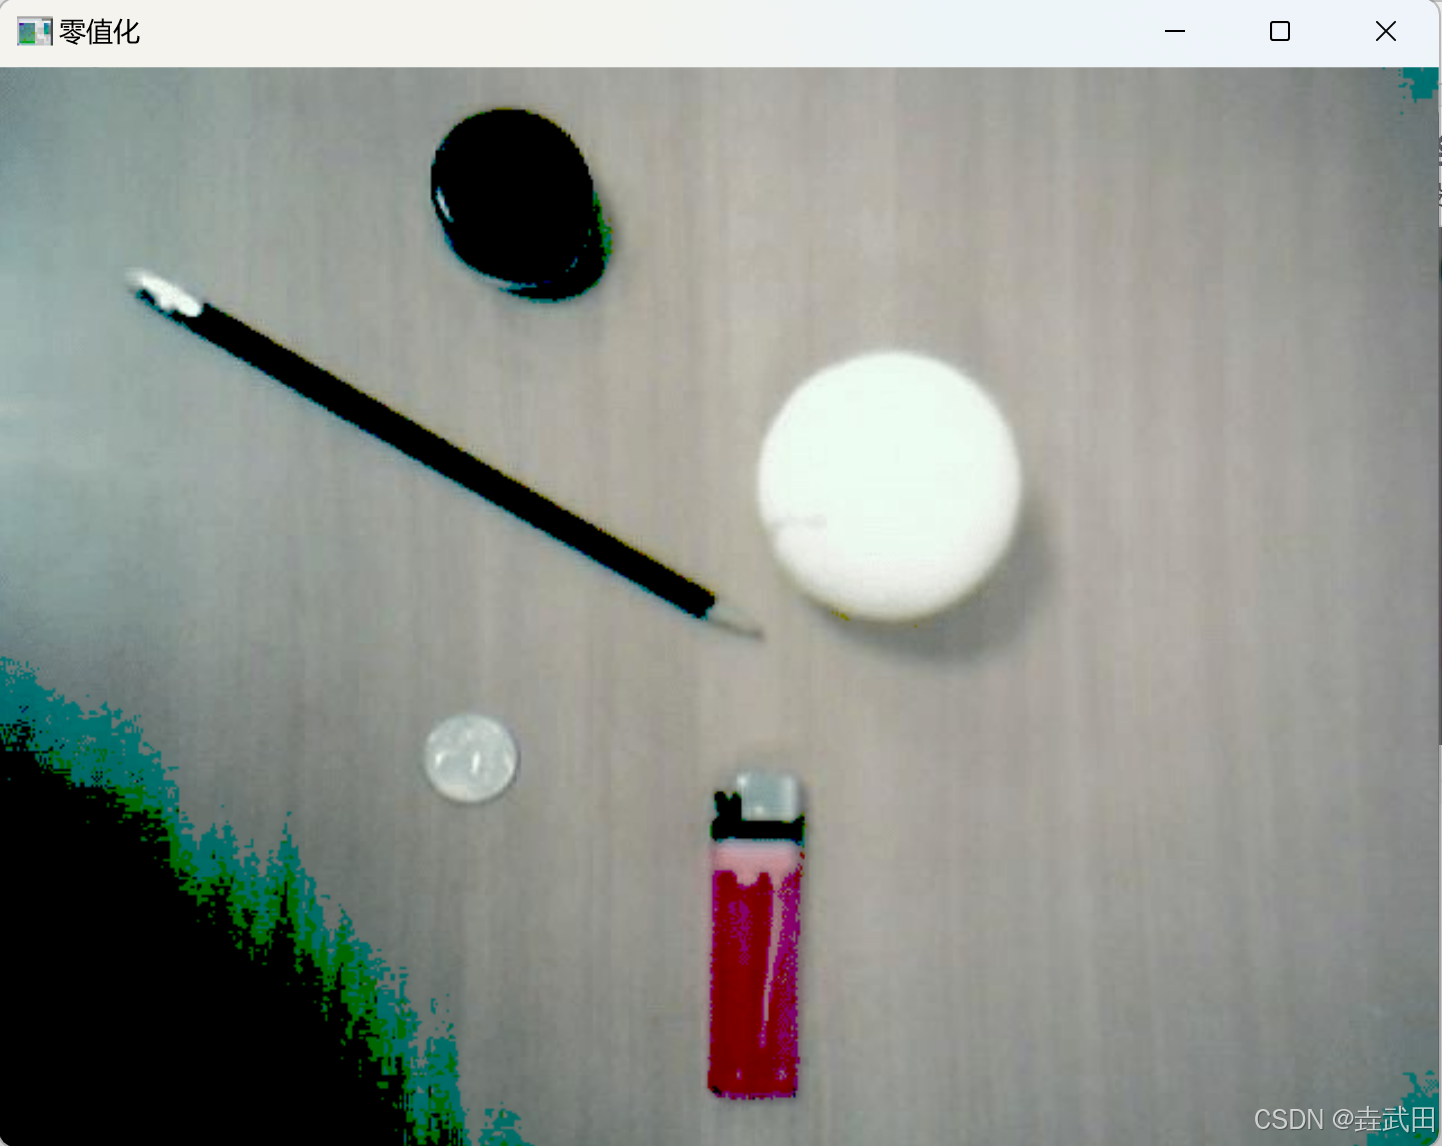
- 零值化
- 反零值化
可以看到对于这张图片,在上述的参数情况下,二值化和反二值化方法能更好地分离图像中的墙壁、打火机等对象。
也可以改变参数或者使用滑动条来挑选更适合每种方法的参数。