《接口设计》系列,共包含以下 5 篇文章:
- 前后端的通信方式 REST
- 如何设计统一 RESTful 风格的数据接口
- 为 APP、PC、H5 网页提供统一风格的 API(实战篇,附源码地址)
- 用 Swagger 实现接口文档
- 学会用 RestTemplate 发请求
😊 如果您觉得这篇文章有用 ✔️ 的话,请给博主一个一键三连 🚀🚀🚀 吧 (点赞 🧡、关注 💛、收藏 💚)!!!您的支持 💖💖💖 将激励 🔥 博主输出更多优质内容!!!
学会用 RestTemplate 发请求
1.认识 RestTemplate
在 Java 应用程序中访问 RESTful 服务,可以使用 Apache 的 HttpClient 来实现。不过此方法使用起来太烦琐。 Spring 提供了一种简单便捷的模板类 —— RestTemplate 来进行操作。RestTemplate 是 Spring 提供的用于访问 REST 服务的客户端,它提供了多种便捷访问远程 HTTP 服务的方法,能够大大提高客户端的编写效率。
RestTemplate 用于同步 Client 端的核心类,简化与 HTTP 服务的通信。在默认情况下, RestTemplate 默认依赖 JDK 的 HTTP 连接工具。也可以通过 setRequestFactory 属性切换到不同的 HTTP 源,比如 Apache HttpComponents、Netty 和 OkHttp。
RestTemplate 简化了提交表单数据的难度,并附带自动转换为 JSON 格式数据的功能。该类的入口主要是根据 HTTP 的 6 种方法制定的。
| HTTP 方法 | RestTemplate 方法 | HTTP 方法 | RestTemplate 方法 |
|---|---|---|---|
| DELETE | delete | POST | postForLocation |
| GET | getForObject | POST | postForObject |
| GET | getForEntity | PUT | put |
| HEAD | headForHeaders | any | exchange |
| OPTIONS | optionsForAllow | any | execute |
此外,exchange 和 excute 也可以使用上述方法。
RestTemplate 默认使用 HttpMessageConverter 将 HTTP 消息转换成 POJO,或从 POJO 转换成 HTTP 消息,默认情况下会注册主 MIME 类型的转换器,但也可以通过 setMessageConverters 注册其他类型的转换器。
2.创建测试实体
package com.example.demo.entity;

public class User {
    private long id;
    private String name;

    public User() {
    }

    public User(long id, String name) {
        this.id = id;
        this.name = name;

    }

    public long getId() {
        return id;
    }

    public void setId(long id) {
        this.id = id;
    }

    public String getName() {
        return name;
    }

    public void setName(String name) {
        this.name = name;
    }

}
3.创建用于测试的 API
@RestController
public class TestController {

    @RequestMapping(value = "/getparameter", method = RequestMethod.GET)
    public User getparameter(User user) {
        return user;
    }

    @RequestMapping(value = "/getuser1", method = RequestMethod.GET)
    public User user1() {
        return new User(1, "Bob");
    }

    @RequestMapping(value = "/postuser", method = RequestMethod.POST)
    public User postUser(User user) {
        System.out.println("name:" + user.getName());
        System.out.println("id:" + user.getId());
        return user;
    }

	@ResponseBody
    @RequestMapping(path = "success")
    public String loginSuccess(String name, Integer id) {
        return "welcome " + name;
    }

    @RequestMapping(value = "/post", method = RequestMethod.POST)
    public String post(HttpServletRequest request,
    				   @RequestParam(value = "name", required = false) String name,
                       @RequestParam(value = "password", required = false) String password,
                       @RequestParam(value = "id", required = false) Integer id, HttpServletResponse response) {
        // 如果获取的值为 “null”,则需要把 URI 添加到 response 信息的 header 中。添加方法为:“response.addHeader("Location",uri)”
        response.addHeader("Location", "success?name=" + name + "&id=" + id + "&status=success");
        return "redirect:/success?name=" + name + "&id=" + id + "&status=success";
        // return "redirect:/success?name=" + URLEncoder.encode(name, "UTF-8") + "&id=" + id + "&status=success";
    }
}
4.用 RestTemplate 发送 GET 请求
在 RestTemplate 中发送 GET 请求,可以通过 getForEntity 和 getForObject 两种方式。
下面具体实现用 RestTemplate 发送 GET 请求。
4.1 方法一:使用 getForEntity
4.1.1 返回 String(不带参数)
@RequestMapping("/nparameters")
// 返回 String, 不带参数
public String nparameters() {
    RestTemplate client = restTemplateBuilder.build();
    ResponseEntity<String> responseEntity = client.getForEntity("http://localhost:8080/getuser1", String.class);
    return responseEntity.getBody();
}
4.1.2 返回 String(带参数)
在调用服务提供者提供的接口时,有时需要传递参数,有以下两种不同的方式。
① 用一个数字做占位符。最后是一个可变长度的参数,用来替换前面的占位符。使用方法见以下代码:
@RequestMapping("/withparameters1")
// 返回 String, 带参数
public String withparameters1() {
    RestTemplate client = restTemplateBuilder.build();
    ResponseEntity<String> responseEntity = client.getForEntity("http://localhost:8080/getparameter?name={1}&id={2}", String.class, "Mike", 2);
    return responseEntity.getBody();
}
② 使用 name={name} 这种形式。最后一个参数是一个 map,map 的 key 即为前边占位符的名字,map 的 value 为参数值。使用方法见以下代码:
@RequestMapping("/withparameters2")
// 返回 String, 带参数
public String withparameters2() {
    RestTemplate client = restTemplateBuilder.build();
    Map<String, String> map = new HashMap<>();
    map.put("name", "Tony");
    ResponseEntity<String> responseEntity = client.getForEntity("http://localhost:8080/getparameter?name={name}&id=3", String.class, map);
    return responseEntity.getBody();
}
4.1.3 返回对象
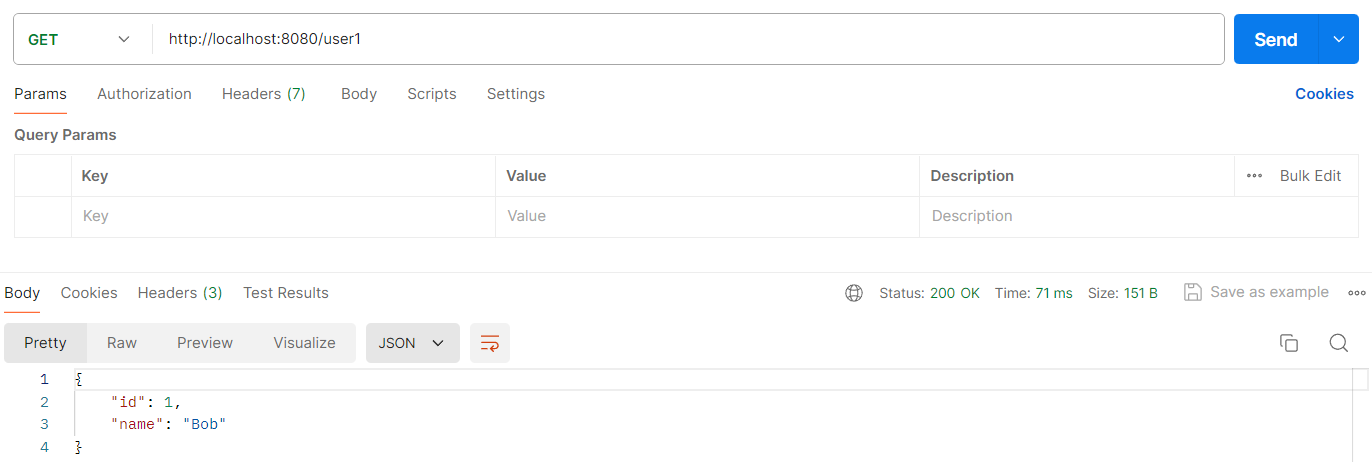
@RequestMapping("/user1")
// 返回一个自定义类型的对象
public User restUser1() {
    RestTemplate client = restTemplateBuilder.build();
    ResponseEntity<User> responseEntity = client.getForEntity("http://localhost:8080/getuser1", User.class);
    return responseEntity.getBody();
}
4.2 方法二:使用 getForObject
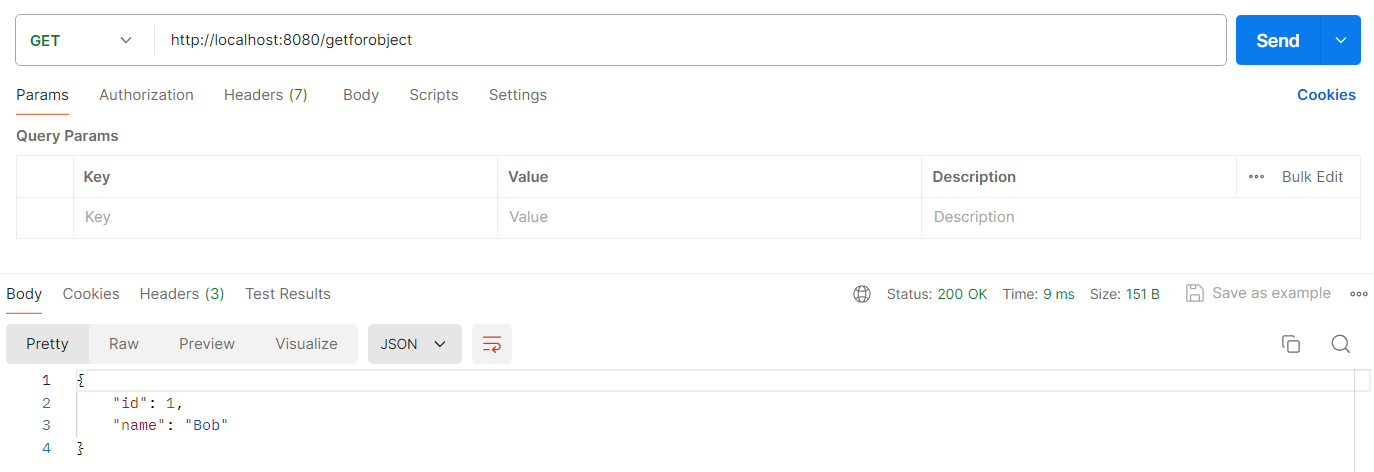
getForObject 函数是对 getForEntity 函数的进一步封装。如果你只关注返回的消息体的内容,对其他信息都不关注,则可以使用 getForObject,见以下代码:
@RequestMapping("/getforobject")
public User getForObject() {
    RestTemplate client = restTemplateBuilder.build();
    User user = client.getForObject("http://localhost:8080/getuser1", User.class);
    return user;
}
4.3 本小节完整代码
package com.example.demo.controller;

import com.example.demo.entity.User;
import org.springframework.beans.factory.annotation.Autowired;
import org.springframework.boot.web.client.RestTemplateBuilder;
import org.springframework.http.ResponseEntity;
import org.springframework.web.bind.annotation.RequestMapping;
import org.springframework.web.bind.annotation.RestController;
import org.springframework.web.client.RestTemplate;

import java.util.HashMap;
import java.util.Map;

@RestController
public class GetController {
    @Autowired
    RestTemplateBuilder restTemplateBuilder;

    @RequestMapping("/nparameters")
    //返回String,不带参数
    public String nparameters() {
        RestTemplate client = restTemplateBuilder.build();
        ResponseEntity<String> responseEntity = client.getForEntity("http://localhost:8080/getuser1", String.class);
        return responseEntity.getBody();
    }

    @RequestMapping("/withparameters1")
    //返回String,带参数
    public String withparameters1() {
        RestTemplate client = restTemplateBuilder.build();
        ResponseEntity<String> responseEntity = client.getForEntity("http://localhost:8080/getparameter?name={1}&id={2}", String.class, "Mike", 2);
        return responseEntity.getBody();
    }

    @RequestMapping("/withparameters2")
    //返回String,带参数
    public String withparameters2() {
        RestTemplate client = restTemplateBuilder.build();
        Map<String, String> map = new HashMap<>();
        map.put("name", "Tony");
        ResponseEntity<String> responseEntity = client.getForEntity("http://localhost:8080/getparameter?name={name}&id=3", String.class, map);
        return responseEntity.getBody();
    }

    @RequestMapping("/user1")
    //返回一个自定义类型的对象
    public User restUser1() {
        RestTemplate client = restTemplateBuilder.build();
        ResponseEntity<User> responseEntity = client.getForEntity("http://localhost:8080/getuser1", User.class);
        return responseEntity.getBody();
    }

    @RequestMapping("/getforobject")
    public User getForObject() {
        RestTemplate client = restTemplateBuilder.build();
        User user = client.getForObject("http://localhost:8080/getuser1", User.class);
        return user;
    }
}
5.用 RestTemplate 发送 POST 请求
在 RestTemplate 中,POST 请求可以通过 postForEntity、postForObject、 postForLocation、exchange 四种方法来发起。
用 postForEntity、postForObject、postForLocation 三种方法传递参数时,Map 不能被定义为 HashMap、LinkedHashMap,而应被定义为 LinkedMultiValueMap,这样参数才能成功传递到后台。
5.1 方法一:使用 postForEntity
postForEntity(String url, Object request, Class responseType, Object ... urlVariables)postForEntity(String url, Object request, Class responseType, Map urlVariables)postForEntity(String url, Object request, Class responseType)
第 1 个参数表示 要调用的服务的地址。第 2 个参数表示 上传的参数。第 3 个参数表示 返回的消息体的数据类型。
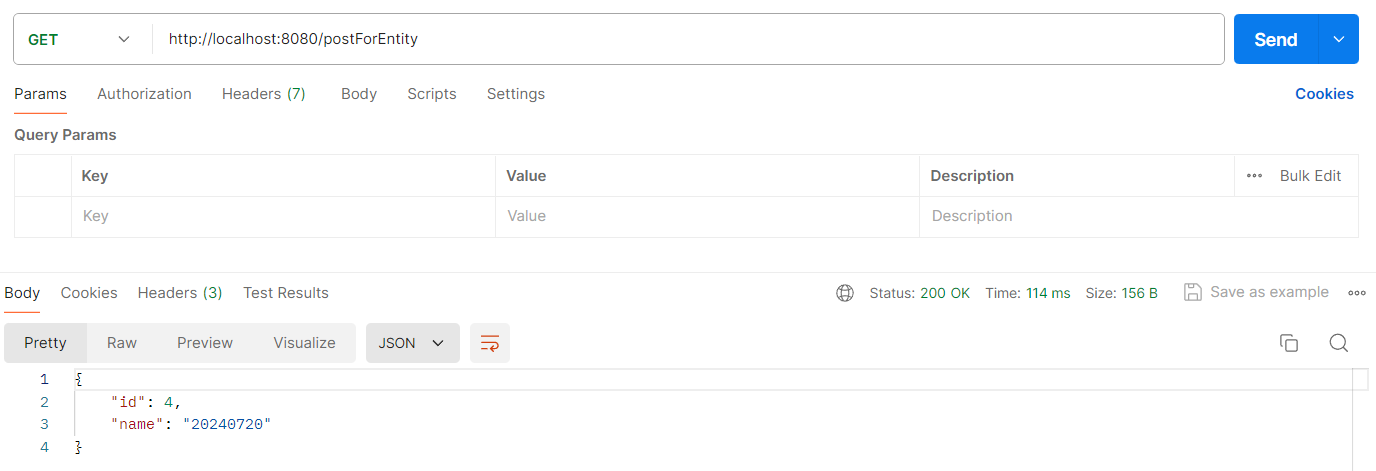
@GetMapping("/postForEntity")
public User postForEntity() {
    // RestTemplate client = restTemplateBuilder.build();
    // 封装参数,千万不要替换为Map与HashMap,否则参数无法传递
    MultiValueMap<String, Object> paramMap = new LinkedMultiValueMap<String, Object>();
    paramMap.add("name", "20240720");
    paramMap.add("id", 4);
    User user = new User();
    user.setName("pipi");
    user.setId(4);
    // 方法的第一参数表示要调用的服务的地址
    // 方法的第二个参数表示上传的参数
    // 方法的第三个参数表示返回的消息体的数据类型
    ResponseEntity<User> responseEntity = restTemplate.postForEntity("http://localhost:8080/postuser", paramMap, User.class);
    return responseEntity.getBody();
}
MultiValueMap:封装参数,千万不要替换为 Map 与 HashMap,否则参数无法被传递。restTemplate.postForEntity("url", paramMap, User.class):参数分别表示要调用的服务的地址、上传的参数、返回的消息体的数据类型。
5.2 方法二:使用 postForObject
postForObject(String url, Object request, Class responseType, Object ... urlVariables)postForObject(String url, Object request, Class responseType, Map urlVariables)postForObject(String url, Object request, Class responseType)
postForObject 和 getForObject 相对应,只关注返回的消息体,见以下代码:
@RequestMapping("/postForObject")
public String postForObject() {
    // 封装参数,千万不要替换为Map与HashMap,否则参数无法传递
    MultiValueMap<String, Object> paramMap = new LinkedMultiValueMap<String, Object>();
    paramMap.add("name", "20240720");
    paramMap.add("id", 4);
    RestTemplate client = restTemplateBuilder.build();
    User user = new User();
    user.setName("pipi");
    user.setId(5);
    String response = client.postForObject("http://localhost:8080/postuser", paramMap, String.class);
    return response;
}
5.3 方法三:使用 postForLocation
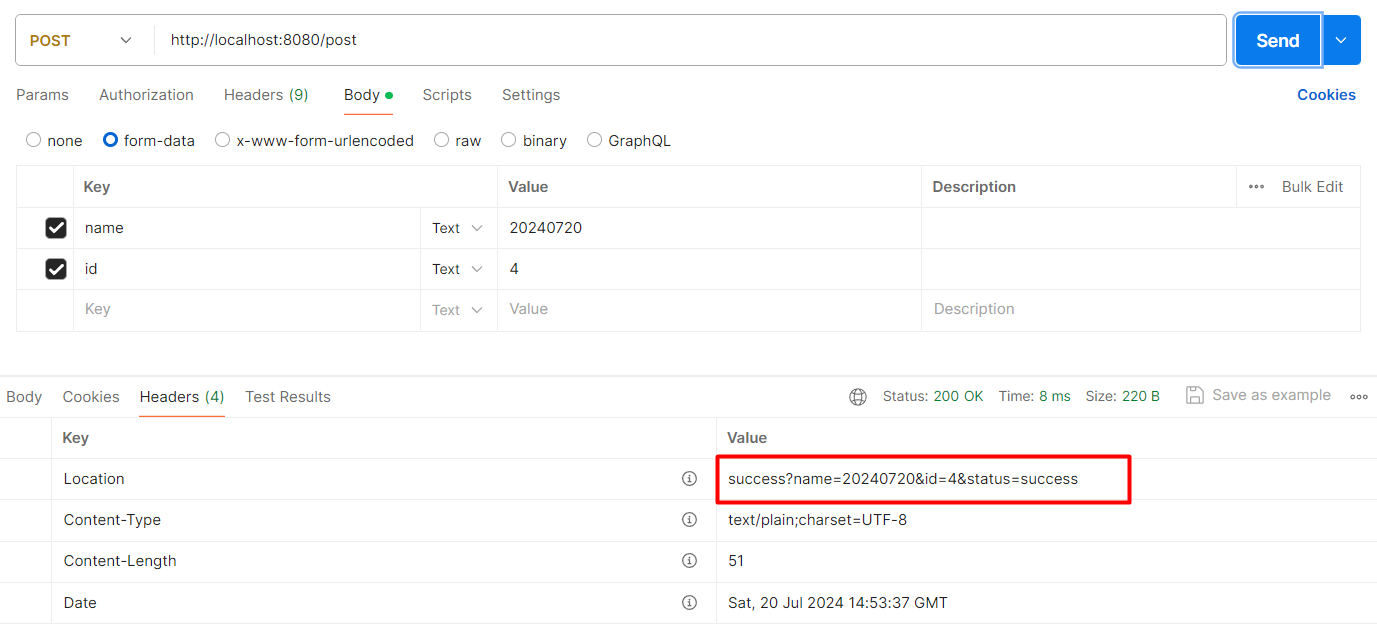
postForLocation 也用于提交资源。在提交成功之后,会返回新资源的 URI。它的参数和前面两种方法的参数基本一致,只不过 该方法的返回值为 URI,表示新资源的位置。
• postForLocation(String url, Object request, Object ... urlVariables)
• postForLocation(String url, Object request, Map urlVariables)
• postForLocation(String url, Object request)
它用于提交数据,并获取返回的 URI。一般登录、注册都是 POST 请求,操作完成之后,跳转到某个页面,这种场景就可以使用 postForLocation。所以,先要添加处理登录的 API,见以下代码:
@ResponseBody
@RequestMapping(path = "success")
public String loginSuccess(String name, Integer id) {
    return "welcome " + name;
}

@RequestMapping(value = "/post", method = RequestMethod.POST)
public String post(HttpServletRequest request,
				   @RequestParam(value = "name", required = false) String name,
                   @RequestParam(value = "password", required = false) String password,
                   @RequestParam(value = "id", required = false) Integer id,
                   HttpServletResponse response) {
    // 如果获取的值为 “null”,则需要把 URI 添加到 response 信息的 header 中。添加方法为:“response.addHeader("Location",uri)”
    response.addHeader("Location", "success?name=" + name + "&id=" + id + "&status=success");
    return "redirect:/success?name=" + name + "&id=" + id + "&status=success";
    // return "redirect:/success?name=" + URLEncoder.encode(name, "UTF-8") + "&id=" + id + "&status=success";
}
然后使用 postForLocation 请求,用法见以下代码:
@RequestMapping("/postForLocation")
public URI postForLocation() {
    // 封装参数,千万不要替换为Map与HashMap,否则参数无法传递
    MultiValueMap<String, Object> paramMap = new LinkedMultiValueMap<String, Object>();
    paramMap.add("name", "20240720");
    paramMap.add("id", 4);
    RestTemplate client = restTemplateBuilder.build();
    User user = new User();
    user.setName("pipi");
    user.setId(6);
    URI response = client.postForLocation("http://localhost:8080/postuser", paramMap);
    return response;
}
如果有中文,则结果可能会出现乱码,可以用 URLEncoder.encode(name, "UTF-8") 进行处理。
如果获取的值为 null,则需要把 URI 添加到 response 信息的 header 中。添加方法为:response.add("Location",uri)。
5.4 方法四:使用 exchange
使用 exchange 方法可以指定调用方式,使用方法如下:
ResponseEntity<String> response = template.exchange(newUrl, HttpMethod.DELETE, request, String.class);
@RequestMapping("/postForexchange")
public String postForexchange() {
    // 封装参数,千万不要替换为Map与HashMap,否则参数无法传递
    MultiValueMap<String, Object> paramMap = new LinkedMultiValueMap<String, Object>();
    paramMap.add("name", "20240720");
    paramMap.add("id", 4);
    RestTemplate client = restTemplateBuilder.build();
    HttpHeaders headers = new HttpHeaders();
    // headers.set("id", "long");
    HttpEntity<MultiValueMap<String, Object>> httpEntity = new HttpEntity<MultiValueMap<String, Object>>(paramMap, headers);
    ResponseEntity<String> response = client.exchange("http://localhost:8080/postuser", HttpMethod.POST, httpEntity, String.class, paramMap);
    return response.getBody();
}
5.5 本小节完整代码
package com.example.demo.controller;

import com.example.demo.entity.User;
import org.springframework.beans.factory.annotation.Autowired;
import org.springframework.boot.web.client.RestTemplateBuilder;
import org.springframework.http.HttpEntity;
import org.springframework.http.HttpHeaders;
import org.springframework.http.HttpMethod;
import org.springframework.http.ResponseEntity;
import org.springframework.util.LinkedMultiValueMap;
import org.springframework.util.MultiValueMap;
import org.springframework.web.bind.annotation.GetMapping;
import org.springframework.web.bind.annotation.RequestMapping;
import org.springframework.web.bind.annotation.RestController;
import org.springframework.web.client.RestTemplate;

import java.net.URI;

@RestController
public class PostController {
    @Autowired
    RestTemplateBuilder restTemplateBuilder;
    RestTemplate restTemplate = new RestTemplate();

    @GetMapping("/postForEntity")
    public User postForEntity() {
        // RestTemplate client= restTemplateBuilder.build();
        // 封装参数,千万不要替换为Map与HashMap,否则参数无法传递
        MultiValueMap<String, Object> paramMap = new LinkedMultiValueMap<String, Object>();
        paramMap.add("name", "20240720");
        paramMap.add("id", 4);
        User user = new User();
        user.setName("pipi");
        user.setId(4);
        // 方法的第一参数表示要调用的服务的地址
        // 方法的第二个参数表示上传的参数
        // 方法的第三个参数表示返回的消息体的数据类型
        ResponseEntity<User> responseEntity = restTemplate.postForEntity("http://localhost:8080/postuser", paramMap, User.class);
        return responseEntity.getBody();
    }

    @RequestMapping("/postForObject")
    public String postForObject() {
        // 封装参数,千万不要替换为Map与HashMap,否则参数无法传递
        MultiValueMap<String, Object> paramMap = new LinkedMultiValueMap<String, Object>();
        paramMap.add("name", "20240720");
        paramMap.add("id", 4);
        RestTemplate client = restTemplateBuilder.build();
        User user = new User();
        user.setName("pipi");
        user.setId(5);
        String response = client.postForObject("http://localhost:8080/postuser", paramMap, String.class);
        return response;
    }

    @RequestMapping("/postForexchange")
    public String postForexchange() {
        // 封装参数,千万不要替换为Map与HashMap,否则参数无法传递
        MultiValueMap<String, Object> paramMap = new LinkedMultiValueMap<String, Object>();
        paramMap.add("name", "20240720");
        paramMap.add("id", 4);
        RestTemplate client = restTemplateBuilder.build();
        HttpHeaders headers = new HttpHeaders();
        // headers.set("id", "long");
        HttpEntity<MultiValueMap<String, Object>> httpEntity = new HttpEntity<MultiValueMap<String, Object>>(paramMap, headers);
        ResponseEntity<String> response = client.exchange("http://localhost:8080/postuser", HttpMethod.POST, httpEntity, String.class, paramMap);
        return response.getBody();
    }
6.用 RestTemplate 发送 PUT 和 DELETE 请求
6.1 PUT 请求
在 RestTemplate 中,发送 修改 请求和前面介绍的 postForEntity 方法的参数基本一致,只是修改请求没有返回值,用法如下:
@RequestMapping("/put")
public void put() {
    RestTemplate client = restTemplateBuilder.build();
    User user = new User();
    user.setName("pipi");
    client.put("http://localhost:8080/{1}", user, 7);
}
最后的 7 用来替换前面的占位符 {1}。
6.2 DELETE 请求
删除 请求,可以通过调用 DELETE 方法来实现,用法见以下代码:
@RequestMapping("/delete")
public void delete() {
    RestTemplate client = restTemplateBuilder.build();
    client.delete("http://localhost:8080/{1}", 8);
}
最后的 8 用来替换前面的占位符 {1}。
6.3 本小节完整代码
package com.example.demo.controller;

import com.example.demo.entity.User;
import org.springframework.beans.factory.annotation.Autowired;
import org.springframework.boot.web.client.RestTemplateBuilder;
import org.springframework.http.ResponseEntity;
import org.springframework.web.bind.annotation.GetMapping;
import org.springframework.web.bind.annotation.RequestMapping;
import org.springframework.web.bind.annotation.RestController;
import org.springframework.web.client.RestTemplate;

import java.net.URI;

@RestController
public class PutAndDeleteController {
    @Autowired
    RestTemplateBuilder restTemplateBuilder;

    @RequestMapping("/put")
    public void put() {
        RestTemplate client = restTemplateBuilder.build();
        User user = new User();
        user.setName("hongwei");
        client.put("http://localhost:8080/{1}", user, 7);
    }

    @RequestMapping("/delete")
    public void delete() {
        RestTemplate client = restTemplateBuilder.build();
        client.delete("http://localhost:8080/{1}", 8);
    }
}


