书接上文(如何将vue2源码一键升级到vue3(上)),我们知道了如何通过ast去改造源码,本篇文章将介绍如何通过vue自定义loader的方式实现vue2的代码运行在基于vue3的项目当中。源码地址 vue2-to-vue3。
关于loader
可以将其理解为在文件打包构建完成之前,对文件进行预处理,譬如我们熟知less-loader、sass-loader的作用就是将其转换为css输出,编写自定义loader的目的也是将文件按照我们的预期输出,更多关于loader的内容大家可以在Loaders上查阅。
目标
- 入口文件main.js改造
- vue文件改造
- 项目vue版本升级为3.x 以及相关依赖版本替换
- 跑起来
准备工作
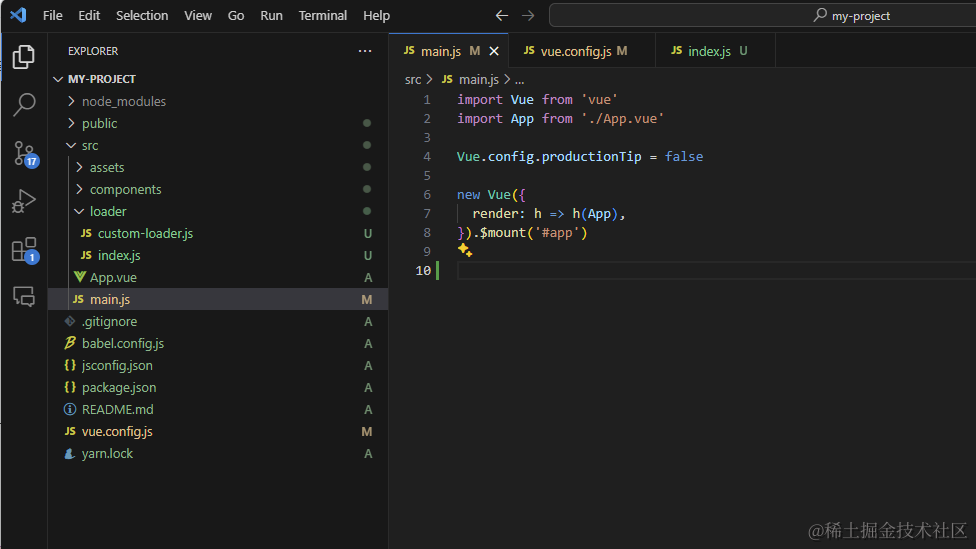
新建一个vue2项目,在src目录下新建loader文件夹,其中包含index.js入口文件以及custom-loader文件,项目结构如下:
在vue.config.js对我们的自定义loader进行配置
// vue.config.js
const { defineConfig } = require('@vue/cli-service')
module.exports = defineConfig({
  chainWebpack: config => {
    // 配置自定义loader
    config.module
      .rule('custom-loader')
       // 匹配.vue和js文件
      .test(/\.(vue|js)$/)
      .include.add(/src/) // 只转化src目录下的js
      .end()
      .use('custom-loader')
      .loader(require.resolve('./src/loader'))
      .end()
  }
})
编写loader/index.js文件,source为源文件内容,在loader导出的函数中, this 作为上下文会被 webpack 填充,所以此处不能使用箭头函数,最后函数通过webpack注入到this上的callback()返回最终结果。
// src/loader/index.js
const loader = require('./custom-loader');
const compiler = function(source) {
    // 实例化loader,传入源代码,调用transform方法获取转换后的代码
    let result = new loader(source).transform();
    // console.log('result :>> ', result);
    return result;
};
module.exports = function (source) {
    this.callback(null,compiler(source),null);
};
编写loader/custom-loader.js,改造相关的逻辑都会在该文件下进行。
// src/loader/custom-loader.js
const parser = require("@babel/parser");
const traverse = require("@babel/traverse").default;
const t = require("@babel/types");
const generator = require("@babel/generator").default;

/**
 * 转换类
 * @param {string} source 源代码
 * @returns {string} 转换后的代码
 */
class Transformer {
    constructor(source) {
        this.source = source;
    }
    // 转换
    transform() {
        return compileCode(this.source);
    }
}
module.exports = Transformer;

function compileCode(source) {
    // 1. 生成AST
    const ast = parser.parse(source, {
        sourceType: 'module'
    });
    // 2. 遍历AST,找到对应的节点
    traverse(ast, {
        // 遍历 函数调用表达式 类型的节点
        CallExpression(path) {
            // 判断是否是console.log节点
            if (t.isMemberExpression(path.node.callee)
                && t.isIdentifier(path.node.callee.object, { name: 'console' })
                && t.isIdentifier(path.node.callee.property, { name: 'log' })) {
                // 删除节点
                path.remove();
            }
        },
    });
    return generator(ast).code;
}
到这里,我们的loader仅仅是能删除console.log(),但是我们基本的流程已经搭建完,接下来我们对我们列出的目标一一进行攻克。
入口文件main.js改造
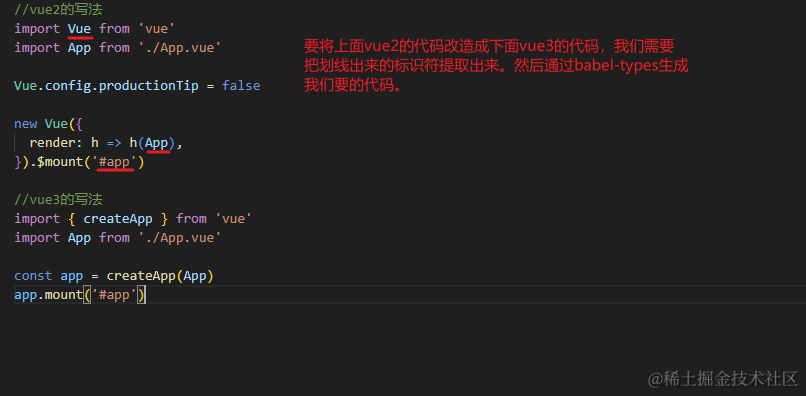
首先我们对 main.js 文件进行分析,找出不兼容vue3的点
// src/main.js
//vue2的写法
import Vue from 'vue'
import App from './App.vue'

Vue.config.productionTip = false

new Vue({
  render: h => h(App),
}).$mount('#app')

//vue3的写法
import { createApp } from 'vue'
import App from './App.vue'

const app = createApp(App)
app.mount('#app')
继续回到custom-loader.js
......
function compileCode(source) {
    // 1. 生成AST
    const ast = parser.parse(source, {
        sourceType: 'module'
    });
    // 2. 遍历AST,找到对应的节点
    traverse(ast, {
        // 遍历 函数调用表达式 类型的节点
        CallExpression(path) {...
        },
               // 遍历 import声明节点
        ImportDeclaration(path) {
            // 配合astexplorer,获取节点结构及属性值
            let node = path.node;
            let specifiers = node.specifiers;
            let defaultSpecifier = specifiers.find(specifier => specifier.type === 'ImportDefaultSpecifier');
            let source = node.source;
            // 符合import xxx from 'vue'的语句
            if (source.value === 'vue' && defaultSpecifier ) {
                // 提取出import的变量名
                state.appName = defaultSpecifier.local.name;
                // 生成预期import语句
                let newImportDeclaration = t.importDeclaration([t.importNamespaceSpecifier(t.identifier(state.appName))], t.stringLiteral(source.value));
                // 替换原有的import语句
                path.replaceWith(newImportDeclaration);
            }
        },
        // Vue.config.productionTip= false 在vue3中已经被废弃,直接删除
        MemberExpression(path) {
            if (t.isIdentifier(path.node.object, { name: state.appName })
                && t.isIdentifier(path.node.property, { name: 'config' })) {
                // 删除整个节点
                path.parentPath.parentPath.remove();
            }
        },
        //  获取h函数的参数与$mount的参数
        CallExpression(path) {
            if (t.isIdentifier(path.node.callee, { name: 'h'})
                && path.node.arguments.length === 1) {
                state.renderName = path.node.arguments[0].name;
            }
            if (t.isMemberExpression(path.node.callee)
                && t.isIdentifier(path.node.callee.property, { name: '$mount' })) {
                state.elName = path.node.arguments[0].value;
            }
            // 生成vue3的写法
            if (state.renderName && state.elName) {
                // 通过types生成的以下代码的ast结构
                // const app = Vue.createApp(App);
                // app.mount('#app');
                let app = t.variableDeclaration('const', [
                    t.variableDeclarator(t.identifier('app'), t.callExpression(t.memberExpression(t.identifier(state.appName), t.identifier('createApp')), [t.identifier(state.renderName)]))
                ]);
                let mount = t.expressionStatement(t.callExpression(t.memberExpression(t.identifier('app'), t.identifier('mount')), [t.stringLiteral(state.elName)]));
                let body = [app, mount];
                // 替换原有的节点
                path.findParent((path) => path.isCallExpression())?.replaceWithMultiple(body);
            }
        },

    });
    return generator(ast).code;
}
再次强调一下,要配合 AST explorer 以及 @babel/types 的文档进行编码,到这里我们实现了最简单的main.js改造,但是还没有涉及到vue模板部分,我们继续。
vue文件改造
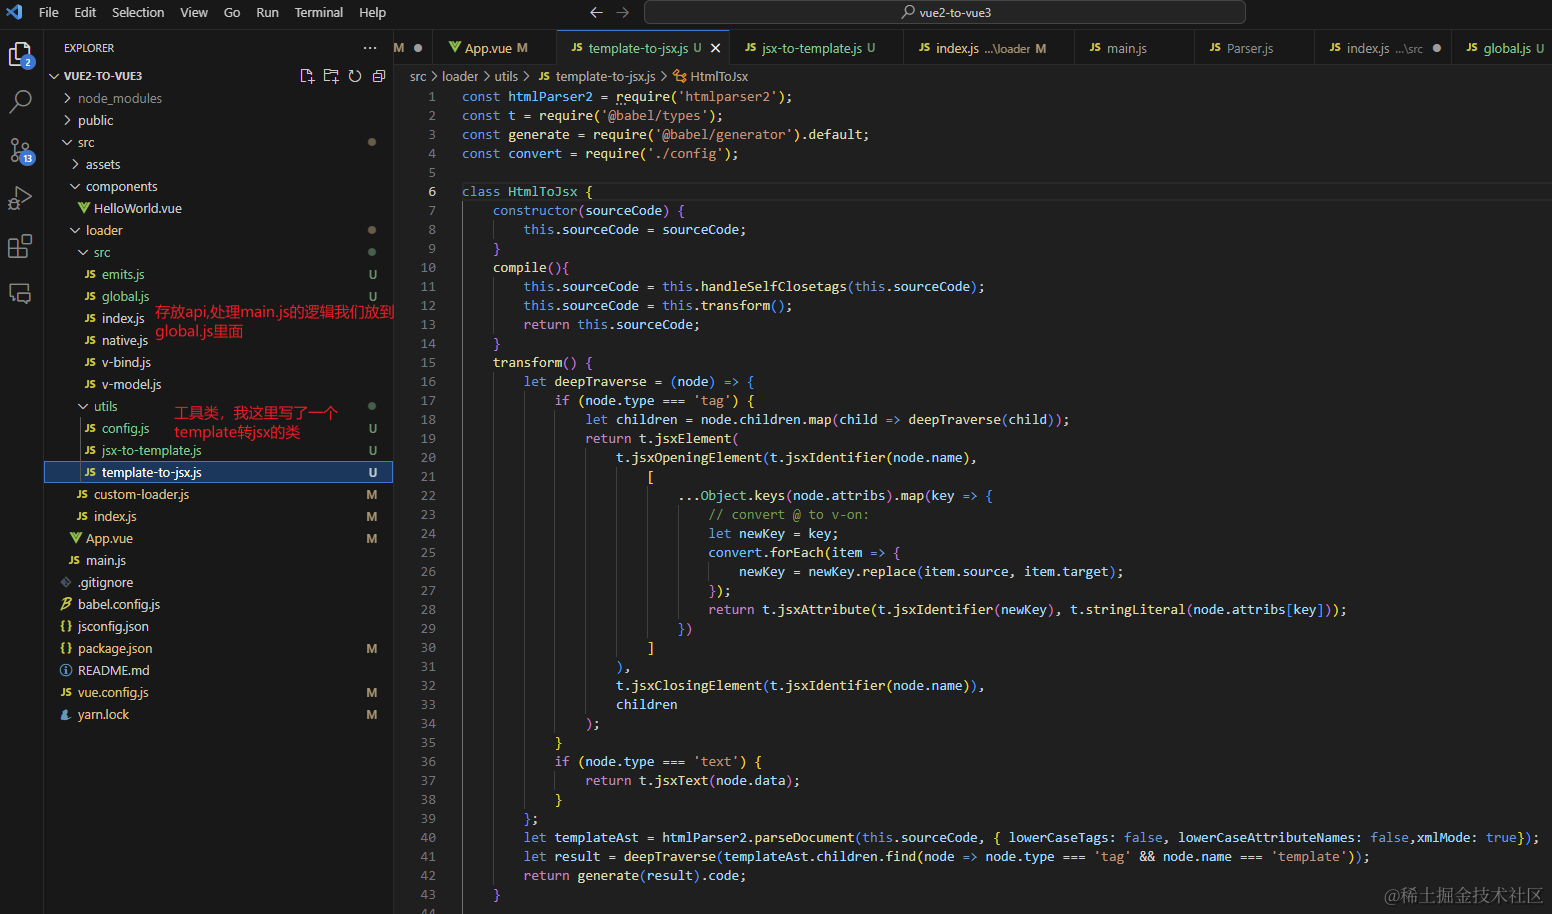
到目前为止,遇到了一个比较难以处理的问题:babel并不支持解析纯html或者是vue文件,我的想法是将vue文件的template模板部分、script、style分别拆分出来,template部分通过html-parser2等类型的html解析器来将其解析成jsx格式,以便babel进行解析。为了项目的扩展性,我们将功能点按照Vue 3 迁移指南 列举的不兼容的点进行拆分,建立相应的文件单独处理。
当前我们的项目结构拆分如下:
接下来我们尝试修改vue2里面$emits()的写法,emits 选项 | Vue 3 迁移指南 (vuejs.org)中提到:强烈建议使用 emits 记录每个组件所触发的所有事件,简单分析我们要做的事情:
- 收集代码中所有对$emits()的调用,获取参数名。
- 为组件新建一个emits属性,存放可触发事件。
我们来到loader/src/emits.js
// loader/src/emits.js
class EmitsApi {
    constructor(content, babel, isVue) {
        this.content = content;
        this.babel = babel;
        this.isVue = isVue;
        // 存放emits
        this.emitsEvent = [];
    }
    // 转换
    transform() {
        let template = this.compileTemplate(this.content.template);
        let script = this.compileCode(this.content.script);
        let style = this.compileStyle(this.content.style);
        return {
            template,
            script,
            style
        };
    }

    compileTemplate(code) {
        let self = this;
        // 收集template中的$emit事件
        const { parser, traverse, t, generator } = this.babel;
        let ast = parser.parse(code, {
            sourceType: 'module',
            plugins: [
                'jsx',
            ]
        });
        traverse(ast, {
            StringLiteral(path) {
                // 找到value包含$emit的字符串节点
                if (path.node.value.includes('$emit')) {
                    // 截取字符串,获取$emit方法的第一个参数
                    let eventName = path.node.value.match(/\$emit\((.*?)\,/)[1].replace(/\'/g, '');
                    console.log('eventName :>> ', eventName);
                    // 将事件名存入emits数组
                    self.emitsEvent.push(eventName);
                }
            },
        });
        return code;
    }

    compileCode(code) {
        let self = this;
        let sourceArr, scriptTagAttr, content;
        if (this.isVue) {
            sourceArr = code.match(/<script(.*?)>([\s\S]*?)<\/script>/);
            scriptTagAttr = sourceArr[1];
            code = sourceArr[2];
        }
        content = code;
        const { parser, traverse, t, generator } = this.babel;
        let ast = parser.parse(content, {
            sourceType: 'module',
            plugins: [
                'jsx',
            ]
        });
        traverse(ast, {
            // 收集script中的$emit事件
            CallExpression(path) {
                // 判断是否是$emit节点
                if (t.isMemberExpression(path.node.callee)
                    && t.isIdentifier(path.node.callee.property, { name: '$emit' })) {
                    // 获取$emit方法的第一个参数
                    let eventName = path.node.arguments[0].value;
                    // 将事件名存入emits数组
                    self.emitsEvent.push(eventName);
                }
            },
            // 赋值一定要在最后执行,因为我们需要在遍历完整棵树之后才能获取到所有的emits事件
            exit() {
                let exportDefaultDeclaration = ast.program.body.find(node => node.type === 'ExportDefaultDeclaration');
                if (exportDefaultDeclaration) {
                    let properties = exportDefaultDeclaration.declaration.properties;
                    // 首先判断是否有emits属性
                    let emitsProperty = properties.find(property => property.key.name === 'emits');
                    if (emitsProperty) {
                        // 如果有,将收集到的emits数组塞给emits属性
                        let emitsValue = emitsProperty.value.elements.map(item => item.value);
                        emitsProperty.value.elements = [...new Set(emitsValue.concat(self.emitsEvent))].map(item => t.stringLiteral(item));
                    } else {
                        // 如果没有,创建一个emits属性
                        properties.push(t.objectProperty(t.identifier('emits'), t.arrayExpression(self.emitsEvent.map(item => t.stringLiteral(item)))));
                    }
                }
            }

        });
        // 组装返回结果
        return this.isVue ? `<script${scriptTagAttr}>\n${generator(ast).code}\n</script>` : generator(ast).code;
    }

    compileStyle(code) {
        return code;
    }
}
module.exports = EmitsApi;
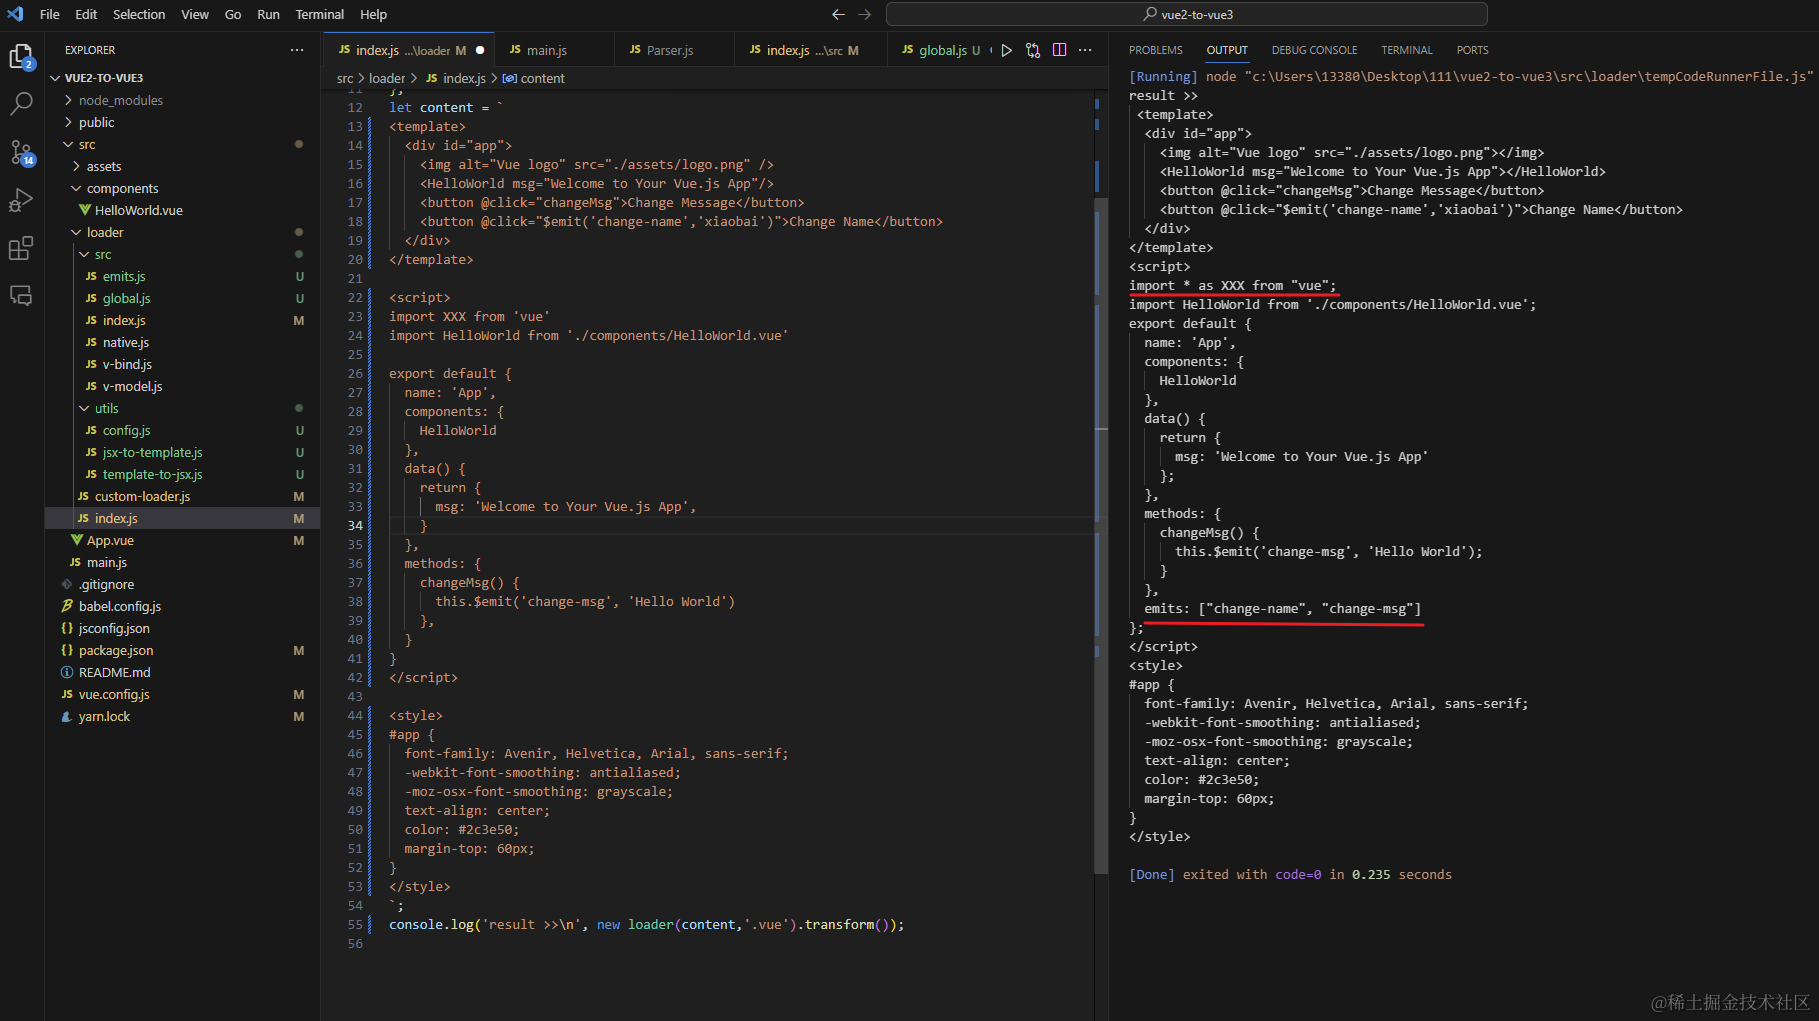
进行到这里我们完成了对 $emits createApp new Vue() $mount() 的改造,看一下编译结果:
现在我们已经在编译层将我们的代码格式改成vue3的了,直接npm run serve 会给我们报错:export 'createApp' (imported as 'Vue') was not found in 'vue',接下来我们升级vue版本及相关依赖。
项目vue版本升级为3.x 以及相关依赖版本替换
在package.json下将 vue的版本替换为 "^3.0.0",删除 package-lock.json 重新运行 npm i,如果遇到问题大家请自行百度。
运行项目
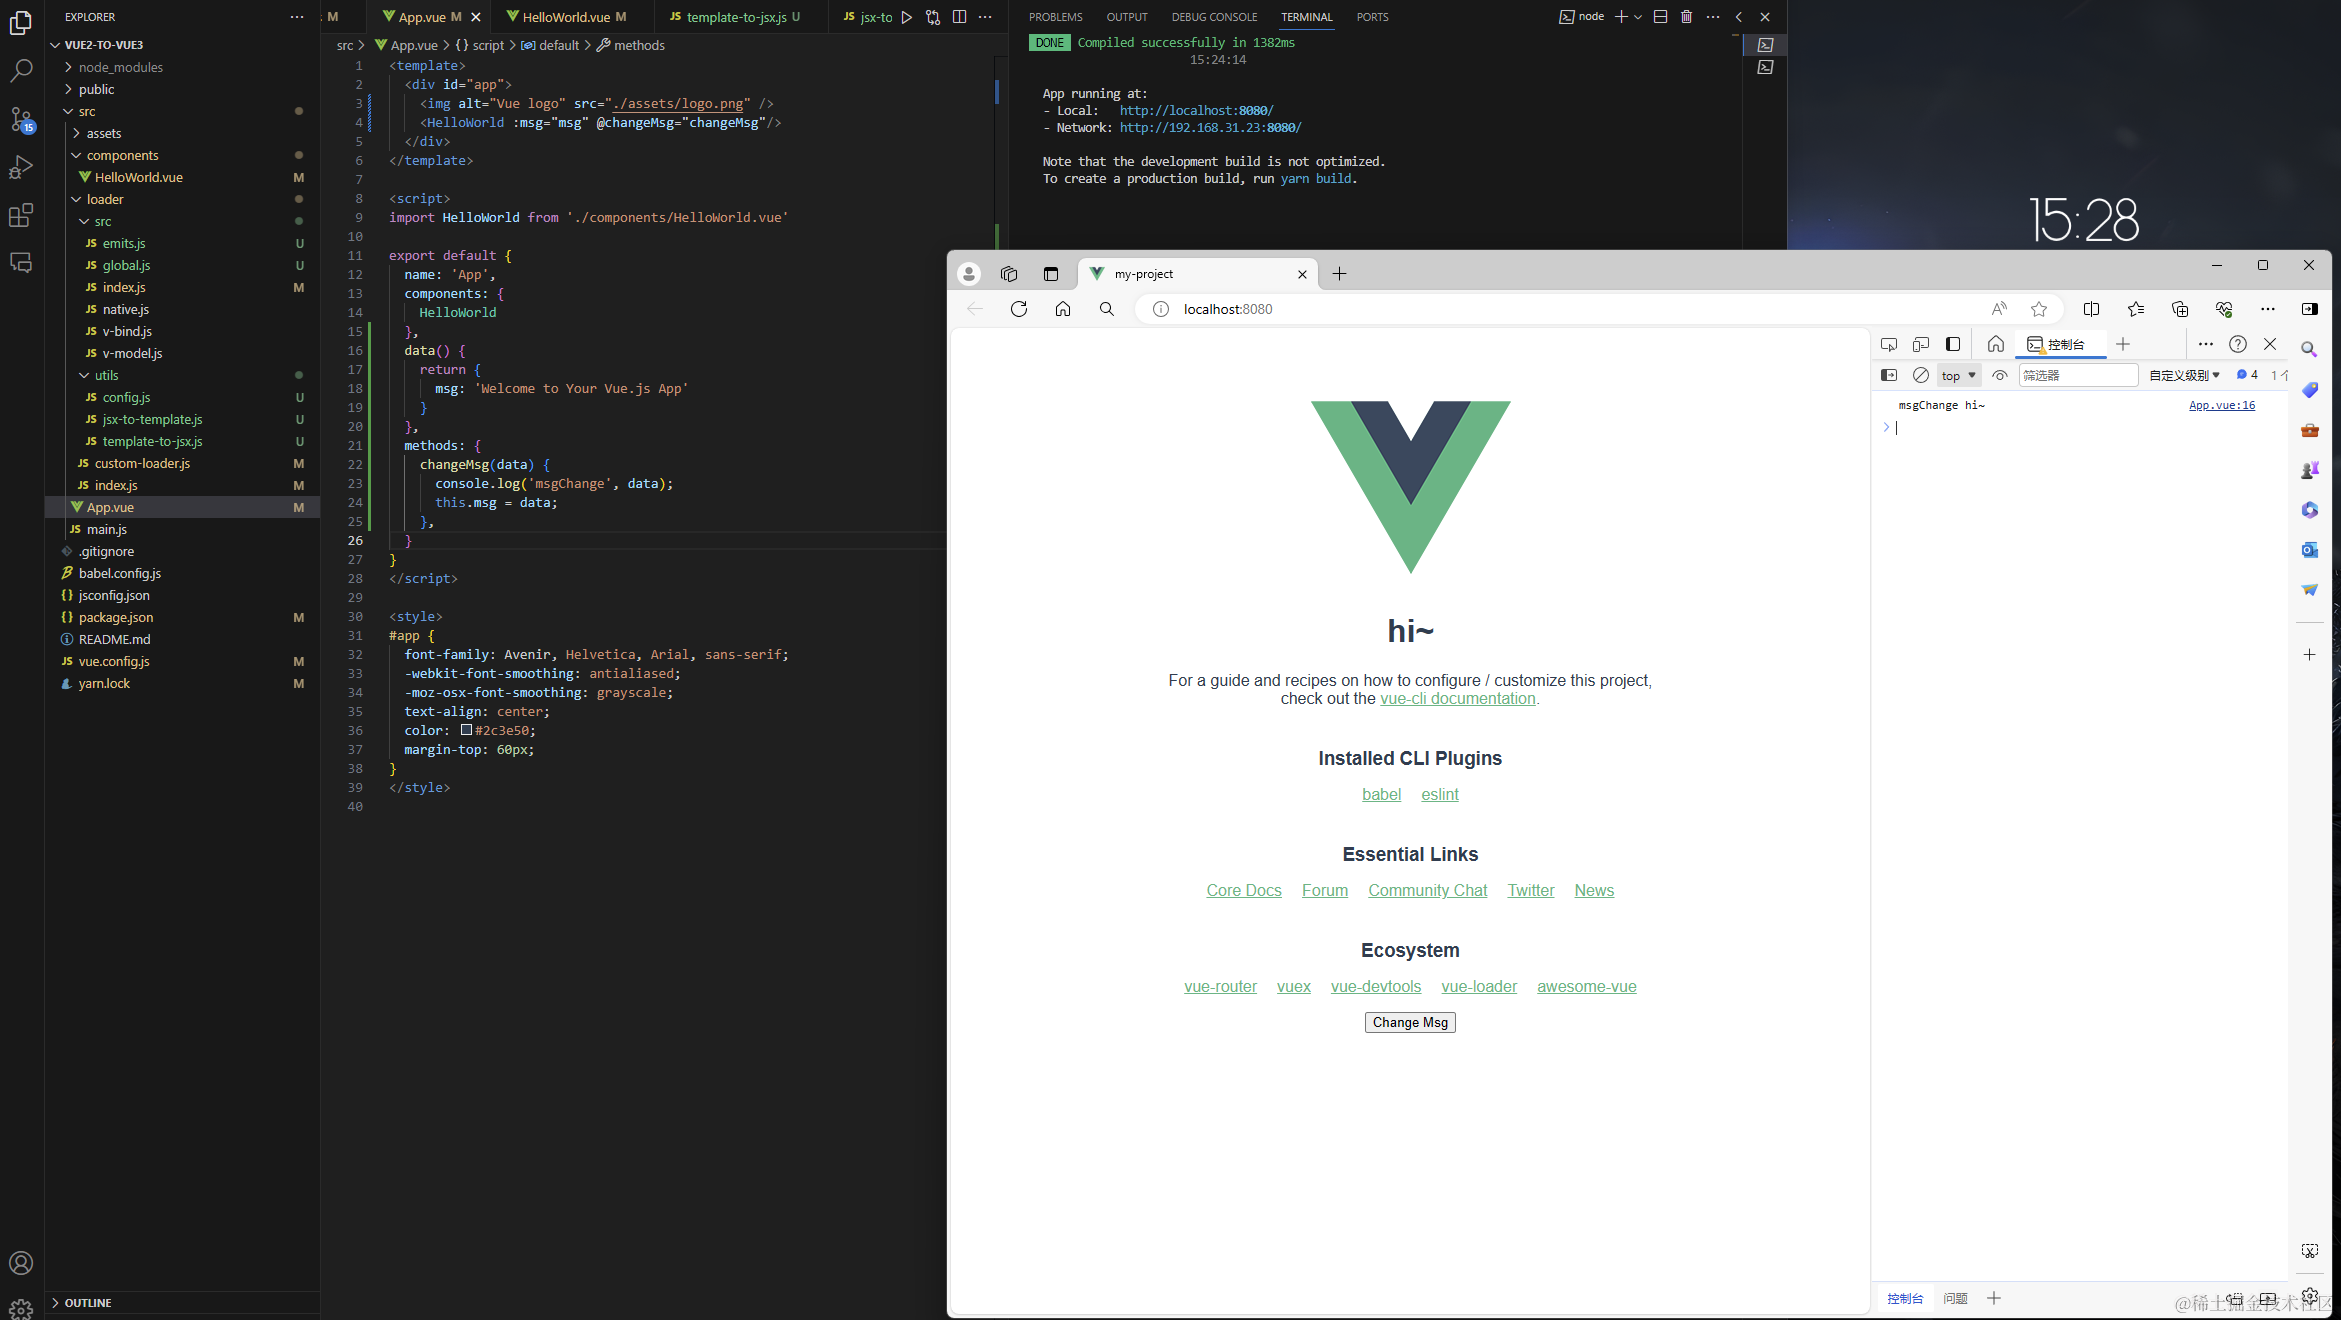
目前我们的项目是基于vue3,而写法是vue2的风格,运行 npm run serve ,ok,正常跑起来了。
总结
不难看出,要将所有的api囊括,工作量还是有点大的,不过万事开头难,项目进行到了这里,接下来要做的就是按照这个思路把剩余的api写完,我会写一篇文章说说如何将现在这份代码打包成一个工具,用命令生成我们想要的代码文件,也希望刷到我这篇文章的伙伴能给我提供一些建议或者思路,共勉~
