1.如何在虚拟机添加硬盘
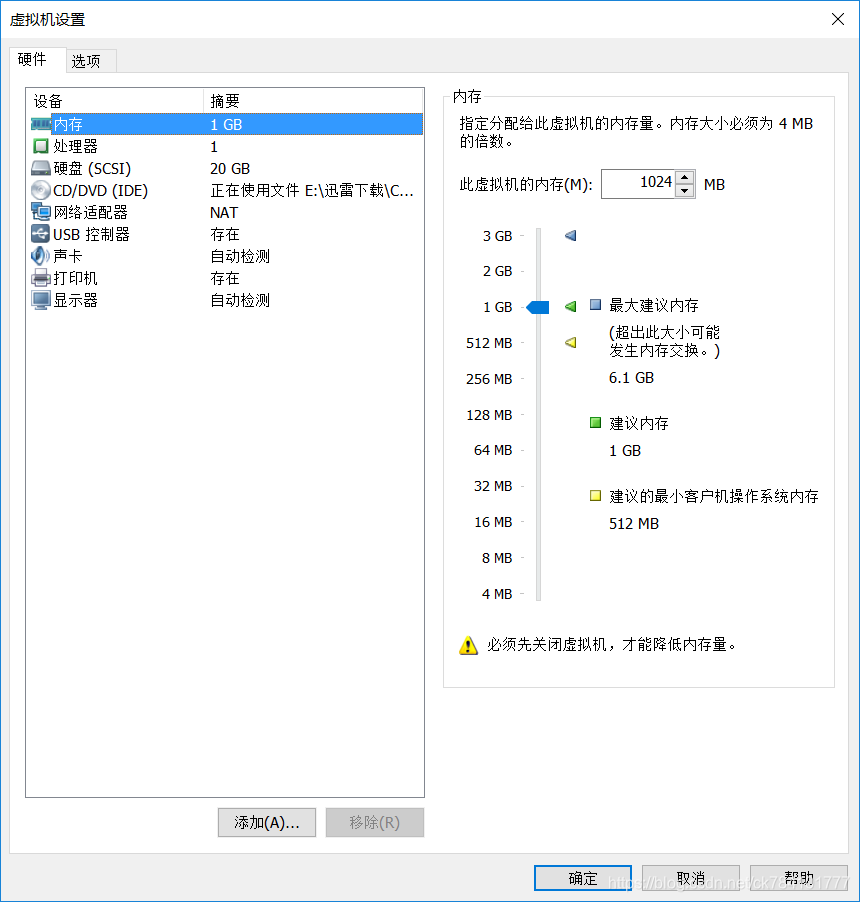
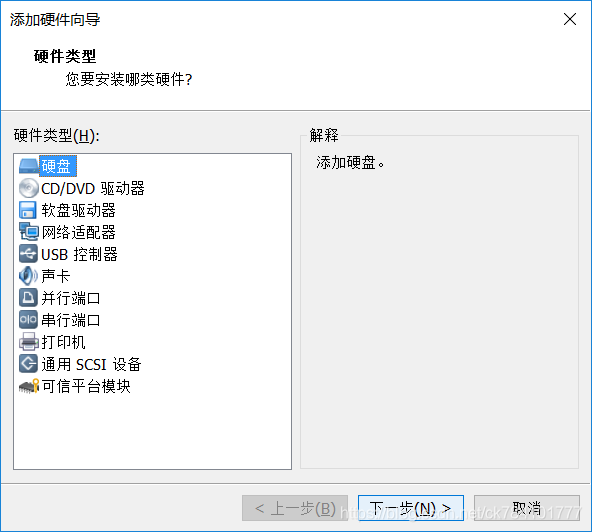
使用VMware添加硬盘教程如下:
右键虚拟机,选择设置
选择硬盘
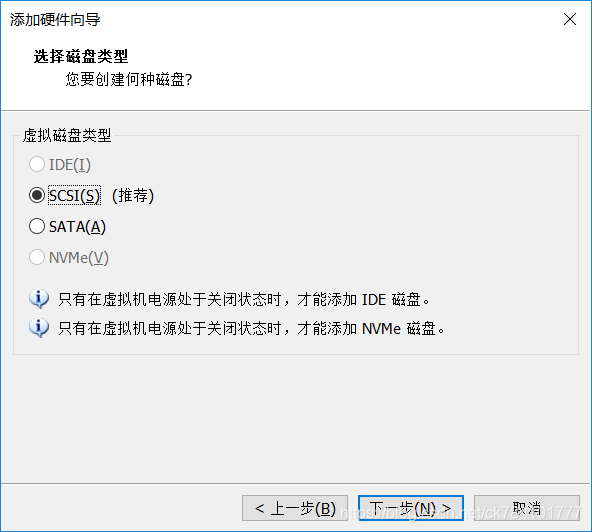
选择scsi(smcall computer systecm interface)
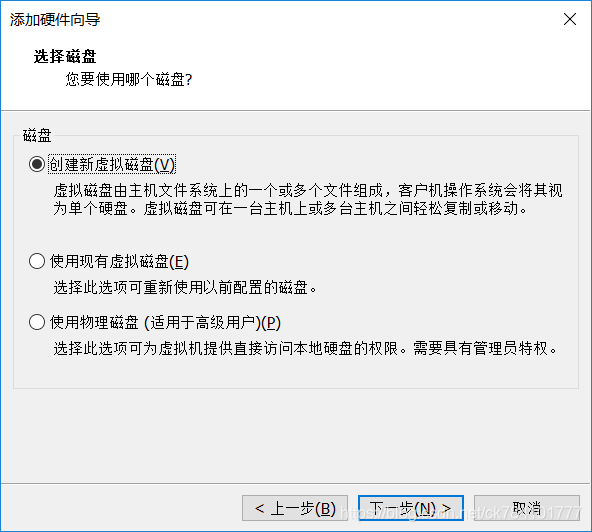
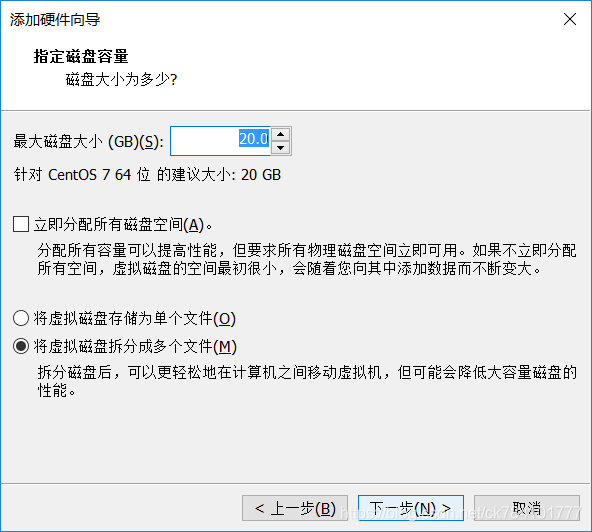
创建虚拟磁盘
大小根据具体情况指定
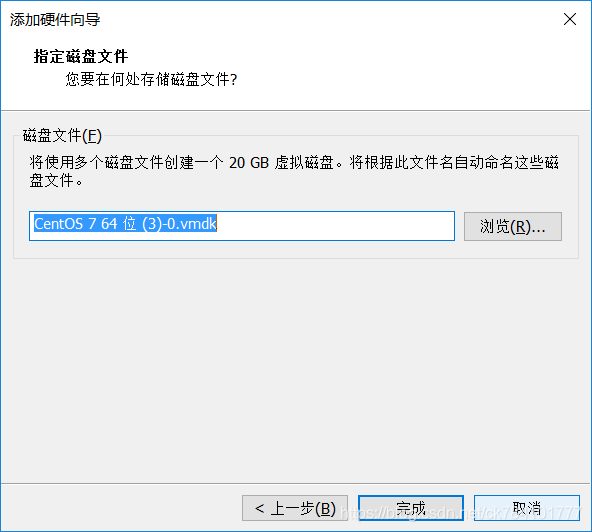
点击完成,即创建成功
2.MBR/msdos分区模式
MBR:
主引导记录(MBR,Master Boot Record)是位于磁盘最前边的一段引导(Loader)代码。它负责磁盘操作系统(DOS)对磁盘进行读写时分区合法性的判别、分区引导信息的定位,它由磁盘操作系统(DOS)在对硬盘进行初始化时产生的
MBR/msdos分区模式特点:
1-4个主分区或0-3个主分区+1个扩展分区(n个逻辑分区)
最大支持2.2TB磁盘
扩展分区不能格式化
关于扩展分区你要知道:
当我们创建了3个主分区后,之后创建的都为扩展分区,这时候如果你还想创建分区,那么所有的分区都会划分到扩展分区中去,这些额外创建的叫逻辑分区,但是他是不能格式化的
2.使用fdisk分区工具
fdisk分区工具用来建立msdos分区方案,其交互模式中的主要指令如下:
- m:列出指令帮助
- p:查看当前的分区表信息
- n:新建分区
- d:删除分区
- t:更改分区标识
- q:放弃分区更改并退出
- w:保存对分区表所做的更改
进入交互式分区界面命令:fdisk 硬盘路径
3.硬盘分区及格式化
问题:
本例要求熟悉硬盘分区结构,使用fdisk分区工具在磁盘 /dev/vdb 上按以下要求建立分区:
- 采用默认的 msdos 分区模式
- 第1个分区 /dev/vdb1 的大小为 200MiB
- 第2个分区 /dev/vdb2 的大小为 2000MiB
- 第3个分区 /dev/vdb3 的大小为 1000MiB
完成分区后,能够配置开机自动挂载 /dev/vdb2 分区:
- 文件系统类型为 EXT4
- 将其挂载到 /mnt/part2 目录
步骤:
实现此案例需要按照如下步骤进行。
步骤一:新建分区表
1)查看硬盘大小
输入命令查看硬盘大小,我准备了一个10G的硬盘
]# lsblk
/dev/vda 10G
2)打开fdisk工具,操作磁盘/dev/vda
本例要求建立3个分区,分别为vda1 vda2 vda3
- [root@server0 ~]# fdisk /dev/vda
- Welcome to fdisk (util-linux 2.23.2).
- Changes will remain in memory only, until you decide to write them.
- Be careful before using the write command.
- Device does not contain a recognized partition table
- Building a new DOS disklabel with disk identifier 0x9ac1bc10.
- Command (m for help): //交互操作提示信息
2)新建第1个分区/dev/vda1
按照案例要求,我们需要分出一个大小为200M的分区
- Command (m for help): n //新建分区,输入n添加硬盘
- Partition type:
- p primary (0 primary, 0 extended, 4 free)
- e extended
- Select (default p): p //类型为p(主分区),不输入敲回车默认为主分区
- Partition number (1-4, default 1): 1 //分区编号1,不输入敲回车默认为编号1
- First sector (2048-20971519, default 2048): //起始位置默认,不输入默认为2048
- Using default value 2048
- Last sector, +sectors or +size{K,M,G} (2048-20971519, default 20971519): +200M
- Partition 1 of type Linux and of size 200 MiB is set //结束位置+200MiB大小
- Command (m for help): p //确认当前分区表
- .. ..
- Device Boot Start End Blocks Id System
- /dev/vda1 2048 411647 204800 83 Linux
3)新建第2个分区/dev/vda2
按照案例我们要分出一个2000M(2G)的分区
- Command (m for help): n
- Partition type:
- p primary (1 primary, 0 extended, 3 free)
- e extended
- Select (default p): p //类型为p(主分区)
- Partition number (2-4, default 2): 2 //分区编号2
- First sector (411648-20971519, default 411648): //起始位置默认
- Using default value 411648
- Last sector, +sectors or +size{K,M,G} (411648-20971519, default 20971519): +2000M
- Partition 2 of type Linux and of size 2 GiB is set //结束位置+2000MiB大小
- Command (m for help): p //确认当前分区表
- .. ..
- Device Boot Start End Blocks Id System
- /dev/vda1 2048 411647 204800 83 Linux
- /dev/vda2 411648 4507647 2048000 83 Linux
4)新建第3个分区/dev/vda3
按照案例我们要分出一个1000M的分区
- Command (m for help): n
- Partition type:
- p primary (2 primary, 0 extended, 2 free)
- e extended
- Select (default p): p
- Partition number (3,4, default 3): 3
- First sector (4507648-20971519, default 4507648):
- Using default value 4507648
- Last sector, +sectors or +size{K,M,G} (4507648-20971519, default 20971519): +1000M
- Partition 3 of type Linux and of size 1000 MiB is set
- Command (m for help): p //确认当前分区表
- .. ..
- Device Boot Start End Blocks Id System
- /dev/vda1 2048 411647 204800 83 Linux
- /dev/vda2 411648 4507647 2048000 83 Linux
- /dev/vda3 4507648 6555647 1024000 83 Linux
5)调整分区类型标识(可选)
将/dev/vdb1的类型(默认为83,表示EXT2/3/4分区)修改为8e(LVM设备),我们默认穿甲的事ext4,这是centos6版本以及6版本以前的系统类型,如果你的系统版本大于6(现在主流为Centos7),你需要转换一下系统类型
- Command (m for help): t //修改分区类型标识
- Partition number (1-3, default 3): 1 //指定第1个分区
- Hex code (type L to list all codes): 8e //类型改为8e
- Changed type of partition 'Linux' to 'Linux LVM'
- Command (m for help): p //确认当前分区表
- .. ..
- Device Boot Start End Blocks Id System
- /dev/vdb1 2048 411647 204800 8e Linux LVM
- /dev/vdb2 411648 4507647 2048000 83 Linux
- /dev/vdb3 4507648 6555647 1024000 83 Linux
6)保存分区更改,退出fdisk分区工具
输入w保存退出,输入q不保存退出,这里输入w保存修改并退出
- Command (m for help): w //保存并退出
- The partition table has been altered!
- Calling ioctl() to re-read partition table.
- Syncing disks.
7)刷新分区表
输入命令partprobe可以刷新分区,输入lsblk查看硬盘分区,可以看到在你的硬盘下出现vda1 vda2 vda3带有编号的分区
- [root@server0 ~]# partprobe /dev/vda //重新检测磁盘分区
- //或者
- [root@server0 ~]# reboot //对已使用中磁盘的分区调整,应该重启一次【可选】
- .. ..
4.格式化分区并挂载使用
上面讲了如何划分分区,划分后是无法直接使用的,必须格式化,下面案例演示如何格式化分区
1.将分区/dev/vdb2格式化为EXT4文件系统
你需要用到一条新命令:
mkfs.文件系统类型 分区路径
可选文件系统类型:ext3,ext4,xfs
目前使用的多的事ext4和xfs,ext3随着LInux版本升级已经淘汰
你可以输入mkfs.<tab><tab>
快速敲两下tab可以查看能够选择的系统类型
- [root@server0 ~]# mkfs.ext4 /dev/vdb2
- .. ..
- Allocating group tables: done
- Writing inode tables: done
- Creating journal (8192 blocks): done
- Writing superblocks and filesystem accounting information: done
2.创建挂载点,并验证挂载配置
- [root@server0 ~]# mkdir /mnt/part2 //创建挂载点
- [root@server0 ~]# mount -a //挂载fstab中的可用设备
- [root@server0 ~]# df -hT /mnt/part2/ //检查文档所在的文件系统及设备
- Filesystem Type Size Used Avail Use% Mounted on
- /dev/vdb2 ext4 1.9G 5.9M 1.8G 1% /mnt/part2
3.配置开机自动挂载
格式化分区之后,你还是无法使用,需要你挂载到具体文件目录下使用,这里有一个概念你要理解:
Linux系统中一切皆文件
所以我们的根分区其实也是通过挂载使用的
- [root@server0 ~]# vim /etc/fstab
- .. ..
- /dev/vdb2 /mnt/part2 ext4 defaults 0 0
