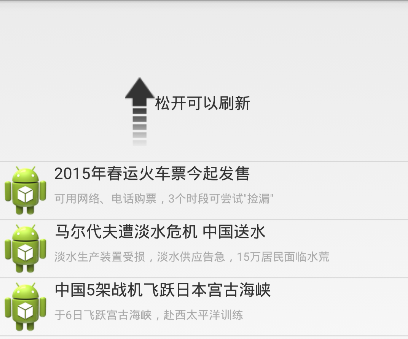
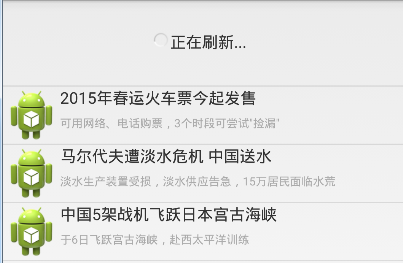
背景知识
ListView使用非常广泛,对于使用ListView的应用来说,下拉刷新是必不可少要实现的功能。
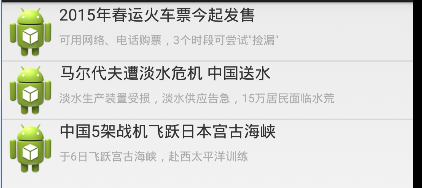
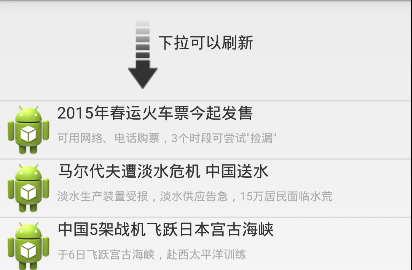
我们常用的微博、网易新闻,搜狐新闻都使用了这一功能,如下图所示。
微博
搜狐新闻
具体学习:
首先分析下拉刷新的具体操作过程:
用户手指在ListView上按下并往下拉----->出现一个提示的View在ListView顶部----->ListView内容更新,顶部的提示View消失
具体实现步骤:
1.创建继承自ListView的RefreshListView,并添加顶部提示View
public class RefreshListView extends ListView {
    View header;// 顶部提示View
    public RefreshListView(Context context) {
        super(context);
        initView(context);
    }

    public RefreshListView(Context context, AttributeSet attrs) {
        super(context, attrs);
        initView(context);
    }

    public RefreshListView(Context context, AttributeSet attrs, int defStyleAttr) {
        super(context, attrs, defStyleAttr);
        initView(context);
    }

    private void initView(Context context) {
        // LayoutInflater作用是加载布局
        LayoutInflater inflater = LayoutInflater.from(context);
        header = inflater.inflate(R.layout.header_layout, null);
        this.addHeaderView(header);
    }
}
顶部提示View布局文件 header_layout.xml:
 1 <?xml version="1.0" encoding="utf-8"?>
 2 <LinearLayout xmlns:android="http://schemas.android.com/apk/res/android"
 3     android:layout_width="match_parent"
 4     android:layout_height="match_parent"
 5     android:orientation="vertical" >
 6
 7    <RelativeLayout
 8        android:layout_width="match_parent"
 9        android:layout_height="wrap_content"
10        android:paddingTop="10dip"
11        android:paddingBottom="10dip"
12        >
13        <LinearLayout
14            android:layout_width="wrap_content"
15            android:layout_height="wrap_content"
16            android:orientation="vertical"
17            android:id="@+id/layout"
18            android:layout_centerInParent="true"
19            android:gravity="center"
20            >
21            <!-- 提示文字 -->
22            <TextView
23                android:id="@+id/tips"
24                android:layout_width="wrap_content"
25                android:layout_height="wrap_content"
26                android:text="下拉可以刷新"
27                />
28            <!-- 距上次更新至今的时间 -->
29            <TextView
30                android:id="@+id/time"
31                android:layout_width="wrap_content"
32                android:layout_height="wrap_content"
33                />
34
35        </LinearLayout>
36        <!-- 箭头 -->
37        <ImageView
38            android:id="@+id/arrow"
39            android:layout_width="wrap_content"
40            android:layout_height="wrap_content"
41            android:layout_toLeftOf="@id/layout"
42            android:src="@drawable/pull_to_refresh_arrow"
43            />
44        <!-- 更新进度条 -->
45        <ProgressBar
46            android:id="@+id/progress"
47            android:layout_width="wrap_content"
48            android:layout_height="wrap_content"
49            style="?android:attr/progressBarStyleSmall"
50            android:layout_toLeftOf="@id/layout"
51            android:visibility="gone"
52            />
53    </RelativeLayout>
54 </LinearLayout>
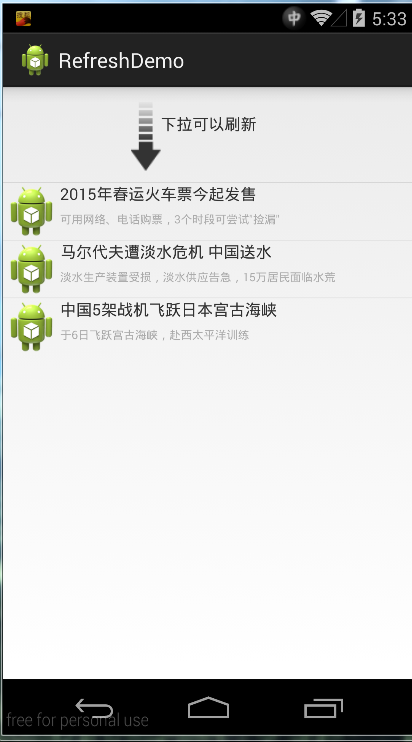
运行效果图:
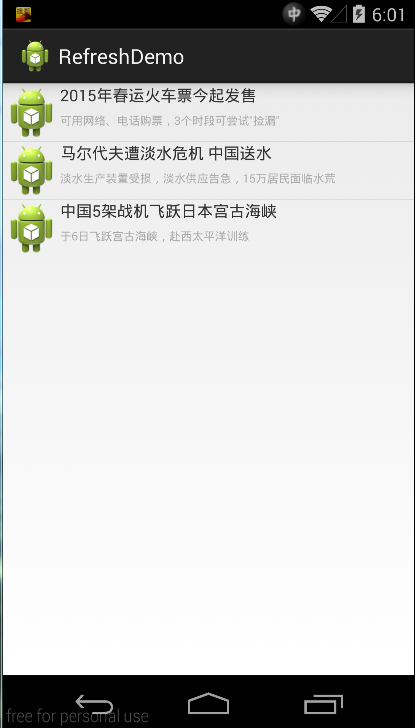
2.由上图可以知道,默认加载header是显示出来的。默认我们应该隐藏顶部提示布局header。
 1 private void initView(Context context){
 2         //LayoutInflater作用是加载布局
 3         LayoutInflater inflater = LayoutInflater.from(context);
 4         header = inflater.inflate(R.layout.header_layout, null);
 5         measureView(header);
 6         headerHeight = header.getMeasuredHeight();
 7         topPadding(-headerHeight);
 8         this.addHeaderView(header);
 9     }
10     /**
11      * 设置顶部布局的上边距
12      * @param topPadding
13      */
14     private void topPadding(int topPadding){
15         //设置顶部提示的边距
16         //除了顶部用参数值topPadding外,其他三个用header默认的值
17         header.setPadding(header.getPaddingLeft(), topPadding,
18                 header.getPaddingRight(), header.getPaddingBottom());
19         //使header无效,将来调用onDraw()重绘View
20         header.invalidate();
21     }
22     /**
23      * 通知父布局,占用的宽和高
24      */
25     private void measureView(View view){
26         //LayoutParams are used by views to tell their parents
27         //how they want to be laid out.
28         //LayoutParams被view用来告诉它们的父布局它们应该被怎样安排
29         ViewGroup.LayoutParams p = view.getLayoutParams();
30         if(p==null){
31             //两个参数:width,height
32             p = new ViewGroup.LayoutParams(ViewGroup.LayoutParams.MATCH_PARENT,
33                     ViewGroup.LayoutParams.WRAP_CONTENT);
34         }
35         //getChildMeasureSpec:获取子View的widthMeasureSpec、heightMeasureSpec值
36         int width = ViewGroup.getChildMeasureSpec(0, 0, p.width);
37         int height;
38         int tempHeight = p.height;
39         if(tempHeight>0){
40             height = MeasureSpec.makeMeasureSpec(tempHeight, MeasureSpec.EXACTLY);
41         }else{
42             height = MeasureSpec.makeMeasureSpec(0, MeasureSpec.UNSPECIFIED);
43         }
44         view.measure(width, height);
45     }
运行效果图:
3.监听用户滑动屏幕操作
1.实现OnScrollListener接口
2.根据用户按下、移动、抬起手势来设置不同的响应事件
3.顶部提示View--header有四种状态:
1. 正常状态(NONE)
2.提示用户下拉可以刷新(PULL)
3.提示用户释放可以刷新(RELEASE)
4.提示用户正在刷新状态(REFREASH)
 1 public class RefreshListView extends ListView implements OnScrollListener{
 2         View header;//下拉刷新时出现的顶部布局View
 3     int headerHeight;//header的高度
 4     int firstVisibleItem;//当前界面第一个可见的item的位置
 5
 6     boolean isFlag;//标志,是在当前显示的listView是在listView最顶端时按下额
 7     int startY;//用户按下的Y值
 8
 9
10     int state;//当前状态
11     final int NONE = 0;//正常状态
12     final int PULL = 1;//提示下拉状态
13     final int RELEASE = 2;//提示释放状态
14     final int REFRESH = 3;//提示正在刷新状态
15
16
17         @Override
18     public void onScrollStateChanged(AbsListView view, int scrollState) {
19         // TODO Auto-generated method stub
20         this.scrollState = scrollState;
21     }
22     @Override
23     public void onScroll(AbsListView view, int firstVisibleItem,
24             int visibleItemCount, int totalItemCount) {
25         // TODO Auto-generated method stub
26         this.firstVisibleItem = firstVisibleItem;
27     }
28     @Override
29     public boolean onTouchEvent(MotionEvent ev) {
30         // TODO Auto-generated method stub
31         switch (ev.getAction()) {
32         case MotionEvent.ACTION_DOWN:
33             if(firstVisibleItem == 0){
34                 isFlag = true;//ListView最顶端按下,标志值设为真
35                 startY = (int)ev.getY();
36             }
37             break;
38         case MotionEvent.ACTION_MOVE:
39             onMove(ev);
40             break;
41         case MotionEvent.ACTION_UP:
42             if(state == RELEASE){
43                 state = REFRESH;
44                 //加载数据
45                 refreshViewByState();
46                 iRefreshlistener.onRefresh();
47             }else if(state == PULL){
48                 state = NONE;
49                 isFlag = false;
50                 refreshViewByState();
51             }
52             break;
53         }
54         return super.onTouchEvent(ev);
55
onMove()方法----->根据用户下拉距离的不同设置不同的响应方法
 1 private void onMove(MotionEvent ev){
 2         //如果不是最顶端按下,则直接返回
 3         if(!isFlag){
 4             return;
 5         }
 6         int currentY = (int)ev.getY();//当前的Y值
 7         int space = currentY - startY;//用户向下拉的距离
 8         int topPadding = space - headerHeight;//顶部提示View距顶部的距离值
 9         switch (state) {
10         //正常状态
11         case NONE:
12             if(space>0){
13                 state = PULL;//下拉的距离大于0,则将状态改为PULL(提示下拉更新)
14                 refreshViewByState();//根据状态的不同更新View
15             }
16             break;
17         case PULL:
18             topPadding(topPadding);
19             if(space>headerHeight+30//下拉的距离大于header的高度加30且用户滚动屏幕,手指仍在屏幕上
20                     &&scrollState == SCROLL_STATE_TOUCH_SCROLL ){
21                 state = RELEASE;//将状态改为RELEASE(提示松开更新)
22                 refreshViewByState();
23             }
24             break;
25         case RELEASE:
26             topPadding(topPadding);
27             if(space<headerHeight+30){//用户下拉的距离不够
28                 state = PULL;         //将状态改为PULL
29                 refreshViewByState();
30             }else if(space<=0){  //用户下拉的距离为非正值
31                 state = NONE;    //将状态改为NONE
32                 isFlag = false;  //标志改为false
33                 refreshViewByState();
34             }
35             break;
36         }
37     }
根据不同状态,改变用户界面的显示
 1     /**
 2      * 根据当前状态state,改变界面显示
 3      * state:
 4      *      NONE:无操作
 5      *      PULL:下拉可以刷新
 6      *      RELEASE:松开可以刷新
 7      *      REFREASH:正在刷新
 8      */
 9     private void refreshViewByState(){
10         //提示
11         TextView tips = (TextView)header.findViewById(R.id.tips);
12         //箭头
13         ImageView arrow = (ImageView)header.findViewById(R.id.arrow);
14         //进度条
15         ProgressBar progress = (ProgressBar)header.findViewById(R.id.progress);
16         //箭头的动画效果1,由0度转向180度,即箭头由朝下转为朝上
17         RotateAnimation animation1 = new RotateAnimation(0, 180,
18                 RotateAnimation.RELATIVE_TO_SELF,0.5f,
19                 RotateAnimation.RELATIVE_TO_SELF,0.5f);
20         animation1.setDuration(500);
21         animation1.setFillAfter(true);
22         //箭头的动画效果2,由180度转向0度,即箭头由朝上转为朝下
23         RotateAnimation animation2 = new RotateAnimation(180, 0,
24                 RotateAnimation.RELATIVE_TO_SELF,0.5f,
25                 RotateAnimation.RELATIVE_TO_SELF,0.5f);
26         animation2.setDuration(500);
27         animation2.setFillAfter(true);
28
29         switch (state) {
30         case NONE:                     //正常状态
31             arrow.clearAnimation();    //清除箭头动画效果
32             topPadding(-headerHeight); //设置header距离顶部的距离
33             break;
34
35         case PULL:                                //下拉状态
36             arrow.setVisibility(View.VISIBLE);    //箭头设为可见
37             progress.setVisibility(View.GONE);    //进度条设为不可见
38             tips.setText("下拉可以刷新");           //提示文字设为"下拉可以刷新"
39             arrow.clearAnimation();               //清除之前的动画效果,并将其设置为动画效果2
40             arrow.setAnimation(animation2);
41             break;
42
43         case RELEASE:                            //下拉状态
44             arrow.setVisibility(View.VISIBLE);   //箭头设为可见
45             progress.setVisibility(View.GONE);   //进度条设为不可见
46             tips.setText("松开可以刷新");          //提示文字设为"松开可以刷新"
47             arrow.clearAnimation();              //清除之前的动画效果,并将其设置为动画效果2
48             arrow.setAnimation(animation1);
49             break;
50
51         case REFRESH:                             //更新状态
52             topPadding(50);                       //距离顶部的距离设置为50
53             arrow.setVisibility(View.GONE);       //箭头设为不可见
54             progress.setVisibility(View.VISIBLE); //进度条设为可见
55             tips.setText("正在刷新...");            //提示文字设为""正在刷新..."
56             arrow.clearAnimation();                //清除动画效果
57             break;
58
59         }
60     }
4.更新数据 由于在RefreshListView中不能直接更新数据,必须设置回调接口来实现更新数据这一功能。
     IRefreshListener iRefreshlistener;//刷新数据的接口
      ...
       public void setInterface(IRefreshListener listener){
        this.iRefreshlistener = listener;
    }
        /**
     * 刷新数据接口
     * @author lenovo
     *
     */
    public interface IRefreshListener{
        public void onRefresh();
    }
在MainActivity中实现IRefreshListener接口并实现onRefresh()方法
public class MainActivity extends Activity implements IRefreshListener{
   ......
   @Override
    public void onRefresh() {
        // TODO Auto-generated method stub
        //handler设置刷新延时效果
        Handler handler = new Handler();
        handler.postDelayed(new Runnable() {

            @Override
            public void run() {
                // TODO Auto-generated method stub
                //获取最新数据
                getRefreshData();
                //通知界面显示
                adapter.notifyDataSetChanged();
                //通知listView刷新数据完毕
                listView.refreshComplete();
            }
        }, 2000);
}
刷新完成的操作:
 1 public void refreshComplete(){
 2         state = NONE;   //状态设为正常状态
 3         isFlag = false; //标志设为false
 4         refreshViewByState();
 5         //设置提示更新时间间隔
 6         Time t = new Time();
 7         t.setToNow();
 8         time = t.hour*60+t.minute-updateTime;
 9         updateTime = t.hour*60+t.minute;
10         TextView lastUpdateTime = (TextView)findViewById(R.id.time);
11         lastUpdateTime.setText(time+"分钟前更新");
12     }
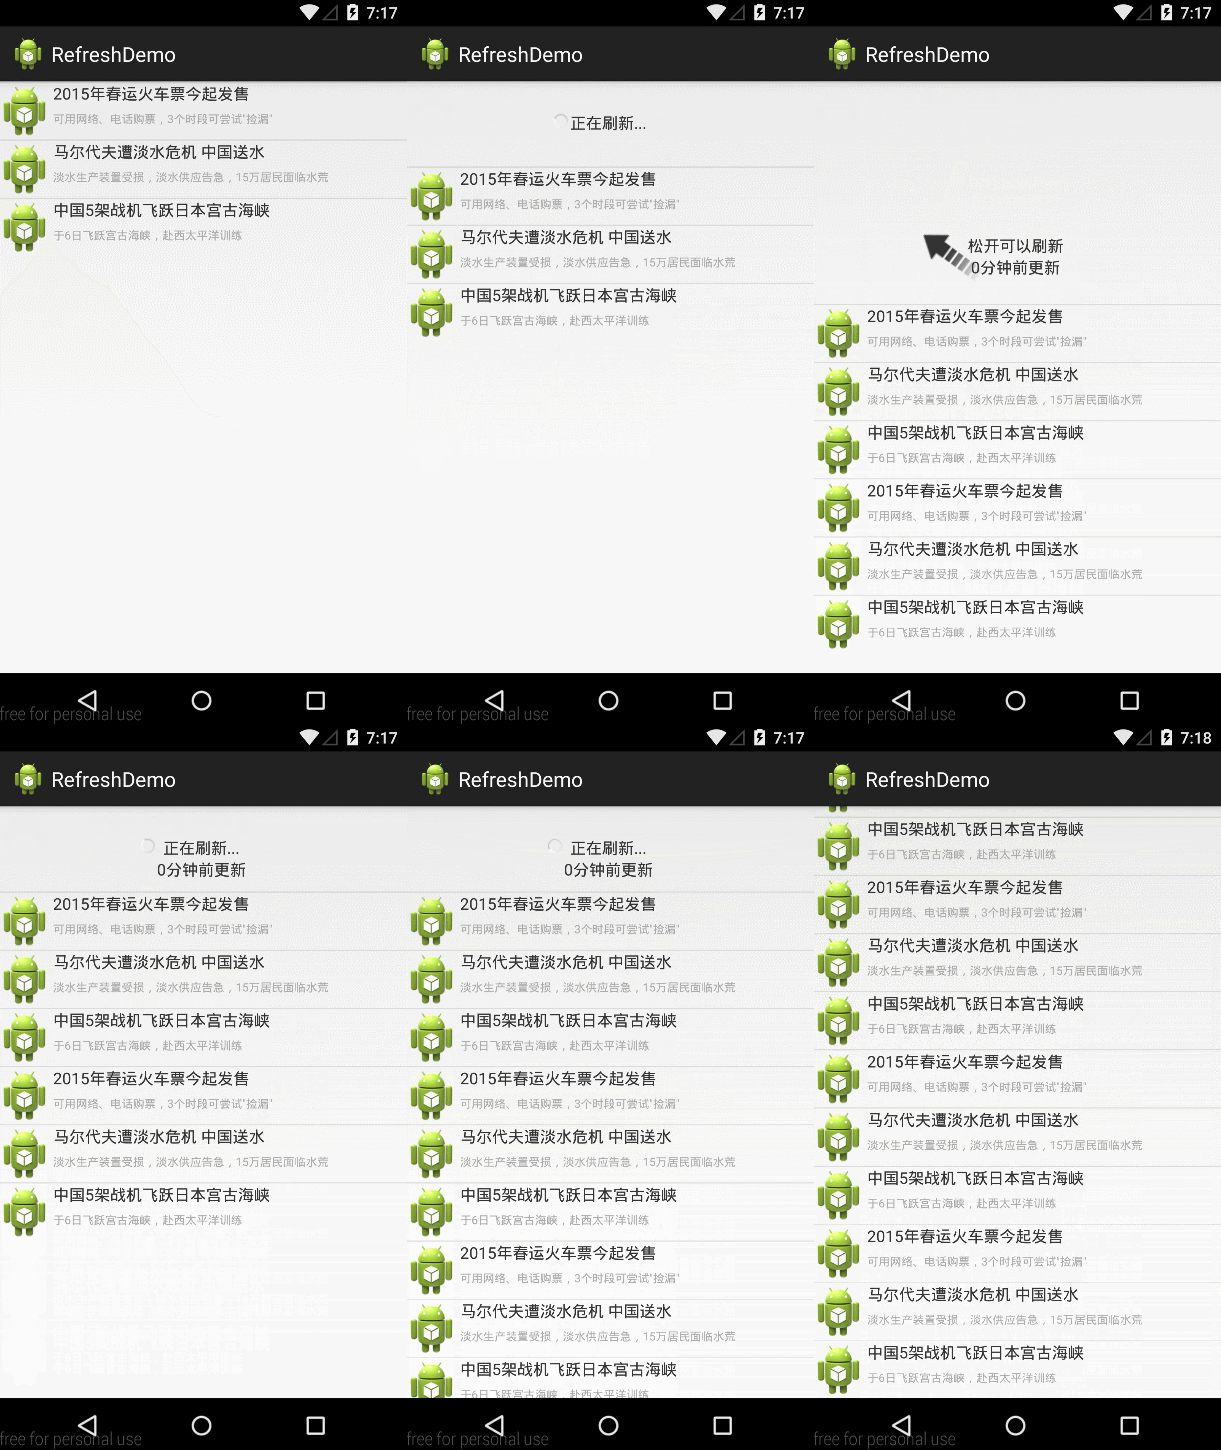
Demo运行效果图
想及时获取最新最有用的Android开发干货,请关注我
转载请注明网址:http://www.cnblogs.com/JohnTsai
如果觉得本文对你的学习工作有所帮助,不妨在右下方点推荐一下,谢谢。
