欢迎来到C#与C++交互开发系列的第八篇。在这篇博客中,我们将探讨C#与C++互操作的实际应用案例。通过一个完整的示例项目,展示如何在真实项目中应用C#与C++互操作技术和优化方法。
8.1 项目介绍
我们将开发一个图像处理应用程序,该程序使用C++实现图像处理算法,并通过C#提供图形用户界面(GUI)。项目包含以下功能:
- 图像加载:从文件加载图像。
- 图像处理:应用C++实现的图像处理算法。
- 图像显示:在C#中显示处理后的图像。
8.2 创建项目
首先,我们需要创建一个包含C++和C#代码的混合项目。
Step 1: 创建C++项目
在Visual Studio中创建一个新的C++项目,并命名为ImageProcessingLib。添加以下代码:
// ImageProcessingLib.h
#pragma once

extern "C" {
    __declspec(dllexport) void ApplyGrayscale(unsigned char* image, int width, int height, int stride);
}

// ImageProcessingLib.cpp
#include "ImageProcessingLib.h"

void ApplyGrayscale(unsigned char* image, int width, int height, int stride) {
    for (int y = 0; y < height; y++) {
        for (int x = 0; x < width; x++) {
            unsigned char* pixel = image + y * stride + x * 4;
            unsigned char gray = (unsigned char)(0.299 * pixel[2] + 0.587 * pixel[1] + 0.114 * pixel[0]);
            pixel[0] = pixel[1] = pixel[2] = gray;
        }
    }
}
更改输出目录:
$(SolutionDir)ImageProcessingApp\bin\Debug\net8.0-windows\
编译项目生成ImageProcessingLib.dll文件。
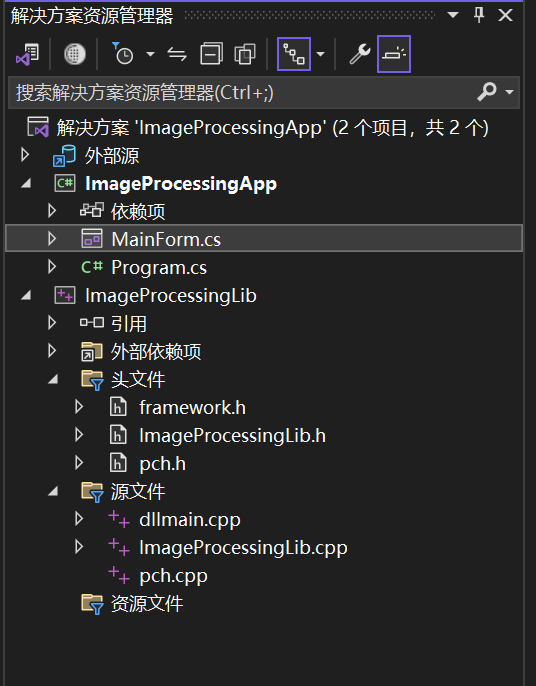
Step 2: 创建C#项目
在Visual Studio中创建一个新的C# Windows Forms应用程序,并命名为ImageProcessingApp。添加对ImageProcessingLib.dll的引用。
Step 3: 在C#中实现图像加载和显示
我们将使用Windows Forms实现图像加载和显示功能。
using System;
using System.Drawing;
using System.Drawing.Imaging;
using System.Runtime.InteropServices;
using System.Windows.Forms;

namespace ImageProcessingApp
{
    public partial class MainForm : Form
    {
        [DllImport("ImageProcessingLib.dll", CallingConvention = CallingConvention.Cdecl)]
        public static extern void ApplyGrayscale(IntPtr image, int width, int height, int stride);

        private Bitmap originalImage;
        private Bitmap processedImage;

        public MainForm()
        {
            InitializeComponent();
        }

        private void btnLoad_Click(object sender, EventArgs e)
        {
            using (OpenFileDialog openFileDialog = new OpenFileDialog())
            {
                openFileDialog.Filter = "Image Files|*.bmp;*.jpg;*.png";
                if (openFileDialog.ShowDialog() == DialogResult.OK)
                {
                    originalImage = new Bitmap(openFileDialog.FileName);
                    pictureBox.Image = originalImage;
                }
            }
        }

        private void btnProcess_Click(object sender, EventArgs e)
        {
            if (originalImage != null)
            {
                processedImage = new Bitmap(originalImage);
                Rectangle rect = new Rectangle(0, 0, processedImage.Width, processedImage.Height);
                BitmapData bmpData = processedImage.LockBits(rect, ImageLockMode.ReadWrite, processedImage.PixelFormat);
                ApplyGrayscale(bmpData.Scan0, bmpData.Width, bmpData.Height, bmpData.Stride);
                processedImage.UnlockBits(bmpData);
                pictureBox.Image = processedImage;
            }
        }
    }
}
Step 4: 设计Windows Forms界面
在Visual Studio的设计器中,添加以下控件:
- Button
btnLoad:用于加载图像。 - Button
btnProcess:用于处理图像。 - PictureBox
pictureBox:用于显示图像。
设置控件的属性,使界面如下所示:
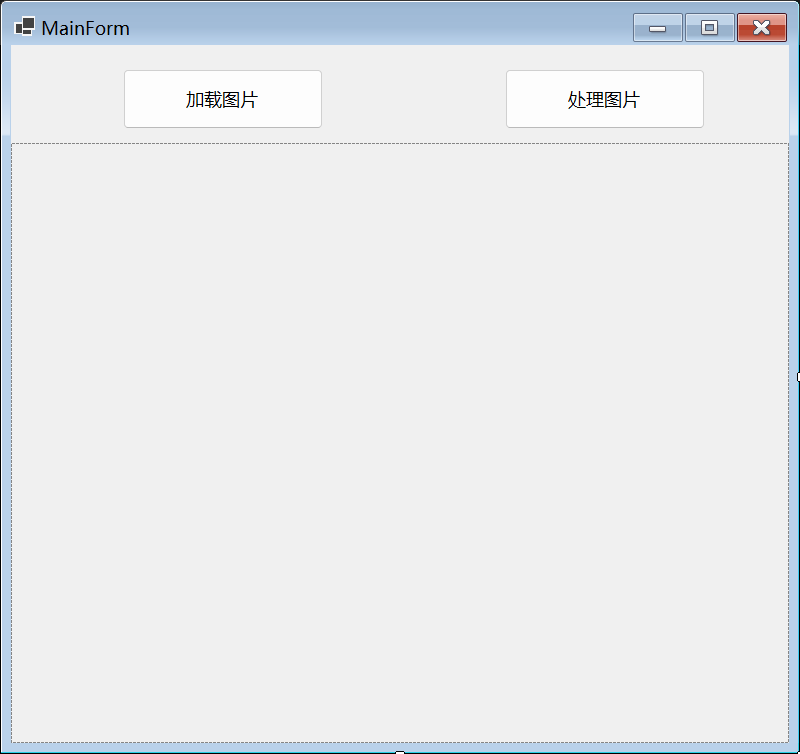
8.3 项目运行
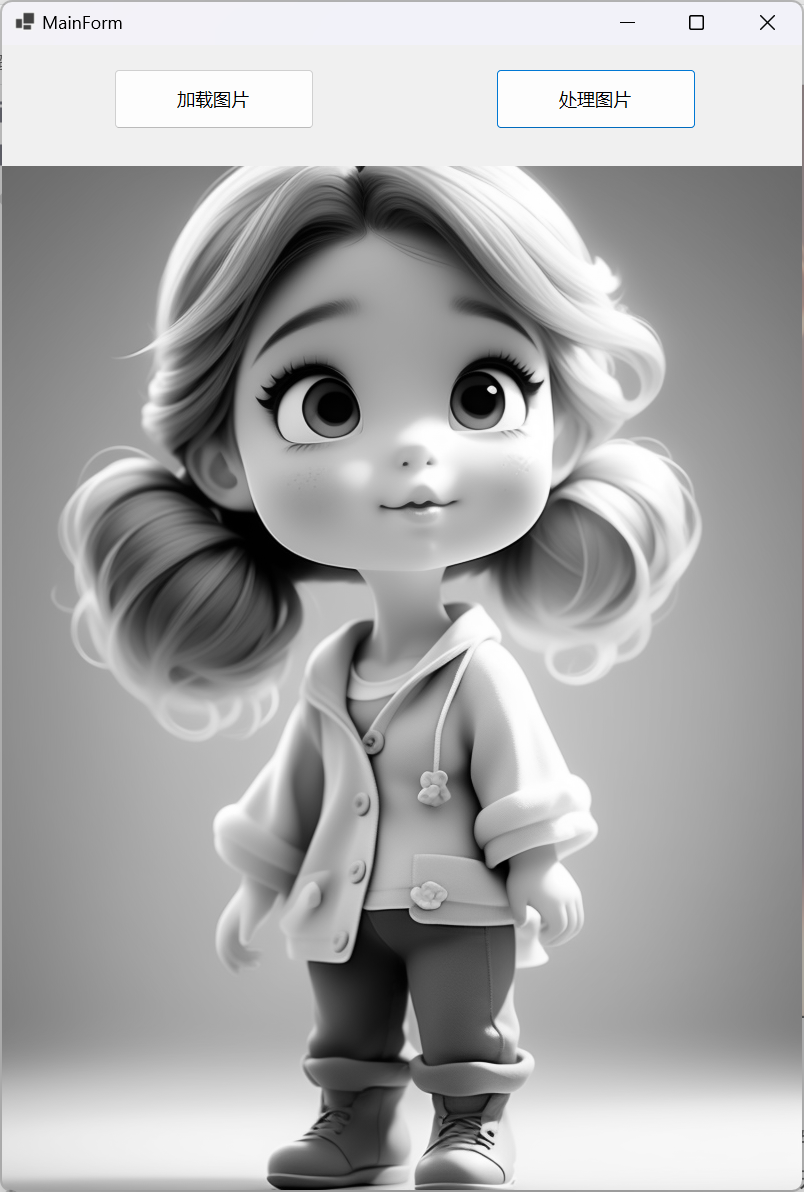
编译并运行项目,点击Load Image按钮选择一张图像,显示在PictureBox控件中。
点击Process Image按钮应用灰度处理效果。处理后的图像将显示在PictureBox控件中。

8.4 总结
在这篇博客中,我们通过一个图像处理应用程序的完整示例,展示了C#与C++互操作技术在实际项目中的应用。我们实现了图像加载、处理和显示功能,并结合使用C++和C#代码来优化性能。在这个过程中,我们应用了前几篇博客中介绍的各种技术和优化方法。