1、安装vue-cli4.x
可以使用下列任一命令安装这个新的包:
npm install -g @vue/cli
# OR
yarn global add @vue/cli
你还可以用这个命令来检查其版本是否正确:
vue --version
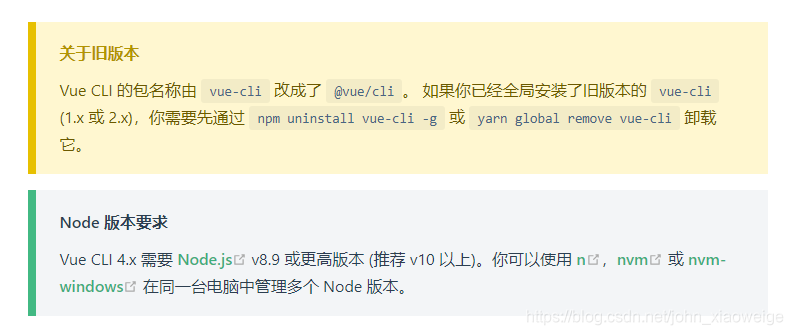
如果已经安装过了@vue/cli,想升级最新版本,可以用下面命令升级:
npm update -g @vue/cli

# 或者
yarn global upgrade --latest @vue/cli
注意:
官方资料
2、创建vue3.0项目
执行创建项目命令:
vue create vue-demo
? Please pick a preset: (Use arrow keys) 			//请选择预选项
> Default ([Vue 2] babel, eslint)					//使用Vue2默认模板进行创建
  Default (Vue 3 Preview) ([Vue 3] babel, eslint)	//使用Vue3默认模板进行创建
  Manually select features							//手动选择(自定义)的意思
我们选择第三项:Manually select features
? Check the features needed for your project: (Press <space> to select, <a> to toggle all, <i> to invert selection)
>(*) Choose Vue version	// 选择Vue版本
 (*) Babel // vue项目中普遍使用es6语法,但有时我们的项目需要兼容低版本浏览器,这时就需要引入babel插件,将es6转成es5
 ( ) TypeScript	// TypeScript通过添加类型来扩展JavaScript。通过了解JavaScript,TypeScript可以节省您捕获错误的时间并在运行代码之前提供修复。任何浏览器,任何操作系统,任何运行JavaScript的地方。 完全开源
 ( ) Progressive Web App (PWA) Support  // 渐进式Web应用程序(PWA)支持
 ( ) Router	// router路由
 ( ) Vuex	// vuex状态管理
 ( ) CSS Pre-processors // CSS预处理器,例如:less,sass,stylus
 (*) Linter / Formatter // 格式化程序
 ( ) Unit Testing   // 单元测试
 ( ) E2E Testing	// 端到端单元测试
我们依次勾选
Choose Vue version
Babel
Progressive Web App (PWA) Support
Router
Vuex
CSS Pre-processors
Linter / Formatter
注意:里面某些项是选择勾选的,比如,你不需要vuex,则可以不勾选
? Choose a version of Vue.js that you want to start the project with (Use arrow keys)
> 2.x
  3.x (Preview)
选择vue版本,我们选择3.x
? Use history mode for router? (Requires proper server setup for index fallback in production) (Y/n)
路由选择模式是否选择history?我们写n
? Pick a CSS pre-processor (PostCSS, Autoprefixer and CSS Modules are supported by default): (Use arrow keys)
> Sass/SCSS (with dart-sass)
  Sass/SCSS (with node-sass)
  Less
  Stylus
css预处理器选择,我们选择用less
? Pick a linter / formatter config: (Use arrow keys)
> ESLint with error prevention only
  ESLint + Airbnb config
  ESLint + Standard config
  ESLint + Prettier
我们选择使用ESLint + Prettier
? Pick additional lint features: (Press <space> to select, <a> to toggle all, <i> to invert selection)
>(*) Lint on save
 ( ) Lint and fix on commit
我们选择使用Lint on save
? Where do you prefer placing config for Babel, ESLint, etc.? (Use arrow keys)
> In dedicated config files
  In package.json
你选择这些配置文件时单独存放,还是直接存放在package.json文件里?
我们选择In dedicated config files,单独存放
? Save this as a preset for future projects? (y/N)
是否将此保存为将来项目的预设
我们选择N
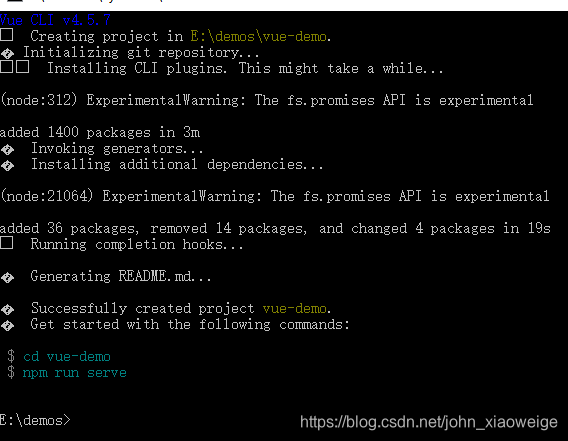
至此,我们创建步骤就走完了,最后坐等依赖下载完成,进入项目目录,运行启动命令即可:
3、基本语法
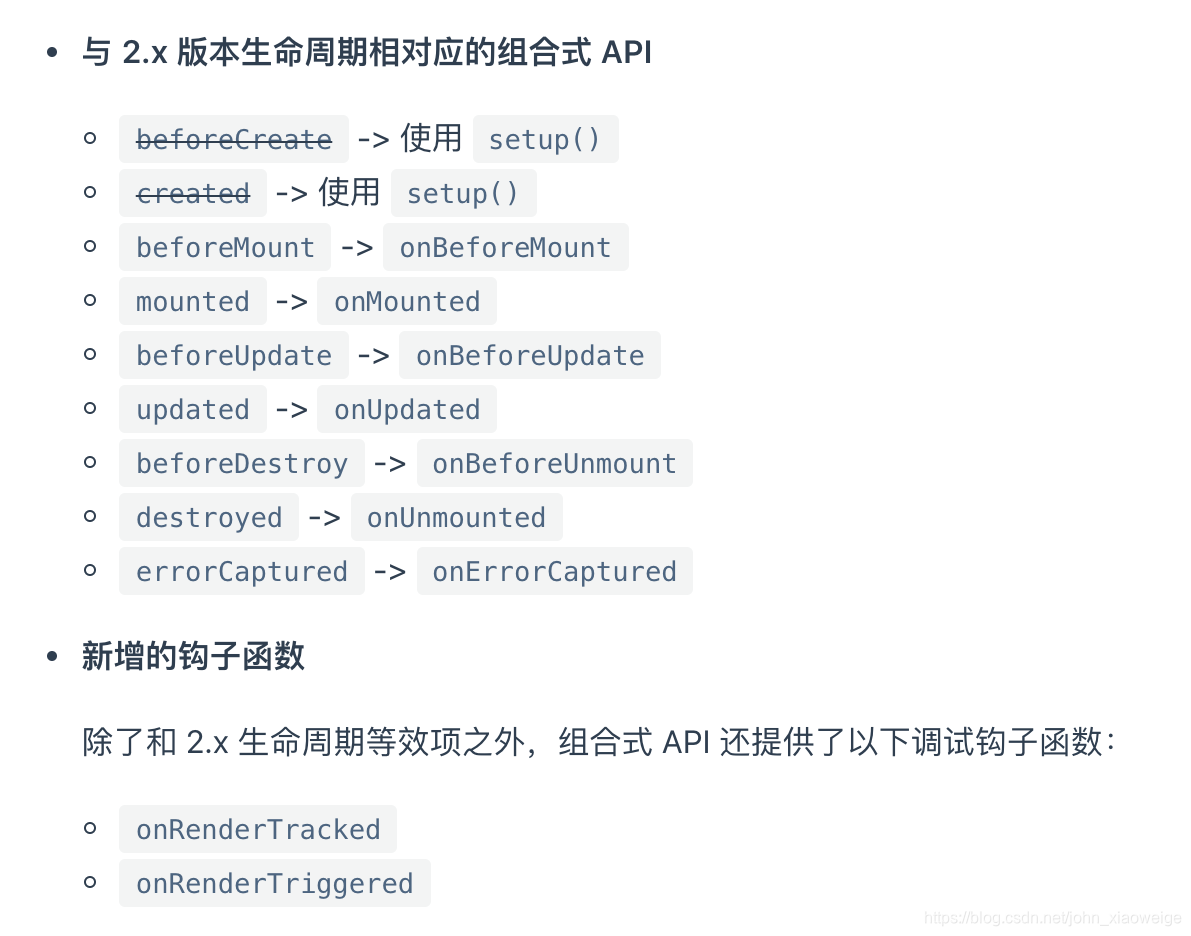
3.1、vue3.0生命周期变化
| 2.0 周期名称 | 3.0 周期名称 | 说明 |
|---|---|---|
| beforeCreate | setup | 组件创建之前 |
| created | setup | 组件创建完成 |
| beforeMount | onBeforeMount | 组件挂载之前 |
| mounted | onMounted | 组件挂载完成 |
| beforeUpdate | onBeforeUpdate | 数据更新,虚拟 DOM 补丁之前 |
| updated | onUpdated | 数据更新,虚拟 DOM渲染完成 |
| beforeDestroy | onBeforeUnmount | 组件销毁之前 |
| destroyed | onUnmounted | 组件销毁后 |
// vue3.x
import {
  onBeforeMount,
  onMounted,
  onBeforeUpdate,
  onUpdated,
  onBeforeUnmount,
  onUnmounted
} from 'vue'

export default {
  setup(props, content) {
	// 接收props对象作为第一个参数,接收来的props对象,可以通过watchEffect监视其变化。
	// 接受context对象作为第二个参数,这个对象包含attrs,slots,emit三个属性。

    onBeforeMount(() => {
      console.log('component is onBeforeMount')
    })
    onMounted(() => {
      console.log('component is onMounted')
    })
    onBeforeUpdate(() => {
      console.log('component is onBeforeUpdate')
    })
    onUpdated(() => {
      console.log('component is onUpdated')
    })
    onBeforeUnmount(() => {
      console.log('component is onBeforeUnmount')
    })
    onUnmounted(() => {
      console.log('component is onUnmounted')
    })
  }
}
3.2 数据绑定和事件绑定 ref & reactive
ref:接受一个参数值并返回一个响应式且可改变的 ref 对象。ref 对象拥有一个指向内部值的单一属性 .value
reactive:接收一个普通对象然后返回该普通对象的响应式代理,响应式转换是“深层的”:会影响对象内部所有嵌套的属性。基于 ES2015 的 Proxy 实现,返回的代理对象不等于原始对象。建议仅使用代理对象而避免依赖原始对象。
总结一句话:在‘template’中使用ref或者reactive定义的变量时候,不用加 ‘.value’,在js中操作ref定义的变量需要加 '.value’才能改变值,而reactive定义的变量则不用
<template>
  <div class="father">
    <div>{{ count }}</div>
    <button @click="handleCountAdd">handleCountAdd</button>

    <div>{{ number }}</div>
    <button @click="handleNumberAdd">handleNumberAdd</button>
  </div>
</template>

<script>
import { ref, reactive, toRefs } from 'vue'

export default {
  name: "Father",
  components: {},
  setup () {
    let count = ref(0)
    const handleCountAdd = () => {
      count.value++
    }


    let state = reactive({number: 0})
    const handleNumberAdd = () => {
      state.number++
    }

    return {
      count,
      handleCountAdd,
      // 不能直接...state这么写,因为会失去响应式,toRefs()就帮我们解决了这个响应式的问题
      ...toRefs(state),
      handleNumberAdd
    }
  }
};
</script>
3.3、父子组件通讯
父组件
<template>
  <!-- 父组件 -->
  <div class="father">
    <Child :name="name" :age="age" :height="height" @onAfterAYear="changeData" />
  </div>
</template>

<script>
import { reactive, toRefs } from 'vue'
import Child from '@/components/child'

export default {
  name: "Father",
  components: { Child },
  setup () {
    let state = reactive({
      name: '小明',
      age: 12,
      height: 155
    })

    const changeData = () => {
      state.name = '大明'
      state.age = 13
      state.height = 169
    }

    return {
      ...toRefs(state),
      changeData
    }
  }
};
</script>
子组件
<template>
  <!-- 子组件 -->
  <p>我是{{ name }}</p>
  <p>今年{{ age }} 岁</p>
  <p>身高{{ height }}cm</p>
  <button @click="handleClick">有过了一年</button>
</template>

<script>
export default {
  name: "Child",
  props: {
    name: {
      type: String,
      default: ''
    },
    age: {
      type: Number,
      default: 0
    },
    height: {
      type: Number,
      default: 0
    }
  },
  emits: ['onAfterAYear'], // 这句要加上,否则会报警告
  setup (props, ctx) {
    // props可以取到父组件传进来的值
    console.log('props', props.name)
    console.log('props', props.age)
    console.log('props', props.height)

    const handleClick = () => {
      // 注意这了是emit,不是$emit
      ctx.emit('onAfterAYear', '过了一年')
    }
    return {
      handleClick
    }
  }
};
</script>
3.4、computed 的使用(filters 在vue3.0已经废除)
用法computed(() => value)
<template>
  <!-- 父组件 -->
  <div class="father">
    <p>{{ count }}</p>
    <p>{{ countCheng }}</p>
    <button @click="handleAdd">handleAdd</button>
  </div>
</template>

<script>
import { computed, reactive, toRefs } from 'vue'

export default {
  name: "Father",
  setup () {
    let state = reactive({ count: 0 })
    let countCheng = computed(() => {
      return '我把count*10了 ' + state.count * 10
    })
    const handleAdd = () => {
      state.count++
    }
    return {
      ...toRefs(state),
      countCheng,
      handleAdd
    }
  }
};
</script>
3.5、 监听属性 watch & watchEffect
watch:
1.具有一定的惰性lazy 第一次页面展示的时候不会执行,只有数据变化的时候才会执行(加上immediate属性,就能变成非惰性的,立即执行的)
2.参数可以拿到当前值和原始值
3.可以侦听多个数据的变化,用一个侦听起承载
import { reactive, toRefs, ref, watch} from 'vue'

export default {
  name: "Father",
  setup () {
    let a = ref(0)
    let b = reactive({ c: 0})

    // ref定义的直接用,reactive定义的要用function返回来用
    watch([a, () => b.c], ([newA, newC], [oldA, oldC]) => {
      console.log('newA', newA)
      console.log('oldA', oldA)
      console.log('newC', newC)
      console.log('oldC', oldC)
    },{ immediate: true })

    return {
      a,
      ...toRefs(b)
    }
  }
};
watchEffect:
没有过多的参数 只有一个回调函数
1.立即执行,没有惰性,页面的首次加载就会执行。
2.自动检测内部代码,代码中有依赖 便会执行
3.不需要传递要侦听的内容 会自动感知代码依赖,不需要传递很多参数,只要传递一个回调函数
4.不能获取之前数据的值 只能获取当前值
5.一些=异步的操作放在这里会更加合适
import { reactive, toRefs, ref, watchEffect } from 'vue'

export default {
  name: "Father",
  setup () {
    let a = ref(0)
    let b = reactive({ c: 0})

    const stopWatchEffect = watchEffect(() => {
      console.log('a', a)
      console.log('b', b)
      setTimeout(() => {
        stopWatchEffect()
      }, 3000)
    })

    return {
      a,
      ...toRefs(b)
    }
  }
};
3.6、Fragment
vue2.x中规定,template只允许有一个根节点
但vue3.x中可以允许有多个根节点
<template>
	<div>1</div>
	<div>2</div>
	<div>3</div>
</template>
3.7 、路由[email protected]
vue2.x使用的是[email protected]和[email protected],vue3.x使用的是[email protected]和[email protected]
获取路由
网上一些教程会告诉你通过ctx访问router和store对象,但是其实这种方式只能在develement模式有效,在production环境编译后,ctx在develement下看到的属性都无法访问,容易误导大家
错误示例:
import { getCurrentInstance } from 'vue'

export default {
  setup () {
    const { ctx } = getCurrentInstance()
    console.log(ctx)
    console.log(ctx.$router.currentRoute.value)
    const userId = computed(() => ctx.$store.state.app.userId)
    return {
      userId
    }
  }
}
正确示例:
import { getCurrentInstance } from 'vue'
import { useRouter, useRoute } from 'vue-router'
import { useStore } from 'vuex'

export default {
  setup () {
    const { ctx } = getCurrentInstance()
    console.log(ctx)
    const router = useRouter()
    const store = userStore()
    console.log(router, route, store)
    console.log(router.currentRoute.value)
    const userId = computed(() => store.state.app.userId)

	// 路由跳转
	const route = useRoute()
	route.push('/home')
	route.push({path: '/home'})
	route.push({path: '/home', query: {a: 0,b: 1}})
	route.push({name: 'Home', params: {a: 0,b: 1}})

	// home页面获取路由传值
	const route = useRoute()
	const query = route.query
	const params = route.params

    return {
      userId
    }
  }
}
路由的scrollBehavior滚动行为
vue3.x router弃用了vue2.x router中的 { selector, x, y, offset },使用{ el, left, top, behavior }代替,新的api语义更接近原生DOM
// vue2.x router
const router = new Router({
  base: process.env.BASE_URL,
  mode: 'history',
  scrollBehavior: () => ({ x: 0, y: 0 }),
  routes
})

// vue3.x router
const router = createRouter({
  history: createWebHistory(process.env.BASE_URL),
  routes,
  scrollBehavior(to, from, savedPosition) {
    // scroll to id `#app` + 200px, and scroll smoothly (when supported by the browser)
    return {
      el: '#app',
      top: 0,
      left: 0,
      behavior: 'smooth'
    }
  }
})
路由重定向redirect变化
vue2.x使用路由选项redirect设置路由自动调整,vue3.x中移除了这个选项,将在子路由中添加一个空路径路由来匹配跳转
// vue2.x router
[
  {
    path: '/',
    component: Layout,
    name: 'WebHome',
    meta: { title: '平台首页' },
    redirect: '/dashboard', // 这里写跳转
    children: [
      {
        path: 'dashboard',
        name: 'Dashboard',
        meta: { title: '工作台' },
        component: () => import('../views/dashboard/index.vue')
      }
    ]
  }
]

// vue3.x router
[
  {
    path: '/',
    component: Layout,
    name: 'WebHome',
    meta: { title: '平台首页' },
    children: [
      { path: '', redirect: 'dashboard' }, // 这里写跳转
      {
        path: 'dashboard',
        name: 'Dashboard',
        meta: { title: '工作台' },
        component: () => import('../views/dashboard/index.vue')
      }
    ]
  }
]
vuex4.x整体改动较少
创建实例
// vue2.x vuex
import Vue from 'vue'
import Vuex from 'vuex'

Vue.use(Vuex)

export default new Vuex.Store({
  state: {},
  mutations: {},
  actions: {},
  getters: {},
  modules: {}
}

// vue3.x vuex
import Vuex from 'vuex'

export default Vuex.createStore({
  state: {},
  mutations: {},
  actions: {},
  getters: {},
  modules: {}
})
获取store
// vue3.x vuex
import { getCurrentInstance } from 'vue'
import { useRouter, useRoute } from 'vue-router'
import { useStore } from 'vuex'

export default {
  setup () {
    const { ctx } = getCurrentInstance()
    console.log(ctx)
    const router = useRouter()
    const route = useRoute()
    const store = userStore()
    console.log(router, route, store)
    console.log(router.currentRoute.value)
    const userId = computed(() => store.state.app.userId)
    return {
      userId
    }
  }
}
3.9、获取dom节点 ref
2.x可以在组件挂载之后通过this.
e
l
访
问
组
件
根
元
素
3.
x
去
掉
t
h
i
s
,
并
且
支
持
F
r
a
g
m
e
n
t
,
所
以
t
h
i
s
.
el访问组件根元素 3.x去掉this,并且支持Fragment,所以this.
el访问组件根元素3.x去掉this,并且支持Fragment,所以this.el没有存在的意义,建议通过refs访问DOM
当使用组合式 API 时,reactive refs 和 template refs 的概念已经是统一的。为了获得对模板内元素或组件实例的引用,我们可以像往常一样在 setup() 中声明一个 ref 并返回它
<template>
  <div ref="root"></div>
</template>

<script>
  import { ref, onMounted, getCurrentInstance } from 'vue'

  export default {
    setup() {
      const vm = getCurrentInstance()
      const root = ref(null)

      onMounted(() => {
        // 在渲染完成后, 这个 div DOM 会被赋值给 root ref 对象
        console.log(root.value) // <div/>
        console.log(vm.refs.root) // <div/>
        console.log(root.value === vm.refs.root) // true
      })

      return {
        root
      }
    }
  }
</script>
3.10、移除 on,on,off
在Vue2.x中可以通过EventBus的方法来实现组件通信
// 声明实例
var EventBus = new Vue()
Vue.prototype.$globalBus = EventBus
// 组件内调用
this.$globalBus.$on('my-event-name', callback)
this.$globalBus.$emit('my-event-name', data)
在vue3.x中移除了 o n 、 on、 on、off等方法,而是推荐使用mitt方案来代替:
// 声明实例
import mitt from 'mitt'
const emitter = mitt()
// 组件内调用
// listen to all events
emitter.on('*', (type, e) => console.log(type, e))
emitter.on('my-event-name', callback)
emitter.emit('my-event-name', data)
// clearing all events
emitter.all.clear()
3.11、provide & inject
import {provide,inject} from 'vue';

// 父组件
provide("customVal", "我是父组件向子组件传递的值");

// 子组件
const customVal = inject("customVal");
3.12、代码格式风格,切割成各种模块导出
import useAfrom './a';

import useBfrom './b';

import useCfrom './c';

export default {
	setup (props) {

		let{ a, methodsA } = useAfrom();

		let{ b, methodsB } = useBfrom();

		let{ c, methodsC } = useCfrom();

		return{
			a,
			methodsA,
			b,
			methodsB,
			c,
			methodsC
		}
	}
}
参考资料链接:
https://juejin.cn/post/6867114456762679309