spring源码依赖注入的核心方法populateBean(beanName, mbd, instanceWrapper)分析:通过源码我们发现在分析这个方法之前,此对象已经创建完成实例,内存开辟了空间,比如:
instanceWrapper = createBeanInstance(beanName, mbd, args);但是对象类里面的参数和方法还没有真正赋值,真正的赋值在这里,doCreateBean的接口中:
//ioc di,依赖注入的核心方法
populateBean(beanName, mbd, instanceWrapper);
1、点击 populateBean
protected void populateBean(String beanName, RootBeanDefinition mbd, @Nullable BeanWrapper bw) {
if (bw == null) {
if (mbd.hasPropertyValues()) {
throw new BeanCreationException(
mbd.getResourceDescription(), beanName, "Cannot apply property values to null instance");
}
else {
// Skip property population phase for null instance.
return;
}
}
// Give any InstantiationAwareBeanPostProcessors the opportunity to modify the
// state of the bean before properties are set. This can be used, for example,
// to support styles of field injection.
//这里很有意思,写接口可以让所有类都不能依赖注入
if (!mbd.isSynthetic() && hasInstantiationAwareBeanPostProcessors()) {
for (BeanPostProcessor bp : getBeanPostProcessors()) {
if (bp instanceof InstantiationAwareBeanPostProcessor) {
InstantiationAwareBeanPostProcessor ibp = (InstantiationAwareBeanPostProcessor) bp;
if (!ibp.postProcessAfterInstantiation(bw.getWrappedInstance(), beanName)) {
return;
}
}
}
}
PropertyValues pvs = (mbd.hasPropertyValues() ? mbd.getPropertyValues() : null);
int resolvedAutowireMode = mbd.getResolvedAutowireMode();
if (resolvedAutowireMode == AUTOWIRE_BY_NAME || resolvedAutowireMode == AUTOWIRE_BY_TYPE) {
MutablePropertyValues newPvs = new MutablePropertyValues(pvs);
// Add property values based on autowire by name if applicable.
if (resolvedAutowireMode == AUTOWIRE_BY_NAME) {
autowireByName(beanName, mbd, bw, newPvs);
}
// Add property values based on autowire by type if applicable.
if (resolvedAutowireMode == AUTOWIRE_BY_TYPE) {
autowireByType(beanName, mbd, bw, newPvs);
}
pvs = newPvs;
}
boolean hasInstAwareBpps = hasInstantiationAwareBeanPostProcessors();
boolean needsDepCheck = (mbd.getDependencyCheck() != AbstractBeanDefinition.DEPENDENCY_CHECK_NONE);
PropertyDescriptor[] filteredPds = null;
//重点看这个if代码块,重要程度 5
if (hasInstAwareBpps) {
if (pvs == null) {
pvs = mbd.getPropertyValues();
}
for (BeanPostProcessor bp : getBeanPostProcessors()) {
if (bp instanceof InstantiationAwareBeanPostProcessor) {
InstantiationAwareBeanPostProcessor ibp = (InstantiationAwareBeanPostProcessor) bp;
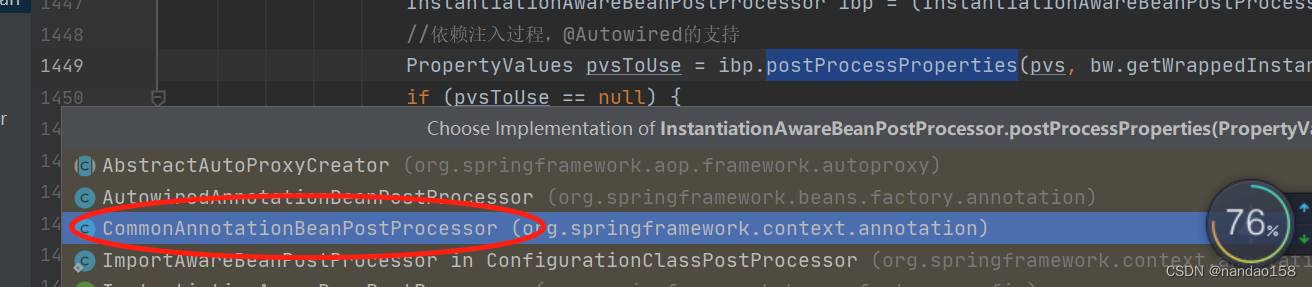
//依赖注入过程,@Autowired的支持
PropertyValues pvsToUse = ibp.postProcessProperties(pvs, bw.getWrappedInstance(), beanName);
if (pvsToUse == null) {
if (filteredPds == null) {
filteredPds = filterPropertyDescriptorsForDependencyCheck(bw, mbd.allowCaching);
}
//老版本用这个完成依赖注入过程,@Autowired的支持
pvsToUse = ibp.postProcessPropertyValues(pvs, filteredPds, bw.getWrappedInstance(), beanName);
if (pvsToUse == null) {
return;
}
}
pvs = pvsToUse;
}
}
}
if (needsDepCheck) {
if (filteredPds == null) {
filteredPds = filterPropertyDescriptorsForDependencyCheck(bw, mbd.allowCaching);
}
checkDependencies(beanName, mbd, filteredPds, pvs);
}
//这个方法很鸡肋了,建议不看,是老版本用<property name="username" value="Jack"/>
//标签做依赖注入的代码实现,复杂且无用
if (pvs != null) {
applyPropertyValues(beanName, mbd, bw, pvs);
}
}2、点击 postProcessProperties方法:

循环调用:我们以 AutowiredAnnotationBeanPostProcessor 为例进入:
	@Override
	public PropertyValues postProcessProperties(PropertyValues pvs, Object bean, String beanName) {//去缓存中取封装的类信息,在上篇的apply..方法中保存的,这里点开简单看一下
		InjectionMetadata metadata = findAutowiringMetadata(beanName, bean.getClass(), pvs);
		try {//反射调用,核心方法
			metadata.inject(bean, beanName, pvs);
		}
		catch (BeanCreationException ex) {
			throw ex;
		}
		catch (Throwable ex) {
			throw new BeanCreationException(beanName, "Injection of autowired dependencies failed", ex);
		}
		return pvs;
	}
点击findAutowiringMetadata方法:
private InjectionMetadata findAutowiringMetadata(String beanName, Class<?> clazz, @Nullable PropertyValues pvs) {
		// Fall back to class name as cache key, for backwards compatibility with custom callers.
		String cacheKey = (StringUtils.hasLength(beanName) ? beanName : clazz.getName());
		// Quick check on the concurrent map first, with minimal locking.
        //此处缓存中有数据,直接就返回了
		InjectionMetadata metadata = this.injectionMetadataCache.get(cacheKey);
		if (InjectionMetadata.needsRefresh(metadata, clazz)) {
			synchronized (this.injectionMetadataCache) {
				metadata = this.injectionMetadataCache.get(cacheKey);
				if (InjectionMetadata.needsRefresh(metadata, clazz)) {
					if (metadata != null) {
						metadata.clear(pvs);
					}
					//这个重要方法上篇分享过了,这里就不说了
					metadata = buildAutowiringMetadata(clazz);
					this.injectionMetadataCache.put(cacheKey, metadata);
				}
			}
		}
		return metadata;
	}
3、点击 metadata.inject(bean, beanName, pvs);方法,来到 InjectionMetadata 类
public void inject(Object target, @Nullable String beanName, @Nullable PropertyValues pvs) throws Throwable {
Collection<InjectedElement> checkedElements = this.checkedElements;
Collection<InjectedElement> elementsToIterate =
(checkedElements != null ? checkedElements : this.injectedElements);
if (!elementsToIterate.isEmpty()) {
//循环每个带有@Atowared注解的参数或者方法,依次通过反射赋值
for (InjectedElement element : elementsToIterate) {
if (logger.isTraceEnabled()) {
logger.trace("Processing injected element of bean '" + beanName + "': " + element);
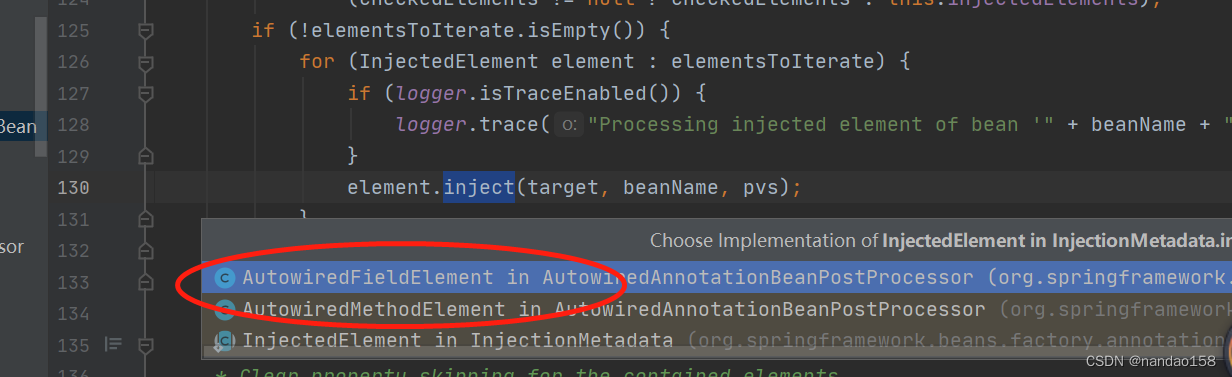
}//反射核心方法,处理参数或者方法,点击
element.inject(target, beanName, pvs);
}
}
}如图验证参数或者方法:
4、点击 element.inject(target, beanName, pvs);方法:参数赋值
	@Override
		protected void inject(Object bean, @Nullable String beanName, @Nullable PropertyValues pvs) throws Throwable {
			Field field = (Field) this.member;
			Object value;
			if (this.cached) {
				value = resolvedCachedArgument(beanName, this.cachedFieldValue);
			}
			else {
				DependencyDescriptor desc = new DependencyDescriptor(field, this.required);
				desc.setContainingClass(bean.getClass());
				Set<String> autowiredBeanNames = new LinkedHashSet<>(1);
				Assert.state(beanFactory != null, "No BeanFactory available");
				TypeConverter typeConverter = beanFactory.getTypeConverter();
				try {
					//这里会触发依赖注入属性的getBean操作,前几篇分析过,此处省略
					value = beanFactory.resolveDependency(desc, beanName, autowiredBeanNames, typeConverter);
				}
				catch (BeansException ex) {
					throw new UnsatisfiedDependencyException(null, beanName, new InjectionPoint(field), ex);
				}
				synchronized (this) {
					if (!this.cached) {
						if (value != null || this.required) {
							this.cachedFieldValue = desc;
							registerDependentBeans(beanName, autowiredBeanNames);
							if (autowiredBeanNames.size() == 1) {
								String autowiredBeanName = autowiredBeanNames.iterator().next();
								if (beanFactory.containsBean(autowiredBeanName) &&
										beanFactory.isTypeMatch(autowiredBeanName, field.getType())) {
									this.cachedFieldValue = new ShortcutDependencyDescriptor(
											desc, autowiredBeanName, field.getType());
								}
							}
						}
						else {
							this.cachedFieldValue = null;
						}
						this.cached = true;
					}
				}
			}
			if (value != null) {
				ReflectionUtils.makeAccessible(field);
                //最终通过反射赋值,参数如下。
				field.set(bean, value);
			}
		}
	}
方法赋值进入:
	@Override
		protected void inject(Object bean, @Nullable String beanName, @Nullable PropertyValues pvs) throws Throwable {
			if (checkPropertySkipping(pvs)) {
				return;
			}
			Method method = (Method) this.member;
			Object[] arguments;
			if (this.cached) {
				// Shortcut for avoiding synchronization...
				arguments = resolveCachedArguments(beanName);
			}
			else {
				int argumentCount = method.getParameterCount();
				arguments = new Object[argumentCount];
				DependencyDescriptor[] descriptors = new DependencyDescriptor[argumentCount];
				Set<String> autowiredBeans = new LinkedHashSet<>(argumentCount);
				Assert.state(beanFactory != null, "No BeanFactory available");
				TypeConverter typeConverter = beanFactory.getTypeConverter();
				for (int i = 0; i < arguments.length; i++) {
					MethodParameter methodParam = new MethodParameter(method, i);
					DependencyDescriptor currDesc = new DependencyDescriptor(methodParam, this.required);
					currDesc.setContainingClass(bean.getClass());
					descriptors[i] = currDesc;
					try {
						Object arg = beanFactory.resolveDependency(currDesc, beanName, autowiredBeans, typeConverter);
						if (arg == null && !this.required) {
							arguments = null;
							break;
						}
						arguments[i] = arg;
					}
					catch (BeansException ex) {
						throw new UnsatisfiedDependencyException(null, beanName, new InjectionPoint(methodParam), ex);
					}
				}
				synchronized (this) {
					if (!this.cached) {
						if (arguments != null) {
							DependencyDescriptor[] cachedMethodArguments = Arrays.copyOf(descriptors, arguments.length);
							registerDependentBeans(beanName, autowiredBeans);
							if (autowiredBeans.size() == argumentCount) {
								Iterator<String> it = autowiredBeans.iterator();
								Class<?>[] paramTypes = method.getParameterTypes();
								for (int i = 0; i < paramTypes.length; i++) {
									String autowiredBeanName = it.next();
									if (beanFactory.containsBean(autowiredBeanName) &&
											beanFactory.isTypeMatch(autowiredBeanName, paramTypes[i])) {
										cachedMethodArguments[i] = new ShortcutDependencyDescriptor(
												descriptors[i], autowiredBeanName, paramTypes[i]);
									}
								}
							}
							this.cachedMethodArguments = cachedMethodArguments;
						}
						else {
							this.cachedMethodArguments = null;
						}
						this.cached = true;
					}
				}
			}
			if (arguments != null) {
				try {
					ReflectionUtils.makeAccessible(method);
					method.invoke(bean, arguments);//方法执行
				}
				catch (InvocationTargetException ex) {
					throw ex.getTargetException();
				}
			}
		}
5、业务测试类:
import com.enjoy.jack.designPattern.strategy.CQ;
import com.enjoy.jack.designPattern.strategy.SC;
import org.springframework.beans.factory.annotation.Autowired;
import org.springframework.stereotype.Component;

import javax.annotation.Resource;

@Component
public class AutowiredConstructorBean {

   @Autowired(required = false)
    public AutowiredConstructorBean(SC sc,CQ cq) {
        System.out.println(sc);
        System.out.println(cq);
    }

    @Autowired
    SC sccc;

 }
参数:
package com.enjoy.jack.designPattern.strategy;

import org.springframework.stereotype.Component;

@Component
public class SC implements Province{

    private static String flag = "SC";

    @Override
    public boolean support(String flag) {
        return SC.flag.equalsIgnoreCase(flag);
    }

    @Override
    public String handler() {
        System.out.println("======SC处理类处理");
        return null;
    }
}
执行如图:

6、当然注解的方法也是同样道理,比如进入:
点击进入:
@Override
	public PropertyValues postProcessProperties(PropertyValues pvs, Object bean, String beanName) {//也是从缓存中取,同上道理
		InjectionMetadata metadata = findResourceMetadata(beanName, bean.getClass(), pvs);
		try {
			metadata.inject(bean, beanName, pvs);
		}
		catch (Throwable ex) {
			throw new BeanCreationException(beanName, "Injection of resource dependencies failed", ex);
		}
		return pvs;
	}
到此,注解参数赋值依赖注入分析结束,下篇分享依赖注入后的调用,敬请期待。