Android开发学习笔记——Fragment
概述
Fragment直译过来即碎片, 是一种可以嵌入在 Android 当中的 UI 片段,它能让程序更加合理和充分地利用大屏幕的空间,因而在平板上应用得非常广泛。Fragment 和 Activity 非常像,同样可以包含布局,同样都有自己的生命周期。你甚至可以将 Fragment 理解成一个迷你型的 Activity,虽然这个迷你型的 Activity 有可能和普通的 Activity 是一样大的。
官方文档对Fragment做出了以下描述:
- Fragment 表示 FragmentActivity 中的行为或界面的一部分。您可以在一个 Activity 中组合多个片段,从而构建多窗格界面,并在多个 Activity 中重复使用某个片段。您可以将片段视为 Activity 的模块化组成部分,它具有自己的生命周期,能接收自己的输入事件,并且您可以在 Activity 运行时添加或移除片段(这有点像可以在不同 Activity 中重复使用的“子 Activity”)。
- 片段必须始终托管在 Activity 中,其生命周期直接受宿主 Activity 生命周期的影响。不过,当 Activity 正在运行(处于已恢复生命周期状态)时,您可以独立操纵每个片段,如添加或移除片段。当执行此类片段事务时,您也可将其添加到由 Activity 管理的返回栈 — Activity 中的每个返回栈条目都是一条已发生片段事务的记录。借助返回栈,用户可以通过按返回按钮撤消片段事务(后退)。
- 当您将片段作为 Activity 布局的一部分添加时,其位于 Activity 视图层次结构的某个 ViewGroup 中,并且片段会定义其自己的视图布局。您可以通过在 Activity 的布局文件中声明片段,将其作为 < fragment > 元素插入您的 Activity 布局,或者通过将其添加到某个现有的 ViewGroup,利用应用代码将其插入布局。
根据官方文档的描述,我们可以大致总结出Fragment的以下几个特点:
- Fragment不能单独存在,必须依托于Activity
- Fragment具有自己的生命周期,但是其生命周期受宿主Activity的生命周期的影响
- 每个Activity中可以同时存在多个Fragment,并可以对其分别进行管理控制
- Fragment可以通过< fragment >静态添加到Activity中,也可以通过代码动态添加到Activity布局中的某个ViewGroup中
基本使用
从上一节的描述中我们可以了解到,Fragment的使用实际上就相当于一个小的Activity,因此其使用方式也与Activity的相似。其使用主要分为两部分:
- 创建Fragment
- 在Activity中创建Fragment容器并进行将Fragment添加到其中
创建Fragment
首先,让我们来创建一个简单的Fragment,与Activity不同的是Fragment并不属于四大组件之一,因此也不需要在AndroidManifest中进行注册,我们只需要自定义Fragment类并为其创建对应的xml布局即可。
首先,创建简单的xml布局,这与Activity完全相同,如下:
<androidx.constraintlayout.widget.ConstraintLayout xmlns:android="http://schemas.android.com/apk/res/android"
    android:layout_width="match_parent"
    android:layout_height="match_parent"
    xmlns:app="http://schemas.android.com/apk/res-auto"
    android:background="@color/colorAccent">

    <TextView
        android:layout_width="wrap_content"
        android:layout_height="wrap_content"
        android:text="TestFragment1"
        app:layout_constraintStart_toStartOf="parent"
        app:layout_constraintEnd_toEndOf="parent"
        app:layout_constraintTop_toTopOf="parent"
        app:layout_constraintBottom_toBottomOf="parent"/>

</androidx.constraintlayout.widget.ConstraintLayout>
然后,继承Fragment类,自定义Fragment,并在onCreateView中为Fragment绑定xml布局,代码如下:
class TestFragment : Fragment() {


    override fun onCreateView(
        inflater: LayoutInflater,
        container: ViewGroup?,
        savedInstanceState: Bundle?
    ): View? {

    	//注意的是:不要将视图层次结构附加到传入的ViewGroup父元素中,即第三个参数必须为false,该关联会自动完成。如果在此回调中将碎片的视图层次结构附加到父元素,很可能会出现异常。
        return inflater.inflate(R.layout.fragment_test, container, false)//Fragment对应布局
    }

}
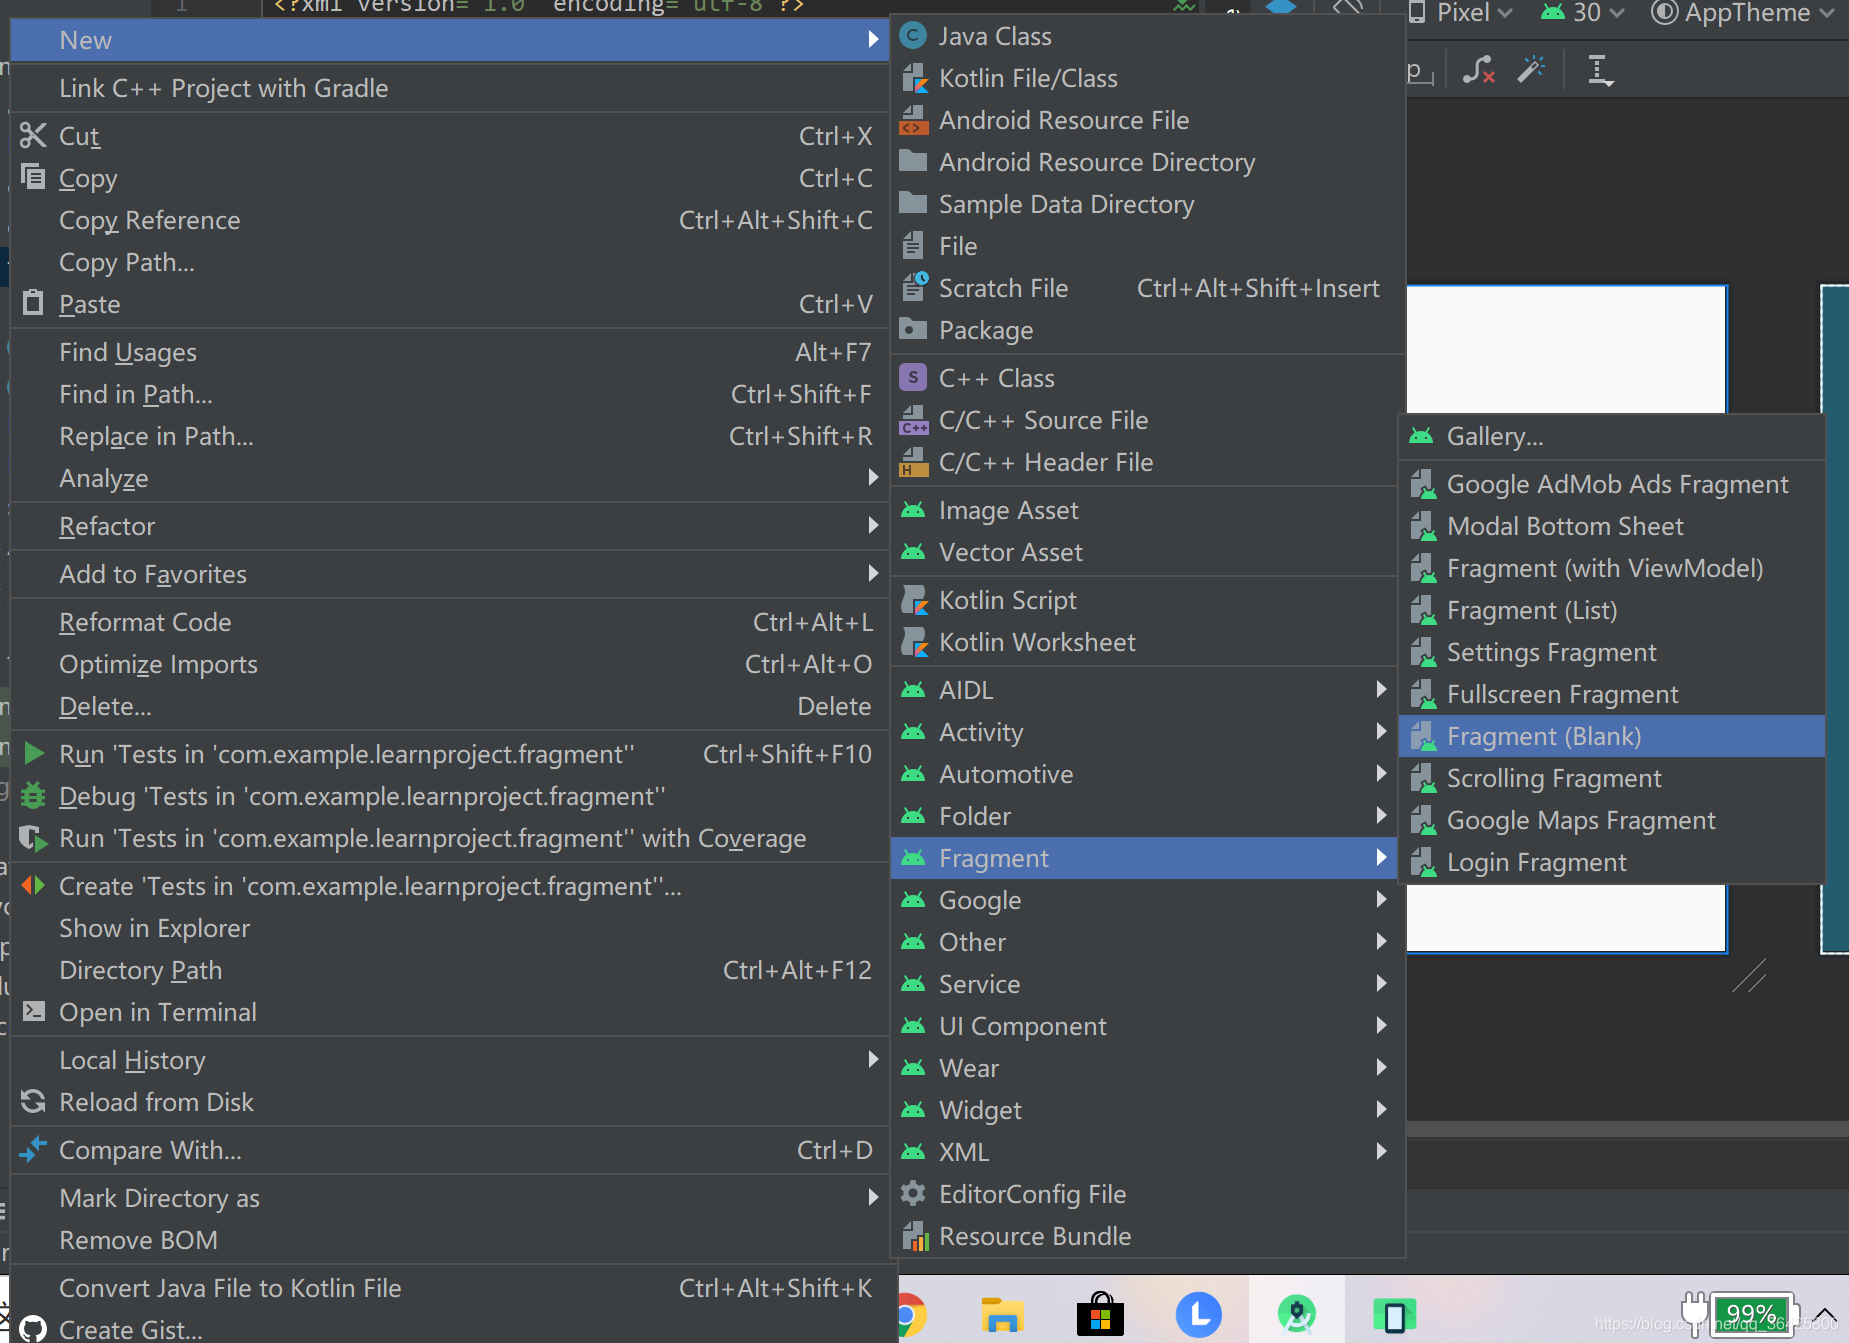
至此,一个简单的Fragment其实就已经创建完毕了,其实与Activity很相似,只不过Activity是使用setContentView在onCreate设置布局的。实际上,AS也为创建Fragment提供了多种常见的Fragment帮助我们节省时间,如下:
创建出来的空Fragment,AS已经默认为我们生成了设置布局,传递参数和生成实例等代码,如下:
// TODO: Rename parameter arguments, choose names that match
// the fragment initialization parameters, e.g. ARG_ITEM_NUMBER
private const val ARG_PARAM1 = "param1"
private const val ARG_PARAM2 = "param2"

/**
 * A simple [Fragment] subclass.
 * Use the [BlankFragment.newInstance] factory method to
 * create an instance of this fragment.
 */
class BlankFragment : Fragment() {

    // TODO: Rename and change types of parameters
    private var param1: String? = null
    private var param2: String? = null

    override fun onCreate(savedInstanceState: Bundle?) {

        super.onCreate(savedInstanceState)
        arguments?.let {

            param1 = it.getString(ARG_PARAM1)
            param2 = it.getString(ARG_PARAM2)
        }
    }

    override fun onCreateView(
        inflater: LayoutInflater, container: ViewGroup?,
        savedInstanceState: Bundle?
    ): View? {

        // Inflate the layout for this fragment
        return inflater.inflate(R.layout.fragment_blank, container, false)
