网上搜索了关于java串口开发的资料,发现都不是特别的全,故写下一些心得以帮助其他人能快速上手java串口开发,如有错漏之处,敬请指正
串口开发会用到一个javax.comm和RXTXcomm库,,javax.comm库不支持64位操作系统。该库仅适用于32位操作系统,所以接下来主要介绍的还是RXTXcomm库进行的串口开发
资源下载
RXTXcomm有32位的,也有64位的包,我们大多用到的都是64而且jdk都是1.8版本的
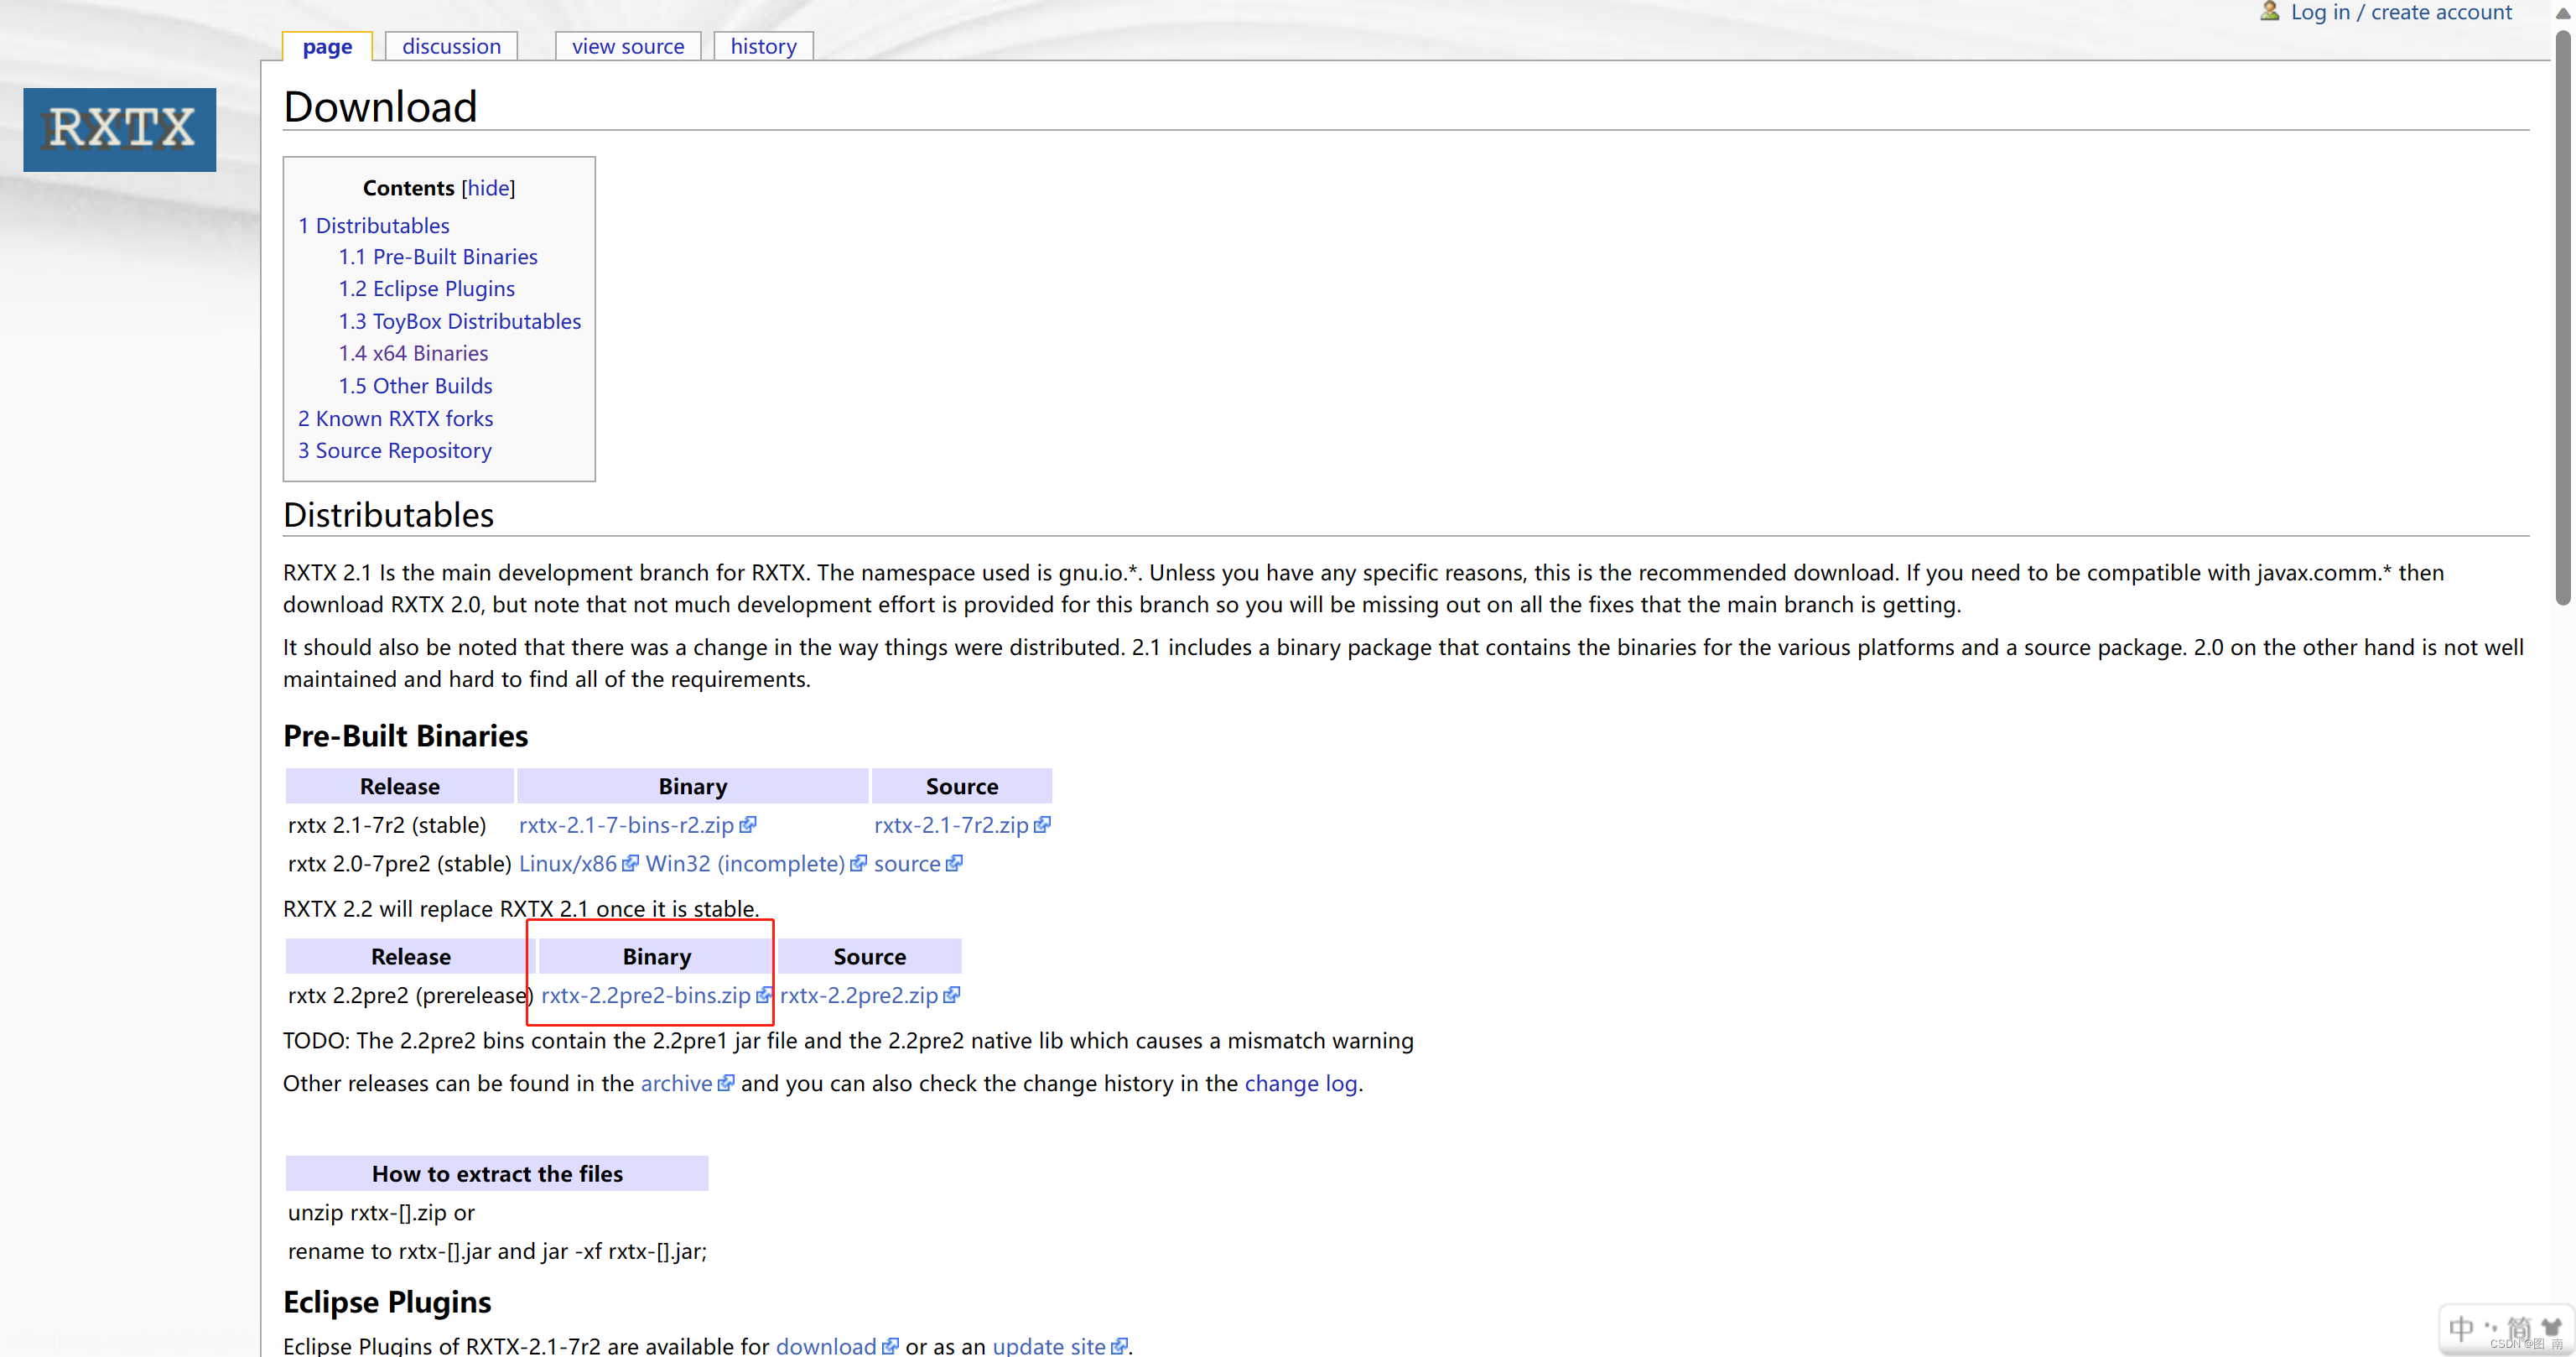
链接: 下载地址
这里注意选择2.2版本的,这个版本是支持64位的操作系统
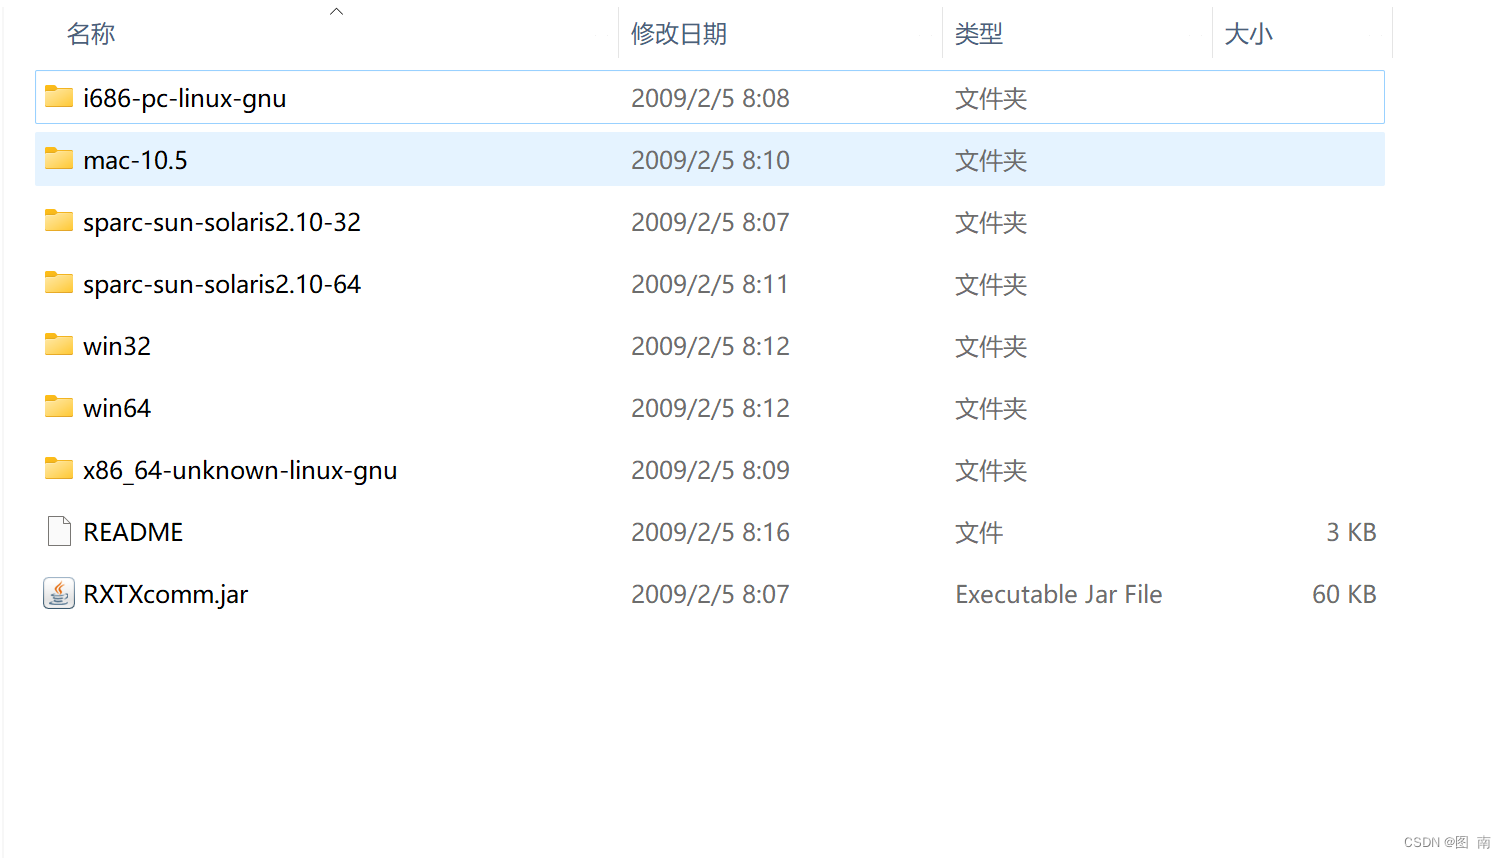
下载完以后我们可以发现,目录下有一个jar文件,和对各个操作系统不同支持的系统文件,这里我们如果是在windwos64位的情况下只有的话,只需要用到RXTXcomm.jar和win64里面的dll文件即可
环境配置
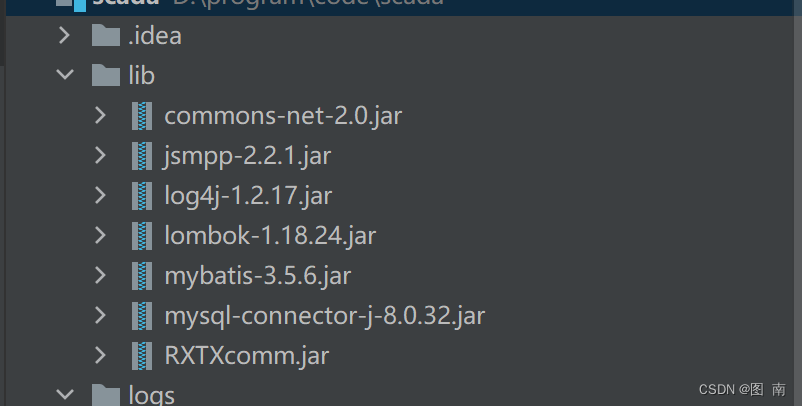
下载完成以后,接下来我们需要将这个jar文件和lib文件引入到项目中
- 将rxtxSerial.dll文件放到JAVA_HOME\jre\bin下
- 将RXTXComm分别放在项目的lib目录下,和jre的ext目录下(JAVA_HOME\jre\lib\ext)
下载完成以后我们可以简单的写一段测试代码检测下是否配置存在异常
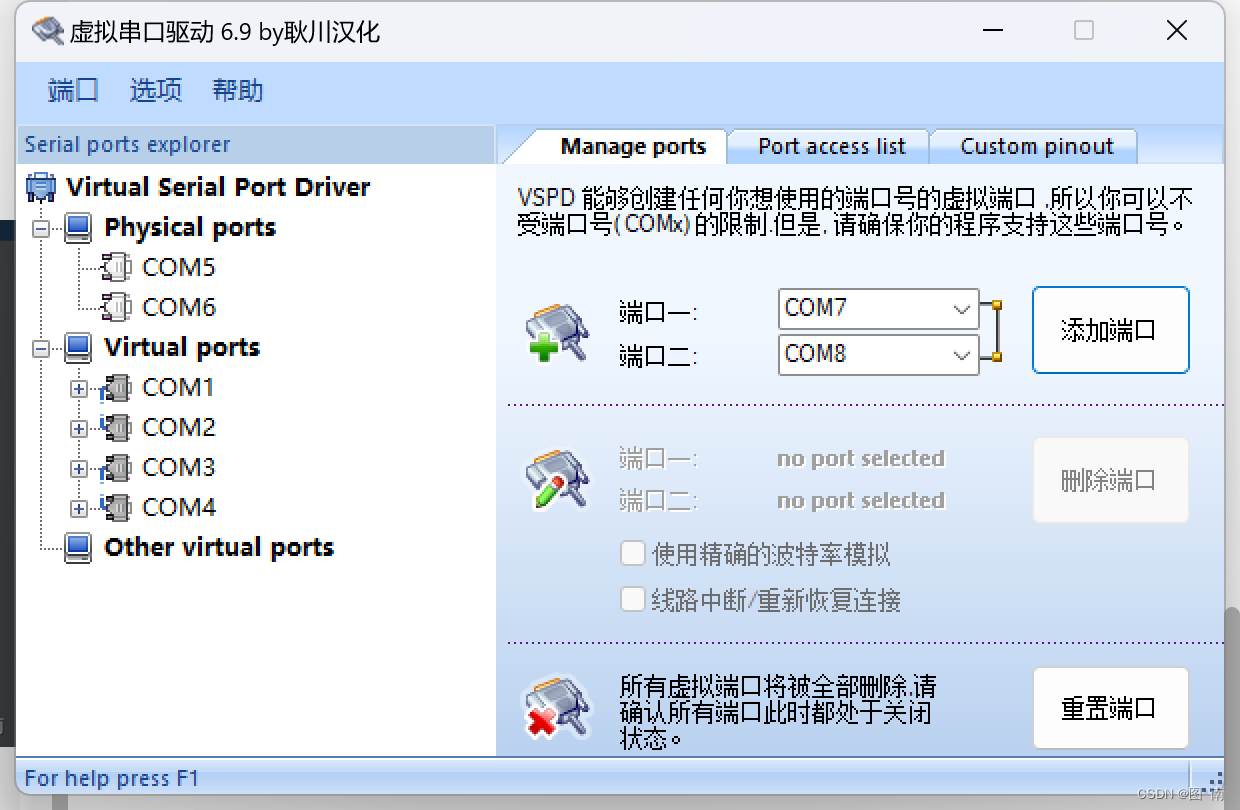
这里我们可以采用虚拟串口的方式先进行简单的测试
import gnu.io.*;

import java.io.*;

public class SerialTest {

    public static void main(String[] args) {
        // 串口名称,根据实际情况修改
        String portName = "COM3";
        // 波特率,根据实际情况修改
        int baudRate = 9600;

        try {
            // 获取串口实例
            CommPortIdentifier portIdentifier = CommPortIdentifier.getPortIdentifier(portName);
            if (portIdentifier.isCurrentlyOwned()) {
                System.out.println("Error: Port is currently in use");
            } else {
                // 打开串口并设置波特率
                CommPort commPort = portIdentifier.open(SerialTest.class.getName(), 2000);
                if (commPort instanceof SerialPort) {
                    SerialPort serialPort = (SerialPort) commPort;
                    serialPort.setSerialPortParams(baudRate, SerialPort.DATABITS_8, SerialPort.STOPBITS_1, SerialPort.PARITY_NONE);

                    // 获取输出流并发送数据
                    OutputStream outputStream = serialPort.getOutputStream();
                    outputStream.write("Hello World".getBytes());

                    // 关闭串口
                    serialPort.close();
                } else {
                    System.out.println("Error: Only serial ports are handled by this example.");
                }
            }
        } catch (NoSuchPortException | PortInUseException | UnsupportedCommOperationException | IOException ex) {
            System.out.println("Error: " + ex.getMessage());
        }
    }
}
可以看到,我们已经能够正常的将数据发送至串口
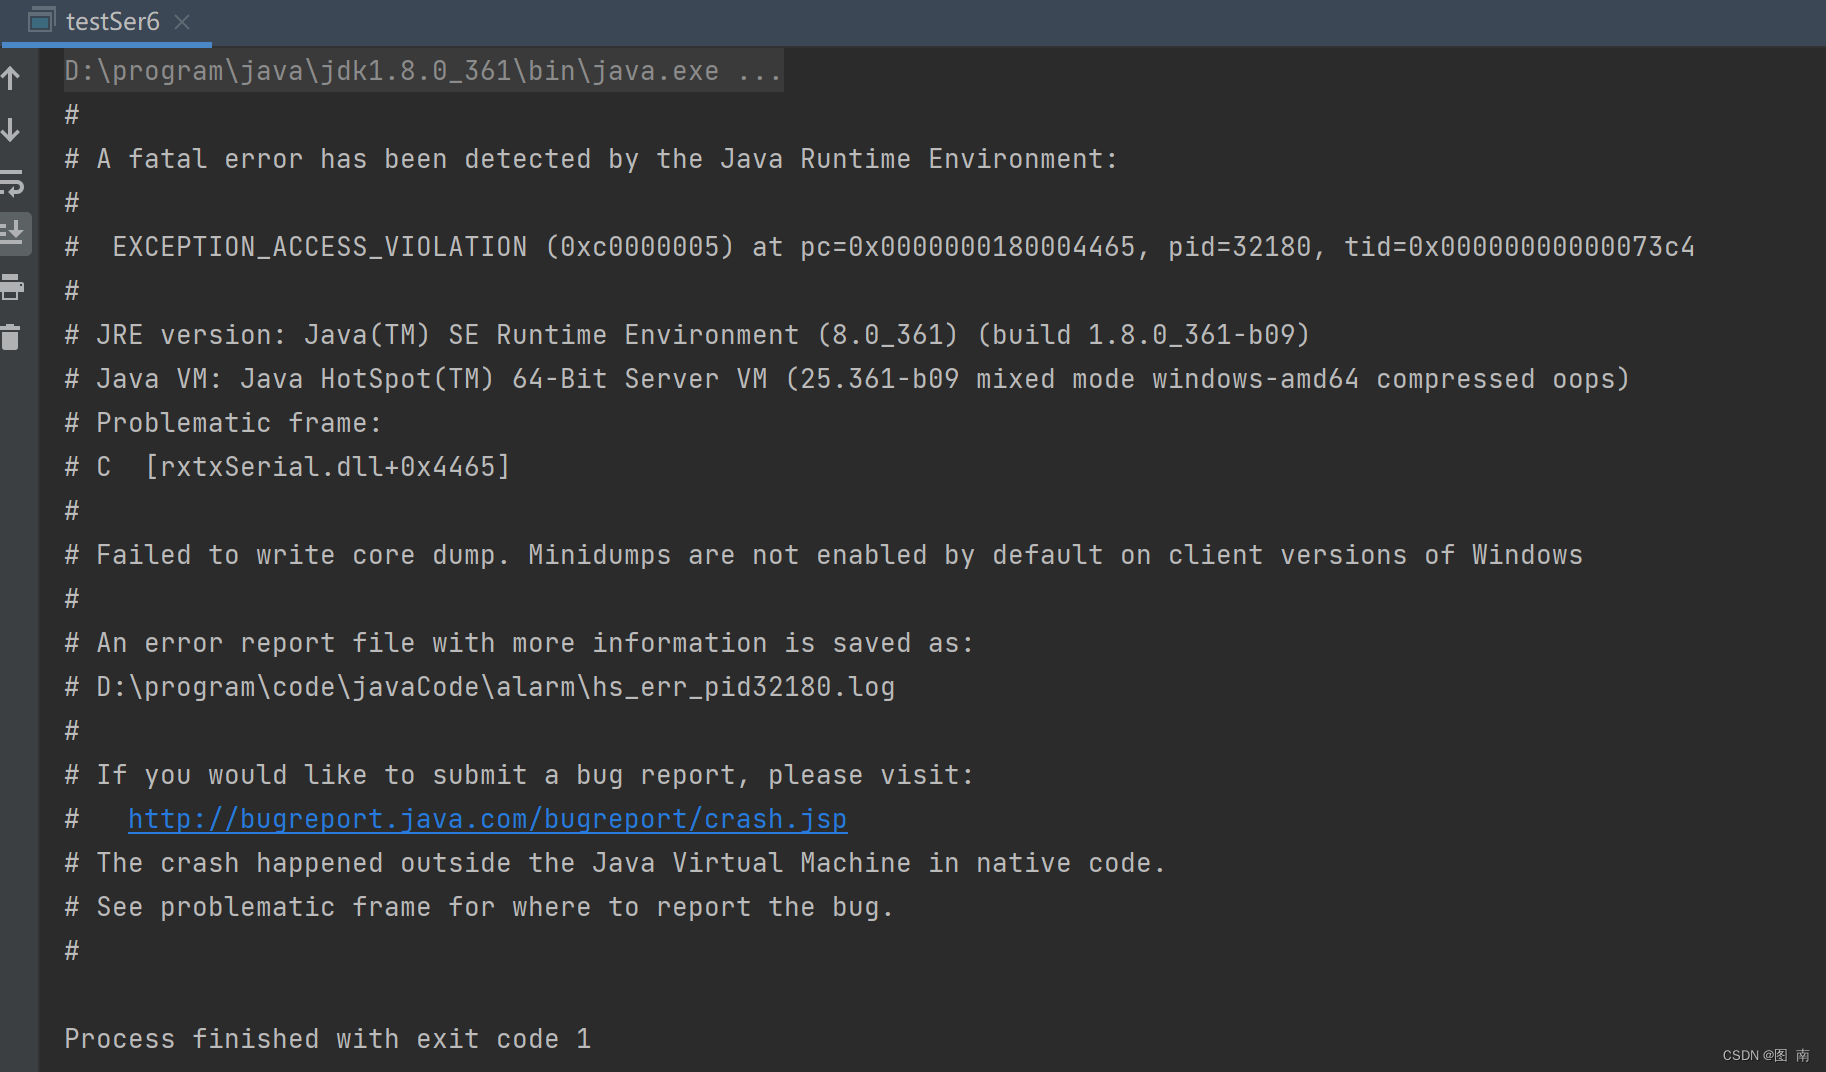
不过也有的可能会出现以下的错误信息
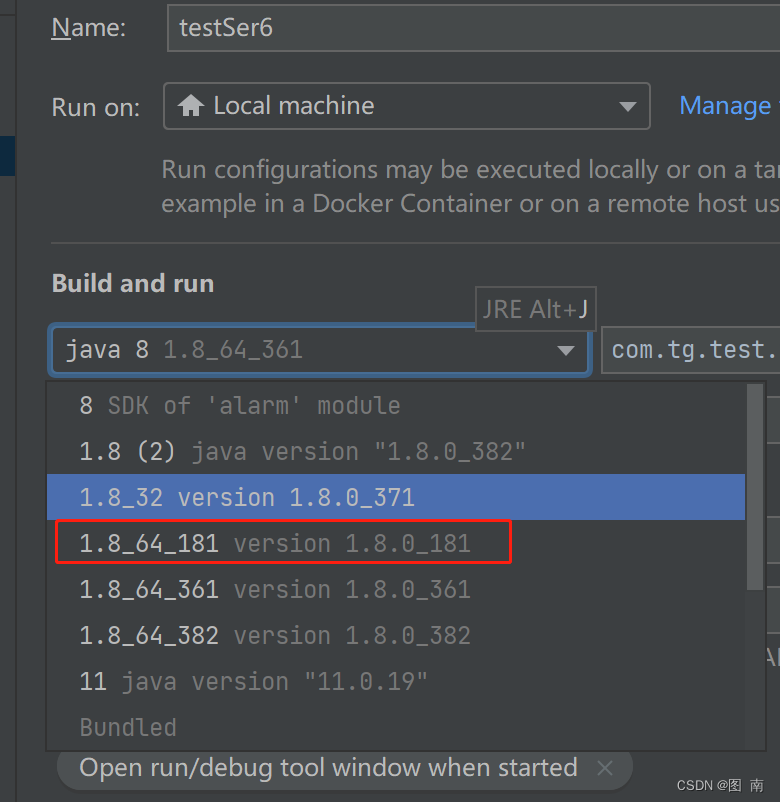
这边我分别使用了32位1.8和64位1.8进行了测试,发现32位没有出现这个问题,当使用1.8,361和1,8,382版本的时候都出现了这个问题,181却可以正常使用,如果大家遇到这个问题的时候,可以使用小版本较低的jdk1.8进行使用
打包
经过上面的安装和设置,我们已经可以使用java RXTX库进行串口开发了,如果需要进行打包操作的话,并且在maven环境下使用的话,可以使用我下面提供的代码
我们前面将RXTXcomm的jar添加到了lib包下面,所以打包的时候可以借助maven-shade插件将lib包也一起进行打包
<build>
        <plugins>
            <plugin>
                <groupId>org.apache.maven.plugins</groupId>
                <artifactId>maven-shade-plugin</artifactId>
                <version>3.1.0</version>
                <executions>
                    <execution>
                        <phase>package</phase>
                        <goals>
                            <goal>shade</goal>
                        </goals>
                        <configuration>
                            <createDependencyReducedPom>false</createDependencyReducedPom>
                            <transformers>
                                <transformer
                                        implementation="org.apache.maven.plugins.shade.resource.ManifestResourceTransformer">
                                    <mainClass>mainClass</mainClass>

                                </transformer>
                            </transformers>
                        </configuration>
                    </execution>
                </executions>
            </plugin>
            <plugin>
                <groupId>com.googlecode.addjars-maven-plugin</groupId>
                <artifactId>addjars-maven-plugin</artifactId>
                <version>1.0.5</version>
                <executions>
                    <execution>
                        <goals>
                            <goal>add-jars</goal>
                        </goals>
                        <configuration>
                            <resources>
                                <resource>
                                    <directory>${basedir}/lib</directory>
                                </resource>
                            </resources>
                        </configuration>
                    </execution>
                </executions>
            </plugin>
        </plugins>
    </build>
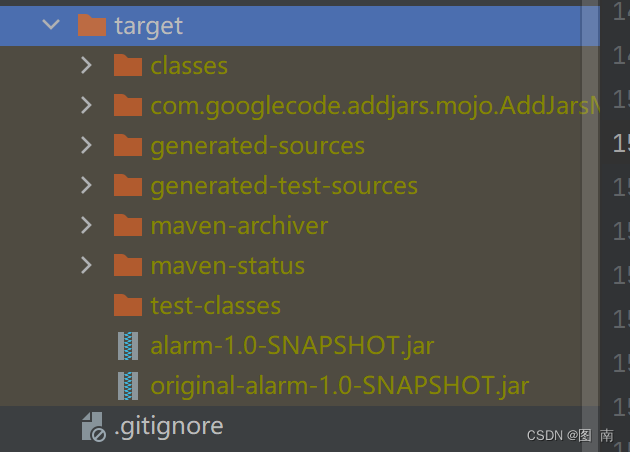
使用mvn package命令即可将项目项目打包成jar的形式
最后
使用java进行串口开发的场景使用并不多,如果涉及到这方面的需求,可以根据我下面提供代码进行修改即可完成开发,同时我也会将我使用到的一切工具或代码上传到资源供大家下载使用。接下来我还会写一篇关于java smslib包相关的文章(实现手机通讯模块短信收发功能)
北斗
以下是我针对北京神州天鸿的北斗卫星电台编写的操作代码,提供给有需要的小伙伴
/**
 * @program: scada
 * @description: 操作串口使用北斗进行短信的收发
 * @author: Dongrui
 * @create: 2023-06-06 14:42
 **/
public class Beidou implements SerialPortEventListener {

    /**
     * 端口
     */
    String port;
    /**
     * 波特率
     */
    int baudRate;
    /**
     * 超时时间
     */
    int timeOut = 2000;


    //    输入和输出流
    public static InputStream inputStream;
    public static OutputStream outputStream;


    /**
     * @param port     端口
     * @param baudRate 波特率
     */
    public Beidou(String port, int baudRate) {
        this.port = port;
        this.baudRate = baudRate;
        System.out.println(port + " " + baudRate);
        initSerialPort();
    }

    /**
     * @param port     端口
     * @param baudRate 波特率
     * @param timeout  超时时间
     */
    public Beidou(String port, int baudRate, int timeout) {
        this.port = port;
        this.baudRate = baudRate;
        this.timeOut = timeout;
        System.out.println(port + " " + baudRate);
        initSerialPort();
    }

    /**
     * 初始化串口
     */
    private void initSerialPort() {
        SerialPort serialPort = null;
        try {
            CommPortIdentifier portIdentifier = CommPortIdentifier.getPortIdentifier(port);
            serialPort = (SerialPort) portIdentifier.open("BDSerialCommunication", timeOut);
            serialPort.setSerialPortParams(baudRate, SerialPort.DATABITS_8, SerialPort.STOPBITS_1, SerialPort.PARITY_NONE);
            // 获取输入输出流
            inputStream = serialPort.getInputStream();
            outputStream = serialPort.getOutputStream();
//            添加串口事件监听器
            serialPort.addEventListener(this);
            serialPort.notifyOnDataAvailable(true);
            // 设置当通信中断时唤醒中断线程
            serialPort.notifyOnBreakInterrupt(true);
        } catch (NoSuchPortException e) {
            Logger.getInstance().logError("not found port:" + port, null, null);
        } catch (PortInUseException e) {

            Logger.getInstance().logError("port:" + port + " in use", null, null);
        } catch (IOException e) {
            Logger.getInstance().logError("port:" + port + " get stream fail", null, null);

        } catch (TooManyListenersException e) {
            Logger.getInstance().logError("port:" + port + " too many listeners", null, null);

        } catch (UnsupportedCommOperationException e) {
            Logger.getInstance().logError("port:" + port + " not support param," +
                    "baudRate:" + baudRate, null, null);

        }

    }

    /**
     * 生成校验码
     *
     * @param str
     * @return
     */
    private static char checkSum(String str) {
        int result = str.charAt(0);
        for (int i = 1; i < str.length(); i++) {
            result = str.charAt(i) ^ result;
        }

        return (char) result;

    }

    /**
     * 发送短信
     *
     * @param senderID                    收信方id:1表示本机id,2表示随机id,3表示公司,4表示广播;其中,2和3仅仅适用于管理型用户终端,4仅仅适用于网管中心控制用户终端
     * @param recipientAddress            收信方地址,当收信方为神州天鸿终端时,收信方地址为神州天鸿终端的id好
     * @param confidentialityRequirements 保密要求:1表示不保密,2表示保密
     * @param receiptFlag                 回执标志,0表示不需要回执,1表示需要回执,这里的回执可能是系统回执或通信回执
     * @param messageContent              电文内容,字符与数字用ascii码表示,汉字用gb2312码表示(两个字节表示一个汉字),电文内容的长度最多不超过200个字节
     * @throws IOException
     */
    public void sendMessage(int senderID, int recipientAddress, int confidentialityRequirements, int receiptFlag, String messageContent) throws IOException {


        int length = messageContent.getBytes("GB2312").length;
//        发送短信的指令
        String instructions = "$TTCA" + "," + senderID + "," + recipientAddress + "," + confidentialityRequirements + "," + receiptFlag + "," + length + "," + messageContent + ",";
//      生成校验码
        char checksum = checkSum(instructions);

//        发送至串口的字符串
        String str = instructions + checksum + "\r\n";
        Logger.getInstance().logInfo("北斗操作串口发送短信:" + str, null, null);
//      写至串口
        outputStream.write(str.getBytes());
        outputStream.flush();

    }


    /**
     * 查询状态输出频度
     *
     * @return
     * @throws IOException
     * @throws InterruptedException
     */
    public void queryStatus() throws IOException, InterruptedException {
        queryStatus(0);
    }

    /**
     * 状态输出频度
     *
     * @param stateOutputFrequency 时间间隔,单位为秒,范围0~255,当状态输出频度为0时,表示只向外设输出一次状态信息
     * @return
     * @throws IOException
     * @throws InterruptedException
     */
    public void queryStatus(int stateOutputFrequency) throws IOException, InterruptedException {
        String instructions = "$QSTA" + "," + stateOutputFrequency + ",";

        char checksum = checkSum(instructions);
        String str = instructions + checksum + "\r\n";
//        往串口发送数据
        outputStream.write(str.getBytes());
        outputStream.flush();


    }

    /**
     * 定位申请
     *
     * @param confidentialityRequirements 保密要求
     * @param positioningType             定位类型
     * @param heightMeasurementMethod     测高方式
     * @param knownElevation              已知高程
     * @param serviceFrequency            服务频度
     */
    public void positioningApplication(int confidentialityRequirements, int positioningType, int heightMeasurementMethod, int knownElevation, int antennaHeight, int serviceFrequency) throws IOException, InterruptedException {

        String data = "$PAPP" + "," + confidentialityRequirements + "," + positioningType + "," + knownElevation + "," + heightMeasurementMethod + "," + knownElevation + "," + antennaHeight + "," + serviceFrequency + ",";
        System.out.println(data);
        char checksum = checkSum(data);
        String str = data + checksum + "\r\n";
        outputStream.write(str.getBytes());
        outputStream.flush();

    }


    @Override
    public void serialEvent(SerialPortEvent serialPortEvent) {
        if (serialPortEvent.getEventType() == SerialPortEvent.DATA_AVAILABLE) {
            try {
                int availableBytes = inputStream.available();
                byte[] buffer = new byte[availableBytes];
                inputStream.read(buffer);
                // 处理接收到的数据
                String receivedData = new String(buffer);
                handleSerialPortData(receivedData);
                System.out.println("Received data: " + receivedData);
            } catch (IOException e) {
                e.printStackTrace();
            }
        }

    }

    private void handleSerialPortData(String response) {
		//加入自己的业务代码即可
    }


}
声光报警器
以下为操作声光报警器的代码,提供给需要的小伙伴
public static void main(String[] args) {
        String portName = "COM3"; // 替换为您的串口号
        int baudRate = 9600; // 根据您的设备设置正确的波特率

        try {
            // 打开串口
            SerialPort serialPort = (SerialPort) CommPortIdentifier.getPortIdentifier(portName).open("SerialCommunicationExample", 2000);
            serialPort.setSerialPortParams(baudRate, SerialPort.DATABITS_8, SerialPort.STOPBITS_1, SerialPort.PARITY_NONE);

            // 获取输入输出流
            InputStream inputStream = serialPort.getInputStream();
            OutputStream outputStream = serialPort.getOutputStream();

            // 发送指令
            String hexCommand = "7EFF063A000101EF";
            byte[] commandBytes = hexStringToByteArray(hexCommand);

            outputStream.write(commandBytes);
            outputStream.flush();

//            // 接收响应
//            byte[] buffer = new byte[1024];
//            int bytesRead = inputStream.read(buffer);
//            System.out.println("收到的数据" + bytesRead);
//            String response = byteArrayToHexString(buffer, bytesRead);
//            System.out.println("Received response: " + response);
//
//            // 关闭串口
//            serialPort.close();
        } catch (Exception e) {
            e.printStackTrace();
        }
    }

    // 将十六进制字符串转换为字节数组
    private static byte[] hexStringToByteArray(String hexString) {
        int len = hexString.length();
        byte[] data = new byte[len / 2];
        for (int i = 0; i < len; i += 2) {
            data[i / 2] = (byte) ((Character.digit(hexString.charAt(i), 16) << 4)
                    + Character.digit(hexString.charAt(i + 1), 16));
        }
        return data;
    }

    // 将字节数组转换为十六进制字符串
    private static String byteArrayToHexString(byte[] bytes, int length) {
        StringBuilder sb = new StringBuilder();
        for (int i = 0; i < length; i++) {
            sb.append(String.format("%02X", bytes[i]));
        }
        return sb.toString();
    }
