前言:
本帖子是根据vue和elementul写出来的。直接告诉你们使用方法,直接创建一个点vue文件复制代码放进去,然后把文件引入到你的项目内,注册组件就可以用了。当然里面也有详细注释,一步步解释写法逻辑,让不熟悉这个功能的小伙伴可以先复制了直接用着,然后看注释理解原理。
没有下载elementul的自己下一哈
npm i element-ui -S
功能介绍
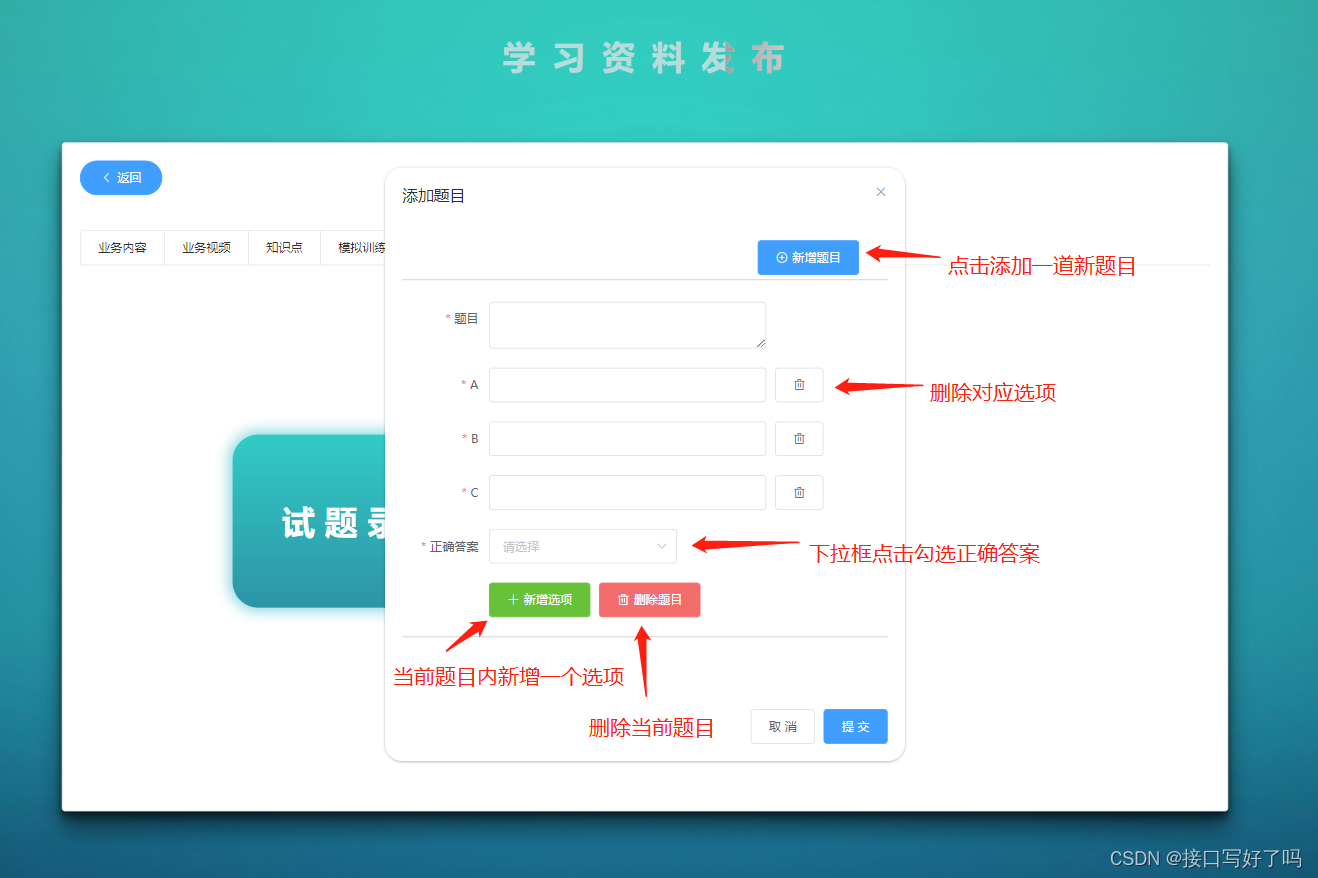
考试题目录入页面:
页面点击按钮后出现弹框,里面录入题目,从上到下分为
题目:输入框输入题目
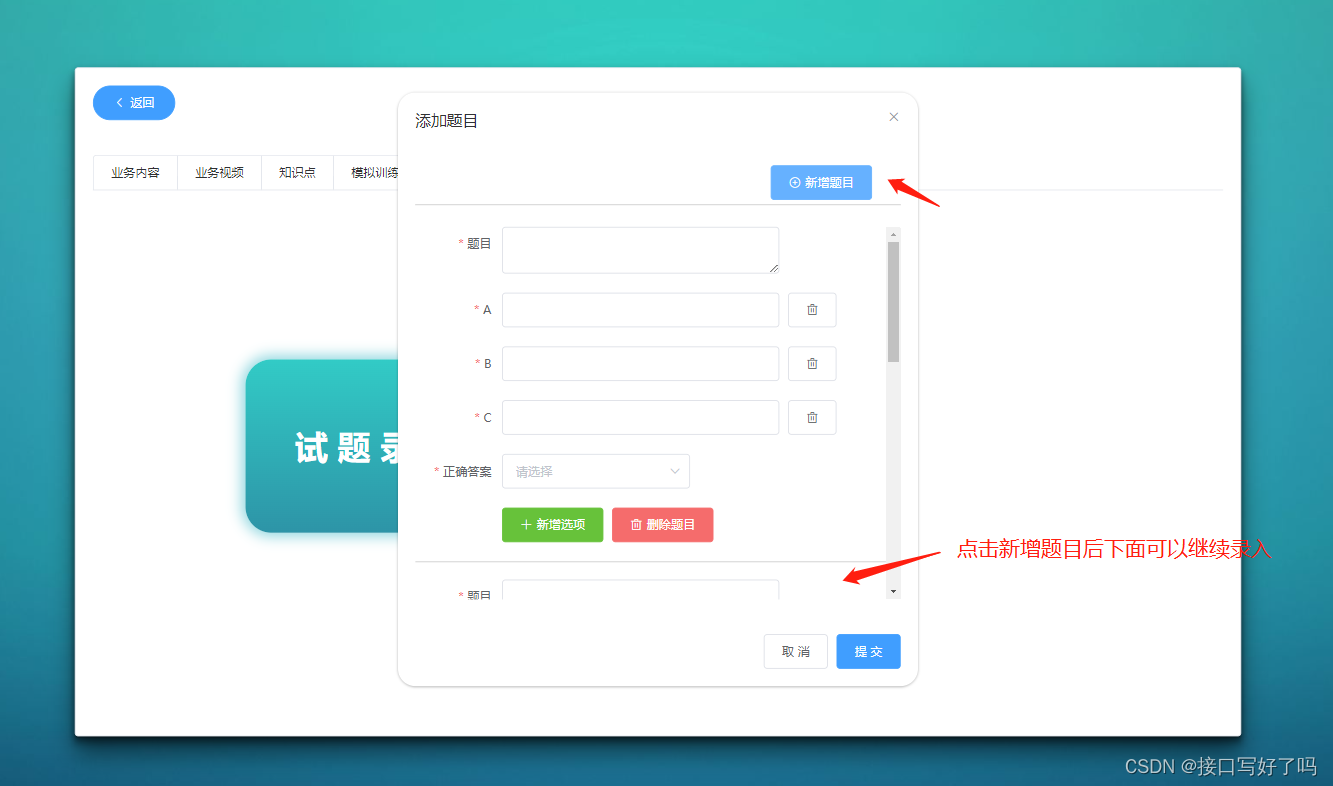
选项:可以添加删除,多个选项。选项内可以输入答案
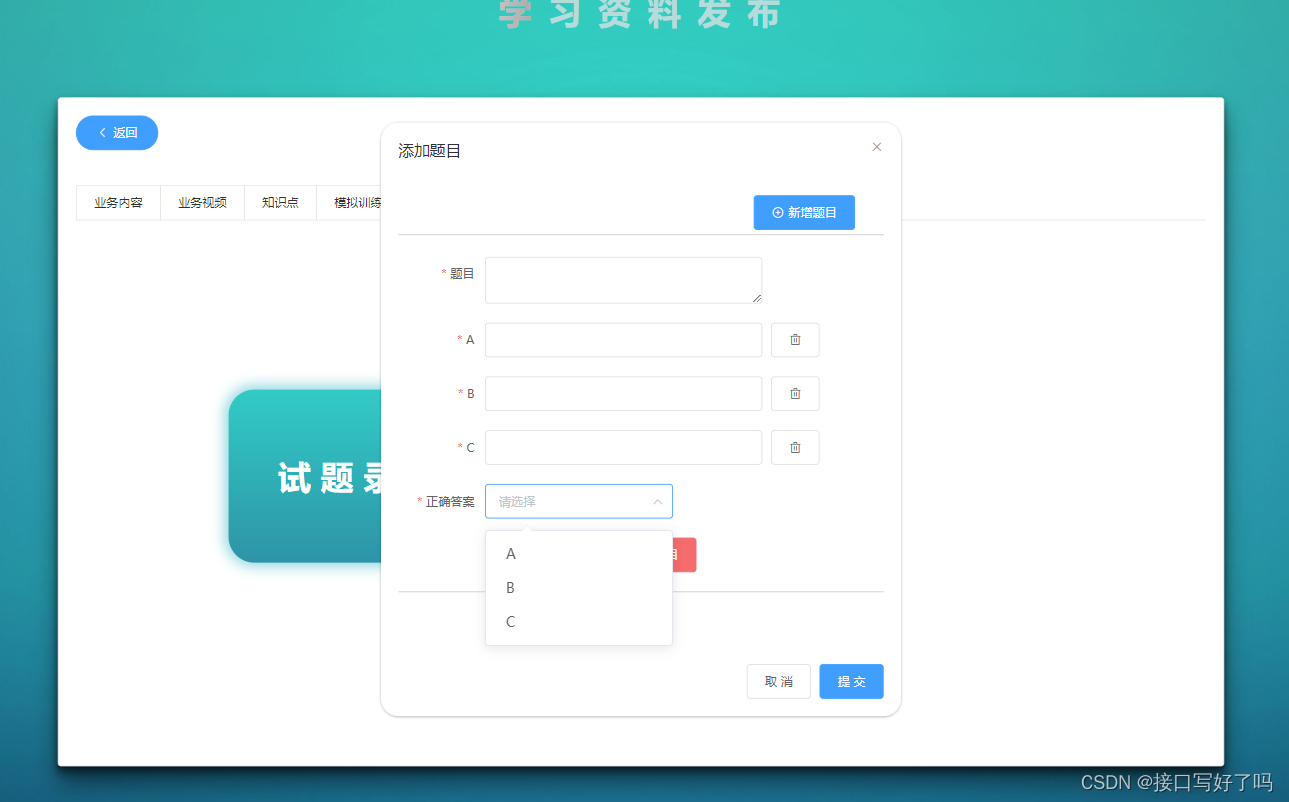
正确答案:用选项下拉框直接点击选中的就是正确答案
规则设定:
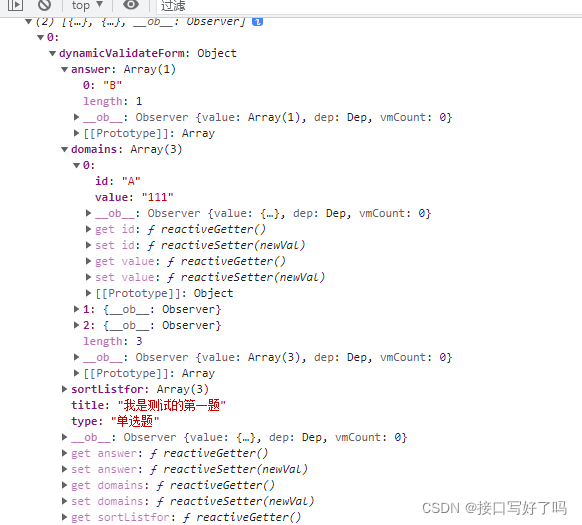
单选题:当答案为一个的时候判定是单选题
多选题:当答案为多个的时候判定是多选题
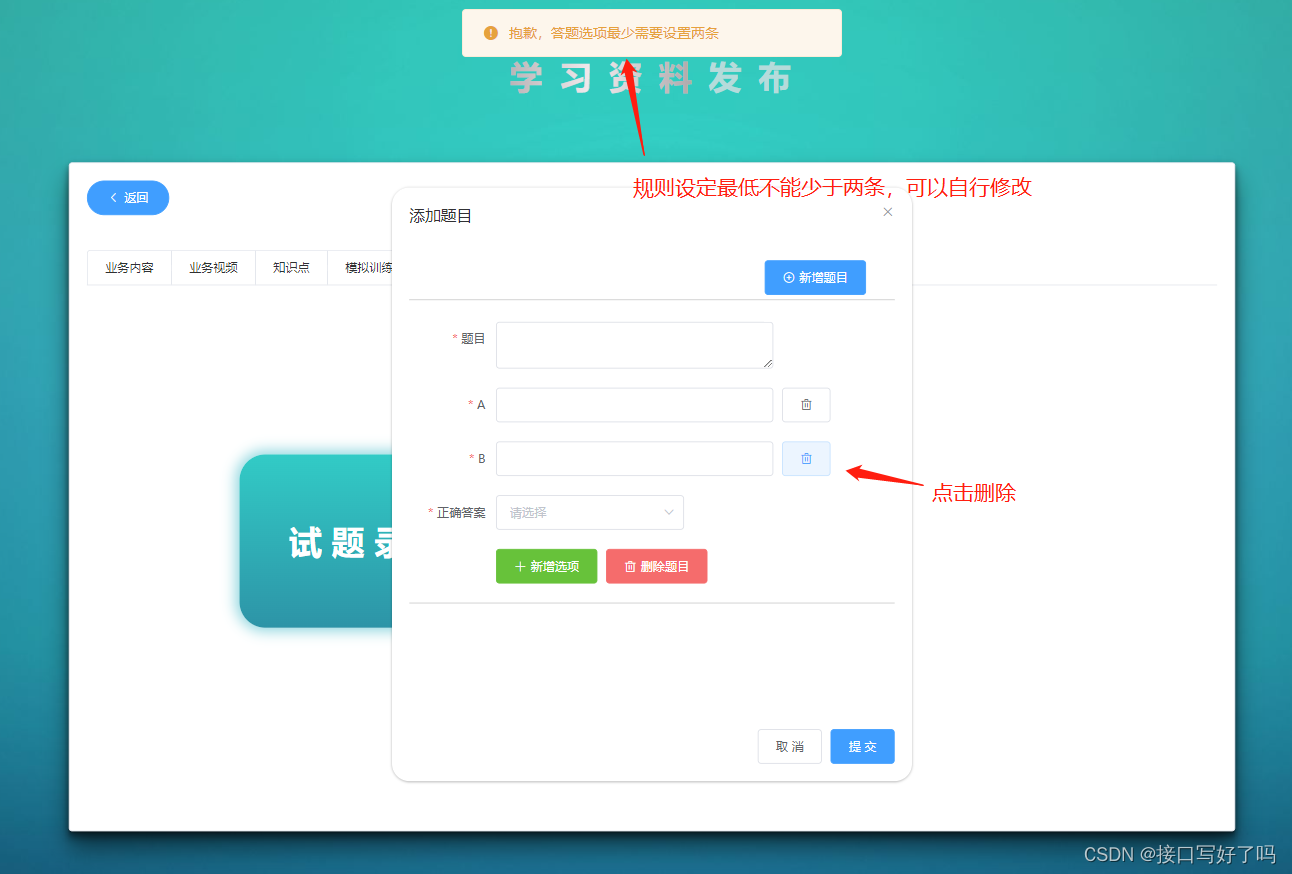
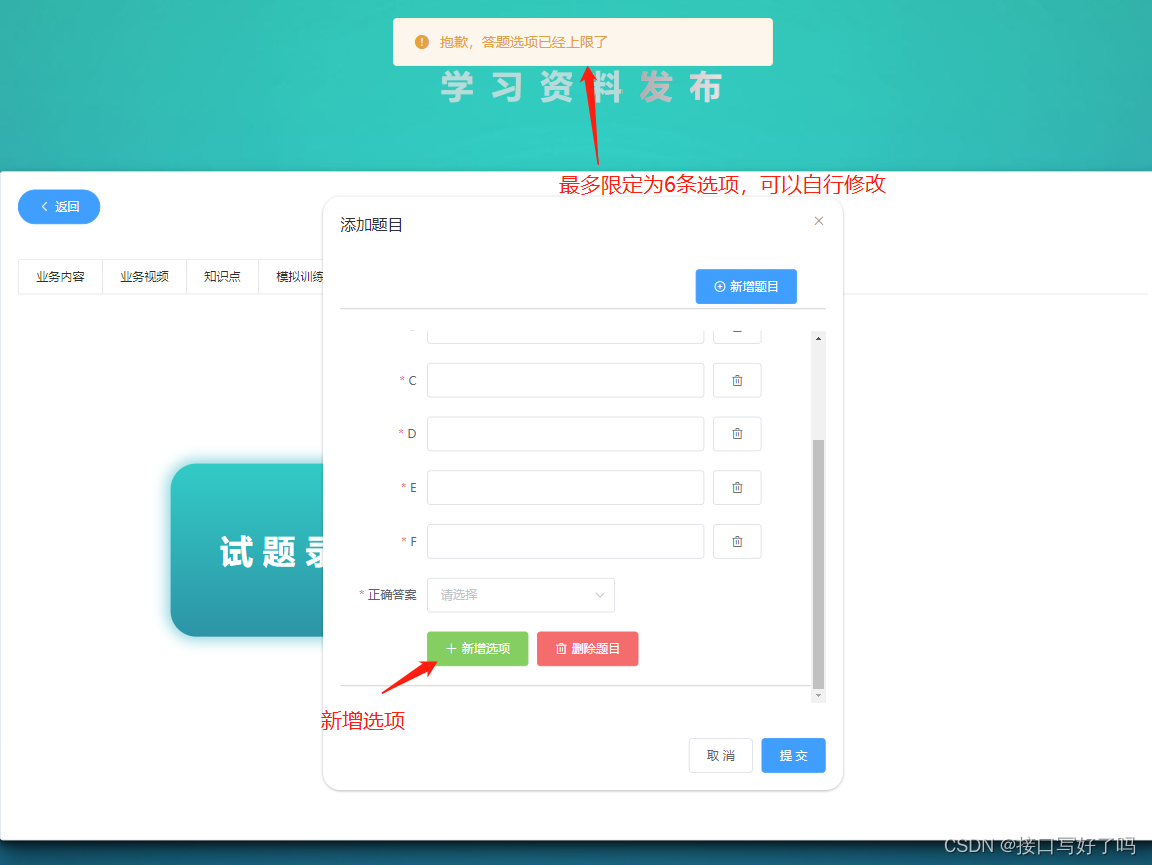
选项个数:设定最高不超过6个,最低不少于两个,可自行修改
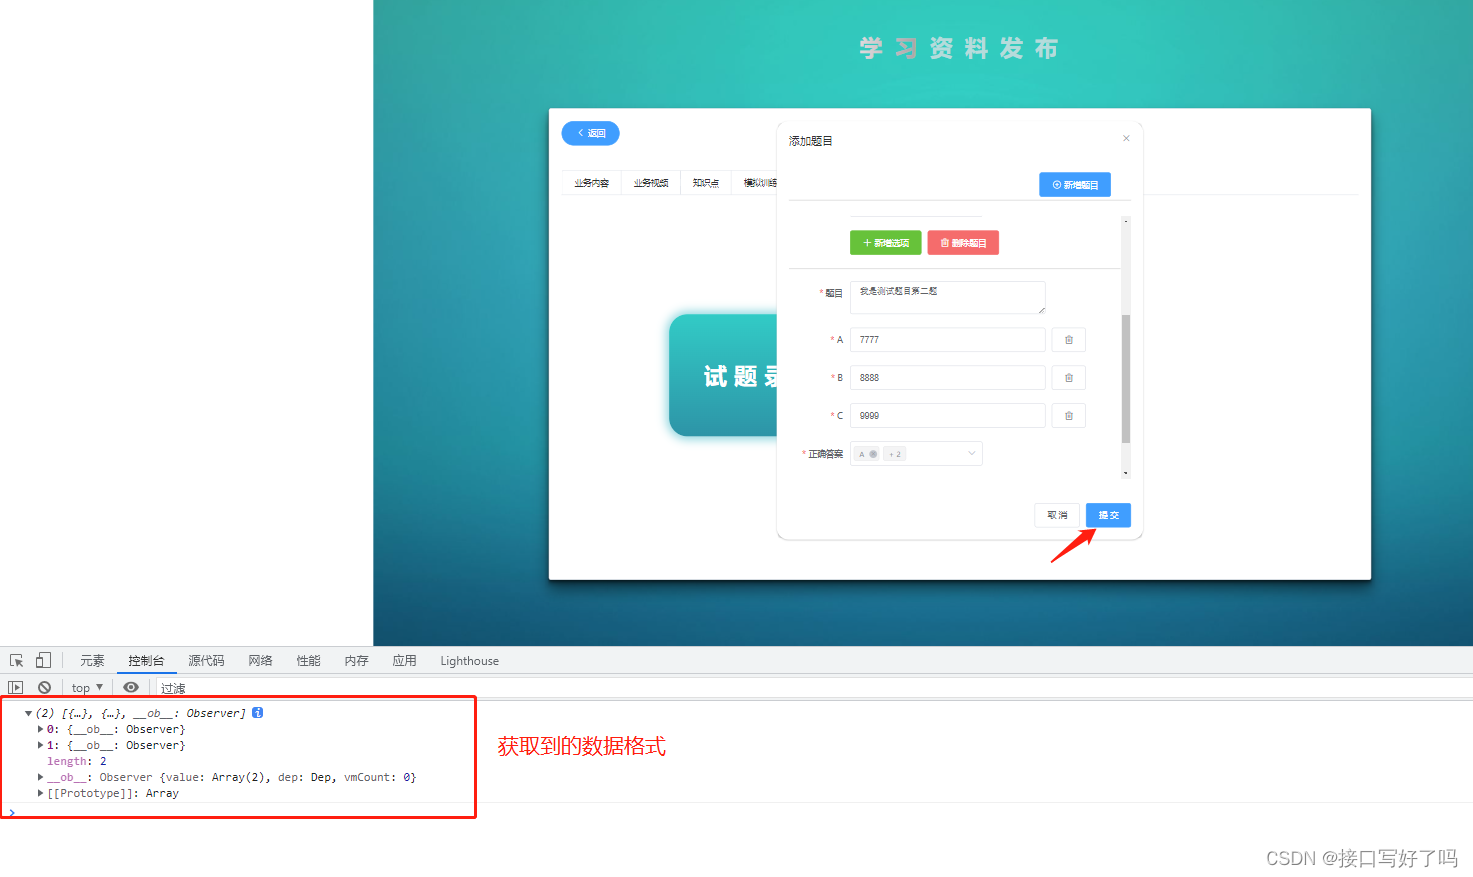
验证:提交时会验证每一题的题目,选项,答案是否填好,没有填的提示
效果图(按顺序)
试题录入这个按钮就是组件,以弹框形式出现的
详细页面
代码使用流程介绍:
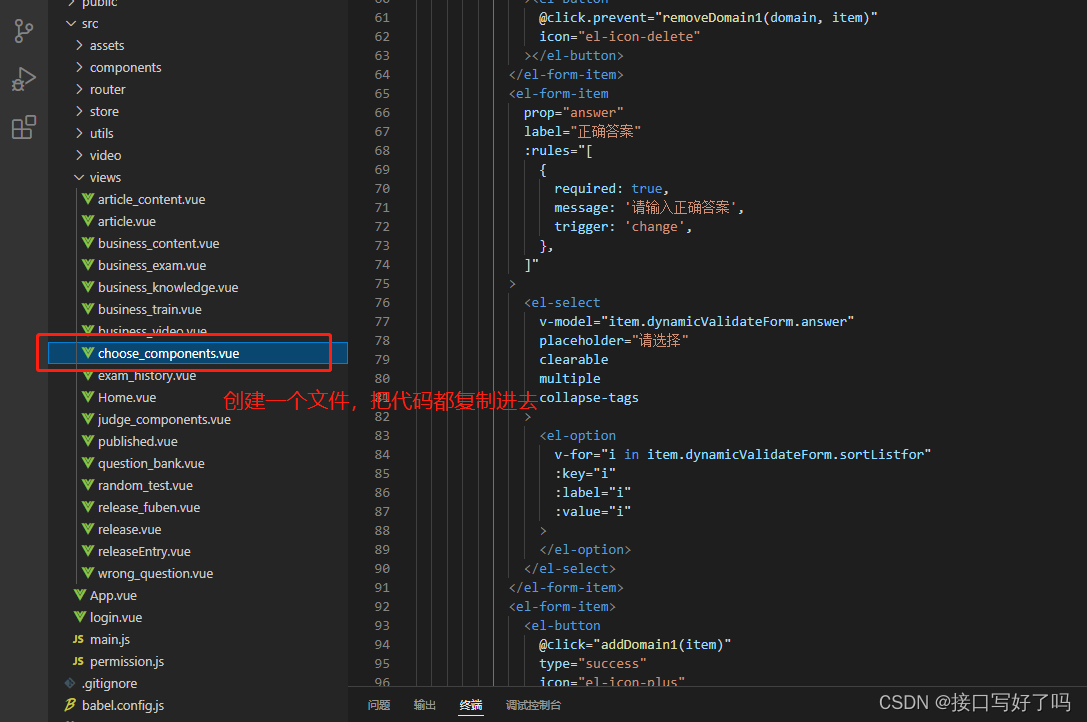
(1)创建一个vue文件,名字可以自己随便改
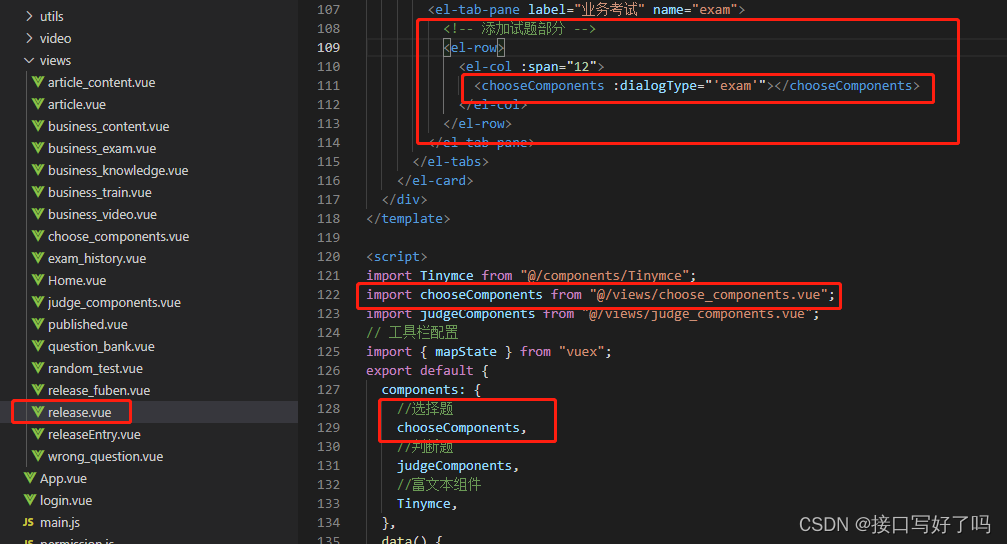
(2)到需要组件的地方引入就可以了,这里组件上面的exam是传参过去用于区分的,因为我一个页面复用了两次这个组件,所以区分一下。
上代码
这个代码可以直接一键复制然后去粘贴就可以了,看看效果,如果有css的问题,自己调整下就好了。
<template class="choose_wrap">
  <div>
    <div class="choose" @click="dialogFormVisible = true">试 题 录 入</div>
    <el-dialog
      title="添加题目"
      :visible.sync="dialogFormVisible"
      :modal="false"
      top="3vh"
      width="600px"
    >
      <div style="border-bottom: 1px #ccc solid; margin-bottom: 25px">
        <el-button
          type="primary"
          icon="el-icon-circle-plus-outline"
          class="from_btn"
          @click="addTopic"
          >新增题目</el-button
        >
      </div>
      <div class="dialog_height">
        <div class="from_box" v-for="(item, index) in topicList" :key="index">
          <el-form
            :model="item.dynamicValidateForm"
            ref="dynamicValidateForm"
            label-width="100px"
            class="demo-dynamic"
          >
            <el-form-item
              prop="title"
              label="题目"
              :rules="[
                {
                  required: true,
                  message: '请输入题目',
                  trigger: 'blur',
                },
              ]"
            >
              <el-input
                type="textarea"
                v-model="item.dynamicValidateForm.title"
                style="width: 320px"
              ></el-input>
            </el-form-item>
            <el-form-item
              v-for="(domain, index) in item.dynamicValidateForm.domains"
              :label="sortList[index]"
              :key="domain.key"
              :prop="'domains.' + index + '.value'"
              :rules="{
                required: true,
                message: '选项不能为空',
                trigger: 'blur',
              }"
            >
              <el-input
                v-model="domain.value"
                style="width: 320px; margin-right: 10px"
              ></el-input
              ><el-button
                @click.prevent="removeDomain1(domain, item)"
                icon="el-icon-delete"
              ></el-button>
            </el-form-item>
            <el-form-item
              prop="answer"
              label="正确答案"
              :rules="[
                {
                  required: true,
                  message: '请输入正确答案',
                  trigger: 'change',
                },
              ]"
            >
              <el-select
                v-model="item.dynamicValidateForm.answer"
                placeholder="请选择"
                clearable
                multiple
                collapse-tags
              >
                <el-option
                  v-for="i in item.dynamicValidateForm.sortListfor"
                  :key="i"
                  :label="i"
                  :value="i"
                >
                </el-option>
              </el-select>
            </el-form-item>
            <el-form-item>
              <el-button
                @click="addDomain1(item)"
                type="success"
                icon="el-icon-plus"
                >新增选项</el-button
              >
              <el-button
                type="danger"
                icon="el-icon-delete"
                @click="remove_dom(item)"
                >删除题目</el-button
              >
            </el-form-item>
          </el-form>
        </div>
      </div>
      <div slot="footer" class="dialog-footer">
        <el-button @click="dialogFormVisible = false">取 消</el-button>
        <el-button type="primary" @click="submitForm('dynamicValidateForm')"
          >提 交</el-button
        >
      </div>
    </el-dialog>
  </div>
</template>

<script>
export default {
  //dialogType:区分考试和模拟
  props: ["dialogType"],
  data() {
    return {
      dialogFormVisible: false,
      //录入的题目等信息
      topicList: [
        {
          //唯一识别码,当前时间戳
          key: Date.now(),
          //题目信息
          dynamicValidateForm: {
            //选项
            domains: [
              {
                id: "A",
                value: "",
              },
              {
                id: "B",
                value: "",
              },
              {
                id: "C",
                value: "",
              },
            ],
            //题目
            title: "",
            //正确答案
            answer: [],
            //默认下拉框选项
            sortListfor: ["A", "B", "C"],
            //类型
            type: '--'
          },
        },
      ],
      //每个选项的id
      uid: "",
      //每个选项的排序号
      sortList: ["A", "B", "C", "D", "E", "F", "G", "H"],
    };
  },

  methods: {
    //弹框内新增选项
    addDomain1(item) {
      //item:题目
      //先拿到题目的角标
      let index = this.topicList.indexOf(item);
      //保存一下题目选项的长度,用来下面判断用
      let listLength =
        this.topicList[index].dynamicValidateForm.domains.length + 1;
      //判断:题目选项的长度超过6个了就不能继续添加了,并提示上限
      if (listLength > 6) {
        this.$message({
          message: "抱歉,答题选项已经上限了",
          type: "warning",
        });
        return;
      } else {
        //需要拿到对应的id添加到新创建的选项中,所以直接对题目选项筛选
        this.topicList[index].dynamicValidateForm.domains.filter(
          (item, index) => {
            //判断:当前已有的每一项选项的id和我们提前设置的排序号数组按顺序对比是否一致,一致的不管,当按顺序比到最后一个的时候,我们用角标+1的方式,拿到后面的一个字母,用来当id
            if (item.id == this.sortList[index]) {
              this.uid = this.sortList[index + 1];
            }
          }
        );
        //添加选项时,同时往下拉框内添加选项,添加的是序列号数组的角标对应位置数据。
        this.topicList[index].dynamicValidateForm.sortListfor.push(
          this.sortList[listLength - 1]
        );
        //按照id和value的格式把新的一个选项添加进选项数组内
        this.topicList[index].dynamicValidateForm.domains.push({
          id: this.uid,
          value: "",
        });
      }
    },
    //两个参数,arr:题目数组,index:角标。传入两个参数用来在删除选项的时候把每个选项的id从新排列,避免混乱
    delOne(arr, index) {
      arr.splice(index, 1),
        arr.forEach((ele, key) => {
          ele.id = this.sortList[key];
        });
      return arr;
    },
    //弹框删除选项
    removeDomain1(i, item) {
      //i:选项数据
      //item:题目
      //先拿到传来的题目在数组中的角标
      let index = this.topicList.indexOf(item);
      let listLength =
        this.topicList[index].dynamicValidateForm.domains.length - 1;
      if (listLength < 2) {
        this.$message({
          message: "抱歉,答题选项最少需要设置两条",
          type: "warning",
        });
        return;
      } else {
        //然后利用角标在数组中对应的题目中找到这一条选项的角标
        let indexs =
          this.topicList[index].dynamicValidateForm.domains.indexOf(i);
        //判断选项角标是否存在
        if (indexs !== -1) {
          //存在,就删除对应题目的对应一条选项数据
          let L = this.topicList[index].dynamicValidateForm.domains;
          let v = this.delOne(L, indexs);
          console.log("新数组:", v);
          //并把下拉框选中的清空
          this.topicList[index].dynamicValidateForm.answer = [];
          //并删除下拉框选项数据的最后一位
          this.topicList[index].dynamicValidateForm.sortListfor.pop();
        }
      }
    },
    //弹框删除题目
    remove_dom(item) {
      //查找点击删除的这一项的角标,保存
      let index = this.topicList.indexOf(item);
      //判断有没有在题目数组内找到,-1代表没找到
      if (index !== -1) {
        //找到了就删除这一条题目
        this.topicList.splice(index, 1);
      }
    },
    //弹框增加题目
    addTopic() {
      //点击增加,按照格式新增一个对象
      this.topicList.push({
        key: Date.now(),
        dynamicValidateForm: {
          domains: [
            {
              id: "A",
              value: "",
            },
            {
              id: "B",
              value: "",
            },
            {
              id: "C",
              value: "",
            },
          ],
          title: "",
          answer: [],
          sortListfor: ["A", "B", "C"],
          type:''
        },
      });
    },
    //提交按钮
    submitForm(formName) {
      //用来记录验证通过的题目数量
      let n = 0;
      //提交时,循环题目数组
      this.topicList.forEach((item, index) => {
        //formName:ref绑定的表单dom传参进去
        //循环表单内的每一项题目是否通过验证,验证规格写在了html标签上的rules就是
        this.$refs[formName][index].validate((valid) => {
          if (valid) {
            //通过验证的n+1,这里计数用来判断是不是所有题都通过验证了
            n++;
            //判断这个题目数组的长度和n一致,那么验证成功数和数组长度一致,也就是全部验证成功。
            if (n == this.topicList.length) {
              //全部验证通过执行方法:
              //把所有的题目遍历判断一下,当选择的答案大于一个的时候就把type改成多选题,反之单选
              this.topicList.forEach(i=>{
                i.dynamicValidateForm.type=i.dynamicValidateForm.answer.length>1?"多选题":"单选题"
              })
              console.log(this.topicList);
            }
          } else {
            console.log("error submit!!");
            return false;
          }
        });
      });
    },
  },
};
</script>

<style scoped lang='scss'>
.choose {
  width: 300px;
  height: 200px;
  margin: auto;
  margin-top: 180px;
  text-align: center;
  line-height: 200px;
  font-size: 38px;
  color: #fff;
  font-weight: bold;
  border-radius: 30px;
  cursor: pointer;
  background-image: linear-gradient(#32cbc6, #2d94a7);
  margin-bottom: 25px;
  box-shadow: 0px 0px 15px 5px #97d9e1;
}
.choose:hover {
  background-image: linear-gradient(#0093e9, #2d94a7);
  box-shadow: 0px 0px 15px 5px #0093e9;
}
.from_box {
  border-bottom: 1px #ccc solid;
  margin-bottom: 20px;
}
.from_btn {
  margin-left: 410px;
  margin-bottom: 5px;
}
.dialog_height {
  height: 430px;
  overflow: auto;
}
</style>
<style >
.choose_wrap .el-dialog {
  border-radius: 20px;
}
</style>
【好了,到底结束,希望大家复制的开心,愿天下没有看不懂的技术贴】
