主要对图像分割的颜色转换,模板这部分解释,以LedNet 项目源码为例:
参考全部源代码:https://github.com/xiaoyufenfei/LEDNet
label 和output
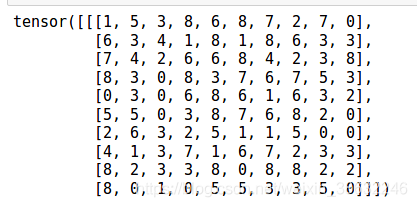
这里图像分割的label和网络输出的output一般都假设单通道的灰度图,比如先生成一个output输出:
10*10的size:
a=torch.randint(9,size=[1,10,10])
print(a)
得到这个单通道的灰度图后,做一个颜色表的映射:
import numpy as np
def colormap_cityscapes(n):
    cmap=np.zeros([n, 3]).astype(np.uint8)
    cmap[0] = np.array([128, 64,128])
    cmap[1] = np.array([244, 35,232])
    cmap[2] = np.array([ 70, 70, 70])
    cmap[3] = np.array([ 102,102,156])
    cmap[4] = np.array([ 190,153,153])
    cmap[5] = np.array([ 153,153,153])

    cmap[6] = np.array([ 250,170, 30])
    cmap[7] = np.array([ 220,220,  0])
    cmap[8] = np.array([ 107,142, 35])
    cmap[9] = np.array([ 152,251,152])
    cmap[10] = np.array([ 70,130,180])

    cmap[11] = np.array([ 220, 20, 60])
    cmap[12] = np.array([ 255,  0,  0])
    cmap[13] = np.array([ 0,  0,142])
    cmap[14] = np.array([  0,  0, 70])
    cmap[15] = np.array([  0, 60,100])

    cmap[16] = np.array([  0, 80,100])
    cmap[17] = np.array([  0,  0,230])
    cmap[18] = np.array([ 119, 11, 32])
    cmap[19] = np.array([ 0,  0,  0])

    return cmap
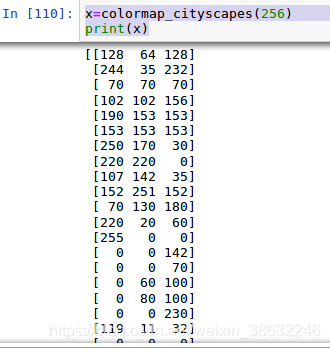
打印一下颜色表,这里总共20类,最后一类是背景。
有了颜色表之后,我们需要将刚才的网络output转换为三通道的image,
上色代码,
class Colorize:

    def __init__(self, n=20):
        #self.cmap = colormap(256)
        self.cmap = colormap_cityscapes(256)   #cmap是颜色表
        self.cmap[n] = self.cmap[-1] #把最后一类的颜色表设为[0,0,0]
        self.cmap = torch.from_numpy(self.cmap[:n]) # cmap由nump数组转为tensor

    def __call__(self, gray_image):
        size = gray_image.size()  # 网络output的大小
        color_image = torch.ByteTensor(3, size[1], size[2]).fill_(0)
        #生成3通道的image模板

        for label in range(0, len(self.cmap)):# 依次遍历label的颜色表
            mask = gray_image[0] == label
            #gray_image[0] 是将三维的图像,以【1, 10, 10】为例,变成二维【10,10】,这个参数是外部传入,这里确保是二维单通道就行了
            #gray_image[0] == label 意思是将 gray_image[0]中为label值的元素视为true或者1,其他的元素为False 或0,得到mask的布尔图

            color_image[0][mask] = self.cmap[label][0] #取取颜色表中为label列表(【a,b,c】)的a
            #color_image[0]是取三通道模板中的单通道 ,然后把mask放上去
            color_image[1][mask] = self.cmap[label][1]  # 取b
            color_image[2][mask] = self.cmap[label][2]#   取c

        return color_image
生成output对应的三通道图像模板
size = a.size()
color_image = torch.ByteTensor(3, size[1], size[2]).fill_(0)
print(color_image)
打印出:
tensor([[[0, 0, 0, 0, 0, 0, 0, 0, 0, 0],
[0, 0, 0, 0, 0, 0, 0, 0, 0, 0],
[0, 0, 0, 0, 0, 0, 0, 0, 0, 0],
[0, 0, 0, 0, 0, 0, 0, 0, 0, 0],
[0, 0, 0, 0, 0, 0, 0, 0, 0, 0],
[0, 0, 0, 0, 0, 0, 0, 0, 0, 0],
[0, 0, 0, 0, 0, 0, 0, 0, 0, 0],
[0, 0, 0, 0, 0, 0, 0, 0, 0, 0],
[0, 0, 0, 0, 0, 0, 0, 0, 0, 0],
[0, 0, 0, 0, 0, 0, 0, 0, 0, 0]],
[[0, 0, 0, 0, 0, 0, 0, 0, 0, 0],
[0, 0, 0, 0, 0, 0, 0, 0, 0, 0],
[0, 0, 0, 0, 0, 0, 0, 0, 0, 0],
[0, 0, 0, 0, 0, 0, 0, 0, 0, 0],
[0, 0, 0, 0, 0, 0, 0, 0, 0, 0],
[0, 0, 0, 0, 0, 0, 0, 0, 0, 0],
[0, 0, 0, 0, 0, 0, 0, 0, 0, 0],
[0, 0, 0, 0, 0, 0, 0, 0, 0, 0],
[0, 0, 0, 0, 0, 0, 0, 0, 0, 0],
[0, 0, 0, 0, 0, 0, 0, 0, 0, 0]]], dtype=torch.uint8)
得到output a对应的label mask:
mask=a[0].byte().cpu().data==3   #3 是随便取一个label值
print(mask)
#输出
tensor([[0, 0, 1, 0, 0, 0, 0, 0, 0, 0],
        [0, 1, 0, 0, 0, 0, 0, 0, 1, 1],
        [0, 0, 0, 0, 0, 0, 0, 0, 1, 0],
        [0, 1, 0, 0, 1, 0, 0, 0, 0, 1],
        [0, 1, 0, 0, 0, 0, 0, 0, 1, 0],
        [0, 0, 0, 1, 0, 0, 0, 0, 0, 0],
        [0, 0, 1, 0, 0, 0, 0, 0, 0, 0],
        [0, 0, 1, 0, 0, 0, 0, 0, 1, 1],
        [0, 0, 1, 1, 0, 0, 0, 0, 0, 0],
        [0, 0, 0, 0, 0, 0, 1, 1, 0, 0]], dtype=torch.uint8)
将mask附着在color_image 模板上:
color_image[0][mask]=12  #假设12 表示 label为3 的颜色表【a,b,c】中a 为12
print(color_image[0])

#打印输出
tensor([[ 0,  0, 12,  0,  0,  0,  0,  0,  0,  0],
        [ 0, 12,  0,  0,  0,  0,  0,  0, 12, 12],
        [ 0,  0,  0,  0,  0,  0,  0,  0, 12,  0],
        [ 0, 12,  0,  0, 12,  0,  0,  0,  0, 12],
        [ 0, 12,  0,  0,  0,  0,  0,  0, 12,  0],
        [ 0,  0,  0, 12,  0,  0,  0,  0,  0,  0],
        [ 0,  0, 12,  0,  0,  0,  0,  0,  0,  0],
        [ 0,  0, 12,  0,  0,  0,  0,  0, 12, 12],
        [ 0,  0, 12, 12,  0,  0,  0,  0,  0,  0],
        [ 0,  0,  0,  0,  0,  0, 12, 12,  0,  0]], dtype=torch.uint8)

print(color_image)

#单通道输出, 其他2各通道继续执行上面操作,就可以实现把灰度图,映射为RBG图
tensor([[[ 0,  0, 12,  0,  0,  0,  0,  0,  0,  0],
         [ 0, 12,  0,  0,  0,  0,  0,  0, 12, 12],
         [ 0,  0,  0,  0,  0,  0,  0,  0, 12,  0],
         [ 0, 12,  0,  0, 12,  0,  0,  0,  0, 12],
         [ 0, 12,  0,  0,  0,  0,  0,  0, 12,  0],
         [ 0,  0,  0, 12,  0,  0,  0,  0,  0,  0],
         [ 0,  0, 12,  0,  0,  0,  0,  0,  0,  0],
         [ 0,  0, 12,  0,  0,  0,  0,  0, 12, 12],
         [ 0,  0, 12, 12,  0,  0,  0,  0,  0,  0],
         [ 0,  0,  0,  0,  0,  0, 12, 12,  0,  0]],

        [[ 0,  0,  0,  0,  0,  0,  0,  0,  0,  0],
         [ 0,  0,  0,  0,  0,  0,  0,  0,  0,  0],
         [ 0,  0,  0,  0,  0,  0,  0,  0,  0,  0],
         [ 0,  0,  0,  0,  0,  0,  0,  0,  0,  0],
         [ 0,  0,  0,  0,  0,  0,  0,  0,  0,  0],
         [ 0,  0,  0,  0,  0,  0,  0,  0,  0,  0],
         [ 0,  0,  0,  0,  0,  0,  0,  0,  0,  0],
         [ 0,  0,  0,  0,  0,  0,  0,  0,  0,  0],
         [ 0,  0,  0,  0,  0,  0,  0,  0,  0,  0],
         [ 0,  0,  0,  0,  0,  0,  0,  0,  0,  0]],

        [[ 0,  0,  0,  0,  0,  0,  0,  0,  0,  0],
         [ 0,  0,  0,  0,  0,  0,  0,  0,  0,  0],
         [ 0,  0,  0,  0,  0,  0,  0,  0,  0,  0],
         [ 0,  0,  0,  0,  0,  0,  0,  0,  0,  0],
         [ 0,  0,  0,  0,  0,  0,  0,  0,  0,  0],
         [ 0,  0,  0,  0,  0,  0,  0,  0,  0,  0],
         [ 0,  0,  0,  0,  0,  0,  0,  0,  0,  0],
         [ 0,  0,  0,  0,  0,  0,  0,  0,  0,  0],
         [ 0,  0,  0,  0,  0,  0,  0,  0,  0,  0],
         [ 0,  0,  0,  0,  0,  0,  0,  0,  0,  0]]], dtype=torch.uint8)
one-hot:
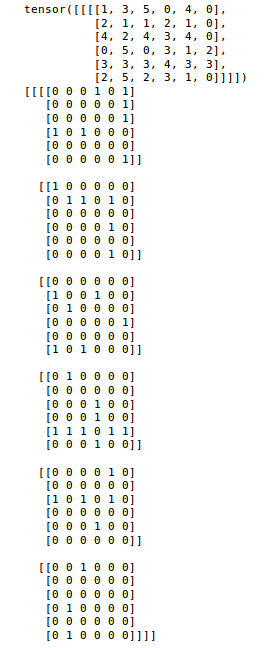
one-hot 是一种编码方式,现在用来对label编码,比如一个图像分割的label图,变成4维[1,1,6,6], 单通道,size为6*6, , ,,,然后分类物体加背景有6类,我们需要将这个单通道label, 变成6个通道的x_onehot输出,就是把label中全为,0的像素拿出来生成一个图,全为2的拿出来,直到5,以下代码:
x=torch.randint(6, size=(1, 1, 6, 6)).long()   #label
print(x)
x_onehot = torch.zeros(1, 6, 6, 6).long()   # 先生成模板

x_onehot.scatter_(1, x, 1).float()   # 这个就是生成6个channel的, scatter_这个函数不必理解太深,知道这么一个用法就OK了

print(x_onehot.numpy())
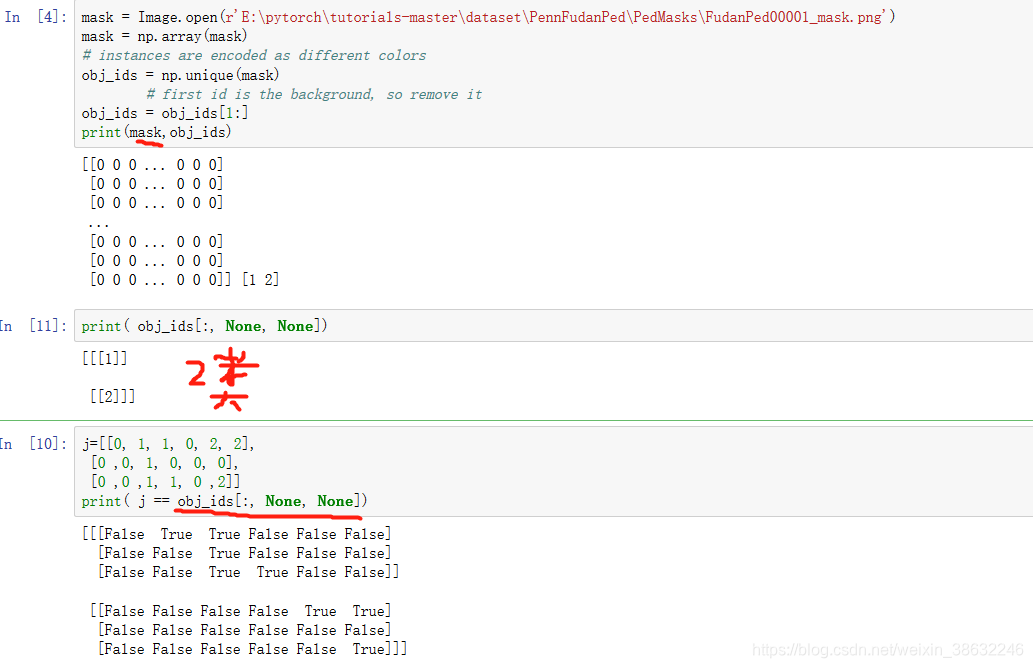
读取一张png的mask,生成多通道掩膜


