一、查找、替换
查找替换的组件 src/views/Editor/SearchPanel.vue
回车的时候会执行查找,查找替换功能的相关方法和属性都在 src/hooks/useSearch.ts 中。
1、查找
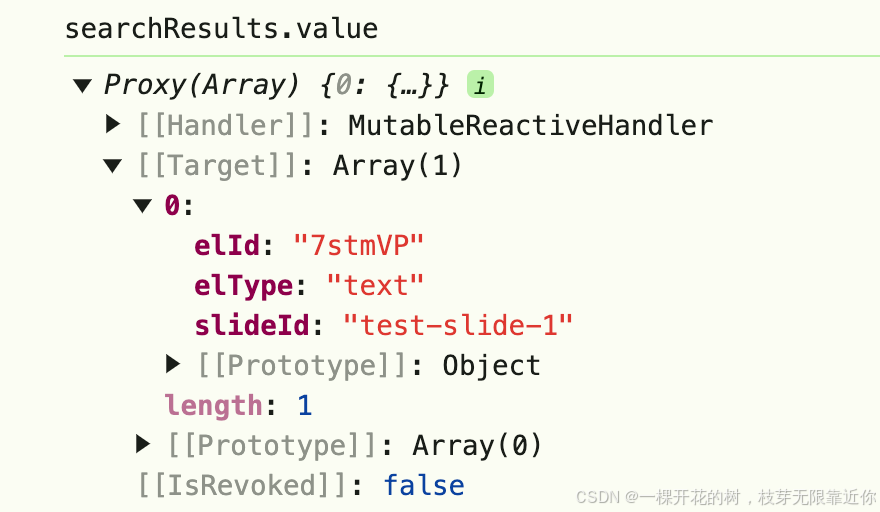
查找的方法也比较的朴实无华,就是 for 循环所有的幻灯片中的所有元素,通过 .match() 方法匹配要查找的关键词,如果匹配上的话,就放到 searchResults 中,会保存元素的id、元素类型以及元素所在的幻灯片的id。然后对 searchResults 中的数据进行高亮。
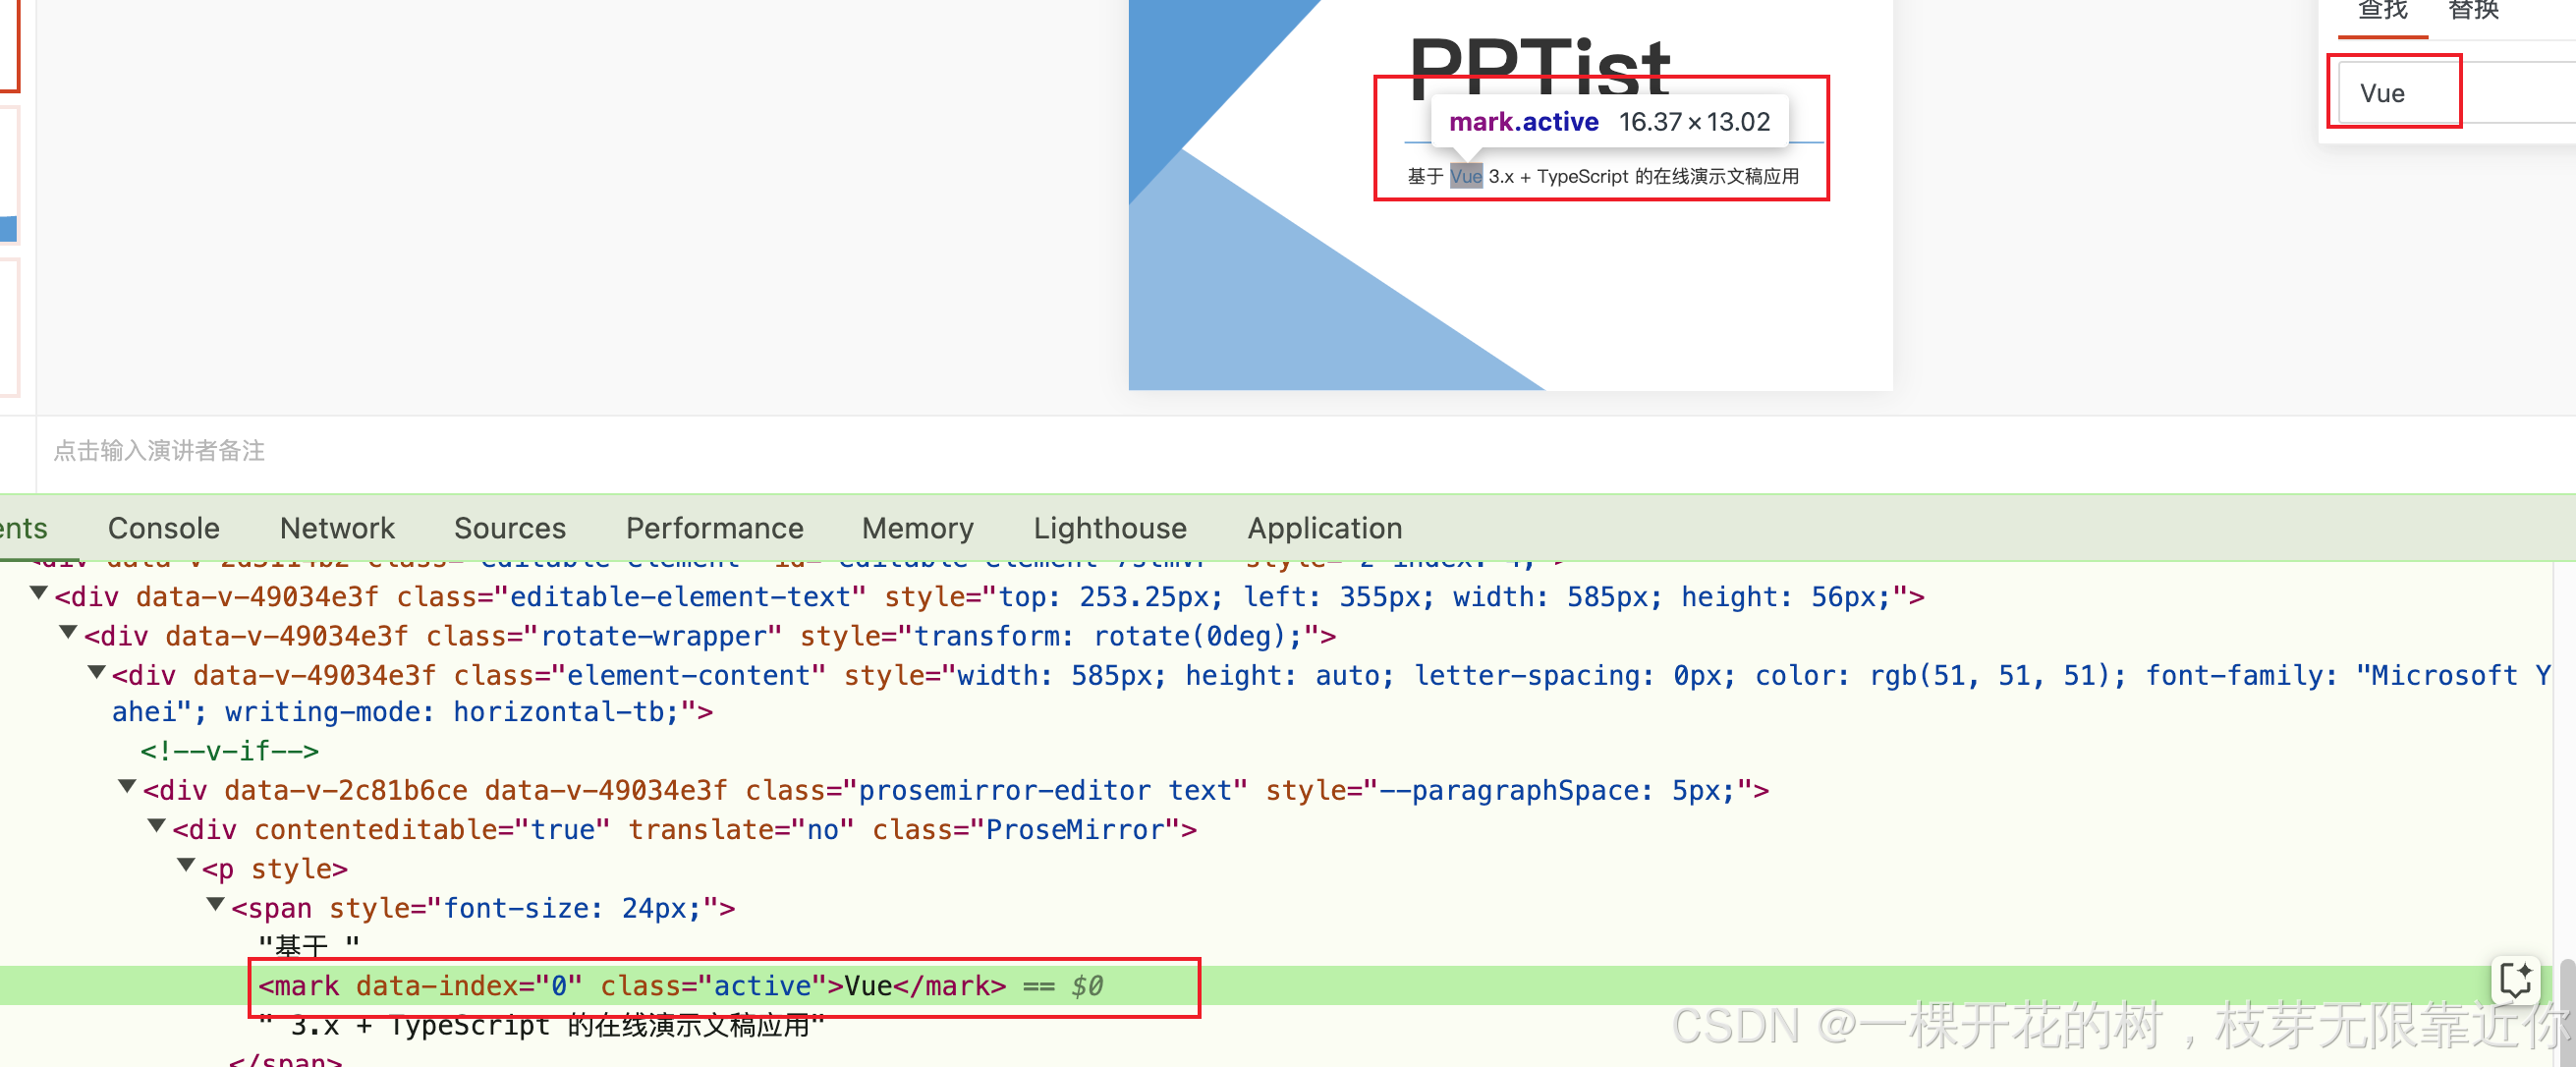
高亮的方法是会给目标文本创建一个父级 marker
mark 上还增加了一个 data-index 表示顺序
通过 textNode.parentNode!.replaceChild(mark, textNode) 使用 mark 替换文本元素
2、下一个/上一个
src/hooks/useSearch.ts 中有一个属性 searchIndex 来标识当前查找第几个关键词。下一个/上一个 的时候,会修改这个属性,然后执行 turnTarget() 方法
const turnTarget = () => {
  if (searchIndex.value === -1) return

  const target = searchResults.value[searchIndex.value]

  if (target.slideId === currentSlide.value.id) setTimeout(setActiveMark, 0)
  else {
    const index = slides.value.findIndex(slide => slide.id === target.slideId)
    if (index !== -1) slidesStore.updateSlideIndex(index)
  }
}
这里有两种情况了,
- 如果幻灯片没变化,执行
setActiveMark(),找对应的mark,增加active类名
const setActiveMark = () => {
  const markNodes = document.querySelectorAll('mark[data-index]')
  for (const node of markNodes) {
    setTimeout(() => {
      const index = (node as HTMLElement).dataset.index
      if (index !== undefined && +index === searchIndex.value) {
        node.classList.add('active')
      }
      else node.classList.remove('active')
    }, 0)
  }
}
- 幻灯片变化,执行
slidesStore.updateSlideIndex(index),要跳转幻灯片。跳转完了之后呢,这里有一个监听幻灯片变化的方法,重新计算一下需要高亮的文本,设置mark为active - src/hooks/useSearch.ts
watch(slideIndex, () => {
  nextTick(() => {
    highlightCurrentSlide()
    setTimeout(setActiveMark, 0)
  })
})
3、替换
替换的时候,如果没有搜索结果的话,会直接执行 searchNext() 方法。
如果当前有搜索结果,就找当前处在激活状态中的 mark,
先制造一个 fakeElement,通过 parentNode.replaceChild(document.createTextNode(replaceWord.value), mark) 方法替换节点,
然后还通过 slidesStore.updateElement({ id: target.elId, props }) 更新元素,使用 fakeElement 替换原来的元素。
4、替换全部
替换全部的时候其实跟替换差不多,但是循环 searchResults,遍历所有的文本节点,给所有的 mark 都创造一个 fakeElement,使用 slidesStore.updateElement({ id: target.elId, slideId: target.slideId, props }) 进行更新。
创建一个fakeElement 而不是直接更新 DOM ,可以防止后续错误导致流程失败结果已经更新了DOM的情况,以及减少页面重绘次数,另外可以统一将更新操作统一执行,代码可维护性更高。
二、绘制文本框
绘制文字范围、绘制形状范围使用的都是 mainStore.setCreatingElement() 方法。这个方法接收一个对象作为参数,就是要绘制的元素本身。如果是绘制文字的话,
// 绘制文字范围
const drawText = (vertical = false) => {
  mainStore.setCreatingElement({
    type: 'text',
    vertical,
  })
}
第二个参数表示是否是垂直方向,默认是横向。
src/views/Editor/Canvas/index.vue
<ElementCreateSelection
   v-if="creatingElement"
   @created="data => insertElementFromCreateSelection(data)"
 />
有了 creatingElement,就会创建 ElementCreateSelection 组件,同时会执行 insertElementFromCreateSelection()
方法。
  // 根据鼠标选区的位置大小插入元素
const insertElementFromCreateSelection = (selectionData: CreateElementSelectionData) => {
  if (!creatingElement.value) return

  const type = creatingElement.value.type
  if (type === 'text') {
    const position = formatCreateSelection(selectionData)
    position && createTextElement(position, { vertical: creatingElement.value.vertical })
  }
  mainStore.setCreatingElement(null)
}
然而,这里有一个容易混淆的地方,@created 并不是Vue3内置的函数,而是这个自定义组件自己定义的监听函数🥹🥹🥹,我说呢,这个方法的执行实际不太对啊,这个方法是鼠标起来的时候才会执行,而不是创建这个组件的时候执行。
我们看一下 src/views/Editor/Canvas/ElementCreateSelection.vue 组件里面的执行流程
-
mousedown
鼠标落下的时候,执行createSelection(),记录此时的坐标到start中。此时会添加document.onmousemove监听函数 -
mousemove
鼠标移动的时候,实时计算坐标,记录到end中 -
mouseup
鼠标抬起时,清空onmousemove和onmouseup。
通过e.button判断此时有没有按鼠标右键e.button = 0 // 鼠标左键 e.button = 1 // 鼠标中键(滚轮) e.button = 2 // 鼠标右键 e.button = 3 // 浏览器后退键 e.button = 4 // 浏览器前进键如果按了就表示取消绘制,
mainStore.setCreatingElement(null)将creatingElement清空。
否则就触发created方法,将start和end传进去,然后自定义组件就会监听到。那我就不明白了,明明是组件内部会触发这个方法,干嘛还要写成监听函数的形式,直接写成组件里面的方法不就行了吗?一般定义监听函数,都是给父组件来触发的👽👽👽
哦,知道了,因为这个const { insertElementFromCreateSelection, formatCreateSelection } = useInsertFromCreateSelection(viewportRef)要将
viewportRef传进去呢,这个模版元素只能从父组件中传过去。 -
@created
监听到这个方法之后,就要执行insertElementFromCreateSelection(data),data是位置信息,就是上面说的start和end。 -
createTextElement()
根据位置信息创建文本元素。这个方法以前也见过了。
src/hooks/useCreateElement.ts// 创建(插入)一个元素并将其设置为被选中元素 const createElement = (element: PPTElement, callback?: () => void) => { // 添加元素到元素列表 slidesStore.addElement(element) // 设置被选中元素列表 mainStore.setActiveElementIdList([element.id]) if (creatingElement.value) mainStore.setCreatingElement(null) setTimeout(() => { // 设置编辑器区域为聚焦状态 mainStore.setEditorareaFocus(true) }, 0) if (callback) callback() // 添加历史快照 addHistorySnapshot() }

