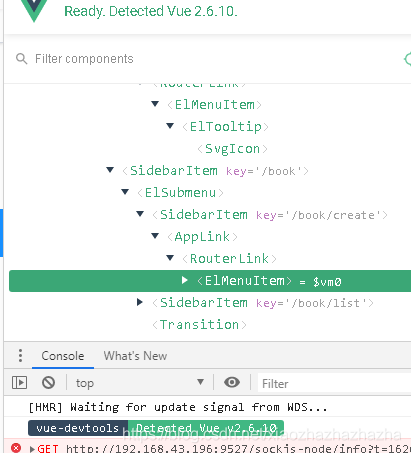
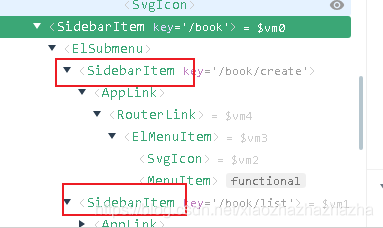
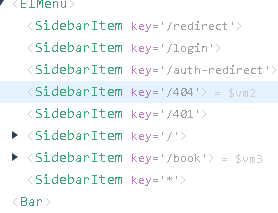
路由和权限校验之后生成了一张路由表,这张路由表最终是如何生成用户菜单的呢
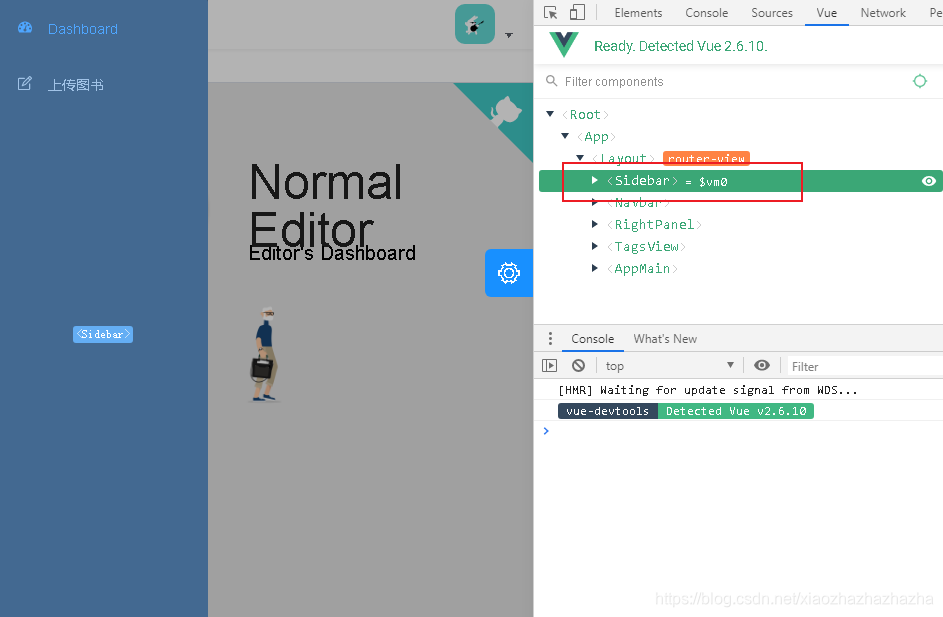
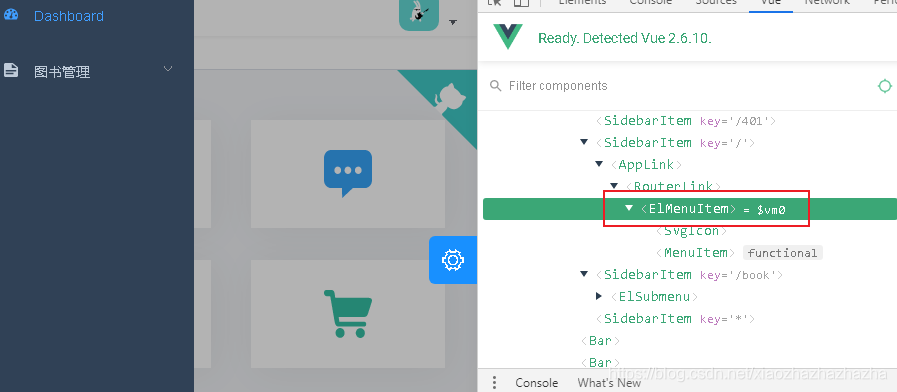
侧边栏就是这个的展示结果
看起来很简单,但是实际上实现是挺复杂的,要兼容很多场景,还要容易扩展。
开始
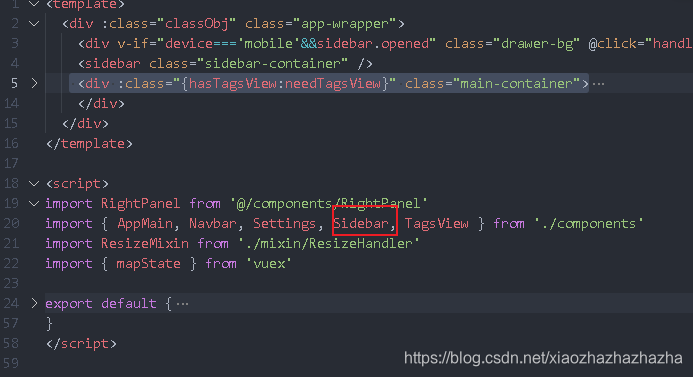
layout/index.vue
找到路径
首先 el-menu 是element ui中关于菜单的组件
menu
需要理解el menu里的属性都是什么意思
还要理解路由和菜单是如何进行映射的
关于menu的用法
<template>
  <el-row class="tac">
    <el-col :span="12">
      <el-menu
        default-active="1-1"
        background-color="#545c64"
        text-color="#fff"
        active-text-color="#ffd04b"
        mode="vertical"
        unique-opened
        :collapse="isCollapse"
        :collapse-transition="false"
        class="el-menu-vertical-demo"
        @open="handleOpen"
        @close="handleClose"
        @select="handleSelect"
      >
        <el-submenu index="1">
          <template slot="title">
            <i class="el-icon-location"></i>
            <span>导航一</span>
          </template>
          <el-menu-item-group>
            <template slot="title">分组一</template>
            <el-menu-item index="1-1">选项1</el-menu-item>
            <el-menu-item index="1-2">选项2</el-menu-item>
          </el-menu-item-group>
          <el-menu-item-group title="分组2">
            <el-menu-item index="1-3">选项3</el-menu-item>
          </el-menu-item-group>
          <el-submenu index="1-4">
            <template slot="title">选项4</template>
            <el-menu-item index="1-4-1">选项1</el-menu-item>
          </el-submenu>
        </el-submenu>
        <el-submenu index="2">
          <template slot="title">
            <i class="el-icon-menu"></i>
            <span slot="title">导航二</span>
          </template>
          <el-menu-item index="2-1">选项2-1</el-menu-item>
        </el-submenu>
        <el-menu-item index="3" disabled>
          <i class="el-icon-document"></i>
          <span slot="title">导航三</span>
        </el-menu-item>
        <el-menu-item index="4">
          <i class="el-icon-setting"></i>
          <span slot="title">导航四</span>
        </el-menu-item>
      </el-menu>
    </el-col>
    <el-col>
      <el-button @click="isCollapse = !isCollapse">折叠</el-button>
    </el-col>
  </el-row>
</template>

<script>
export default {
  data() {
    return {
      isCollapse: false
    }
  },
  methods: {
    handleSelect(key, keyPath) {
      console.log('handleSelect', key, keyPath)
    },
    handleOpen(key, keyPath) {
      console.log('handleOpen', key, keyPath)
    },
    handleClose(key, keyPath) {
      console.log('handleClose', key, keyPath)
    }
  }
}
</script>
el-menu是个菜单容器,在这个容器中可以去编写自定义dom(使用插槽)
允许我们添加el-submenu和el-menu-item两种形式,el-submenu表示他下面也是个子菜单 他是个子菜单容器可以向下伸展
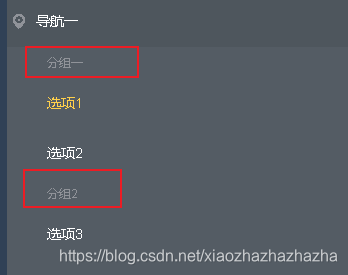
这个时候可以用到el-menu-item-group(设分组)
定制图标:
el-icon
来看看每个属性都是什么意思 具体看文档
 		default-active="1-1"    默认高亮(对应index)
        background-color="#545c64"
        text-color="#fff"
        active-text-color="#ffd04b"
        mode="vertical"
        unique-opened  是否可以同时打开多个菜单
        :collapse="isCollapse"   折叠状态
        :collapse-transition="false"  收缩动画
        class="el-menu-vertical-demo"
        @open="handleOpen"
        @close="handleClose"
        @select="handleSelect"
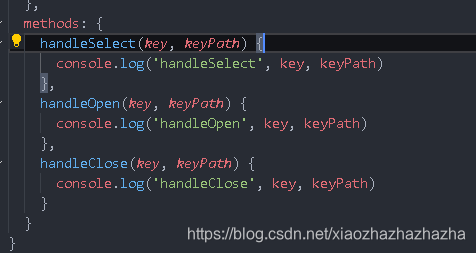
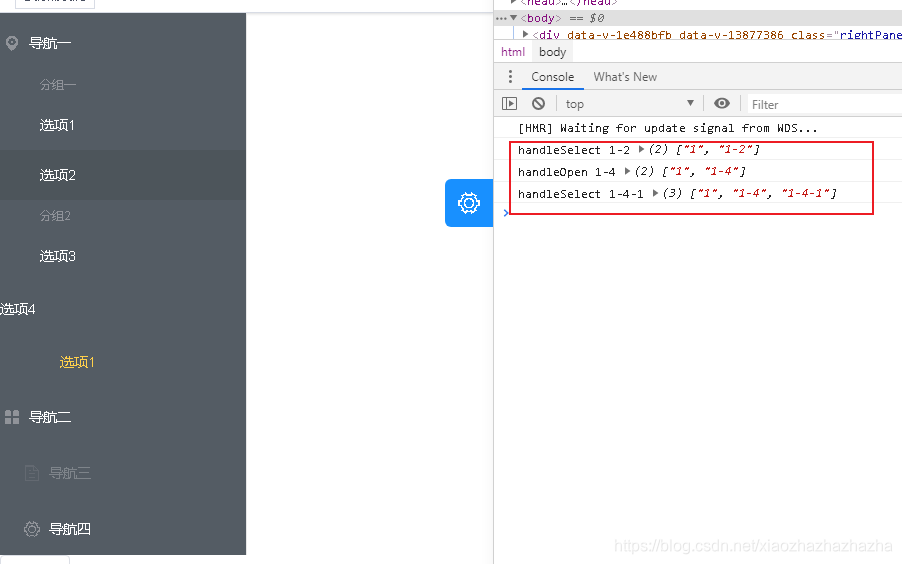
每点击一个,就会调用方法输出出来对应的index
获取 keyPath 我们可以获取 1-4-1 菜单的所有父级菜单的 ID
sidebar组件源码分析
<template>
  <div :class="{'has-logo':showLogo}">
    <logo v-if="showLogo" :collapse="isCollapse" />
    <el-scrollbar wrap-class="scrollbar-wrapper">
      <el-menu
        :default-active="activeMenu"
        :collapse="isCollapse"
        :background-color="variables.menuBg"
        :text-color="variables.menuText"
        :unique-opened="false"
        :active-text-color="variables.menuActiveText"
        :collapse-transition="false"
        mode="vertical"
      >
        <sidebar-item v-for="route in permission_routes" :key="route.path" :item="route" :base-path="route.path" />
      </el-menu>
    </el-scrollbar>
  </div>
</template>

<script>
import { mapGetters } from 'vuex'
import Logo from './Logo'
import SidebarItem from './SidebarItem'
import variables from '@/styles/variables.scss'

export default {
  components: { SidebarItem, Logo },
  computed: {
    ...mapGetters([
      'permission_routes',
      'sidebar'
    ]),
    activeMenu() {
      const route = this.$route
      const { meta, path } = route
      // if set path, the sidebar will highlight the path you set
      if (meta.activeMenu) {
        return meta.activeMenu
      }
      return path
    },
    showLogo() {
      return this.$store.state.settings.sidebarLogo
    },
    variables() {
      return variables
    },
    isCollapse() {
      return !this.sidebar.opened
    }
  }
}
</script>
默认高亮default-active
activeMenu() {
      const route = this.$route
      const { meta, path } = route
      // if set path, the sidebar will highlight the path you set
      if (meta.activeMenu) {
        return meta.activeMenu
      }
      return path
    },
取到route下面的meta 判断meta是否包含activeMenu 包含就将activeMenu返回
不包含就返回path
这个我们可以理解为一个子组件,里面必然包含el-menu-item
<sidebar-item v-for="route in permission_routes" :key="route.path" :item="route" :base-path="route.path" />
他的index和路由一致
activeMenu方法的作用就是进入哪个路由,就把哪个路由返回回来
那
    if (meta.activeMenu) {
       return meta.activeMenu
     }
这个语句是干啥的
可以试一下 在/book/list 的meta下面定义一个activeMenu 值为/book/create 这样的话进入/book/list的时候 始终对/book/list进行高亮
collapse
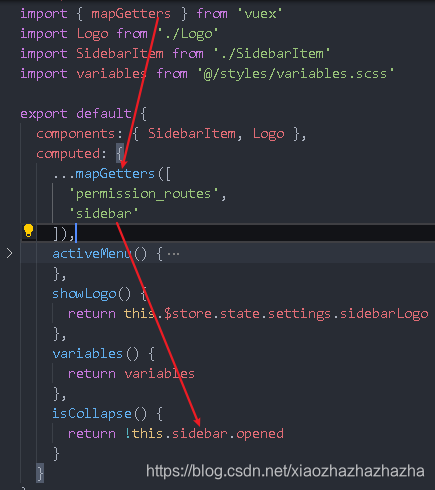
从vuex中读取的
可以搜索一下 找到state里面的sidebar
可以看到open是从cookie中获取的
!!+Cookies.get(‘sidebarStatus’) 什么意思? --字符串转数值 再变成布尔型
扩展:
快速转 Number
var a = '1'

console.log(typeof a)
console.log(typeof Number(a)) // 普通写法
console.log(typeof +a) // 高端写法
快速转 Boolean
var a = 0

console.log(typeof a)
console.log(typeof Boolean(a)) // 普通写法
console.log(typeof !!a) // 高端写法
混写
先转为 Number 再转为 Boolean
var a = '0'

console.log(!!a) // 直接转将得到 true,不符合预期
console.log(!!+a) // 先转为 Number 再转为 Boolean,符合预期
在侧边栏中用到了这种用法:
!!+Cookies.get(‘sidebarStatus’)
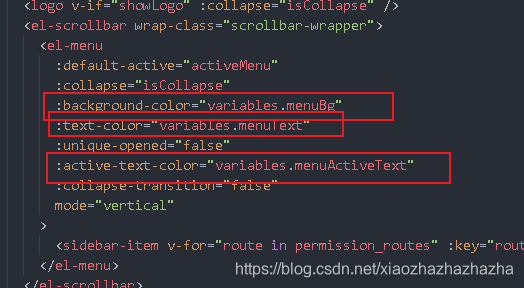
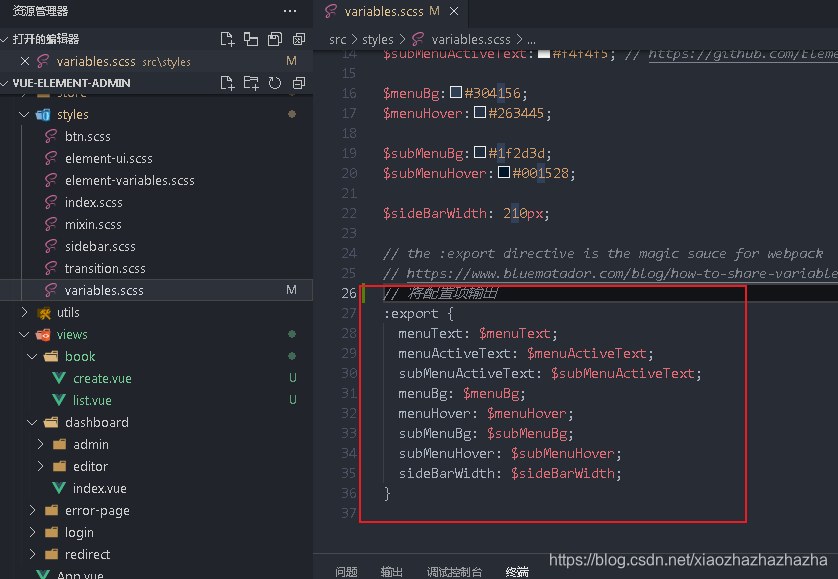
改颜色 --variables
扩展:
js 和 css 两用样式
template 中需要动态定义样式,通常做法:
<template>
  <div :style="{ color: textColor }">Text</div>
</template>

<script>
export default {
  data() {
    return {
      textColor: '#ff5000'
    }
  }
}
</script>
高端做法:
定义 scss 文件
$menuActiveText:#409EFF;

:export {
  menuActiveText: $menuActiveText;
}
在 js 中引用:
使用 import 引用 scss 文件
定义 computed 将 styles 对象变成响应式对象
在 template 中使用 styles 对象
<template>
  <div :style="{ color: styles.menuActiveText }">Text</div>
</template>

<script>
import styles from '@/styles/variables.scss'

export default {
  computed: {
    styles() {
      return styles
    }
  }
}
</script>
组件的关键—sidebar-item
要么显示template要么显示submenu
上面这个逻辑很复杂
hasOneShowingChild(item.children,item) && (!onlyOneChild.children||onlyOneChild.noShowingChildren)&&!item.alwaysShow"
这有三个查询条件
他具体要展示的是这个
     <el-menu-item :index="resolvePath(onlyOneChild.path)" :class="{'submenu-title-noDropdown':!isNest}">
          <item :icon="onlyOneChild.meta.icon||(item.meta&&item.meta.icon)" :title="onlyOneChild.meta.title" />
        </el-menu-item>
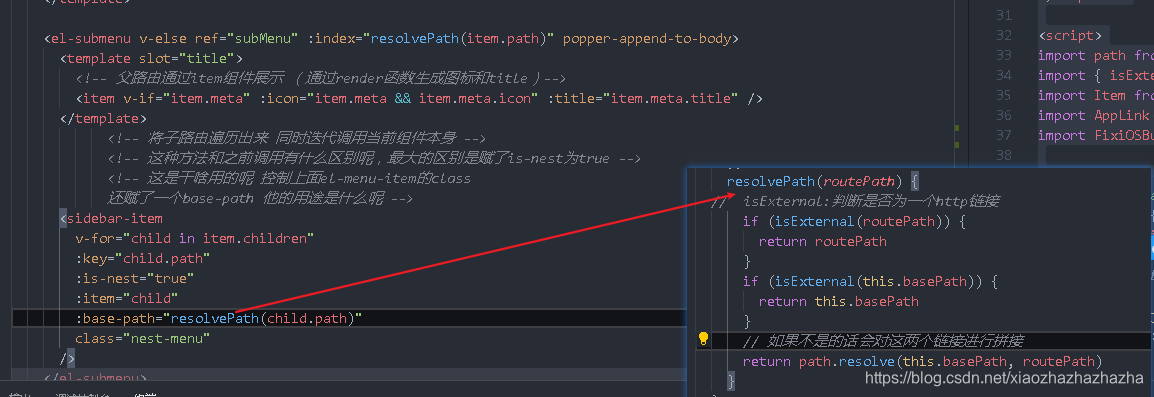
这里的框架调用了自身
 <sidebar-item
        v-for="child in item.children"
        :key="child.path"
        :is-nest="true"
        :item="child"
        :base-path="resolvePath(child.path)"
        class="nest-menu"
      />
分析
hasOneShowingChild(item.children,item) && (!onlyOneChild.children||onlyOneChild.noShowingChildren)&&!item.alwaysShow"
首先
hasOneShowingChild:
判断是否只有一个子路由需要被展示
传入两个参数:item.children(子元素) ,item (路由)
// 看名字即可知功能是判断是否只有一个子元素被展示
hasOneShowingChild(children = [], parent) {

      const showingChildren = children.filter(item => {
        if (item.hidden) {
          return false
        } else {
          // Temp set(will be used if only has one showing child)
          this.onlyOneChild = item
          return true
        }
      })

      // When there is only one child router, the child router is displayed by default
      if (showingChildren.length === 1) {
        return true
      }

      // Show parent if there are no child router to display
      if (showingChildren.length === 0) {
        this.onlyOneChild = { ... parent, path: '', noShowingChildren: true }
        return true
      }

      return false
    },
这个 permission_routes实际上是asyncRoutes和constantRotes合并生成的路由表(经过权限判断以后得到的路由表)
这就是为什么这里有那么多sidebarItem
接着分析hasOneShowingChild函数
对children进行遍历,他会读取children当中是否有hidden 注意他用的filter返回的是一个数组,如果是hidden的话那么那一项就直接被舍掉了 如果不是hidden 会将当前的sidebar里面的onlyOneChild设成item
然后就接着往下走 判断showingChildren的长度 如果为1或0 就返回true
length==1
接着往下判断
!onlyOneChild.children||onlyOneChild.noShowingChildren
onlyOneChilde是否包含children
!item.alwaysShow
有没有alwaysshow这个属性 如果填入了这个属性,哪怕是hidden 也会被展示
这些条件全部命中的话就会展示template而不是submenu
实际展示的是这个item
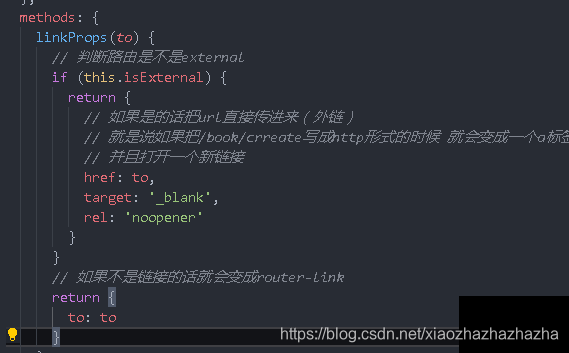
applink: meta存在的时候进行展示
看一下link.vue
他会判断路由是不是external
isExternal作用:判断是不是http请求
并且这里的component就会变成router-link
再回到sidebaritem:
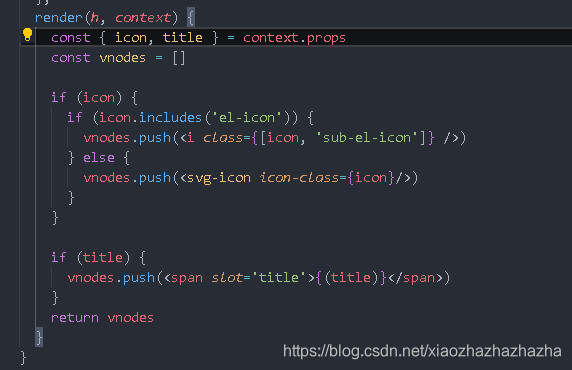
点进item看一下
里面包含了render函数,通过render函数来完成渲染
在这里生成了icon和title
如果子路由没有icon的话他会取父路由的 但是title就只会取当前路由的title
length==0
     if (showingChildren.length === 0) {
        this.onlyOneChild = { ... parent, path: '', noShowingChildren: true }
        return true
      }
parent展开 全部赋值给onlyOneChild path置空, noShowingChildren: 不展示children 只展示parent
设计巧妙 不管是子组件还是父组件,最终都要把值通过浅拷贝赋给一个专门的对象,通过对象渲染,呈现最终的菜单,而不是直接拿路由网上去套。直接拿路由去套的话,数据如果没有初始化,很难展示出来。这个方法就很好的实现了这个功能。
接着往下走,
length==2
如果上述条件都不满足返回false(chilren>=2)
就会展示submenu
开发菜单是很复杂的,尤其是多级的时候,这时候vue-element-admin就提供了一个很好的思路,通过sidebaritem的遍历解决了这个问题。 通过这个方式就可以非常方便的将路由和菜单捆绑在一起,同时还加入了权限判断,同时还加入了权限判断,使用起来非常灵活。
参考
