图片进行了resize后,对于标记框box进行相应的改变,与resize后的图片进行相对应。代码如下:
# 18233275213微信交流

import math
import os
from PIL import Image, ImageDraw
import numpy as np
import xml.etree.ElementTree as ET

def get_random_data(filename_jpg, box, nw, nh):
    """
    修改 box
    :param filename_jpg: 图片名
    :param box: 原box
    :param nw: 改变后的宽度
    :param nh: 改变后的高度
    :return:
    """
    image = Image.open(filename_jpg)
    iw, ih = image.size
    # 对图像进行缩放并且进行长和宽的扭曲
    image = image.resize((nw, nh), Image.BICUBIC)
    # 将box进行调整
    box_resize = []
    for boxx in box:
        boxx[0] = str(int(int(boxx[0]) * (nw / iw)))
        boxx[1] = str(int(int(boxx[1]) * (nh / ih)))
        boxx[2] = str(int(int(boxx[2]) * (nw / iw)))
        boxx[3] = str(int(int(boxx[3]) * (nh / ih)))
        box_resize.append(boxx)
    return image, box_resize

def get_random_data_graybar(filename_jpg, box, w, h):
    # ------------------------------#
    #   读取图像并转换成RGB图像
    # ------------------------------#
    image = Image.open(filename_jpg)
    # image = cvtColor(image)
    # ------------------------------#
    #   获得图像的高宽与目标高宽
    # ------------------------------#
    iw, ih = image.size
    scale = min(w / iw, h / ih)
    nw = int(iw * scale)
    nh = int(ih * scale)
    dx = (w - nw) // 2
    dy = (h - nh) // 2

    # ---------------------------------#
    #   将图像多余的部分加上灰条
    # ---------------------------------#
    image = image.resize((nw, nh), Image.BICUBIC)
    new_image = Image.new('RGB', (w, h), (128, 128, 128))
    new_image.paste(image, (dx, dy))

    box_resize = []
    for boxx in box:
        boxx[0] = str(int(int(boxx[0]) * (nw / iw) + dx))
        boxx[1] = str(int(int(boxx[1]) * (nh / ih) + dy))
        boxx[2] = str(int(int(boxx[2]) * (nw / iw) + dx))
        boxx[3] = str(int(int(boxx[3]) * (nh / ih) + dy))
        box_resize.append(boxx)
    return new_image, box_resize


def read_xml(xml_name):
    """
    看原xml中的box
    :param xml_name: xml文件名
    :return:
    """
    etree = ET.parse(xml_name)
    root = etree.getroot()
    box = []
    for obj in root.iter('object'):
        xmin,ymin,xmax,ymax = (x.text for x in obj.find('bndbox'))
        box.append([xmin,ymin,xmax,ymax])
    return box

def write_xml(xml_name,save_name, box, resize_w, resize_h):
    """
    将修改后的box 写入到 xml文件中
    :param xml_name: 原xml
    :param save_name: 保存的xml
    :param box: 修改后需要写入的box
    :return:
    """
    etree = ET.parse(xml_name)
    root = etree.getroot()

    # 修改图片的宽度、高度
    for obj in root.iter('size'):
        obj.find('width').text = str(resize_w)
        obj.find('height').text = str(resize_h)

    # 修改box的值
    for obj, bo in zip(root.iter('object'), box):
        for index, x in enumerate(obj.find('bndbox')):
            x.text = bo[index]
    etree.write(save_name)

def start(sourceDir, targetDir, resize_w, resize_h):
    """
    程序开始的主函数
    :param sourceDir: 源文件夹
    :param targetDir: 保存文件夹
    :param resize_w: 改变后的宽度
    :param resize_h: 改变后的高度
    :return:
    """
    for root, dir1, filenames in os.walk(sourceDir):
        for filename in filenames:
            file = os.path.splitext(filename)[0]
            if os.path.splitext(filename)[1] == '.jpg':
                print('正在进行resize:' + filename)
                filename_jpg = os.path.join(root, filename)
                xml_name = os.path.join(root, file + '.xml')
                box = read_xml(xml_name)
                # 灰度条填充,等比例
                image_data, box_data = get_random_data_graybar(filename_jpg, box, resize_w, resize_h)
                # 不填充直接resize, 会出现形变
                # image_data, box_data = get_random_data(filename_jpg, box, resize_w, resize_h)
                # 保存返回的图片
                image_data.save(os.path.join(targetDir, filename))
                # 查看修改后的结果,图片显示
                for j in range(len(box_data)):
                    thickness = 3
                    left, top, right, bottom = box_data[j][0:4]
                    draw = ImageDraw.Draw(image_data)
                    for i in range(thickness):
                        draw.rectangle([int(left) + i, int(top) + i, int(right) - i, int(bottom) - i], outline=(255, 0, 0))
                # 修改xml文件(将修改后的 box 写入到xml文件中)
                save_xml = os.path.join(targetDir, file + '.xml')
                write_xml(xml_name, save_xml, box_data, resize_w, resize_h)
                # 查看box绘制在图片上的效果
                path = './draw_img'
                image_data.save(os.path.join(path, filename))


if __name__ == "__main__":

    # 源文件夹
    sourceDir = "./data/"
    # 结果保存文件夹
    targetDir = "./result/"

    start(sourceDir, targetDir, 400, 400)
    print('完成!')
效果演示:
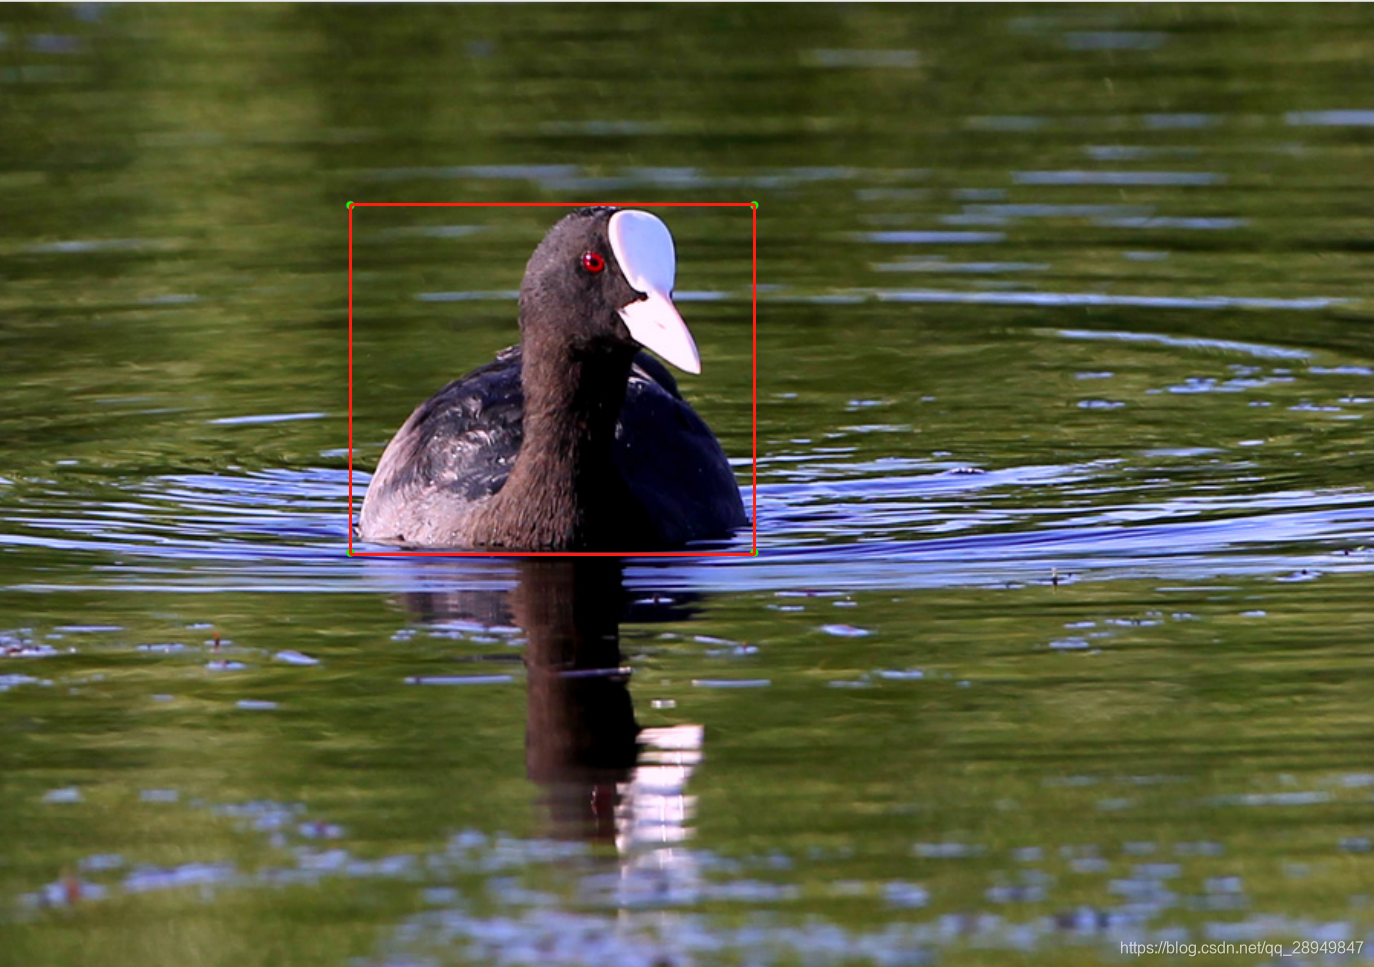
实际图片:
shape:(900,631)
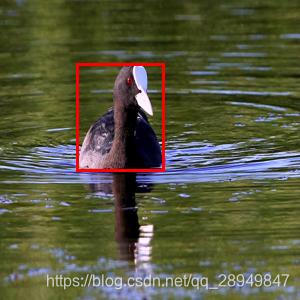
resize后的图片:
shape:(300,300)
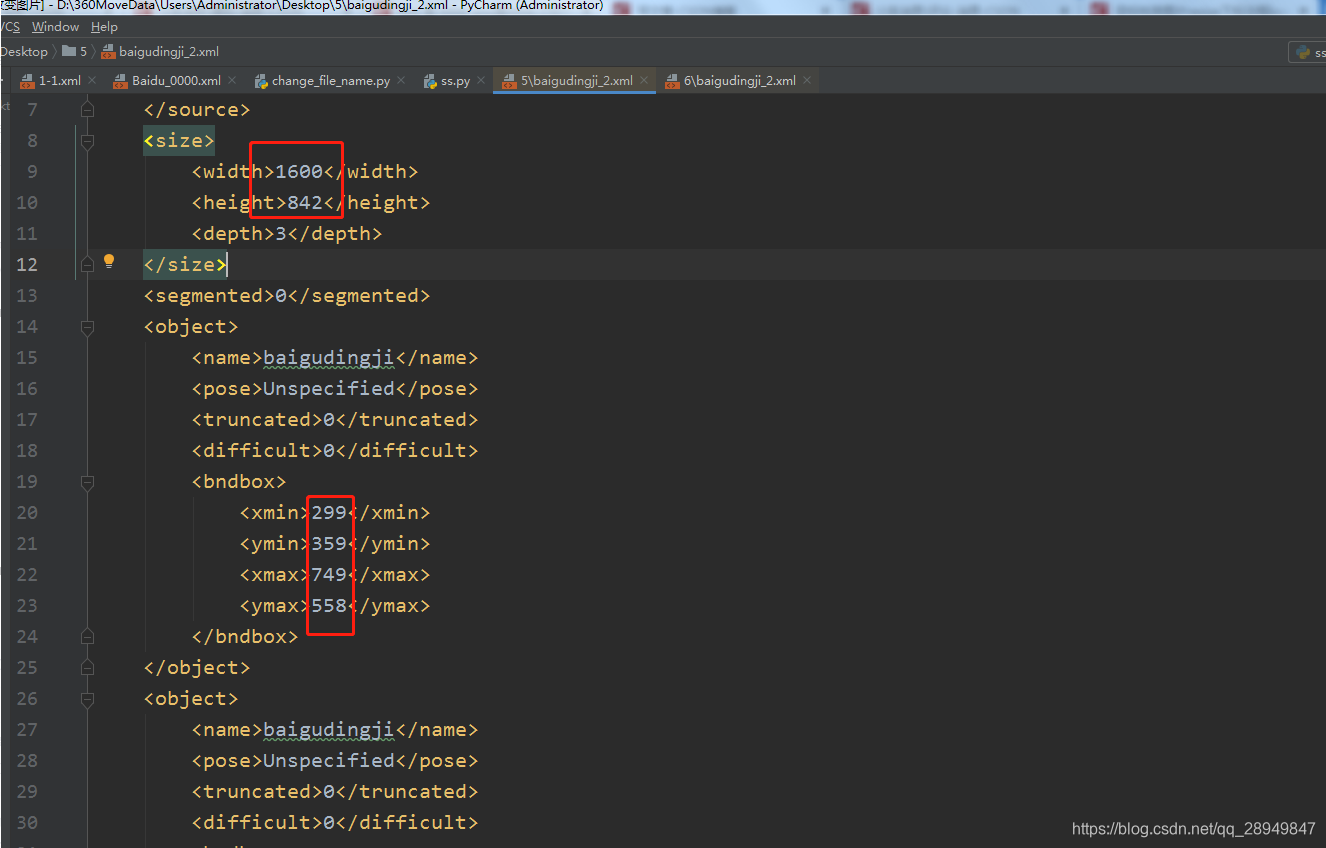
修改前的xml:
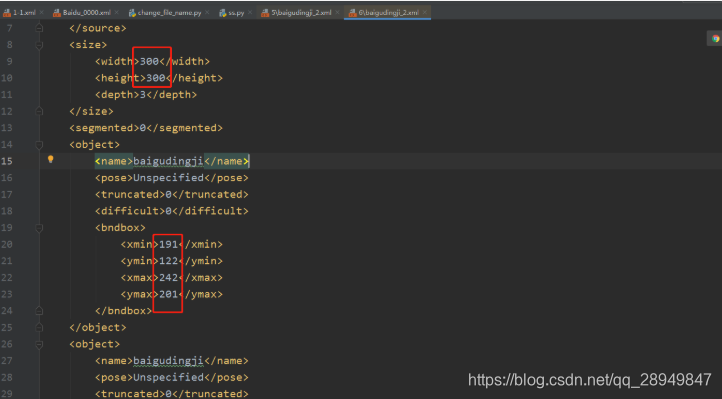
修改后的xml:
其实上面那种简单粗暴的resize并不是最好的结果,通过上面的resize,图片进行了拉伸,学出来的特征也会有问题,很难保证其准确性。这时候我们需要另外一种resize方式,不改变图片的长宽比,但是可以让图片尽可能的填充目标形状。这就会死LetterBox,这个是Yolo系列检测算法里面特有,但是同样也适用于任何一个检测算法。后面的文章会进行更新说明。
2022.02.12 更新get_random_data_graybar(filename_jpg, box, w, h) 无形变resize


