目录
- 1. go build 笔记
- 1.1. go build 编译时的附加参数
- 1.2. `go run main.go` 出错
- 1.3. Windows PowerShell 下运行 `go run *.go` 出错
- 1.4. go build -tags 简约
- 1.5. go build -tags 详尽
- 1.6. `go build .` vs `go build ...`
- 1.7. not able to find executable/binary file after "go build" command
- 1.8. 编译参数
- 1.9. Go 编译错误合集
- 1.10. Go 编译缓存
- 1.11. go build 参数传入程序中
- 1.12. go build examples
- 1.13. These handy Go build options can help you understand the Go compilation process better.
- 1.14. Adding Build Tags
- 1.15. How "go build" Works
1. go build 笔记
1.1. go build 编译时的附加参数
| 附加参数 | 备 注 |
|---|---|
| -v | 编译时显示包名 |
| -p n | 开启并发编译, 默认情况下该值为 CPU 逻辑核数 |
| -a | 强制重新构建 |
| -n | 打印编译时会用到的所有命令, 但不真正执行 |
| -x | 打印编译时会用到的所有命令 |
| -race | 开启竞态检测 |
go build 编译时怎么样指定动态库位置, 例如 glibc:
CGO_LDFLAGS="-O2 -Wl,-rpath-link=/root/lib" go build main.go
1.2. go run main.go 出错
# command-line-arguments
.\main.go:8:16: undefined: Limiter
.\main.go:20:7: undefined: NewLimiter
产生原因: go run main.go 只指定了 main.go 文件, 源码在其它文件里面是不会查找运行的。
解决办法:
- Unix:
go run *.go - Windows:
go run ./
1.3. Windows PowerShell 下运行 go run *.go 出错
CreateFile *.go: The filename, directory name, or volume label syntax is incorrect.
产生原因: PowerShell 不支持 *.go 这种表述。
解决办法: go run ./
1.4. go build -tags 简约
//go:build with_inputs
// +build with_inputs

// Package inputs wraps all inputs implements
package inputs
go run -tags with_inputs cmd/make/make.go
1.5. go build -tags 详尽
1.5.1. 使用方法
- 构建约束以一行
+build开始的注释。在+build之后列出了一些条件, 在这些条件成立时, 该文件应包含在编译的包中; - 约束可以出现在任何源文件中, 不限于 go 文件;
+build必须出现在package语句之前,+build注释之后应要有一个空行。
//
// +build debug

package main

import "fmt"

func main() {
 fmt.Println("Hello World!")
}
1.5.2. 语法规则
- 只允许是字母数字或_
- 多个条件之间, 空格表示 OR; 逗号表示 AND; 叹号 (!) 表示 NOT
- 一个文件可以有多个
+build, 它们之间的关系是 AND。如:
// +build linux darwin
// +build 386
等价于
// +build (linux OR darwin) AND 386
- 预定义了一些条件: runtime.GOOS、runtime.GOARCH、compiler(gc 或 gccgo)、cgo、context.BuildTags 中的其他单词
- 如果一个文件名 (不含后缀), 以
*_GOOS,*_GOARCH, 或*_GOOS_GOARCH结尾, 它们隐式包含了构建约束 - 当不想编译某个文件时, 可以加上
// +build ignore。这里的ignore可以是其他单词, 只是ignore更能让人知道什么意思
更多详细信息, 可以查看 go/build/build.go 文件中 shouldBuild 和 match 方法。
1.5.3. 应用实例 1
除了 *_GOOS 这种预定义的应用, 我们看一个实际的应用。
比如, 项目中需要在测试环境输出 Debug 信息, 一般通过一个变量 (或常量) 来控制是测试环境还是生产环境, 比如: if DEBUG {}, 这样在生产环境每次也会进行这样的判断。在 golang-nuts 邮件列表中有人问过这样的问题, 貌似没有讨论出更好的方法 (想要跟 C 中条件编译一样的效果)。下面我们采用 Build constraints 来实现。
- 文件列表: main.go logger_debug.go logger_product.go
- 在 main.go 中简单的调用 Debug() 方法。
- 在 logger_product.go 中的 Debug() 是空实现, 但是在文件开始加上 // + build !debug
- 在 logger_debug.go 中的 Debug() 是需要输出的调试信息, 同时在文件开始加上 // + build debug
这样, 在测试环境编译的时传递 -tags 参数: go build/install -tags "debug" logger。生产环境: go build/install logger 就行了。
对于生产环境, 不传递 -tags 时, 为什么会编译 logger_product.go 呢? 因为在 go/build/build.go 中的 match 方法中有这么一句:
if strings.HasPrefix(name, "!") { // negation
    return len(name) > 1 && !ctxt.match(name[1:])
}
也就是说, 只要有! (不能只是! ), tag 不在 BuildTags 中时, 总是会编译。
1.5.4. 应用实例 2
本例程中, 编译的 tag 差异较大, 两个文件中一个是 hash tag, 一个是 int tag, 需要引入第三个 tag 来区分编译的文件。否则, 只要不带! 的 tag 都会被编译进包。
display_hash.go
// +build hash !display_alternatives

// 上面
package main

import "fmt"

type DisplayName string

func Print(name DisplayName) {
    fmt.Printf("%s\n", name)
}

func MakeDisplayName(name string) DisplayName {
    return DisplayName(name)
}
display_int.go
// +build int

package main

import (
    "fmt"
    "encoding/hex"
    "encoding/binary"
)

type DisplayName uint64

func Print(name DisplayName) {
    fmt.Printf("%d\n", name)
}

func MakeDisplayName(name string) DisplayName {
    h, err := hex.DecodeString(name)
    if err != nil {
        panic(fmt.Sprintf("decode hex string failed. cause: %v\n", err))
    }
    fmt.Printf("data: %v\n", h)

    value := binary.BigEndian.Uint16(h)
    return DisplayName(value)
}
build_tag.go
package main

import (
    "sync"
    "fmt"
    "math/rand"
    "time"
)

func main() {
    var name DisplayName
    name = MakeDisplayName("FAD9C812")
    Print(name)
编译 display_int.go
编译执行过程 go build -tags "display_alternatives int"
编译 display_hash.go
编译执行过程 go build -tags hash
1.6. go build . vs go build ...
Single dot . means current directory only while triple dots ... means current directory and all sub-directories recursively.
For build command, you would want to organize your executable (those main.go) in its own package and stick to single dot ..
For unit testing, triple dots ... makes sense as you want to test all the packages (including sub-packages) in your project.
Have you tried ./... ?
The slash is very important. This means build current directory but with all the files in it (alongside with recursive explanations).
You need this because the main.go is coded alongside its dependent source codes in the same root directory.
EDIT:
The command should be something like:
$ go build -o ./path/to/my/bin/myProgram ./...
1.7. not able to find executable/binary file after “go build” command
You’re building a package that isn’t main, so there is no executable to create. Setting the -o flag forces build to output the object file that would otherwise be discarded, but that is not an executable. Go object files start with the string !<arch>\n, which is why you receive that error when you attempt to execute it.
Change your package name to main.
1.8. 编译参数
- 跨平台编译 Linux:
GOOS=linux GOARCH=amd64 go build
1.9. Go 编译错误合集
1.9.1. Go: build constraints exclude all Go files in ...
env GOOS="windows" GOARCH="amd64" CGO_ENABLED="1" CC="x86_64-w64-mingw32-gcc" go build
env GOOS="linux" GOARCH="amd64" CGO_ENABLED="1" CC="x86_64-w64-mingw32-gcc" go build
也可能是一些编译开关没打开:
export CGO_ENABLED="1"
export GO111MODULE="on"
1.10. Go 编译缓存
go build 编译的缓存所在的目录:
C:\Users \ 用户名称、AppData\Local\go-build
/Users/[YOUR ACCOUNT NAME]/Library/Caches/go-build
1.10.1. 清理缓存的方法
- 方法 1(推荐):
go clean --cache。 - 方法 2: 手动删除缓存目录。
go clean --cache:
This command removes all the subdirectories inside go-build directory and leaves out just two files
README
trim.txt
The trim.txt file stores a Unix timestamp. I’m guessing it’s the timestamp of the time you run the clean command.
go mod 会产生大量 cache, 很多老旧的 cache 也不会自动删除, 所以, 没事儿要清理一下:
go clean -modcache
1.10.2. 相关命令
# Locate Go build cache directory
go env GOCACHE

# Check disk usage of Go build cache
du -hs $(go env GOCACHE)
1.11. go build 参数传入程序中
go build command is generally used to compile the packages and dependencies that you have defined/used in your project.
So how go build is executing internally, what compiler executes, which directories created or deleted; Those all questions are answered by go build command flags. Let’s see some of those.
If you are specifying a single file as an argument to go build then it treats as a single package but if arguments are a list of .go files then all source specifying a single package.
When compiling packages, build ignores files that end in ‘_test.go’.
Some of the popular commands that used when building the package like
go build -x sourcefile.go
It prints all the commands which are go compiler executes while building a binary file.
go build -a sourcefile.go
It forces rebuilding of packages.
go build -n sourcefile.go
It helps to understand what commands will be execute while building a binary. (This only shows commands and not execute it).
go build -work sourcefile.go
print the name of the temporary work directory and
do not delete it when exiting.
go build -ldflags="-flag" sourcefile.go
This flag is related to the linker. ld stands linker. This flag is the overall used flag as it inserts dynamic information at build time in your binary file. What does it mean, So we have sample example here.
I have a directory structure for Cron job server. Which shown in the below frame. It resides in your go workspace as /src/reportCron/
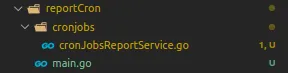
Simple code with main.go file and here I have defined mainpackagevariable. So we assign value to that variable runtime.
package main

import (
	"Go_Exercise/reportCron/cronjobs"
	"fmt"
	"os"
	"os/signal"
	"time"

	"github.com/robfig/cron"
)

var mainpackagevariable string

func main() {
	fmt.Println("Main Package variable=", mainpackagevariable)
	go InitCornJobs()
	// Wait for output only and do not press any key for a while
	// otherwise you will exit from main as aftre user input given
	// as if main exits goroutine will exit
	a := 0
	fmt.Scanf("%d", &a)
}

//InitCornJobs schedules functions for execution at a specified time
func InitCornJobs() {
	c := cron.New()
	fmt.Println("Cron Init at :", time.Now())
	c.AddFunc("1 * * * * *", cronjobs.CountEverythingService)

	go c.Start()
	sig := make(chan os.Signal)
	signal.Notify(sig, os.Interrupt, os.Kill)
	<-sig
}
So we have package cronjobs and this package also has its own variable called otherpackagevariable.
package cronjobs

import "fmt"

var otherpackagevariable string

func CountEverythingService() {
	fmt.Println("Other Package variable=", otherpackagevariable)
	return
}
So after workspace settlement actual build command in the picture. So many developers do common mistakes that they have given only package name while executing command. As like
go build -ldflags="-X ‘main.mainpackagevariable=main variable’ -X ‘cronjobs.otherpackagevariable=Other package variable’" main.go
Above syntax compile the build successfully but you will come to know that your otherpackagevariable is assigning to a blank string. So how to compile those nonmain package variables, This is a big question in developers’ mind.

To solve those types of mistakes you have to include path like the whole import path of the package that you’ve used for dynamic linking.
go build -ldflags="-X ‘main.mainpackagevariable=main variable’ -X ‘Go_Exercise/reportCron/cronjobs.otherpackagevariable=Other package variable’" main.go
So this linking gives you a proper output by setting value to your package variable.

So adding those paths will result in a proper output that you are required for.
You can download the source code from Github page.
Go having kinda cool stuff itself within. So explore more command flags specified in go build.
1.12. go build examples
go build -x sourcefile.goIt prints all the commands which are go compiler executes while building a binary file.go build -a sourcefile.goIt forces rebuilding of packages.go build -n sourcefile.goIt helps to understand what commands will be execute while building a binary. (This only shows commands and not execute it).go build -work sourcefile.goprint the name of the temporary work directory and do not delete it when exiting.go build -ldflags="-flag"sourcefile.go This flag is related to the linker. ld stands linker. This flag is the overall used flag as it inserts dynamic information at build time in your binary file. What does it mean, So we have sample example here.
1.13. These handy Go build options can help you understand the Go compilation process better.
1.13.1. Under the hood
The above commands worked like a breeze to run my program with minimal effort. However, if you want to find out what Go does under the hood to compile these programs, Go provides a -x option that prints everything Go does to produce the executable.
A quick look tells you that Go creates a temporary working directory within /tmp, produces the executable, and then moves it to the current directory where the source Go program was present.
$ go build -x hello.go

WORK=/tmp/go-build1944767317
mkdir -p $WORK/b001/

<< snip >>

mkdir -p $WORK/b001/exe/
cd .
/usr/lib/golang/pkg/tool/linux_amd64/link -o $WORK \
/b001/exe/a.out -importcfg $WORK/b001 \
/importcfg.link -buildmode=exe -buildid=K26hEYzgDkqJjx2Hf-wz/\
nDueg0kBjIygx25rYwbK/W-eJaGIOdPEWgwC6o546 \
/K26hEYzgDkqJjx2Hf-wz -extld=gcc /root/.cache/go-build /cc \
/cc72cb2f4fbb61229885fc434995964a7a4d6e10692a23cc0ada6707c5d3435b-d
/usr/lib/golang/pkg/tool/linux_amd64/buildid -w $WORK \
/b001/exe/a.out # internal
mv $WORK/b001/exe/a.out hello
rm -r $WORK/b001/
This helps solve the mysteries when a program runs but no resulting executable is created within the current directory. Using -x shows that the executable file was indeed created in a /tmp working directory and was executed. However, unlike the build option, the executable did not move to the current directory, making it appear that no executable was created.
$ go run -x hello.go

mkdir -p $WORK/b001/exe/
cd .
/usr/lib/golang/pkg/tool/linux_amd64/link -o $WORK/b001 \
/exe/hello -importcfg $WORK/b001/importcfg.link -s -w -buildmode=exe -buildid=hK3wnAP20DapUDeuvAAS/E_TzkbzwXz6tM5dEC8Mx \
/7HYBzuaDGVdaZwSMEWAa/hK3wnAP20DapUDeuvAAS -extld=gcc \
/root/.cache/go-build/75/ \
7531fcf5e48444eed677bfc5cda1276a52b73c62ebac3aa99da3c4094fa57dc3-d
$WORK/b001/exe/hello
Hello World
1.13.2. Mimic compilation without producing the executable
Suppose you don’t want to compile the program and produce an actual binary, but you do want to see all steps in the process. You can do so by using the -n build option, which prints the steps that it would normally run without actually creating the binary.
$ go build -n hello.go
1.13.3. Save temp directories
A lot of work happens in the /tmp working directory, which is deleted once the executable is created and run. But what if you want to see which files were created in the compilation process? Go provides a -work option that can be used when compiling a program. The -work option prints the working directory path in addition to running the program, but it doesn’t delete the working directory afterward, so you can move to that directory and examine all the files created during the compile process.
$ go run -work hello.go
WORK=/tmp/go-build3209320645
Hello World
$
$ find /tmp/go-build3209320645
/tmp/go-build3209320645
/tmp/go-build3209320645/b001
/tmp/go-build3209320645/b001/importcfg.link
/tmp/go-build3209320645/b001/exe
/tmp/go-build3209320645/b001/exe/hello
$
$ /tmp/go-build3209320645/b001/exe/hello
Hello World
$
1.13.4. Alternative compilation options
What if, instead of using the build/run magic of Go, you want to compile the program by hand and end up with an executable that can be run directly by your operating system (in this case, Linux)? This process can be divided into two parts: compile and link. Use the tool option to see how it works.
First, use the tool compile option to produce the resulting ar archive file, which contains the .o intermediate file. Next, use the tool link option on this hello.o file to produce the final executable, which can then run.
$ go tool compile hello.go
$
$ file hello.o
hello.o: current ar archive
$
$ ar t hello.o
__.PKGDEF
_go_.o
$
$ go tool link -o hello hello.o
$
$ file hello
hello: ELF 64-bit LSB executable, x86-64, version 1 (SYSV), statically linked, not stripped
$
$ ./hello
Hello World
$
To peek further into the link process of producing the executable from the hello.o file, you can use the -v option, which searches for the runtime.a file included in every Go executable.
$ go tool link -v -o hello hello.o
HEADER = -H5 -T0x401000 -R0x1000
searching for runtime.a in /usr/lib/golang/pkg/linux_amd64/runtime.a
82052 symbols, 18774 reachable
	1 package symbols, 1106 hashed symbols, 77185 non-package symbols, 3760 external symbols
81968 liveness data
$
1.13.5. Cross-compilation options
Now that I’ve explained the compilation of a Go program, I’ll demonstrate how Go allows you to build an executable targeted at different hardware architectures and operating systems by providing two environment variables—GOOS and GOARCH—before the actual build command.
Why does this matter? You can see an example when an executable produced for the ARM (aarch64) architecture won’t run on an Intel (x86_64) architecture and produces an Exec format error.
These options make it trivial to produce cross-platform binaries.
$ GOOS=linux GOARCH=arm64 go build hello.go
$
$ file ./hello
./hello: ELF 64-bit LSB executable, ARM aarch64, version 1 (SYSV), statically linked, not stripped
$

$ ./hello
bash: ./hello: cannot execute binary file: Exec format error
$
$ uname -m
x86_64
$
You can read my earlier blog post about my experiences with cross-compilation using Go to learn more.
1.13.6. View underlying assembly instructions
The source code is not directly converted to an executable, though it generates an intermediate assembly format which is then assembled into an executable. In Go, this is mapped to an intermediate assembly format rather than the underlying hardware assembly instructions.
To view this intermediate assembly format, use -gcflags followed by -S given to the build command. This command shows the assembly instructions.
$ go build -gcflags="-S" hello.go
# command-line-arguments
"".main STEXT size=138 args=0x0 locals=0x58 funcid=0x0
	0x0000 00000 (/test/hello.go:5)	TEXT	"".main(SB), ABIInternal, $88-0
	0x0000 00000 (/test/hello.go:5)	MOVQ	(TLS), CX
	0x0009 00009 (/test/hello.go:5)	CMPQ	SP, 16(CX)
	0x000d 00013 (/test/hello.go:5)	PCDATA	$0, $-2
	0x000d 00013 (/test/hello.go:5)	JLS	128

<< snip >>
$
You can also use the objdump -s option, as shown below, to see the assembly instructions for an executable program that was already compiled.
$ ls
hello  hello.go
$
$ go tool objdump -s main.main hello
TEXT main.main(SB) /test/hello.go
  hello.go:5		0x4975a0		64488b0c25f8ffffff	MOVQ FS:0xfffffff8, CX
  hello.go:5		0x4975a9		483b6110		CMPQ 0x10(CX), SP
  hello.go:5		0x4975ad		7671			JBE 0x497620
  hello.go:5		0x4975af		4883ec58		SUBQ $0x58, SP
  hello.go:6		0x4975d8		4889442448		MOVQ AX, 0x48(SP)

<< snip >>
$
1.13.7. Strip binaries to reduce their size
Go binaries are typically large. For example, a simple Hello World program produces a 1.9M-sized binary.
$ go build hello.go
$
$ du -sh hello
1.9M	hello
$
$ file hello
hello: ELF 64-bit LSB executable, x86-64, version 1 (SYSV), statically linked, not stripped
$
To reduce the size of the resulting binary, you can strip off information not needed during execution. Using -ldflags followed by -s -w flags makes the resulting binary slightly lighter, at 1.3M.
$ go build -ldflags="-s -w" hello.go
$
$ du -sh hello
1.3M	hello
$
$ file hello
hello: ELF 64-bit LSB executable, x86-64, version 1 (SYSV), statically linked, stripped
$
1.13.8. Conclusion
I hope this article introduced you to some handy Go build options that can help you understand the Go compilation process better. For additional information on the build process and other interesting options available, refer to the help section:
$ go help build
1.14. Adding Build Tags
You can now use build tags to distinguish the Pro version of your application from the Free version.
Let’s start by examining what a build tag looks like:
// +build tag_name
By putting this line of code as the first line of your package and replacing tag_name with the name of your build tag, you will tag this package as code that can be selectively included in the final binary. Let’s see this in action by adding a build tag to the pro.go file to tell the go build command to ignore it unless the tag is specified. Open up the file in your text editor:
nano pro.go
Then add the following highlighted line:
pro.go
// +build pro

package main

func init() {
  features = append(features,
    "Pro Feature #1",
    "Pro Feature #2",
  )
}
At the top of the pro.go file, we added // +build pro followed by a blank newline. This trailing newline is required, otherwise Go interprets this as a comment. Build tag declarations must also be at the very top of a .go file. Nothing, not even comments, can be above build tags.
The +build declaration tells the go build command that this isn’t a comment, but instead is a build tag. The second part is the pro tag. By adding this tag at the top of the pro.go file, the go build command will now only include the pro.go file with the pro tag is present.
Compile and run the application again:
go build
./app
You’ll receive the following output:
Output
> Free Feature #1
> Free Feature #2
Since the pro.go file requires a pro tag to be present, the file is ignored and the application compiles without it.
When running the go build command, we can use the -tags flag to conditionally include code in the compiled source by adding the tag itself as an argument. Let’s do this for the pro tag:
go build -tags pro
This will output the following:
Output
> Free Feature #1
> Free Feature #2
> Pro Feature #1
> Pro Feature #2
Now we only get the extra features when we build the application using the pro build tag.
This is fine if there are only two versions, but things get complicated when you add in more tags. To add in the Enterprise version of our app in the next step, we will use multiple build tags joined together with Boolean logic.
1.14.1. Build Tag Boolean Logic
When there are multiple build tags in a Go package, the tags interact with each other using Boolean logic. To demonstrate this, we will add the Enterprise level of our application using both the pro tag and the enterprise tag.
In order to build an Enterprise binary, we will need to include both the default features, the Pro level features, and a new set of features for Enterprise. First, open an editor and create a new file, enterprise.go, that will add the new Enterprise features:
nano enterprise.go
The contents of enterprise.go will look almost identical to pro.go but will contain new features. Add the following lines to the file:
enterprise.go
package main

func init() {
  features = append(features,
    "Enterprise Feature #1",
    "Enterprise Feature #2",
  )
}
Save and exit the file.
Currently the enterprise.go file does not have any build tags, and as you learned when you added pro.go, this means that these features will be added to the Free version when executing go.build. For pro.go, you added // +build pro and a newline to the top of the file to tell go build that it should only be included when -tags pro is used. In this situation, you only needed one build tag to accomplish the goal. When adding the new Enterprise features, however, you first must also have the Pro features.
Let’s add support for the pro build tag to enterprise.go first. Open the file with your text editor:
nano enterprise.go
Next add the build tag before the package main declaration and make sure to include a newline after the build tag:
enterprise.go
// +build pro

package main

func init() {
  features = append(features,
    "Enterprise Feature #1",
    "Enterprise Feature #2",
  )
}
Save and exit the file.
Compile and run the application without any tags:
go build
./app
You’ll receive the following output:
Output
> Free Feature #1
> Free Feature #2
The Enterprise features no longer show up in the Free version. Now let’s add the pro build tag and build and run the application again:
go build -tags pro
./app
You’ll receive the following output:
Output
> Free Feature #1
> Free Feature #2
> Enterprise Feature #1
> Enterprise Feature #2
> Pro Feature #1
> Pro Feature #2
This is still not exactly what we need: The Enterprise features now show up when we try to build the Pro version. To solve this, we need to use another build tag. Unlike the pro tag, however, we need to now make sure both the pro and enterprise features are available.
The Go build system accounts for this situation by allowing the use of some basic Boolean logic in the build tags system.
Let’s open enterprise.go again:
nano enterprise.go
Add another build tag, enterprise, on the same line as the pro tag:
enterprise.go
// +build pro enterprise

package main

func init() {
  features = append(features,
    "Enterprise Feature #1",
    "Enterprise Feature #2",
  )
}
Save and close the file.
Now let’s compile and run the application with the new enterprise build tag.
go build -tags enterprise
./app
This will give the following:
Output
> Free Feature #1
> Free Feature #2
> Enterprise Feature #1
> Enterprise Feature #2
Now we have lost the Pro features. This is because when we put multiple build tags on the same line in a .go file, go build interprets them as using OR logic. With the addition of the line // +build pro enterprise, the enterprise.go file will be built if either the pro build tag or the enterprise build tag is present. We need to set up the build tags correctly to require both and use AND logic instead.
Instead of putting both tags on the same line, if we put them on separate lines, then go build will interpret those tags using AND logic.
Open enterprise.go once again and let’s separate the build tags onto multiple lines.
enterprise.go
// +build pro
// +build enterprise

package main

func init() {
  features = append(features,
    "Enterprise Feature #1",
    "Enterprise Feature #2",
  )
}
Now compile and run the application with the new enterprise build tag.
go build -tags enterprise
./app
You’ll receive the following output:
Output
> Free Feature #1
> Free Feature #2
Still not quite there: Because an AND statement requires both elements to be considered true, we need to use both pro and enterprise build tags.
Let’s try again:
go build -tags "enterprise pro"
./app
You’ll receive the following output:
Output
> Free Feature #1
> Free Feature #2
> Enterprise Feature #1
> Enterprise Feature #2
> Pro Feature #1
> Pro Feature #2
Now our application can be built from the same source tree in multiple ways unlocking the features of the application accordingly.
In this example, we used a new // +build tag to signify AND logic, but there are alternative ways to represent Boolean logic with build tags. The following table holds some examples of other syntactic formatting for build tags, along with their Boolean equivalent:
| Build Tag Syntax | Build Tag Sample | Boolean Statement |
|---|---|---|
| Space-separated elements | // +build pro enterprise | pro OR enterprise |
| Comma-separated elements | // +build pro,enterprise | pro AND enterprise |
| Exclamation point elements | // +build !pro | NOT pro |
1.14.2. Conclusion
In this tutorial, you used build tags to allow you to control which of your code got compiled into the binary. First, you declared build tags and used them with go build, then you combined multiple tags with Boolean logic. You then built a program that represented the different feature sets of a Free, Pro, and Enterprise version, showing the powerful level of control that build tags can give you over your project.
If you’d like to learn more about build tags, take a look at the Golang documentation on the subject, or continue to explore our How To Code in Go series.
1.15. How “go build” Works
How does go build compile the simplest Golang program? This post is here to answer that question.
The simplest go program (I can think of) is main.go:
package main
func main() {}
If we run go build main.go it outputs an executable main that is 1.1Mb and does nothing. What did go build do to do create such a useful binary?
go build has some args that are useful for seeing how it builds:
-work:go buildcreates a temporary folder for work files. This arg will print out the location of that folder and not delete it after the build-a: Golang caches previously built packages.-amakesgo buildignore the cache so our build will print all steps-p 1: This sets the concurrency to a single thread to log output linear-x:go buildis a wrapper around other Golang tools likecompile.-xoutputs the commands and arguments that are sent to these tools
Running go build -work -a -p 1 -x main.go will output not only the main binary, but a lot of logs describing exactly what build did to create main.
The logs starts with:
WORK=/var/folders/rw/gtb29xf92fv23f0zqsg42s840000gn/T/go-build940616988
This is the work directory whose structure looks like:
├── b001
│   ├── _pkg_.a
│   ├── exe
│   ├── importcfg
│   └── importcfg.link
├── b002
│   └── ...
├── b003
│   └── ...
├── b004
│   └── ...
├── b006
│   └── ...
├── b007
│   └── ...
└── b008
    └── ...
What are these incrementing directory numbers?
go build defines an action graph of tasks that need to be completed. Each action in this graph gets its own sub-directory (defined in NewObjdir). The first node b001 in the graph is the root task to compile the main binary. Each dependent action has a higher number, the final being b008. (I don’t know where b005 went, I assume its ok)
1.15.1. Part
The first action to be executed is the leaf of the graph, b008:
mkdir -p $WORK/b008/
cat >$WORK/b008/importcfg << 'EOF'
# import config
EOF
cd /<..>/src/runtime/internal/sys
/<..>/compile
  -o $WORK/b008/_pkg_.a
  -trimpath "$WORK/b008=>"
  -p runtime/internal/sys
  -std
  -+
  -complete
  -buildid gEtYPexVP43wWYWCxFKi/gEtYPexVP43wWYWCxFKi
  -goversion go1.14.7
  -D ""
  -importcfg $WORK/b008/importcfg
  -pack
  -c=16
  ./arch.go ./arch_amd64.go ./intrinsics.go ./intrinsics_common.go ./stubs.go ./sys.go ./zgoarch_amd64.go ./zgoos_darwin.go ./zversion.go
/<..>/buildid -w $WORK/b008/_pkg_.a
cp $WORK/b008/_pkg_.a /<..>/Caches/go-build/01/01b...60a-d
The b008 action:
- creates the action directory (all actions do this so I ignore this later on)
- creates the
importcfgfile to be used by thecompiletool (it is empty) - changes the directory to the
runtime/internal/syspackages source folder. This package containsconstants used by the runtime compilethis package- Use
buildidto write (-w) metadata to the package and copy the package to thego-buildcache (all packages are cached so I ignore this later on)
Let’s break this down the arguments sent to the compile tool (also described in go tool compile --help):
-ois the output file-trimpaththis removes the prefix from the source file paths$WORK/b008=>(probably helps with debugging?)-psets the package path used byimport-stdcompiling standard library (not sure what this does)-+compiling runtime (another mystery)-completethe compiler outputs a complete package (no C or assembly).-buildidadds build id to the metadata (as defined here)-goversionrequired version for compiled package-Dthe relative path for local imports is""-importcfgimport configuration file refers to other packages-packcreate package archive (.a) instead of object file (.o)-cconcurrency of the build- finished with a list of files in the package
Most of these arguments are the same for all compile calls, so I ignore them later.
The output of b008 is the file $WORK/b008/_pkg_.a for runtime/internal/sys
1.15.2. Part
Let’s dive into buildid for a second.
The buildid is in the format <actionid>/<contentid>. It is used as an index to cache packages to improve go build performance. The <actionid> is the hash of the action (all calls, arguments, and input files). The <contentid> is a hash of the output .a file. For each go build action, it can look up in the cache for contents created by another action with the same <actionid>. This is implemented in buildid.go.
The buildid is stored as metadata in the file so that it does not need to be hashed every time to get the <contentid>. You can see this id with go tool buildid <file> (also works on binaries).
In the log of b008 above the buildID is being set in by the compile tool as gEtYPexVP43wWYWCxFKi/gEtYPexVP43wWYWCxFKi. This is a just a place holder and is later overwritten with go tool buildid -w to the correct gEtYPexVP43wWYWCxFKi/b-rPboOuD0POrlJWPTEi before being cached.
1.15.3. Part
The next action to be run is b007:
cat >$WORK/b007/importcfg << 'EOF'
# import config
packagefile runtime/internal/sys=$WORK/b008/_pkg_.a
EOF
cd /<..>/src/runtime/internal/math
/<..>/compile
  -o $WORK/b007/_pkg_.a
  -p runtime/internal/math
  -importcfg $WORK/b007/importcfg
  ...
  ./math.go
- This writes the
importcfgbut it includes the linepackagefileruntime/internal/sys=$WORK/b008/_pkg_.a. This meansb007depends on the output ofb008 - compile’s the
runtime/internal/mathpackage. If you inspectmath.go, it hasimport "runtime/internal/sys"built byb008
The output of b007 is the file $WORK/b007/_pkg_.a for runtime/internal/math
1.15.4. Part
The next action is b006:
cat >$WORK/b006/go_asm.h << 'EOF'
EOF
cd /<..>/src/runtime/internal/atomic
/<..>/asm
  -I $WORK/b006/
  -I /<..>/go/1.14.7/libexec/pkg/include
  -D GOOS_darwin
  -D GOARCH_amd64
  -gensymabis
  -o $WORK/b006/symabis
  ./asm_amd64.s
/<..>/asm
  -I $WORK/b006/
  -I /<..>/go/1.14.7/libexec/pkg/include
  -D GOOS_darwin
  -D GOARCH_amd64
  -o $WORK/b006/asm_amd64.o
  ./asm_amd64.s
cat >$WORK/b006/importcfg << 'EOF'
# import config
EOF
/<..>/compile
  -o $WORK/b006/_pkg_.a
  -p runtime/internal/atomic
  -symabis $WORK/b006/symabis
  -asmhdr $WORK/b006/go_asm.h
  -importcfg $WORK/b006/importcfg
  ...
  ./atomic_amd64.go ./stubs.go
/<..>/pack r $WORK/b006/_pkg_.a $WORK/b006/asm_amd64.o
Here is where we step out of the normal .go files and start dealing with lower level “Go assembly” .s files. b006:
- First this makes the header file
go_asm.h - goes to the
runtime/internal/atomicpackage (a bunch of low-level functions). - runs the
go tool asmtool (described withgo tool asm --help) to build thesymabis“Symbol Application Binary Interfaces (ABI) file” and then the object fileasm_amd64.o - Uses
compilecreate the_pkg_.afile including thesymabisfile and the header with-asmhdr. - Uses
packto add theasm_amd64.oobject file to_pkg_.apackage archive
The asm tool is called with the args:
-I: include the actionb007andincludesfolders.includeshas three filesasm_ppc64x.hfuncdata.handtextflag.hall having low level function definitions, e.g.FIXED_FRAME defines the size of the fixed part of a stack frame-D: Adds a predefined symbol-gensymabis: flag to generate thesymabisfile-o: The output file
The output of b006 is $WORK/b006/_pkg_.a for runtime/internal/atomic
1.15.5. Part
Next is b004:
cd /<..>/src/internal/cpu
/<..>/asm ... -o $WORK/b004/symabis ./cpu_x86.s
/<..>/asm ... -o $WORK/b004/cpu_x86.o ./cpu_x86.s
/<..>/compile ... -o $WORK/b004/_pkg_.a ./cpu.go ./cpu_amd64.go ./cpu_x86.go
/<..>/pack r $WORK/b004/_pkg_.a $WORK/b004/cpu_x86.o
b004 is the same as b006 for the package internal/cpu. First we we assemble the symabis and object files, then compile the go files and pack the .o files into _pkg_.a.
The output of b004 is $WORK/b004/_pkg_.a for internal/cpu
1.15.6. Part
The next action is b003
cat >$WORK/b003/go_asm.h << 'EOF'
EOF
cd /<..>/src/internal/bytealg
/<..>/asm ... -o $WORK/b003/symabis ./compare_amd64.s ./count_amd64.s ./equal_amd64.s ./index_amd64.s ./indexbyte_amd64.s
cat >$WORK/b003/importcfg << 'EOF'
# import config
packagefile internal/cpu=$WORK/b004/_pkg_.a
EOF
/<..>/compile ... -o $WORK/b003/_pkg_.a -p internal/bytealg ./bytealg.go ./compare_native.go ./count_native.go ./equal_generic.go ./equal_native.go ./index_amd64.go ./index_native.go ./indexbyte_native.go
/<..>/asm ... -o $WORK/b003/compare_amd64.o ./compare_amd64.s
/<..>/asm ... -o $WORK/b003/count_amd64.o ./count_amd64.s
/<..>/asm ... -o $WORK/b003/equal_amd64.o ./equal_amd64.s
/<..>/asm ... -o $WORK/b003/index_amd64.o ./index_amd64.s
/<..>/asm ... -o $WORK/b003/indexbyte_amd64.o ./indexbyte_amd64.s
/<..>/pack r $WORK/b003/_pkg_.a $WORK/b003/compare_amd64.o $WORK/b003/count_amd64.o $WORK/b003/equal_amd64.o $WORK/b003/index_amd64.o $WORK/b003/indexbyte_amd64.o
b003 is the same as the previous actions b004 b006 for the package internal/bytealg. The main complication with this package is that there are multiple .s files to create many .o object files that each need to be added to the _pkg_.a file.
The output of b003 is $WORK/b003/_pkg_.a for internal/bytealg
1.15.7. Part
The penultimate action, b002:
cat >$WORK/b002/go_asm.h << 'EOF'
EOF
cd /<..>/src/runtime
/<..>/asm
  ...
  -o $WORK/b002/symabis
  ./asm.s ./asm_amd64.s ./duff_amd64.s ./memclr_amd64.s ./memmove_amd64.s ./preempt_amd64.s ./rt0_darwin_amd64.s ./sys_darwin_amd64.s

cat >$WORK/b002/importcfg << 'EOF'
# import config
packagefile internal/bytealg=$WORK/b003/_pkg_.a
packagefile internal/cpu=$WORK/b004/_pkg_.a
packagefile runtime/internal/atomic=$WORK/b006/_pkg_.a
packagefile runtime/internal/math=$WORK/b007/_pkg_.a
packagefile runtime/internal/sys=$WORK/b008/_pkg_.a
EOF
/<..>/compile
  -o $WORK/b002/_pkg_.a
  ...
  -p runtime
  ./alg.go ./atomic_pointer.go ./cgo.go ./cgocall.go ./cgocallback.go ./cgocheck.go ./chan.go ./checkptr.go ./compiler.go ./complex.go ./cpuflags.go ./cpuflags_amd64.go ./cpuprof.go ./cputicks.go ./debug.go ./debugcall.go ./debuglog.go ./debuglog_off.go ./defs_darwin_amd64.go ./env_posix.go ./error.go ./extern.go ./fastlog2.go ./fastlog2table.go ./float.go ./hash64.go ./heapdump.go ./iface.go ./lfstack.go ./lfstack_64bit.go ./lock_sema.go ./malloc.go ./map.go ./map_fast32.go ./map_fast64.go ./map_faststr.go ./mbarrier.go ./mbitmap.go ./mcache.go ./mcentral.go ./mem_darwin.go ./mfinal.go ./mfixalloc.go ./mgc.go ./mgcmark.go ./mgcscavenge.go ./mgcstack.go ./mgcsweep.go ./mgcsweepbuf.go ./mgcwork.go ./mheap.go ./mpagealloc.go ./mpagealloc_64bit.go ./mpagecache.go ./mpallocbits.go ./mprof.go ./mranges.go ./msan0.go ./msize.go ./mstats.go ./mwbbuf.go ./nbpipe_pipe.go ./netpoll.go ./netpoll_kqueue.go ./os_darwin.go ./os_nonopenbsd.go ./panic.go ./plugin.go ./preempt.go ./preempt_nonwindows.go ./print.go ./proc.go ./profbuf.go ./proflabel.go ./race0.go ./rdebug.go ./relax_stub.go ./runtime.go ./runtime1.go ./runtime2.go ./rwmutex.go ./select.go ./sema.go ./signal_amd64.go ./signal_darwin.go ./signal_darwin_amd64.go ./signal_unix.go ./sigqueue.go ./sizeclasses.go ./slice.go ./softfloat64.go ./stack.go ./string.go ./stubs.go ./stubs_amd64.go ./stubs_nonlinux.go ./symtab.go ./sys_darwin.go ./sys_darwin_64.go ./sys_nonppc64x.go ./sys_x86.go ./time.go ./time_nofake.go ./timestub.go ./trace.go ./traceback.go ./type.go ./typekind.go ./utf8.go ./vdso_in_none.go ./write_err.go

/<..>/asm ... -o $WORK/b002/asm.o ./asm.s
/<..>/asm ... -o $WORK/b002/asm_amd64.o ./asm_amd64.s
/<..>/asm ... -o $WORK/b002/duff_amd64.o ./duff_amd64.s
/<..>/asm ... -o $WORK/b002/memclr_amd64.o ./memclr_amd64.s
/<..>/asm ... -o $WORK/b002/memmove_amd64.o ./memmove_amd64.s
/<..>/asm ... -o $WORK/b002/preempt_amd64.o ./preempt_amd64.s
/<..>/asm ... -o $WORK/b002/rt0_darwin_amd64.o ./rt0_darwin_amd64.s
/<..>/asm ... -o $WORK/b002/sys_darwin_amd64.o ./sys_darwin_amd64.s

/<..>/pack r $WORK/b002/_pkg_.a $WORK/b002/asm.o $WORK/b002/asm_amd64.o $WORK/b002/duff_amd64.o $WORK/b002/memclr_amd64.o $WORK/b002/memmove_amd64.o $WORK/b002/preempt_amd64.o $WORK/b002/rt0_darwin_amd64.o $WORK/b002/sys_darwin_amd64.o
b002 is the reason for all actions seen so far. It is the runtime package containing all the operations needed for a go binary to run. For example, it contains mgc.go the implementation of the garbage collection in Go (that also imports both internal/cpu from b004 and runtime/internal/atomic from b006).
b002 although probably the most complex package in the core library, is built using the same pattern we have seen before, it just contains files. It uses asm compile and pack to build _pkg_.a.
The output of b002 is $WORK/b002/_pkg_.a for runtime
1.15.8. Part
The final action, the one that pulls everything together, is b001:
cat >$WORK/b001/importcfg << 'EOF'
# import config
packagefile runtime=$WORK/b002/_pkg_.a
EOF
cd /<..>/main
/<..>/compile ... -o $WORK/b001/_pkg_.a -p main ./main.go
cat >$WORK/b001/importcfg.link << 'EOF'
packagefile command-line-arguments=$WORK/b001/_pkg_.a
packagefile runtime=$WORK/b002/_pkg_.a
packagefile internal/bytealg=$WORK/b003/_pkg_.a
packagefile internal/cpu=$WORK/b004/_pkg_.a
packagefile runtime/internal/atomic=$WORK/b006/_pkg_.a
packagefile runtime/internal/math=$WORK/b007/_pkg_.a
packagefile runtime/internal/sys=$WORK/b008/_pkg_.a
EOF
/<..>/link
  -o $WORK/b001/exe/a.out
  -importcfg $WORK/b001/importcfg.link
  -buildmode=exe
  -buildid=yC-qrh2sY_qI0zh2-NE7/owNzOBTqPO00FkqK0_lF/HPXqvMz_4PvKsQzqGWgD/yC-qrh2sY_qI0zh2-NE7
  -extld=clang
  $WORK/b001/_pkg_.a
mv $WORK/b001/exe/a.out main
- First it builds an
importcfgthat includesruntimebuilt inb002to thencompilemain.goto_pkg_.a - Then it creates
importcfg.linkwhich includes all previous actions packages, pluscommand-line-argumentsreferencing themainpackage we built. Usinglinkto then create an executable file - rename and move the binary to
main
link has the new arguments:
-buildmode: set to build an executable-extld: reference to the external linker
Finally, we have the output we want; the output of b001 is the main binary.
1.15.9. Similarities with Bazel
The building of an action graph in order to have efficient caching is the same idea the build tool Bazel uses for fast builds. Golang’s actionid and contentid map neatly to the action cache and the content-addressable store (CAS) Bazel uses in caching. Bazel is a product of Google, so is Golang. It would make sense that they would have a similar philosophy of how to build software quickly and reliably.
In Bazel’s rules_go package you can see how it reimplements go build in its builder code. This is a very clean implementation because the action graph, the folder management, and the caching are handled externally by Bazel.
1.15.10. The Next Steps
go build does a lot to compile a program that does nothing! I didn’t even get into much specific detail about the tools (compile asm) or their inputs and output files ( .a .o .s). Also, we are still only compiling the most basic program. We could add complications like:
- importing another package, e.g. using
fmtto printHello Worldadds another 23 actions to the action graph - having a
go.modfile referencing external packages - Setting
GOOSandGOARCHto other architectures, e.g. compiling to WASM has entirely different actions and arguments
Running go build and inspecting logs is a very top-down approach to learning how the Golang compiler works. It is a great starting point to dive into more resources like:
- Introduction to the Go compiler
- Go: Overview of the Compiler
- Go at Google: Language Design in the Service of Software Engineering
- Source code like
build.gothe definition of thego buildcommand, orcompile/main.gothe entry point togo tool compile
There is a lot of information out there so still lots to learn about compiling the simplest program.